Recycling - Desoldering plate [Eng+Spa]
English
Image's Source - Fuente de la Imagen
Every day and every day is a new opportunity to improve ourselves and move forward.
Greetings to the DIY community, I hope you are doing the best you can, and as I always say: it doesn't matter if we are not in the best situation, or if it doesn't seem like a good time.
Everything will pass, and we can get ahead, even when it doesn't seem like it, you have to believe and work, it won't be free, no one will help you for anything. Trust in your strength and get on your way.

Image's Source - Fuente de la Imagen
To do a better job, we need the right tools, and in my line of work, which is so broad, I need a lot of tools.
The ideal would be to be able to buy all the tools I need, but at the moment it is not a viable option, so we have the option of making it by hand.
For this job I have recycled a discarded used iron, and I have created a desoldering plate.
I have seen that they have made this tool with microcontrollers, and I was thinking of doing it that way, but I only have one microcontroller left, and I am saving it for a future repair contract. I don't have any way to buy more at the moment.

I had an Oster brand dry iron on hand, which was in very good condition, only the temperature control was damaged.

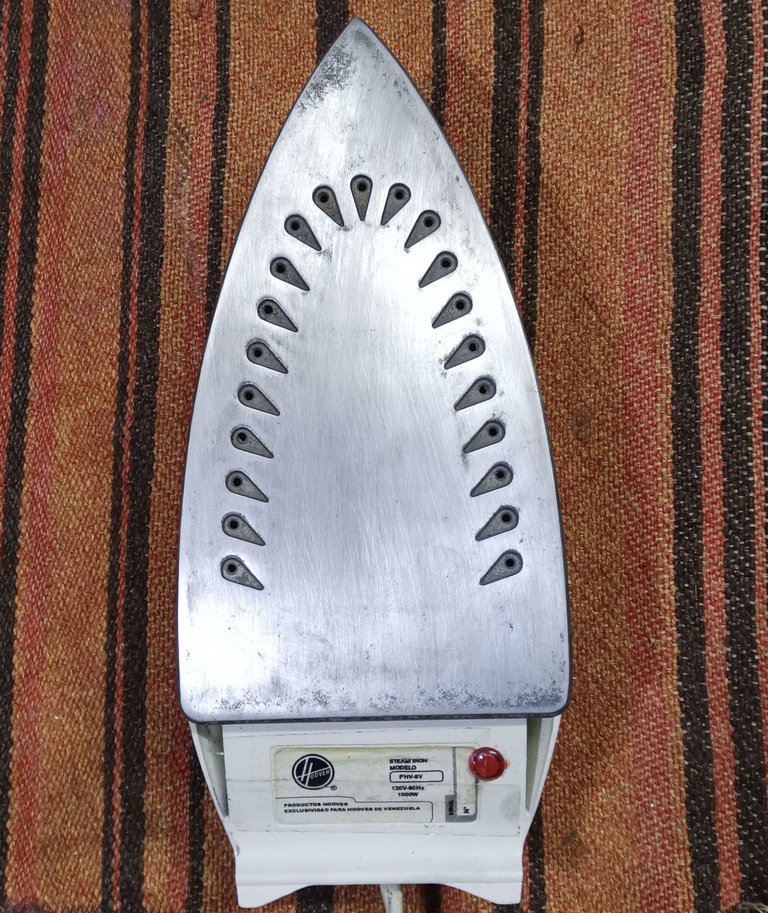
And there was a used Hoover brand steam iron that wouldn't turn on, with the varnish on the metal plate badly deteriorated.

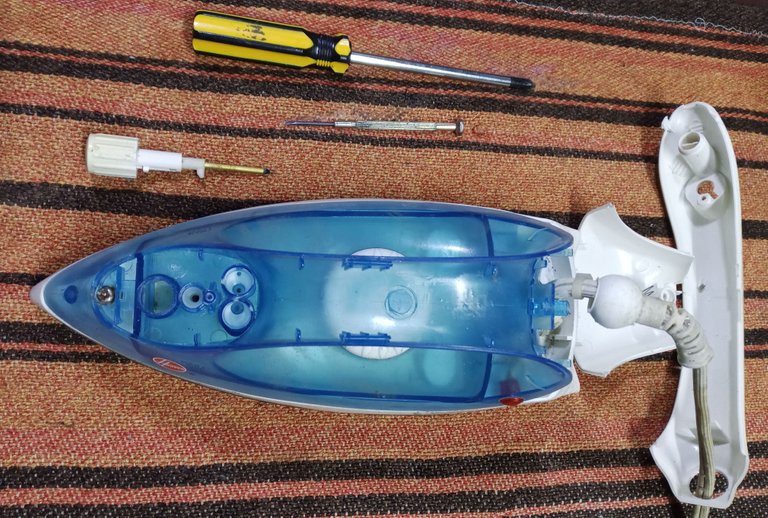
I decided on the steam iron, so I take it apart to see if it can be repaired and see what parts are useful to keep to make the tool.
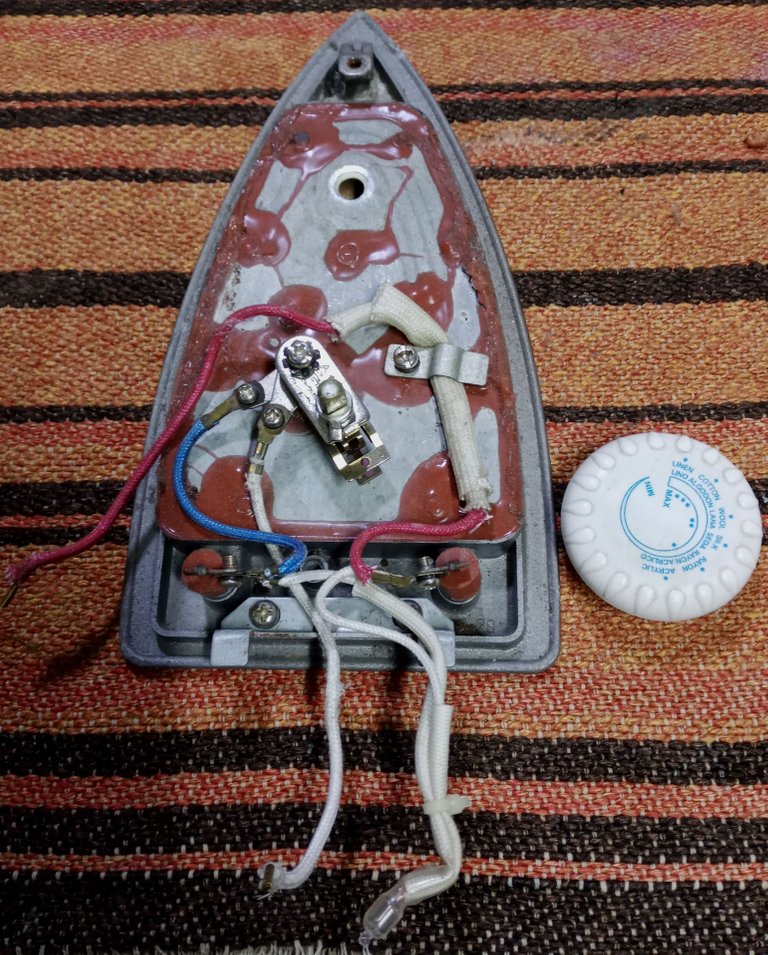
The most common failure of electric irons, toasters and hair dryers is that the temperature fuse is damaged. So it's the first thing I check when I take those gadgets apart. On the plates it is protected by temperature-proof covers.

And indeed it is damaged, if at any time they want to make a repair and change the temperature fuse of any device, it is necessary that they place one with the same maximum temperature as the original one from the factory. Not one of greater or lesser value, it is for your security, please do not alter the security values.
Never remove or alter the security devices of any device, it is something that you should always keep in mind, it is preferable to stop using it, until you have security ready.
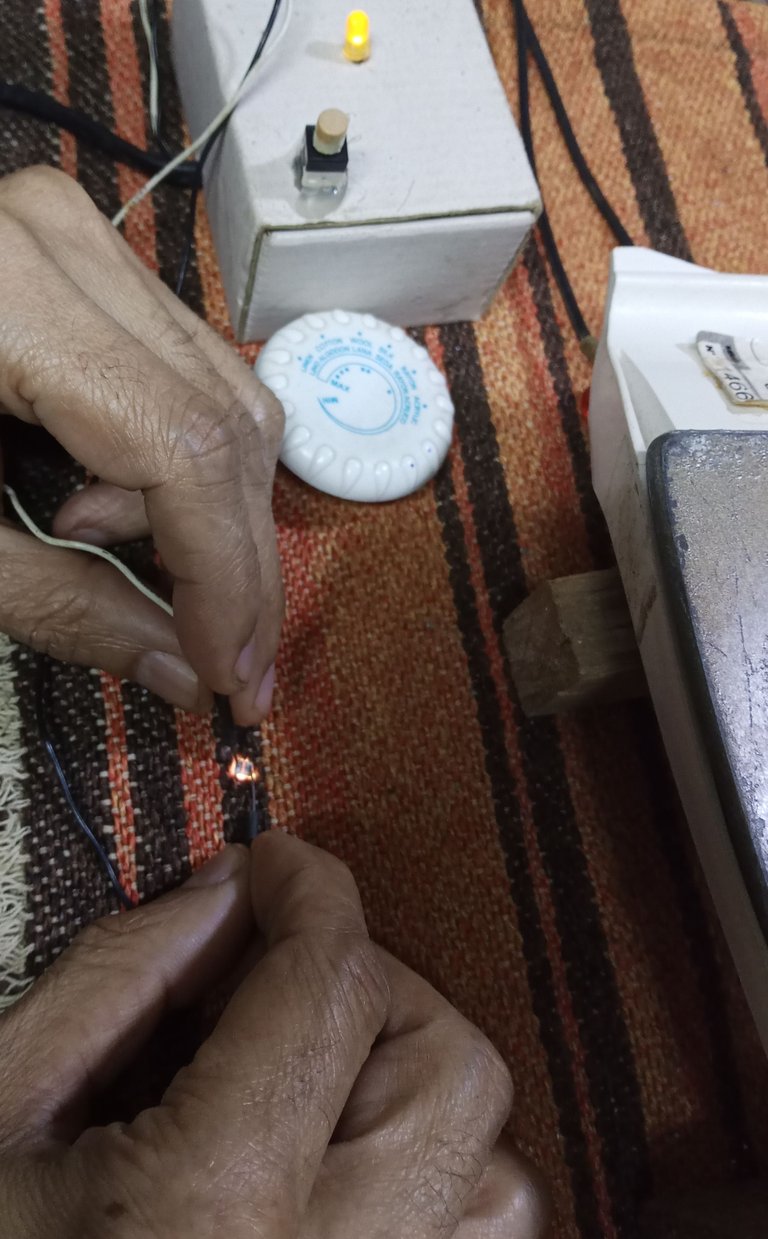
I verify that the resistance is in good condition and that the temperature control is working correctly. And luckily everything is fine.

I still don't have a thermometer to keep track of the temperature, so I had to patiently use the temperature control knob of the iron to slowly raise the heat, and try until I found the minimum working temperature.
I tried first with led bulb circuit boards, and I was able to set a working temperature that worked. And mark on the knob with a blue ink dot, to avoid future failures.
Then, of course, I tested that the leds that I disassembled had not been damaged, it is useless to disassemble components to recycle and that later do not work properly.
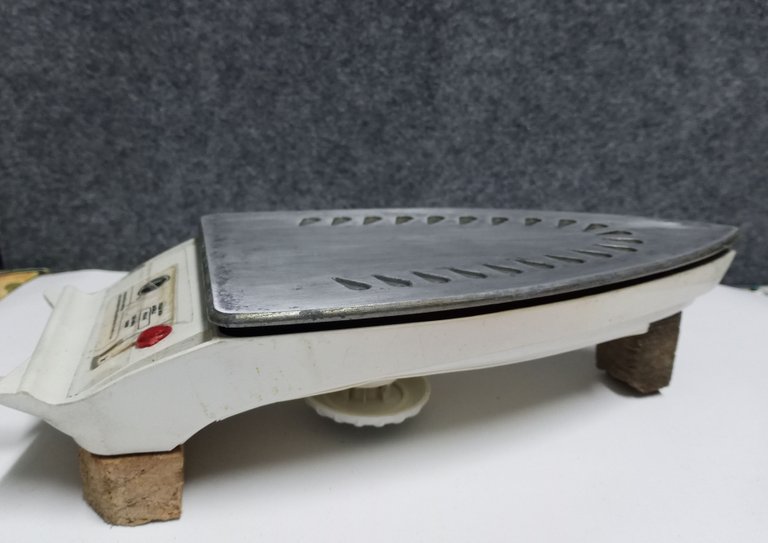
Separate and place a part of the plastic cover that goes over the metal plate, and put some wooden supports on it, I was going to make a box to mount everything, but apart from being very cumbersome, it would not be practical with the heat accumulating, I preferred to stay more open, to avoid problems due to the heat that is generated.

Relocate the red light, power indicator, change the location of the power supply cable and take advantage of the power strip that comes from the factory for electrical connections, use everything you can from the clothes iron.
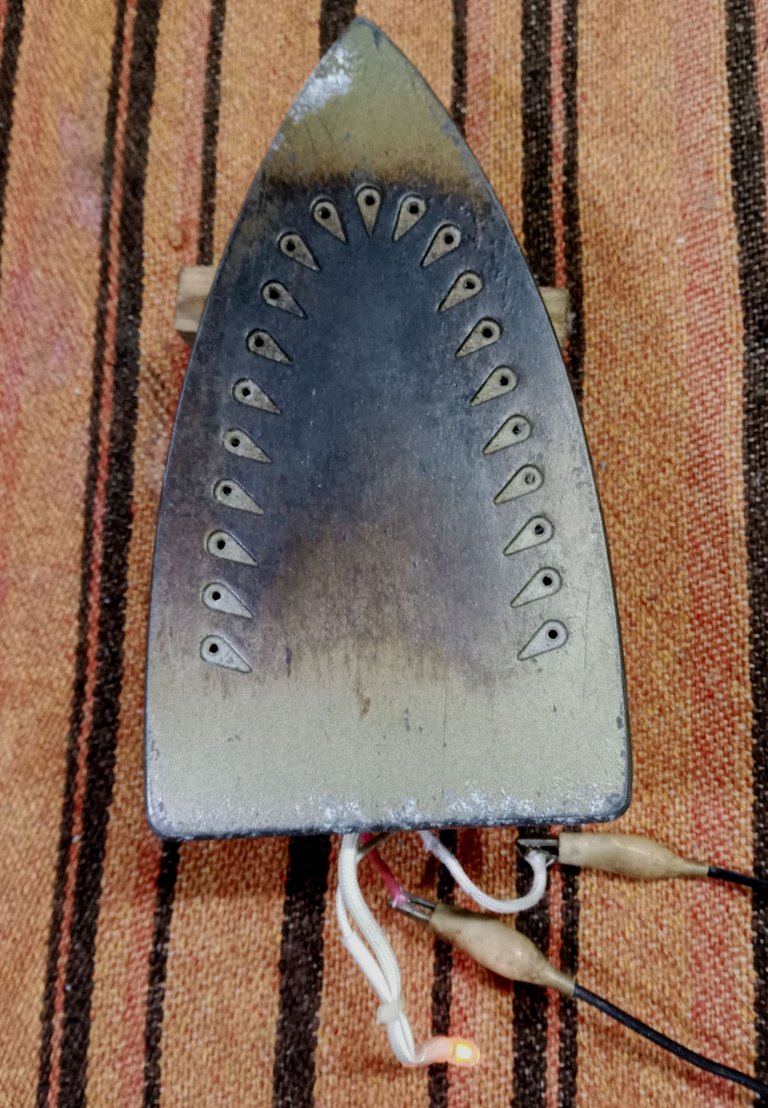
Removing the varnish from the metal plate was somewhat slower, but it seems to me that it turned out quite well and gives it a better appearance, all the burnt fabric stains made it look very bad.
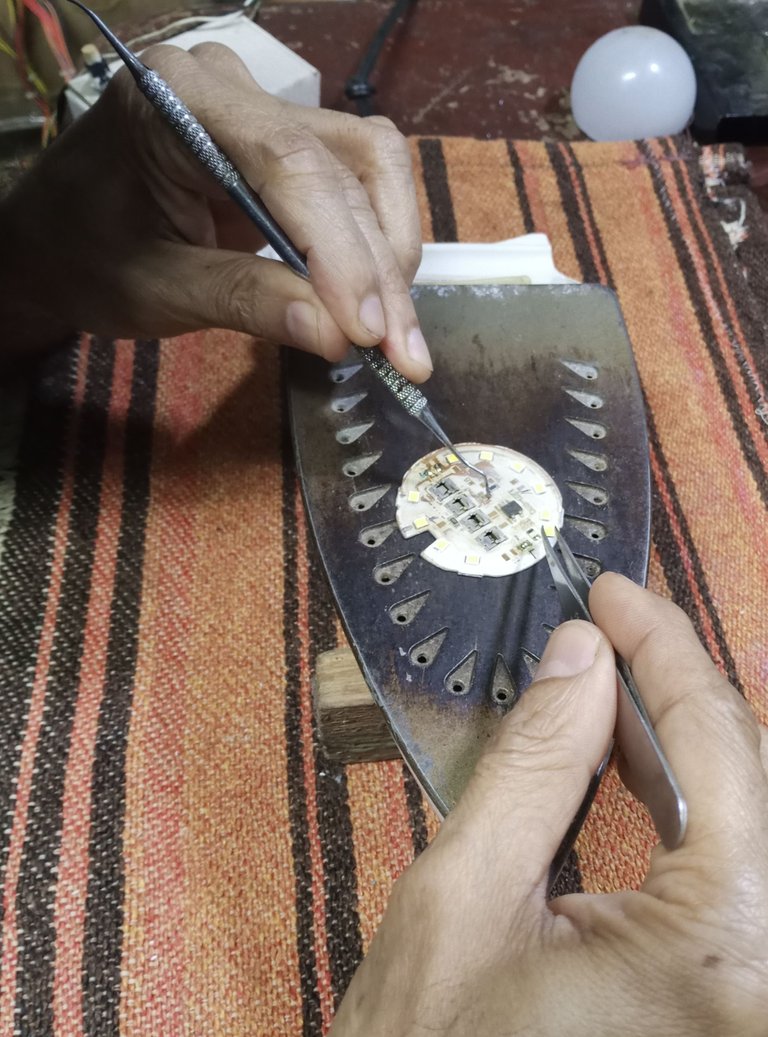
Everything assembled, I used a broken card from a recycling printer, to verify the operation of the iron and I was able to remove the components without problems.

Well we managed to recycle another artifact and give it a different, but very useful application. I wanted to put a power switch, but the ones I had available only supported up to 5 Amps, they would not support long use, so I use the temperature control that comes with the iron from the factory.
A recommendation: do not try to disassemble or modify electrical equipment without having basic electrical training, avoid accidents.
This publication is not a tutorial, I have only shared how I have recycled this artifact to give it a new utility, with the lowest possible cost. It is the particular way in which I have solved the problem.
Thank you very much for stopping by and reading.
Have an excellent week.
Peace.
Images, unless noted, are screenshots of work in my workshop.
I have used the Google translator for the English language.
Many thanks to my brother for the help with the photos.
Español
Image's Source - Fuente de la Imagen
Todos los días y cada día, es una nueva oportunidad para superarnos y avanzar.
Saludos a la comunidad DIY, espero que estén lo mejor que se pueda, y como siempre digo: no importa si no estamos en la mejor situación, o que no parezca que sea un buen momento.
Todo pasará y podemos salir adelante, aun cuando no lo parezca, hay que creer y trabajar, no será gratis, nadie les ayudara por nada. Confía en tus fuerzas y ponte en camino.
Image's Source - Fuente de la Imagen
Para hacer un mejor trabajo, necesitamos herramientas apropiadas, y en mi línea de trabajo, que es tan amplia, necesito muchas herramientas.
Lo ideal sería poder comprar todas las herramientas que necesito, pero de momento no es una opción viable, así que nos queda la opción de fabricarla de forma artesanal.
Para este trabajo he reciclado una plancha usada descartada, y he creado una placa para desoldar.
He visto que han hecho esta herramienta con microcontroladores, y estuve pensado en hacerlo de esa manera, pero me queda un solo microcontrolador, y lo estoy reservando para un contrato de reparación futura. No tengo de momento como adquirir más.
Tenía a mano una plancha seca, de marca Oster, que estaba en muy buen estado, solo tenía dañado el control de temperatura.
Y estaba una plancha de vapor, de marca Hoover, usada que no encendía, con el barniz de la placa metálica muy deteriorado.
Me decidí por la plancha de vapor, así que la desarmo para comprobar si acaso tiene reparación y ver que partes me sean útiles conservar para hacer la herramienta.
La falla más común de las planchas eléctricas, tostadoras y secadores de cabello: es que el fusible de temperatura se dañe. Así que es lo primero que reviso cuando desarmo esos artefactos. En las planchas está protegido por unas cubiertas a prueba de temperatura.
Y en efecto está dañado, si en algún momento quieren hacer una reparación y cambian el fusible de temperatura, de cualquier artefacto, es necesario que coloquen uno con la misma temperatura máxima que trae el original de fábrica. No uno de mayor o menor valor, es por su seguridad, no alteren los valores de seguridad, por favor.
Nunca eliminen o alteren los dispositivos de seguridad de ningún artefacto, es algo que deben tener en mente siempre, es preferible dejar de usarlo, hasta tener la seguridad a punto.
Verifico que la resistencia esté en buenas condiciones y que el control de temperatura esté funcionando correctamente. Y por fortuna está todo bien.
No tengo aún un termómetro para llevar el control de temperatura, así que tuve que ir pacientemente usando la perilla de control de temperatura de la plancha para subir lentamente el calor, y probar, hasta dar con la temperatura mínima de trabajo.
Probé primero con placas de circuitos de bombillos led, y pude graduar una temperatura de trabajo que funcionara. Y marque en la perilla con un punto de tinta azul, para evitar fallas a futuro.
Luego, por supuesto, probé que los leds que desmonte no se hubiesen dañado, de nada sirve desmontar componentes para reciclar y que luego no funcionen apropiadamente.
Separe y coloque una parte de la cubierta plástica que va sobre la placa de metal, y le coloque unos soportes de madera, iba a hacer una caja para montarlo todo, pero aparte de hacerse muy aparatoso, no sería práctico con el calor acumulándose, preferí que quedase más abierto, para evitar problemas por el calor que se genera.
Reubique el piloto rojo, indicador de encendido, cambie la ubicación del cable de suministro eléctrico y aproveche la regleta que trae de fábrica para las conexiones eléctricas, use todo lo que pude de la plancha de ropa.
Eliminar el barniz de la placa metálica, fue algo un poco más lento, pero me parece que quedo bastante bien y le da mejor aspecto, todas las manchas de tela quemada, le hacían lucir de muy mala manera.
Ya todo con armado, use una tarjeta rota de impresora de reciclaje, para verificar el funcionamiento de la plancha y pude retirar los componentes sin problemas.
Bien logramos reciclar otro artefacto y darle una aplicación diferente, pero muy útil. Quería colocar un interruptor de encendido, pero los que tenía a disposición solo soportaban hasta 5 Amperios, no soportarían mucho tiempo de uso, así que empleo el control de temperatura que trae la plancha de fábrica.
Una recomendación: no traten de desmontar o modificar un equipo eléctrico sin tener una capacitación básica en electricidad, eviten accidentes.
Esta publicación no es un tutorial, solo les he compartido como he reciclado este artefacto para darle nueva utilidad, con el menor costo posible. Es la manera en particular en que he resuelto el problema.
Muchas gracias por pasar y leerme.
Que tengan una excelente semana.
Paz.
Las imágenes, a menos que se indique, son capturas del trabajo en mi taller.
He usado el traductor de Google para el idioma Inglés.
Muchas gracias a mi hermano por la ayuda con las fotos.
Yay! 🤗
Your content has been boosted with Ecency Points, by @soltecno.
Use Ecency daily to boost your growth on platform!
Support Ecency
Vote for new Proposal
Delegate HP and earn more
Hola, @soltecno, muy interesante su publicación. Ha conseguido una plancha-desoldadora que no sé bien para qué se usa pero bueno... soy un poco ignorante en cosas de electrónica.
Quería decirle que no debe usar imágenes que estén sujetas a derechos de autor. Para ello, puede buscar en sitios como Pixabay, Unsplash, Pexels (siempre citando correctamente su fuente). Recuerde que usted está monetizando su contenido y aunque ha citado el lugar de donde tomó esas imágenes, pueden estar sujetas a derechos de autor y eso no se permite en Hive.
Para más alcance y visibilidad de sus publicaciones debe tener estas cosillas en cuenta.
Saludos
Saludos, de hecho use imágenes con licencia de libre uso y de compartir .
Gracias igualmente por el aviso.
Pero suelo usar imágenes que son libres de uso.
Disculpe si le incomodé... pero esa imagen es de stock. Por eso le sugiero que saque las imágenes de los sitios que le mencioné.
Pues vale, si le incómoda la cambio.
Pero bajo la licencia de creative comons está de libre uso y compartir libremente. Igualmente no tengo problemas en cambiarla.
Disculpe amigo, no es que me incomode. Mi intención ha sido la de ayudarle para que su contenido pueda ser curado.
Esa persona está haciendo uso indebido de esa imagen también.
Tenga buen día
Bien, como ya dije la cambie. Esta será un buen reemplazo. Tiene licencia de uso y compartir.
Gracias por avisarme.
Mire, no busque así las imágenes, que eso no garantiza su usabilidad. Le voy a poner los links de los sitios donde debe buscar.
www.pixabay.com
www.unsplash.com/es
www.pexels.com
Muy agradecido, aún estoy en esa curva de aprendizaje. Voy a tomar nota, para las publicaciones.
Me falta mucho trabajo aun para mejorar el trabajo de publicación.
👍
I really liked your publication, dear, the way in which you express yourself in each part of your experience is very interesting, it makes me want to do the same, greetings.
Agradezco mucho su comentario amigo.
Quería hacer lo más simple posible, todo, y lo más económico también. Es una herramienta muy útil y se puede hacer reciclando partes que suelen ser desperdicio para las personas.
This post has been manually curated by @bhattg from Indiaunited community. Join us on our Discord Server.
Do you know that you can earn a passive income by delegating to @indiaunited. We share more than 100 % of the curation rewards with the delegators in the form of IUC tokens. HP delegators and IUC token holders also get upto 20% additional vote weight.
Here are some handy links for delegations: 100HP, 250HP, 500HP, 1000HP.
100% of the rewards from this comment goes to the curator for their manual curation efforts. Please encourage the curator @bhattg by upvoting this comment and support the community by voting the posts made by @indiaunited.
Greetings, I hope you are all well and in good health.
Me acabas de dar una idea brillante, hace poco se rompió la plancha de mi madre pero no la quiero reparar sino que puedo usar la resistencia para un proyecto de la facultad y con mi grupo desde hace rato venimos dando vueltas para ver que resistencia vamos a usar así que esta es una muy buena opción.
Si la idea le es útil, me sentiré bastante satisfecho. El conocimiento crece cuando se comparte.
Gracias por pasar y comentar.