Workshop photographic background [Eng+Spa]
English
Greetings to the people of the DIY community, it's a pleasure to meet you again. I have been somewhat busy recovering lead acid batteries, the kind used by emergency lamps and in my case by the UPS.

But they are repairs that, although I want to, I really can't share: the risk when you work with sulfuric acid and how intransigent you have to be with the rules and safety care, are something that I cannot guarantee from other people.

So to avoid any danger or accident, I prefer to publish simpler works. Like this one that I present to you today, it was the help and inspiration of my friend @carlosteele.
This craft is very useful when I do the photographic shots for the publications of the workshop work.
Gives a better look to the images in the post, the artboard and tools don't look great as a background. I had made a screen like this before, but it was very small, and it was difficult for the background to cover the entire space of the piece.
Then take apart the screen that I had made and take advantage of the part of the background that was quite wide, only now it would become the bottom of the screen and I would make a new background in a contrasting color.
I used green canvas, (donation from my brother) he had a fairly wide cloth left, from a job of making cushions, as is common in all these jobs, I used a piece of soap to trace the cut lines on the canvas.

After centering, we carefully stretch and fix the canvas on the cardboard with hot silicone.
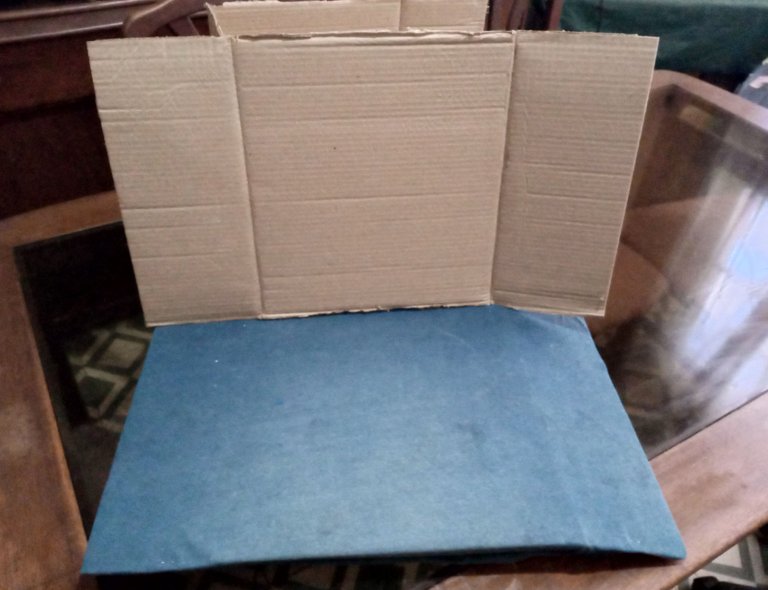
Take one more piece of cardboard, center it, and glue it to make the bracket that will hold the front cover upright, then use packing tape to make a brace on the sides of the bracket.

Since the cardboard I used had a couple of folds (from its previous life as a box), I made some reinforcements for it and secured it with packing tape, so I avoid bending, and the front will look flat.
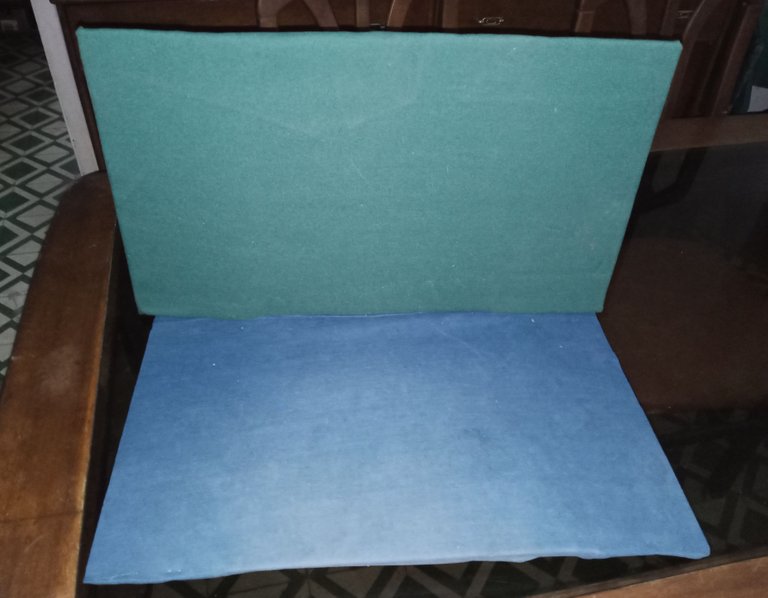
Finished up to that point, I joined the green cover that was just finished with the blue cover (which was already made from the previous background) that will now be the floor or the bottom part.

At the moment, it doesn't look too good, due to the wrinkles and folds that the green canvas had.

But with a little patience and a steam iron, I was able to give it a better look. (ironing is not one of my best skills, I admit, I was still able to make it look more decent)
It's a background that looks much better than having the artboard and tools as a background, it's a real improvement over the previous version. But for sure, the next version I build will be much better.

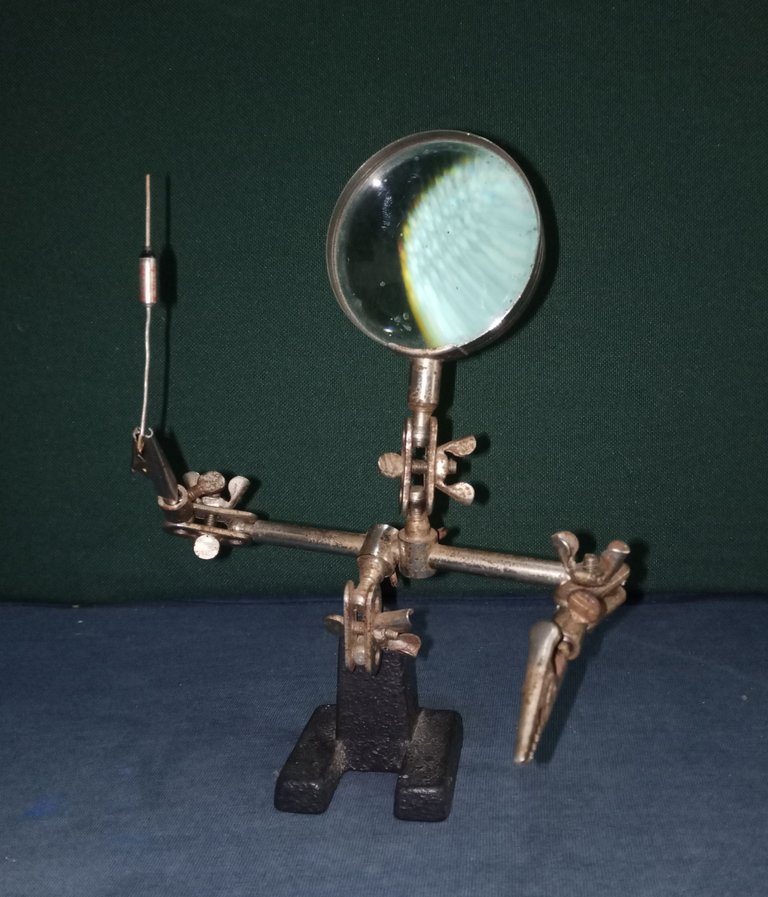
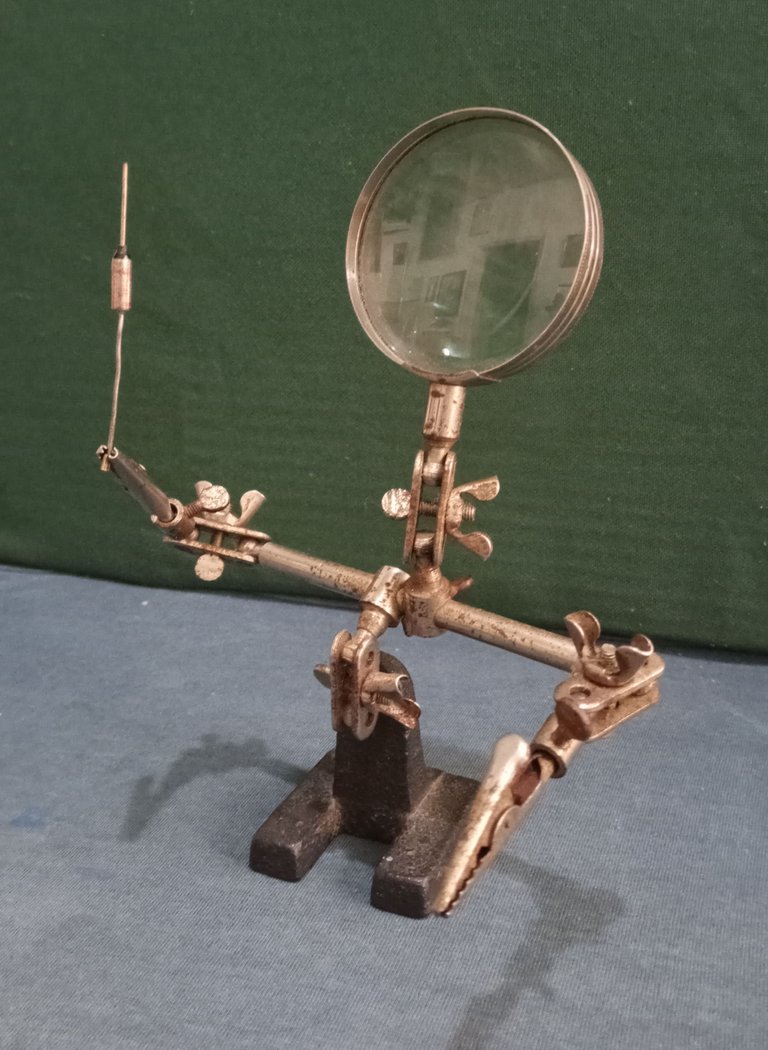
Use my weld wizard to make a test image.
Thank you very much for stopping by and reading.
I hope you have a great week.
Peace.
I have used Google Translate for the English language.
The images are captures of my work in the workshop.
Español
Saludos a la gente de la comunidad DIY, es un placer encontrarlos nuevamente. He estado algo atareado recuperando baterías de plomo ácido, de las que usan las lámparas de emergencia y en mi caso de los UPS.
Pero son reparaciones que, aunque quiero, realmente no puedo compartir: el riesgo cuando trabajas con ácido sulfúrico y lo intransigente que se debe ser con las normas y cuidados de seguridad, son algo que no puedo garantizar de otras personas.
Así que para evitar cualquier peligro o accidente, prefiero publicar de trabajos más sencillos. Como este que les presento hoy, fue ayuda e inspiración del amigo @carlosteele.
Esta manualidad es muy útil cuando hago las tomas fotográficas para las publicaciones del trabajo de taller.
Le da un mejor aspecto a las imágenes de la publicación, la mesa de trabajo y las herramientas no lucen muy bien como fondo. Ya antes había hecho una pantalla como esta, pero era de medidas muy pequeñas, y era difícil que el fondo abarcara todo el espacio de la pieza.
Entonces desarme la pantalla que tenía hecha y aproveche la parte del fondo que si era bastante amplia, solo que ahora se convertiría en el piso de la pantalla y haría un nuevo fondo en un color que le hiciera contraste.
Utilice lona verde, (donación de mi hermano) le quedaba un paño bastante amplio, de un trabajo de hacer cojines, como es común en todos estos trabajos, use un trozo de jabón para trazar las líneas de corte sobre la lona.
Después de centrar, estiramos con cuidado y fijamos con silicona caliente la lona sobre el cartón.
Tome un trozo más de cartón, lo centre y lo pegue para hacer el soporte que mantendrá la cubierta frontal en pie, luego use cinta de embalaje para hacer un refuerzo a los lados del soporte.
Como el cartón que use tenía un par de dobleces (de su vida anterior como caja), le hice unos refuerzos y los asegure con cinta de embalaje, así evito que se doble y el frente lucirá plano.
Terminado hasta ese punto, uní la cubierta verde que recién termine con la cubierta azul (que ya estaba hecha del fondo anterior) que ahora será el piso o la parte de abajo.
De momento no luce demasiado bien, por las arrugas y dobleces que tenía la lona verde.
Pero con un poco de paciencia y una plancha a vapor pude darle un mejor aspecto. (planchar no es una de mis mejores destrezas, lo reconozco, aun así pude darle un aspecto más decente)
Es un fondo que luce mucho mejor que tener como fondo la mesa de trabajo y las herramientas, es una real mejora a la versión anterior. Pero de seguro, la próxima versión que construya quedara mucho mejor.
Use mi asistente para soldaduras, para hacer una imagen de prueba.
Muchas gracias por pasar y leerme
Espero que tengan una excelente semana.
Paz.
He usado el traductor de Google para el idioma inglés.
Las imágenes son capturas de mi trabajo en el taller.
Sí se ve mucho mejor luego de estar planchado.
Stay !ALIVE
!LOLZ
!GIF
!MEME
!PGM
!LUV
!CTP
BUY AND STAKE THE PGM TO SEND A LOT OF TOKENS!
The tokens that the command sends are: 0.1 PGM-0.1 LVL-0.1 THGAMING-0.05 DEC-15 SBT-1 STARBITS-[0.00000001 BTC (SWAP.BTC) only if you have 2500 PGM in stake or more ]
5000 PGM IN STAKE = 2x rewards!
Discord
Support the curation account @ pgm-curator with a delegation 10 HP - 50 HP - 100 HP - 500 HP - 1000 HP
Get potential votes from @ pgm-curator by paying in PGM, here is a guide
I'm a bot, if you want a hand ask @ zottone444
@soltecno! You Are Alive so I just staked 0.1 $ALIVE to your account on behalf of @pedrobrito2004. (1/10)
The tip has been paid for by the We Are Alive Tribe through the earnings on @alive.chat, feel free to swing by our daily chat any time you want.

Credit: unuma
Earn Crypto for your Memes @ HiveMe.me!
El intento de planchado ayudo.
This post has been manually curated by @bhattg from Indiaunited community. Join us on our Discord Server.
Do you know that you can earn a passive income by delegating to @indiaunited. We share more than 100 % of the curation rewards with the delegators in the form of IUC tokens. HP delegators and IUC token holders also get upto 20% additional vote weight.
Here are some handy links for delegations: 100HP, 250HP, 500HP, 1000HP.
100% of the rewards from this comment goes to the curator for their manual curation efforts. Please encourage the curator @bhattg by upvoting this comment and support the community by voting the posts made by @indiaunited.
I really appreciate the support. Thanks friends.
Yay! 🤗
Your content has been boosted with Ecency Points, by @soltecno.
Use Ecency daily to boost your growth on platform!
Support Ecency
Vote for new Proposal
Delegate HP and earn more
Thank you so much. I really appreciate the support.
As a guest curator for @ecency I decided to accept your boost request as your post is much curated, pictures are of a good quality and the post may be useful to many
For a content creator, your words are something we value highly. Thank you so much.
Nice!!! Love your work here, very cool.. also, I have the same third hand! Although yours is in better shape/more complete it looks like :)
I appreciate that you liked the post. My old welding assistant is already about 25 years old, he is quite used, but he continues to support me faithfully.
Thank you very much for reading me and leaving the comment, his friend.
Indeed! :)