Join me in replacing the front shock absorbers on the spark.
Greetings,
Dear friends once again here today I come happy and with great news, I FINALLY mounted the shocks to my car 😁.
Yes friends as you read it after so much saving drop by drop complete the money to replace the front shocks of the spark that months ago was badly needed.
First let's talk about the shocks that we have on the market and their price ranges, today for no one is a secret that the automotive park is mined of poor quality parts and it is increasingly difficult not to fall into tempting offers either in "new" products or in the reconstruction of the latter I like less because they are palliatives that in the long run has us in spending more money than we should.
In the search for prices and quality of the shock absorbers I got a lot of difference but thanks to my experience and that of friends I knew how to discard, the first price was the reconstruction of the shock absorbers that I have seen the work they do and do not change the seals just drill the shock absorber and put thick motor oil to last a few months without leaking and sealed with a spot weld.
In the new products the market is flooded with the perfect brand although they are not bad they are totally rebuilt shock absorbers but they make the cars lose comfort because they are very stiff, the Gabriel that were the shock absorbers par excellence in Venezuela now do not last even 20 thousand kms.
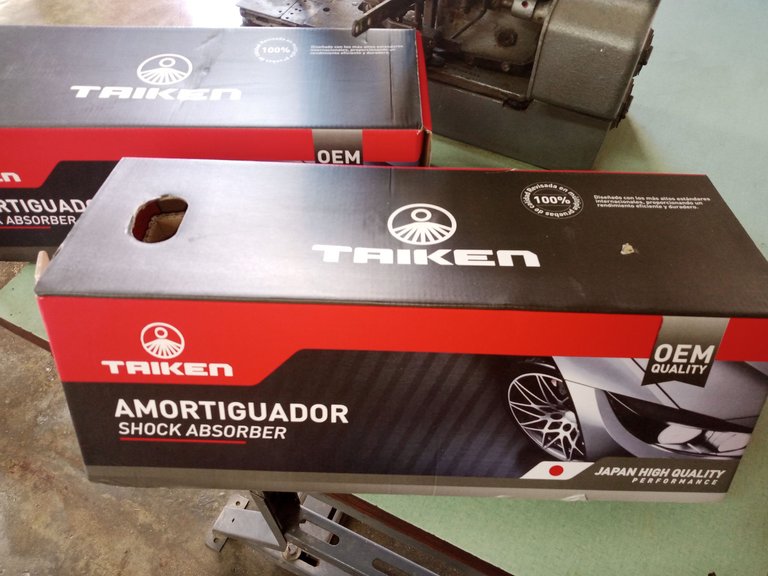
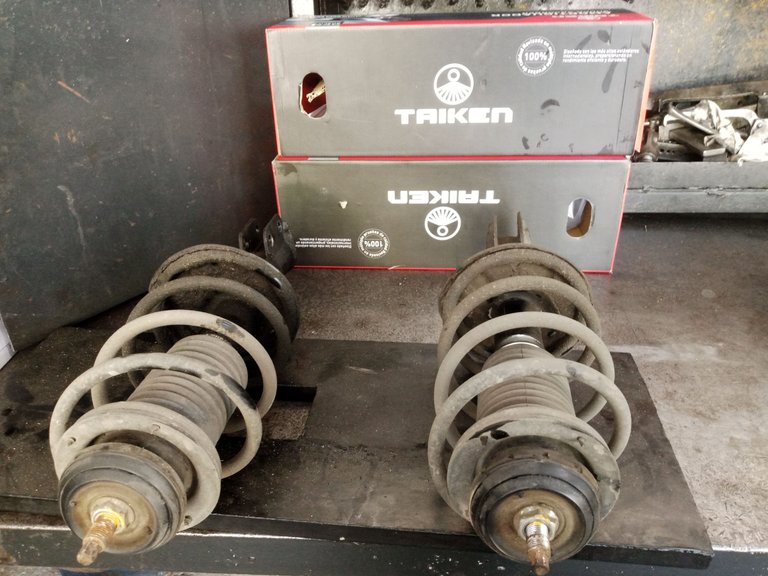
Since a few months ago when I went to the talk about the new taiken products I was inclined to buy them because of the wide warranty they offer besides the fact that they are a Japanese product, but the search for sellers took me some time and the other thing that cost me was to get the right price because when I went to the talk they gave us a price list but many sellers did not respect it. Until I ended up paying 85$ for the pair.
Now let's get to work on the replacement.
First of all we must loosen the nuts that hold the rim and then lift the car and leave it suspended on two donkeys as we call it colloquially here in the shops.
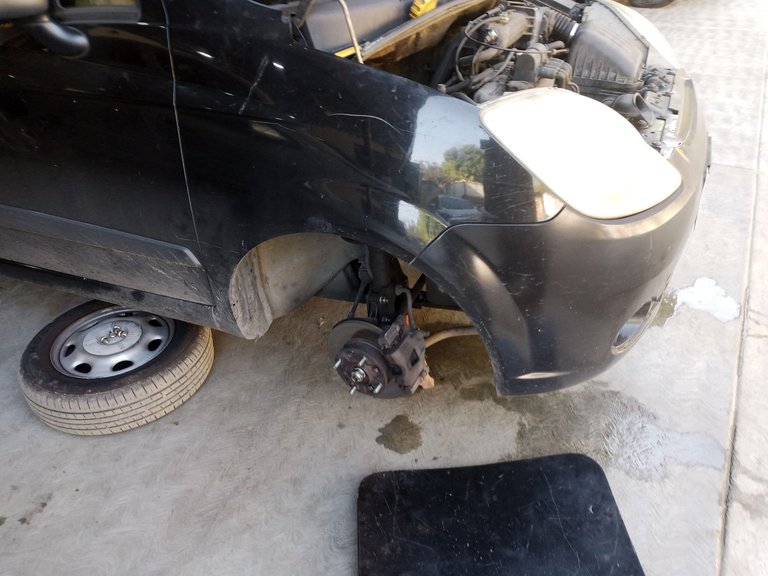
After this we dismount the tires which for safety I always place them under the car so that if something goes wrong the car doesn't hit the ground.
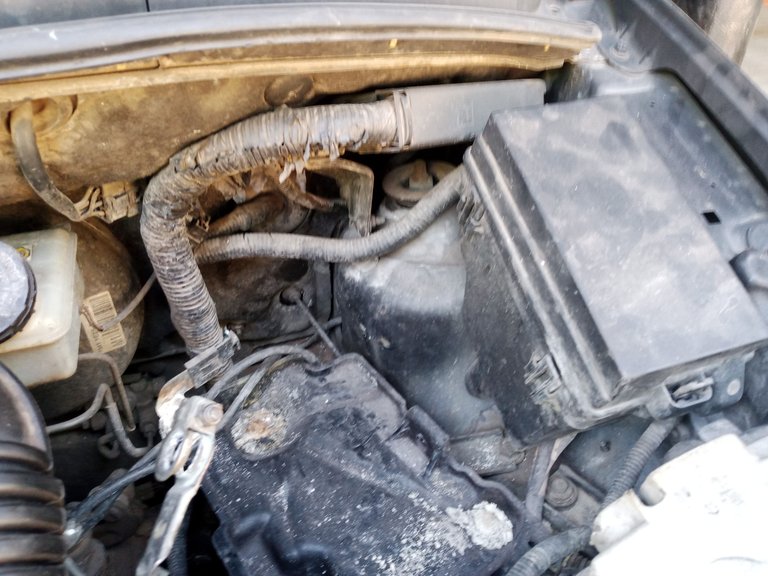
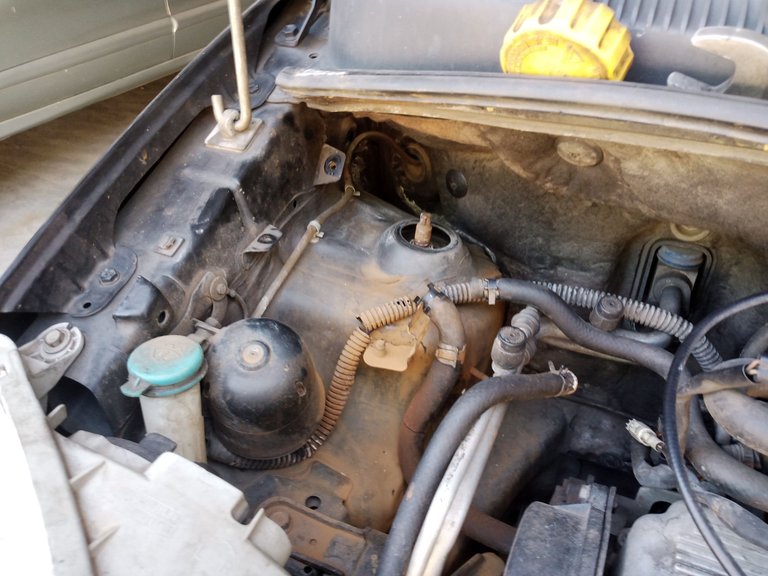
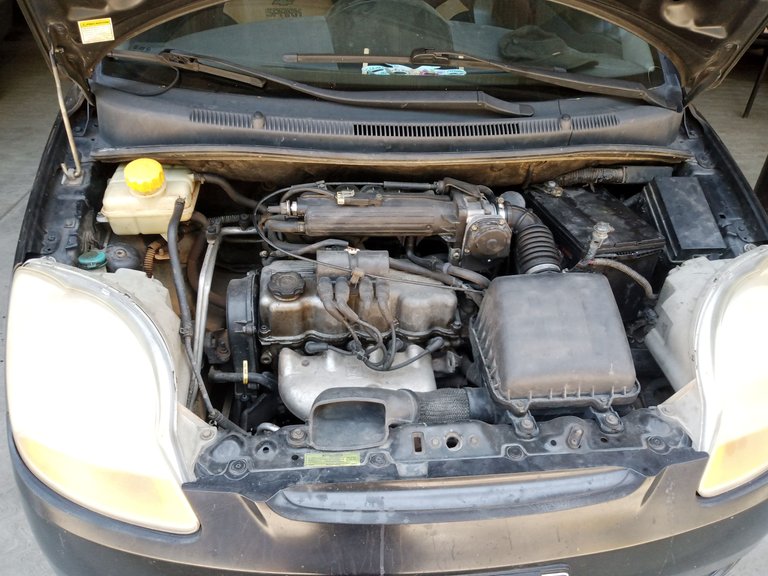
To disassemble the shock absorbers in the case of the spark which is a car with little space in the engine area I had to disassemble the coolant container on the passenger side to have access to the nut that grabs the compact shock absorber and on the driver's side I had to disassemble the battery and the fuse box to work a little more comfortable that if you have to work very carefully because the computer is very close.


Already disassembled what hinders us remove the nut that is a pipe wrench 3/4 inch or 19mm and a 9mm wrench to hold the stem of the shock absorber, at the bottom we take off the shock absorber of the upright with two keys 17mm as it carries two screws with nut and ready and leaves the complete shock absorber of the car.
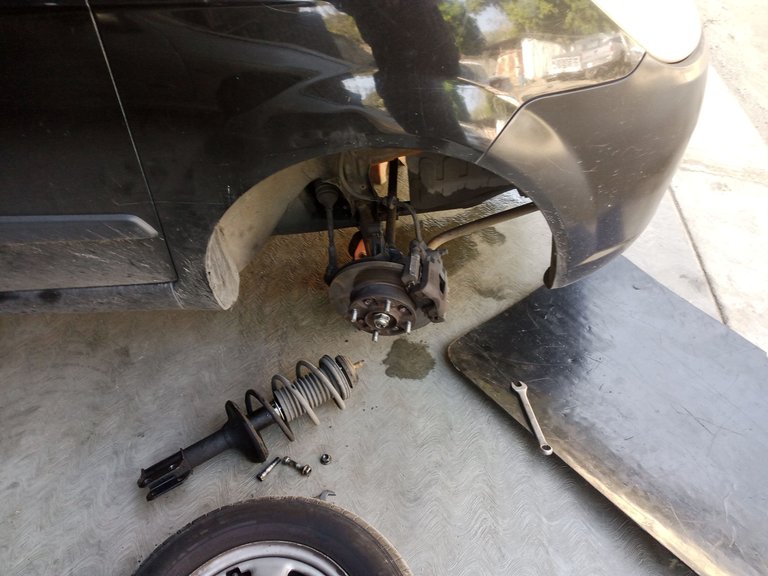
Now comes the part where we must work very carefully because it can be dangerous because we must pick up or remove tension to the spring or coil, for this we use a specific tool that carries a few jaws that are embedded in the diameter of the spring and with a screw are tightened until it takes off the spring of the shock absorber.

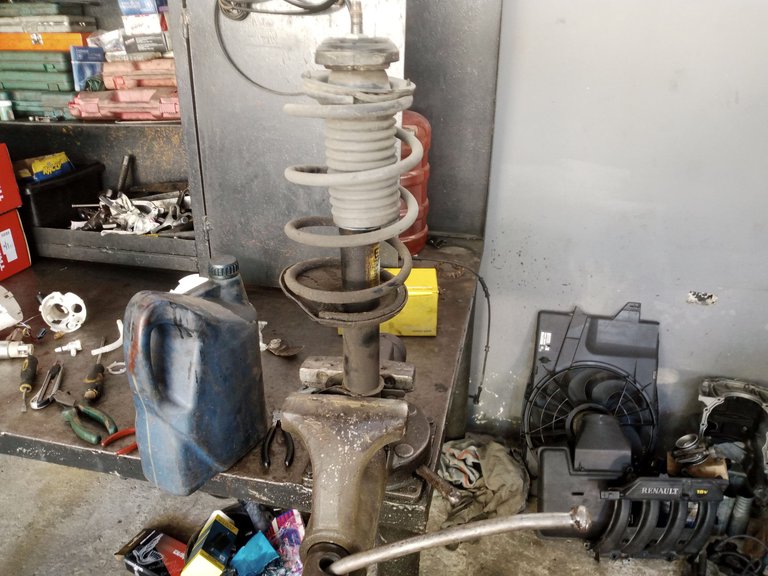
Once collected we remove the nut that holds the base of the shock absorber and is the one that limits the spring not to get out, this nut is safety and is removed with a pipe wrench 22mm.
Then we remove the spring very carefully and place it in a place where it does not fall or hinder to mount to make the change of the bad shock absorber for the new one.
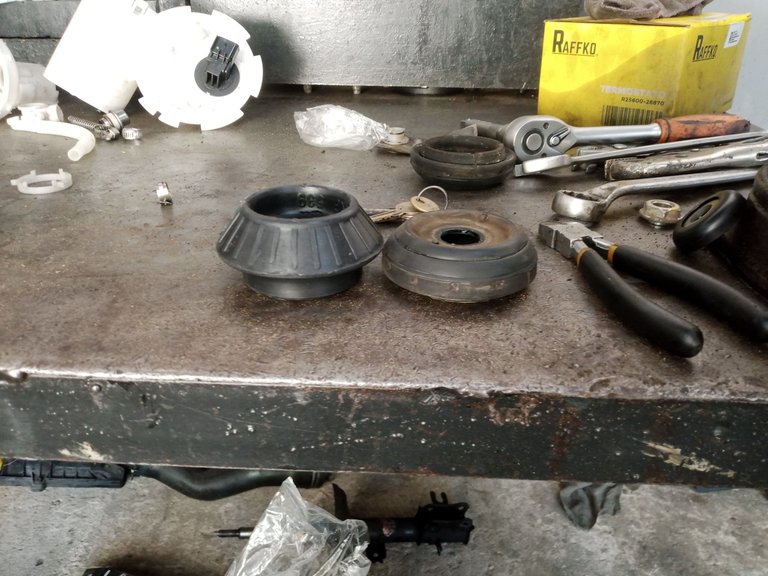
In the image I show you below you can see the new base and the state of the base that was installed.
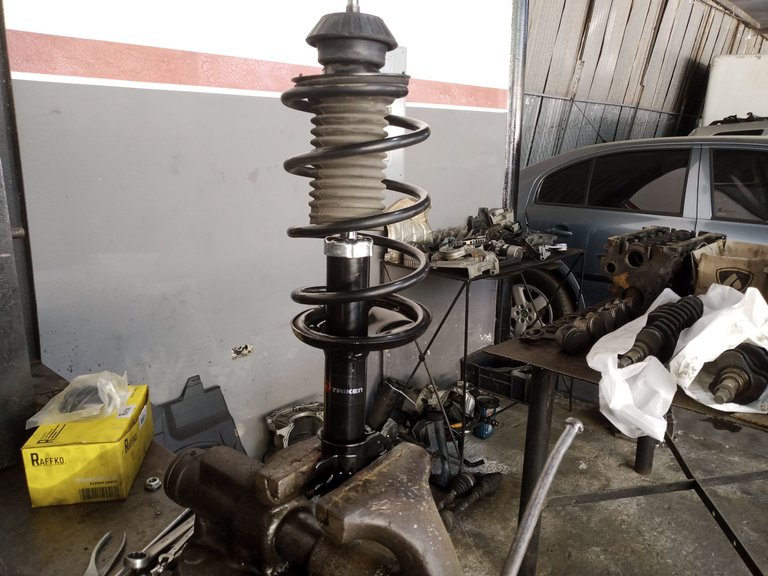
Now we only have to reverse the process and mount the spring, the new base, place the nut that usually comes new with the shock absorber and loosen the jaws that had the coil collected.
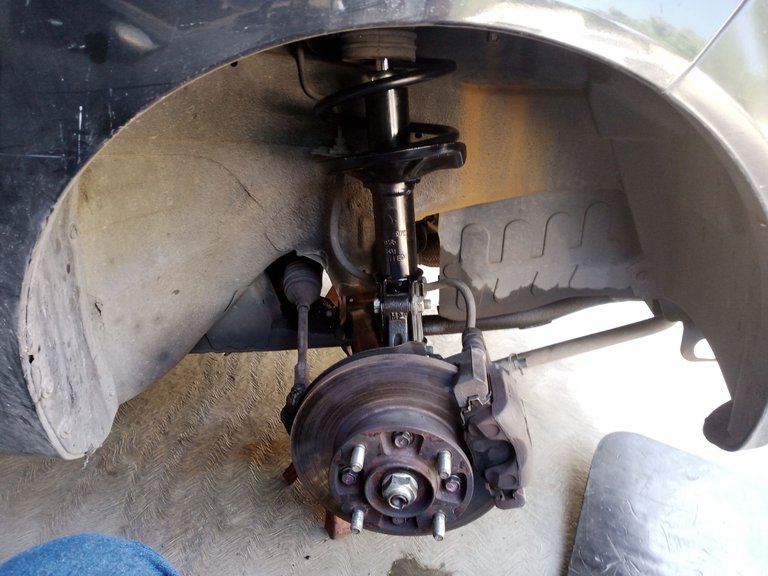
Ready this we take the shock absorber to the car and place in the car again put the screws with nut on the upright and then place the top washer with the 19mm nut tighten everything well, mount the tire again and ready the job.
Finally at the top we return to place the fusilera, the battery and on the other side connect and mount the coolant container and complete the fluid level again by the way to disassemble this container I realized that it is split in one of the coolant return intakes and therefore I am leaking a little liquid soon I will go for replacement and I will let you know here.
Finally before saying goodbye I advise you to take the car to perform a computerized alignment, I did not have time yesterday I hope to do it this week and tell you later.
Now I say goodbye to you friends totally grateful to read my publications, I hope you find them helpful and God bless you greatly.
The photos are of my property taken with the Infinix Hot 10 i cell phone.
Saludos,
Queridos amigos una vez más por aquí hoy vengo contento y con grandes noticias, POR FIN le monte los amortiguadores a mi carro 😁.
Si amigos como lo leen luego de tanto ahorrar gota a gota complete el dinero para reemplazar los amortiguadores delanteros del spark que hace meses le hacía mucha falta.
Primero hablemos de los amortiguadores que tenemos en el mercado y sus rangos de precio, hoy en día para nadie es un secreto que el parque automotriz está minado de repuestos de mala calidad y cada vez es más difícil no caer en ofertas tentadoras ya sea en productos "nuevos" o en la reconstrucción este últimos me gusta menos porque son paliativos que a la larga nos ha en gastar más dinero del debido.
En la búsqueda de precios y calidad de los amortiguadores conseguí mucha diferencia pero gracias a mi experiencia y la de amigos supe hacer descartes, el primer precio era la reconstrucción de los amortiguadores que e visto el trabajo que le hacen y no cambian los sellos solo taladran el amortiguador y le colocan aceite de motor grueso para que dure unos meses sin fugar y lo sellan con un punto de soldadura.
En los productos nuevos el mercado está inundado de la marca perfect aunque no son malos son amortiguadores reconstruidos totalmente pero hacen que los autos pierdan confort porque quedan muy rígidos, los Gabriel que eran los amortiguadores por excelencia en Venezuela ahora no duran ni 20 mil kms.
Desde hace unos meses que fui a la charla de los nuevos productos taiken estaba inclinado había ellos por la amplia garantía que ofrecen aparte de que son un producto japones, pero la búsqueda de vendedores me tomo tiempo y lo otro que me costó fue conseguir el precio correcto ya que cuando fui a la charla nos dieron una lista de precios pero muchos vendedores no la respetaban. Hasta que termine pagando 85$ por el par.
Ahora sí vamos a poner manos a la obra en el reemplazo.
Primero que nada debemos aflojar las tuercas que sujetan el rin y luego levantar el auto y dejar suspendido en dos burros como le llamamos coloquialmente aquí en los talleres.
Luego de esto desmontamos los neumáticos que por seguridad yo siempre los coloco debajo del auto de manera que si algo falla el auto no golpea el suelo.
Para desmontar los amortiguadores en el caso del spark que es un auto con poco espacio en el área del motor me tocó desmontar el envase del refrigerante del lado del copiloto para tener acceso a la tuerca que agarra el amortiguador del compacto y del lado del chófer me tocó desmontar la batería y la fusilera para trabajar un poco más cómodo eso si hay que trabajar con mucho cuidado ya que la computadora está muy cerca.
Ya desmontado lo que nos estorba retiramos la tuerca que es una llave de pipa 3/4 de pulgada o 19mm y una llave 9mm para sujetar el vástago del amortiguador, en la parte de abajo despegamos el amortiguador del montante con dos llaves 17mm ya que lleva dos tornillos con tuerca y listo ya sale el amortiguador completo del auto.
Ahora viene la parte donde debemos trabajar con mucho cuidado porque puede ser peligrosa ya que debemos recoger o quitar tensión al resorte o a espiral, para ello utilizamos una herramienta específica que lleva unas mordazas que se incrustan en el diámetro del resorte y con un tornillo se aprietan hasta que despegue el resorte del amortiguador.
Una vez recogido sacamos la tuerca que sujeta la base del amortiguador y es la que limita al resorte de no salirse, está tuerca es de seguridad y se retira con una llave de pipa 22mm.
Luego retiramos el resorte con mucho cuidado y colocamos en una parte donde no se caiga ni estorbe para montar hacer el cambio del amortiguador malo por el nuevo.
En la imagen que les muestro a continuación pueden observar la base nueva y el estado de la base que estaba instalada.
Ahora solo toca revertir el proceso y montar el resorte, la base nueva colocar la tuerca que por lo general viene nueva con el amortiguador y aflojar las mordazas que tenían el espiral recogido.
Listo esto llevamos el amortiguador al auto y colocamos en el auto de nuevo colocamos los tornillos con tuerca en el montante y luego colocamos la arandela superior con la tuerca 19mm apretamos todo bien, montamos el neumático nuevamente y listo el trabajo.
Por último en la parte superior volvemos a colocar la fusilera, la batería y por el otro lado conectamos y montamos el envase del refrigerante y completamos el nivel del fluido nuevamente por cierto al desmontar este envase me di cuenta que está partido en una de las tomas de refrigerante de retorno y por ello me está fugando un poco de líquido pronto voy por su reemplazo y les avisaré por aquí.
Por último antes de despedirme les aconsejo llevar el auto a realizar una alineación computarizada, yo ayer no tuve tiempo espero hacerlo está semana y contarles luego.
Ahora sí me despido de ustedes amigos agradecido totalmente con leer mis publicaciones, espero que les sean de ayuda y que Dios les bendiga grandemente.
Las fotos son de mi propiedad tomadas con el celular Infinix Hot 10 i.
Olle tienes un spark pero que bien me pondre atenta aprender sobre lo que le haces a tu auto la verdad soy nueva en esto de los autos pero una aprendiz enperdernida me alegra mucho encontrar a alguien con un spark son unos guerreros antes vendía repuestos para carros por ello me defiendo en las marcas los que dijiste solían ser buenos la verdad es que hacen muchas cosas malas pasándola por una marca que antes solia ser buena le quedo bacano el carro con los amortiguadores nuevos si o no que queda uno más contento jajaja
Contento y desahogado porque los cauchos van a durar más, te invito a ver mi perfil tengo muchas publicaciones de reparaciones que he realizado al auto
Que bueno que pudiste cambiar los amortiguadores. Recuerdo que una vez hablaste sobre esta marca, la verdad que uno no sabe que reemplazo comprar que sea de buena calidad, ya nos dirás con el tiempo que tan buenos salieron. Por cierto me impresionó como estaban las bases que quitaste
Si vale bueno es que la mayoría de las partes y reparaciones que le estoy haciendo al auto son por primera vez
Chanfle, eso en cierta forma habla bien del cuidado y mantenimiento que le hiciste al carro para durar tanto tiempo.
Si y además tiene 94000km lo único es que lleva sol desde que salió de agencia 🤭🤭
Oye pero estuvo parado o lo ruedan poco? Es bajo para el año. 👍🏻👏🏻
Solo rueda 30km 6 días a la semana y hace unos años que no había fallas de gasolina usaba la Explorer más que este
Wow you did an amazing job her friend. Now the car will drive smoothly after getting the alignment done. Thanks for sharing this post with me it is very useful to me
Que bueno pudiste cambiar los amortiguadores, además me gusta leer este tipo de historias para estar pendiente cuando me toque cambiarlos a mi
Disfruta de tu carro y cuídalo mucho
Gracias por la visita la idea es eso guiar a quien pueda hacerlo
Espero sigamos coincidiendo en hive motors
Una descripción muy completa del cambio de amortiguadores, la verdad que tienes mucha razón con respecto al procedimiento que hacen para repararlos y al final no deja nada bueno, no conocía la marca, estaré atento a ella, saludos!