When it is time to resolve accumulated failures
Greetings,
Dear friends once again here, this time with a post multi repair hehehe, sometimes things accumulate and do not realize.
The problem is not the accumulation of faults or pending repairs but that we increase the budget and this unbalances the finances so it is better to go over the faults and not let them accumulate.
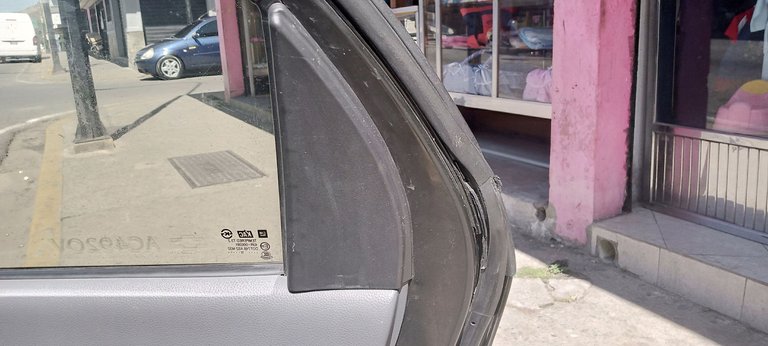
The first repair was the replacement of two external handles on the spark.
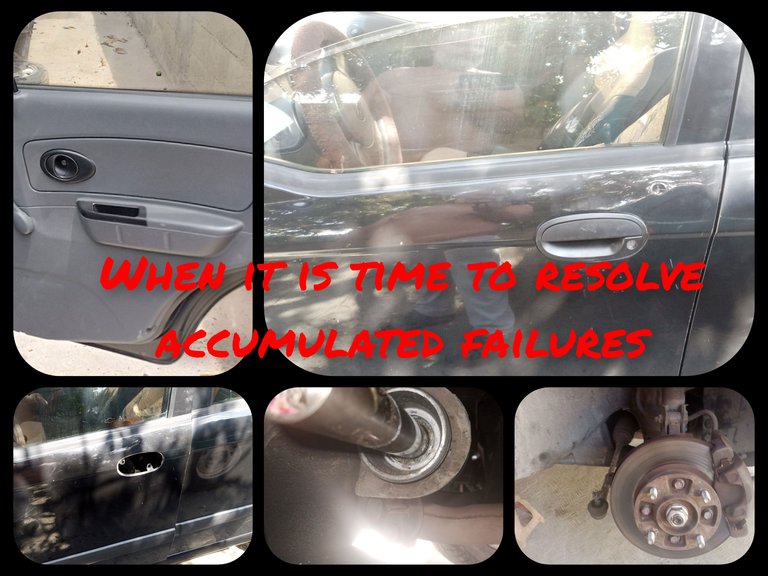
The spark as well as the Aveo are very delicate because of the external handles, I don't know if the plastic is of poor quality or if they are very thin which makes them fragile with the passage of time and the sun.
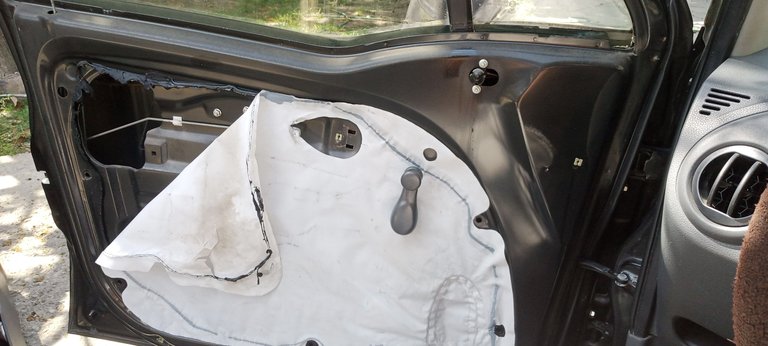
To replace these handles we must remove the internal upholstery of the door, for this we must be very careful first in the internal handle to remove it you must know how to remove the seal of the lock rod, second to remove the handle retainer to raise the glass is quite tedious because it is not even appreciated (so I have no photos of these parts) and finally be sure that we remove all the screws to be able to make force and take off the pressure clip; check well the screws is important because if any of them are left the cover breaks and is damaged and there is no way because it is plastic is not upholstered as in other models.


Once disassembled the upholstery we proceed to locate the screws that hold the Handle usually are two short screws with 10mm head, the driver's door despite carrying the key cylinder is much simpler than the rear.
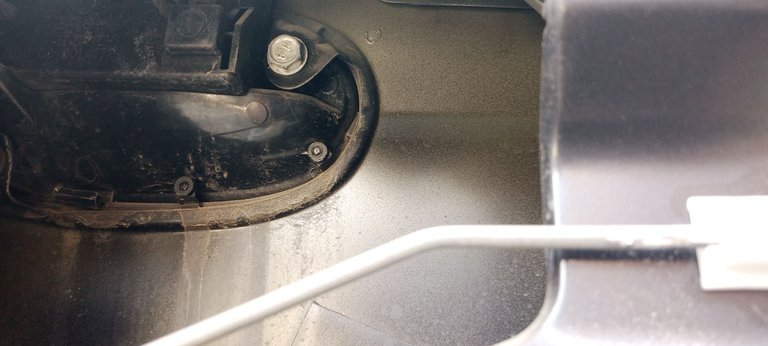
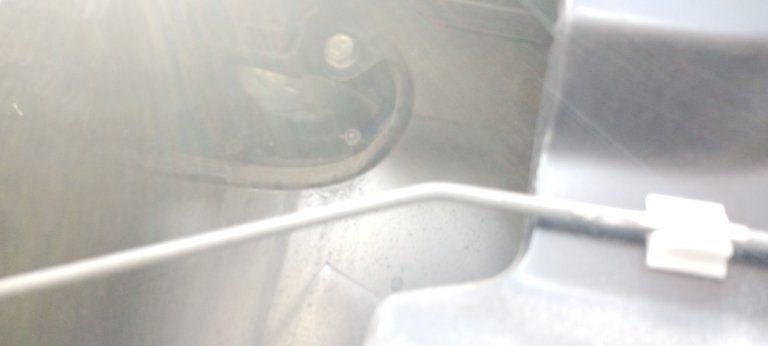
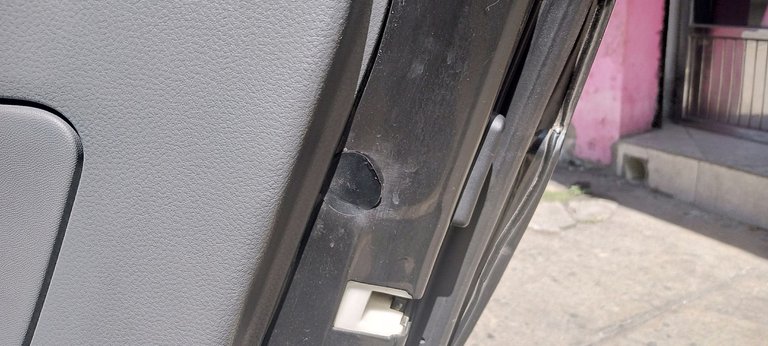
To replace the Tailgate Handle as I tell you above is more complicated you must locate a sticker that goes on the outside of the upholstery that covers a hole to insert the tool and when you are removing the upholstery you have to remove a black triangular cover because underneath there is a screw.
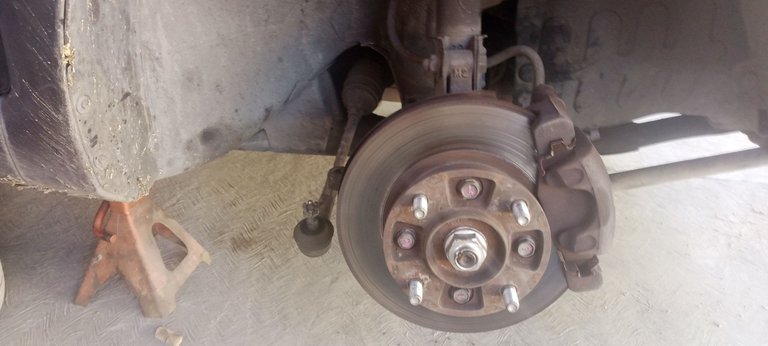
The second fault that I had to correct was a noise in the front axle that drove me crazy and more than that I had already replaced the rocker arms because they were damaged but the noise was still there.
As the days went by I was investigating and remembering when I worked in the hydromatics workshop that many times the steering box loses or wears out the horn of the internal bar which makes the internal damping is lost with the impacts of the irregularities of the floor and begins to stick metal to metal and all that noise gets into the cabin but it is little detectable when examining the front axle.
I was really running away from this repair because I have never liked to disassemble the steering boxes, it is quite a lot of work and it is a difficult area to access and more for me that I have big and fat hands but well it is the car of the house and I had to do it I can not pay $100 for a job that I know how to do but I do not like it.
I went to the workshop of a friend who showed me a trick that applies in this car in the Matiz and in some Fiat and is that you can mount the horn without disassembling the box, of course you have to know that your box is good to take the risk of doing so but as the spark just have 85000 km of travel I considered it was worth doing it that way.
To replace the horn without disassembling the steering box, you have to lift the car on the passenger side and take out the tire, the terminal and the ball joint with its dust cover, there the horn is exposed.
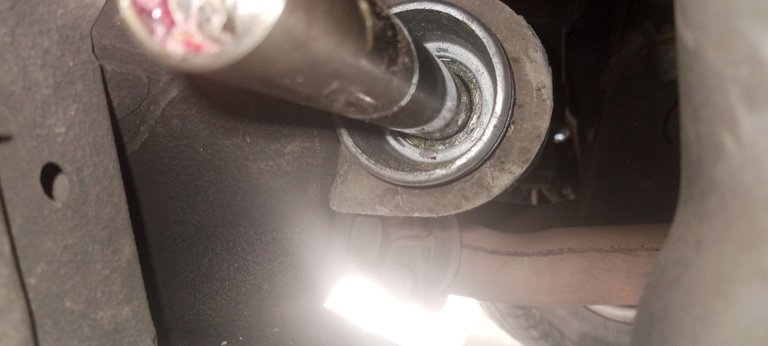
Then with a very thin screwdriver and a hammer we cut what is left of the horn, once cut we turn the steering so that the bar comes out and remove the horn from its position, when the horn comes out we blow with pressurized air we introduce grease and then the new horn until it begins to enter where it goes.
After that without hitting or anything we place the rotula and we are turning the direction to the other side and she with pressure is making it reach its place we do this process several times until we see that it reaches the top then we assemble everything that goes in the sector.
After assembling the car there was still a little noise but it was corrected by adjusting the couplings that go under the steering wheel and ready.
Now the car has all its doors functional and no front end noises although I still have a little noise very slight but I know it's the brake pads that will soon be replaced and rectify the discs but it is content for another publication hehehe.
I hope you find this publication useful, thank you for reading my lines and may God bless you greatly.
The photos are of my property taken with the Infinix Hot 10 i cell phone.
SPANISH
Saludos,
Queridos amigos una vez más por aquí, está vez con un post multi reparación jejeje, aveces las cosas se acumulan y no se da cuenta.
El problema no es el cumulo de fallas o de reparaciones pendientes sino que nos aumenta el presupuesto y esto desequilibra las finanzas por eso es mejor ir encima de las fallas y no dejarlas acumular.
La primera reparación fue el reemplazo de dos manillas externas al spark.
El spark al igual que el Aveo son muy delicados por las manillas externas, no sé si el plástico es de mala calidad o es que son muy delgadas lo que las vuelve frágiles con el paso del tiempo y el sol.
Para reemplazar estás manillas debemos retirar la tapicería interna de la puerta, para esto debemos ser muy cuidadosos primero en la Manilla interna al sacarla hay que saber retirar el precinto de la varilla de la cerradura, segundo para sacar el retén de la Manilla de elevar el vidrio es bastante tedioso porque nisiquiera se logra apreciar (por eso no tengo fotos de estas partes) y por último estar seguro que retiramos todos los tornillos para poder hacer fuerza y despegar los clip de presión; revisar bien lo de los tornillos es importante ya que si queda alguno la tapa se parte y se daña ya no hay manera porque es de plástico no es tapizada cómo en otros modelos.
Una vez desmontada la tapicería procedemos a ubicar los tornillos que sujetan la Manilla por lo general son dos tornillos cortos con cabeza de 10mm, la puerta del chófer a pesar de que lleva el cilindro de la llave es mucho más sencilla que la trasera.
Para reemplazar la Manilla de la puerta trasera como les digo arriba es más complicado debes ubicar un sticker que va del lado de afuera de la tapicería que tapa un hoyo para introducir la herramienta y cuando estás retirando la tapicería hay que sacar una tapa triangular negra porque debajo hay un tornillo.
La segunda falla que me tocó corregir era un ruido en el tren delantero que me traía loco y más que ya había reemplazado las mecetas porque estaban dañadas pero el ruido seguía.
Con el paso de los días fui indagando y recordando cuando trabaje en el taller de hidromaticos que muchas veces el cajetín de la dirección pierde o se desgasta la bocina de la barra interna lo que hace que se pierda la amortiguación interna con los impactos de las irregularidades del piso y empieza a pegar metal con metal y todo ese ruido se mete en la cabina pero es poco detectable al examinar el tren delantero.
De verdad le estaba huyendo a esa reparación porque nunca me ha gustado desmontar los cajetines de dirección, es bastante el trabajo y es un área de difícil acceso y más para mí que soy de manos grandes y gordas pero bueno es el carro de la casa y tocaba hacerlo no puedo pagar 100$ por un trabajo que se hacer pero no me gusta.
Fui al taller de un amigo que me enseñó un truco que aplica en este carro en el matiz y en algunos Fiat y es que se puede montar la bocina sin desmontar el cajetín, claro está tienes que saber que tú cajetín está bueno para tomar el riesgo de hacerlo así pero como el spark apenas tienen 85000 km de recorrido considere que valía la pena hacerlo de esa manera.
Para reemplazar la bocina sin desmontar el cajetín de la dirección toca levantar el auto del lado del copiloto sacar el neumático, el terminal y la rotula con su guardapolvos ahí queda expuesta la bocina.
Luego con un destornillador bien delgado y un martillo cortamos lo que queda de bocina, una vez cortada se gira la dirección para que la barra salga y saque la bocina de su puesto, al salir la bocina soplamos con aire a presión introducimos grasa y luego la bocina nueva hasta que empieza a entrar donde ella va.
Luego de eso sin golpear ni nada colocamos la rotula y vamos girando la dirección al otro lado y ella con presion la va haciendo llegar a su lugar hacemos este proceso varias veces hasta que vemos que llega a tope luego armamos todo lo que va en el sector.
Luego de armar el auto todavía quedaba un poco de ruido pero se corrigió al ajustar los acoples que van debajo del volante y listo.
Ya ahora sí el auto tiene todas sus puertas funcionales y sin ruidos de tren delantero aunque aún me queda un poco de ruido muy leve pero se que son las pastillas de freno que ya pronto les toca reemplazo y rectificar los discos pero ya es contenido para otra publicación jejeje.
Espero les sea de utilidad está publicación, gracias por leer mis líneas y que Dios les bendiga grandemente.
Las fotos son de mi propiedad tomadas con el celular Infinix Hot 10 i.
https://leofinance.io/threads/@soychalbed/re-leothreads-2cnffruw6
The rewards earned on this comment will go directly to the people ( soychalbed ) sharing the post on LeoThreads,LikeTu,dBuzz.
https://twitter.com/1388439908650455040/status/1635788258050228226
https://twitter.com/753437233785540608/status/1636008376713768961
The rewards earned on this comment will go directly to the people( @soychalbed, @josuerr29 ) sharing the post on Twitter as long as they are registered with @poshtoken. Sign up at https://hiveposh.com.
Hay personas que les parece imposible, pero en verdad con tantas obligaciones las reparaciones de nuestro carros se acumulan de verdad, me identifico mucho con eso, y lo del presupuesto ni se diga.
No se si recuerdas aquel plan llamado Venezuela Movil, para vender carros a precios "accesibles" se redujeron muchos costos en las ensambladoras, y la mayor parte se fue en tapicería y piezas plásticas, los años ya nos dicen cuán buenas salieron.
En cuanto a lo del cajetín como me identifique, ser de manos grandes para trabajar un carro pequeño es una pesadilla.
🤣🤣🤣🤣 que bueno ver qué me entienden 🤣🤣🤣 chamo es casi que un odio que le tengo a ese trabajo y lo peor es que se hacerlo, la semana pasada un amigo compro un carro y tenía fugas en el cajetín compro el kit y me dijo ayúdame, le dije solo si tú lo bajas, accedió cuando voy al taller que estamos haciendo la reparación salió disparado un chorro de aceite que me daño una chemise Polo ahora los odio más🤣🤣🤣
Nooo pero como vas una polo hacer ese trabajo jajaja de pana que es una pesadilla
Es que fui solo a guiarlo el es mecánico también 🤣🤣
Amigo estuve tratan de ver estiker que dices que debajo hay un oyó entre las imágenes que colocaste. Si es el stiker de los seriales debes tener cuidado por que te puede salir mas costosa la reparación.
No amigo en la puerta trasera no va ningún serial
Disculpa ya edite el post y fue que no se habían cargado esas imágenes revísalo de nuevo
De ser así. El resto esta muy bien tu post amigo Gracias por compartir
Gracias por el apoyo
You are absolutely right: many times the maintenance piles up and afterwards the expense (in terms of time, because I also do almost everything at home) becomes very high.
In some cases, however, waiting to do maintenance makes you find the problem more precisely, and you just replace the right component without going by exclusion.
In this way I solved a problem I had with a window lifter: the electrician told me to change the motor; by waiting and checking to see if voltage drops were seen, I realized that the motor was not the problem but just a slow connection!
In that you are right my friend, sometimes time makes one think with a fresh head.
Saludos @soychalbed parece mentira pero son cosas sencillas, pero cuando son varias se vuelven fastidiosas y si no reaccionamos a tiempo empeoran y al final el auto es una cacharra, gracias por compartir.