Keeping the Water in the Ground with Swales
This is a typical problem, getting more common lately: Is scorching hot and the rains just won’t come. You can use water from your well to keep your plants from dying, but under these conditions the water table may just drop below your pump, leaving you high and dry. Then, when the long awaited rain comes, half your topsoil could get washed away in one massive downpour. So horrible, yet so familiar! Fortunately, there is a really neat technique that makes sure your water will stay on your land, or rather under it, instead of ripping through the surface before flowing away never to be seen again.
The Behavior of Water
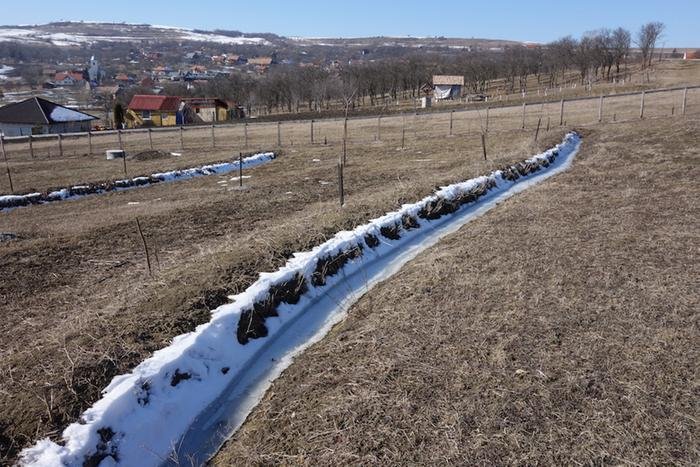
It’s a good idea to take a close look at what water does during a heavy rainstorm. True, most of us don’t enjoy running around under the open sky when it’s raining cats and dogs. But it can be very educational to observe the natural flow of water. It always takes the quickest way down (never up). And depending on the flow, which in turn depends on the amount of water and the ground’s inclination, it can even tear its own way through the landscape. If the ground is fairly dry and without much vegetation, you will even see how a small stream can create a gully – growing into veritable canyons – by carrying sediment with it.
That sediment may be your valuable topsoil! And fairly soon after the rain stops, it will be gone, along with the stream of water. Where did it all go? Just follow the canyon, and you are likely to find it leading away from your land, towards the lower elevations.
But That’s What Water Does. How Can We Counter It?
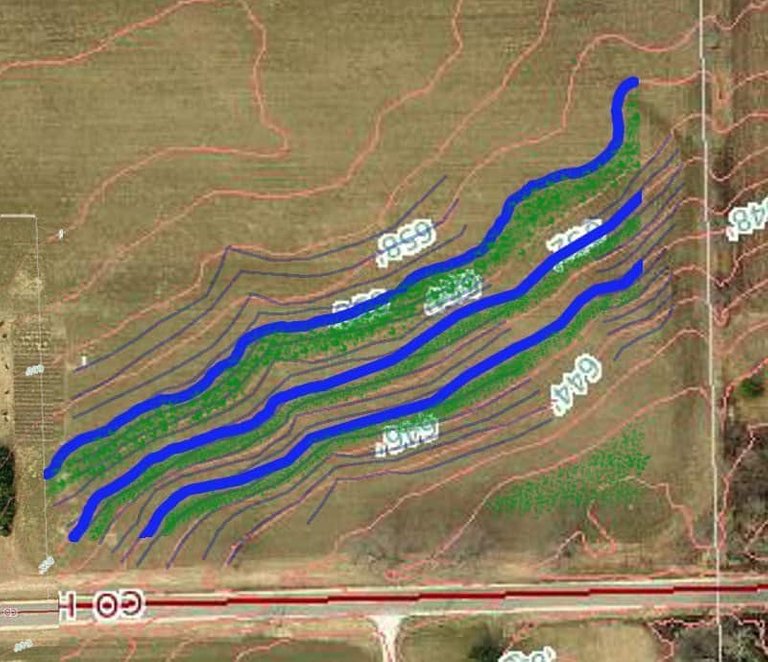
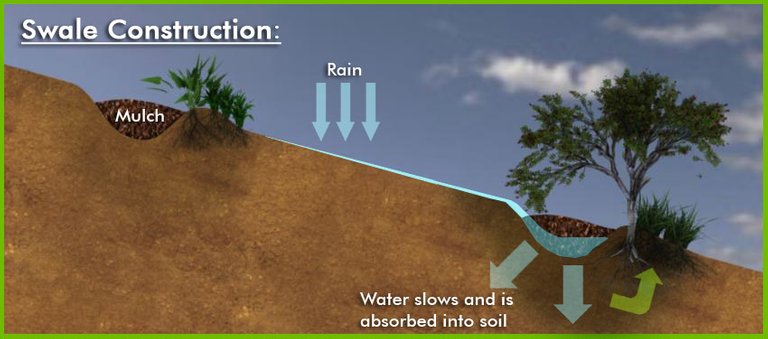
Admittedly, we will never change the natural behavior of water. What we can do, however, is use it for our own purposes. So if it really always goes downhill, let’s give it a place to go: a ditch dug out on the contour line of a hill, which is known as a swale. And that’s all! Since the swale is on contour, meaning that it’s completely horizontal, the water is not going to go anywhere from there until the swale is full (something we must also prepare for). Now that the water lost its momentum, it’s simply going to sit there, and slowly seep downward into the soil. There it won’t have the speed it normally has on the surface, so it can’t carry away any soil. Instead it gradually saturates the ground on the hillside below the swale.
How to Build Swales
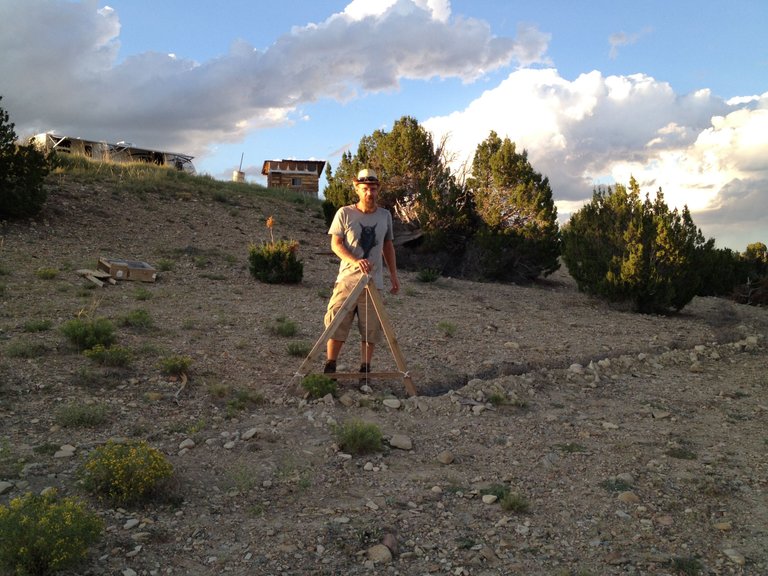
It’s really quite simple: First comes the precision work of measuring out the contour line, followed by the grunt work of digging. You may use machines if your topography allows, or do everything by hand, but in either case, exact measurement is the make-or-break aspect of a swale. There are many different methods for this, ranging from the modest (yet effective) A-frame, to the hose level, all the way to the high-tech laser level.
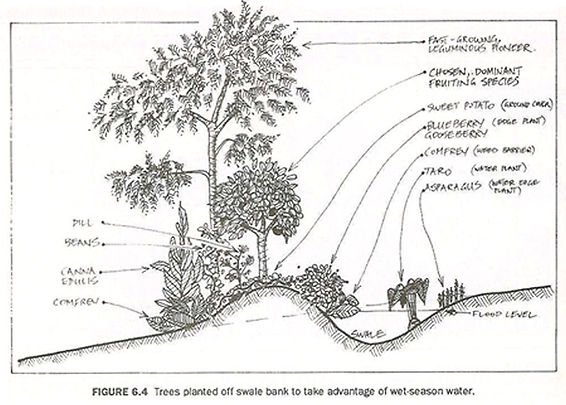
When you are certain that the line is exactly horizontal, you can start digging the trench. Though it can be smaller, I personally like a bigger swale of about 2 feet width and depth. That way it can take up more water, and over time it will be gradually filled with soil anyway. (A place for mining god topsoil later on.) What’s most important when digging the swale is to make sure that it remains exactly on contour! The excavated soil we pile up on the side of the ditch that’s sloping downward. This berm is an ideal place to plant trees (or other plants) to hold the soil together, to help with water saturation and dispersal, as well as to shade the swale to slow down evaporation. In a great design they will also grow something you can eat.
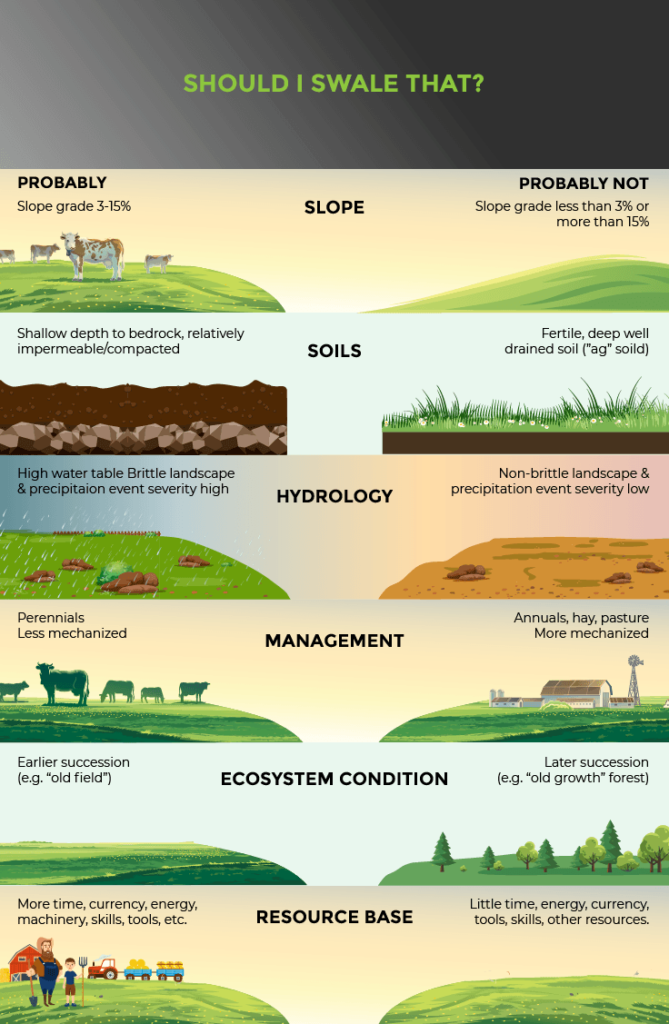
There are a couple of things to look out for: For one thing, the swale should never be placed directly above any buildings (gardens are a much better idea). The best place for them is high up on a hill. Also, make sure the slope doesn’t exceed 15 degrees. Both of these are basic safety measures against slides. It’s also important to make sure the bottom of the swale has a decent water saturation, of at least an inch per hour. Finally, one must prepare for record level rainfall, in other words even the best swale will fill up… and then what? The water needs to go somewhere! So have the overflow channeled into a pond, a dam, or any other feature you have installed for water management.
Okay, so you’ve measured out the contour line, dug a nice big swale, planted trees into the berm, and double-tripple checked that the bottom of your ditch is perfectly level. Great, now you can lean back and wait for the rain! When it comes, put on your gumboots and get out there again to see how your swale is performing!
Maintenance and Long-Term Effects
After a year or so you can take a look at the swale, preferably when it’s not full of water. You’ll see that it’s not as deep any more as how you dug it. It has filled up with soil: your topsoil! This is your land, that otherwise would have been carried away to your neighbor, or eventually into the ocean, to be lost forever. But here it is, ready to be dug out and used for planting. Of course once again, it’s important to keep the bottom completely leveled.
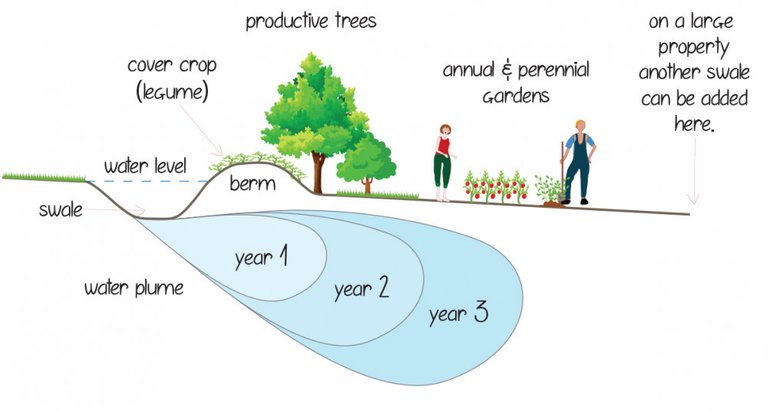
The other effect you are not likely to see immediately, is the water inside, that is under your ground. This is a very gradual process, but the water is going to hang around much longer inside the soil than on the surface. After a while it adds to the water table, and … depending on numerous factors … it will raise it again. There have been many accounts of wells that have been dry for eons started having water again, only a few years after a swale was built on a nearby hill. But since farming and gardening naturally makes you want to think long-term, this technique will fit right into it.
Sources: 1, 2, 3, 4, 5, 6, 7, 8, 9, 10
Note: I wrote this post and published it on this external site a few months ago. You can find more sustainability related posts in my series Permaculture in Theory and Practice.
https://leofinance.io/threads/@fokusnow/re-leothreads-2tqzxufg1
The rewards earned on this comment will go directly to the people ( fokusnow ) sharing the post on LeoThreads,LikeTu,dBuzz.
I'm not sure how I could apply this since I live by a stream but it will probably be useful someday.
Have you seen this video? Some nice tips there
Wonderful! Geoff Lawton is amazing, though I have not seen this video of his until now. I love how he designs the swale to be an access path for the wheelbarrow! And also it includes the equally important aspect of the overflow. Love it! Thanks for sharing. !PIZZA
Do you just follow topographical maps for the contour lines? This seems like a very effective way to conserve water.
You do follow the topography, but it's a more exact matter than just following maps. You need to measure out the actual contour. There are a couple of tools for that, such as the A-frame in the picture, or a clear water hose. Or, you could go fancy and use a laser level. It's really quite simple, though I didn't get into the details of it in this post. But check out the video posted by @fenngen in the comments. That one demonstrates really well the use of this mind-blowingly primitive, yet highly precise instrument (the A-frame).
Such a very informative article from you then. Indeed, I've learned something from this. Thank you for sharing this one. Stay safe and God bless.
PIZZA Holders sent $PIZZA tips in this post's comments:
@stortebeker(2/5) tipped @fenngen (x1)
Join us in Discord!
Wow! This is very informative and this is so helpful for the people especially for our farmers in this very hot weather.
This is also a good idea to save water. Thanks for sharing this with us.
Of course, and thank you for reading and sharing it!
Truly informative, _💞.. Thank you for sharing this @stortebeker ...
I'm glad that you liked it!
Excellent information. It contributes to soil and environmental conservation. My husband applied that method to prevent rainwater from undermining the house in the field and it has given a magnificent result. Only that each time it has to be dug again, because it fills in. Greetings.
That's right, swales need to be maintained. That's why I like to call it mining good topsoil. Since losing nutritious soil is getting washed away, the swales catch it, so in the end you won't really lose it.
Your post has been chosen for the next edition of 'The Garden Shed', a collection of archived posts by @gardenhive that feature gardening advice, DIY tips, homesteading tips and inspiring gardens. You can find previous posts by browsing our Collection via @gardenhive over at Peakd.com.