Assembling My First 6R80 Transmission

Well Hello There Fellow Technicians And Hivers!
Most of you guys probably thought dayum this guy must have quit his job! Nope... I don't think I ever will... well perhaps for something that pays significantly better of course. But I am still swinging those wrenches like it's going out of style!
Now for today I had a Ford transmission to assemble and as always I won't be covering every step just what I found interesting in the moment. This specific transmission is called the 6R80 and it's typically found in vehicles such the Ford pickup's, the ranger's wildtrak's, stormtrak's as well as the everest and so on. They are probably found in a wider variety overseas but where I'm from they are limit to a few.
I've already done the teardown on it aswell as assemble all the parts that are needed, got the fresh clutches and bushes inserted where needed. Literally all I need to do is tuck everything back into the casings in the correct order and assemble the pump of the transmission.
This is all easy work but it has so much room for error.
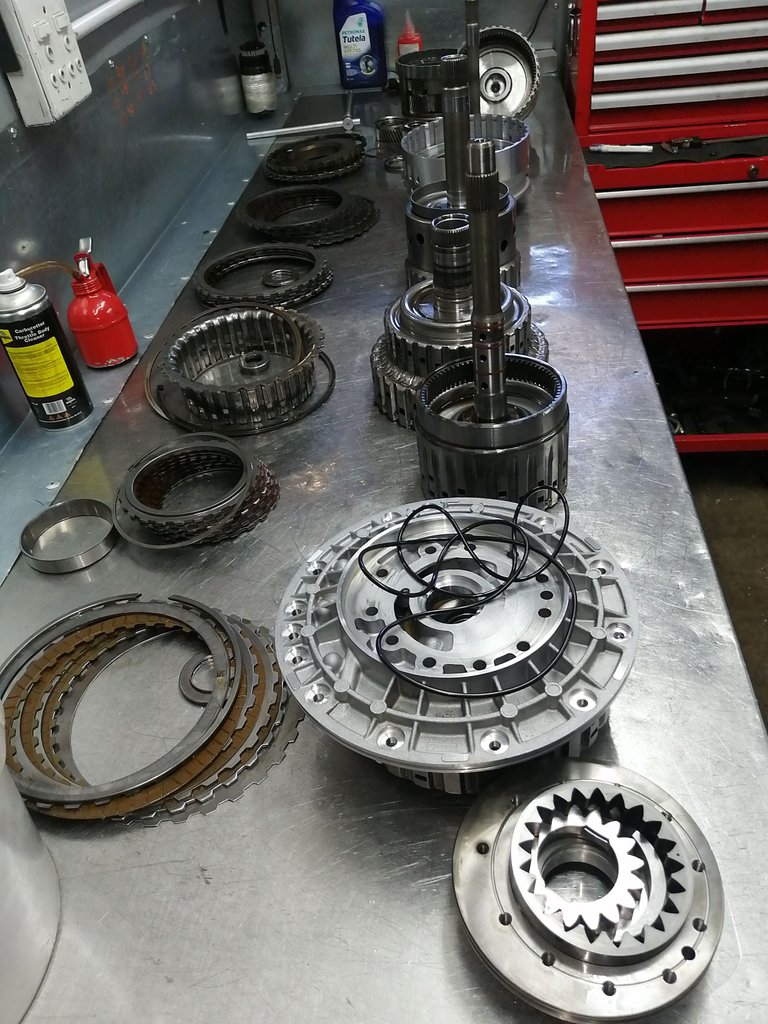
All the parts, cleaned and ready for assembly.
These 6R80's aren't like the conventional transmission where you split the casings and then the rest, they are nice to work with, in a way. Once you remove the pump where the converter is pushed into you can then pull everything out almost like gutting a pig. A very quick and easy box to teardown and assemble but as I said the assembly requires some patience and focus, it has a lot of bushes and seals that can be pinched when stuff are inserted wrong and the best part is you wont even know you pinched it until it is fitted and ready for a test drive!
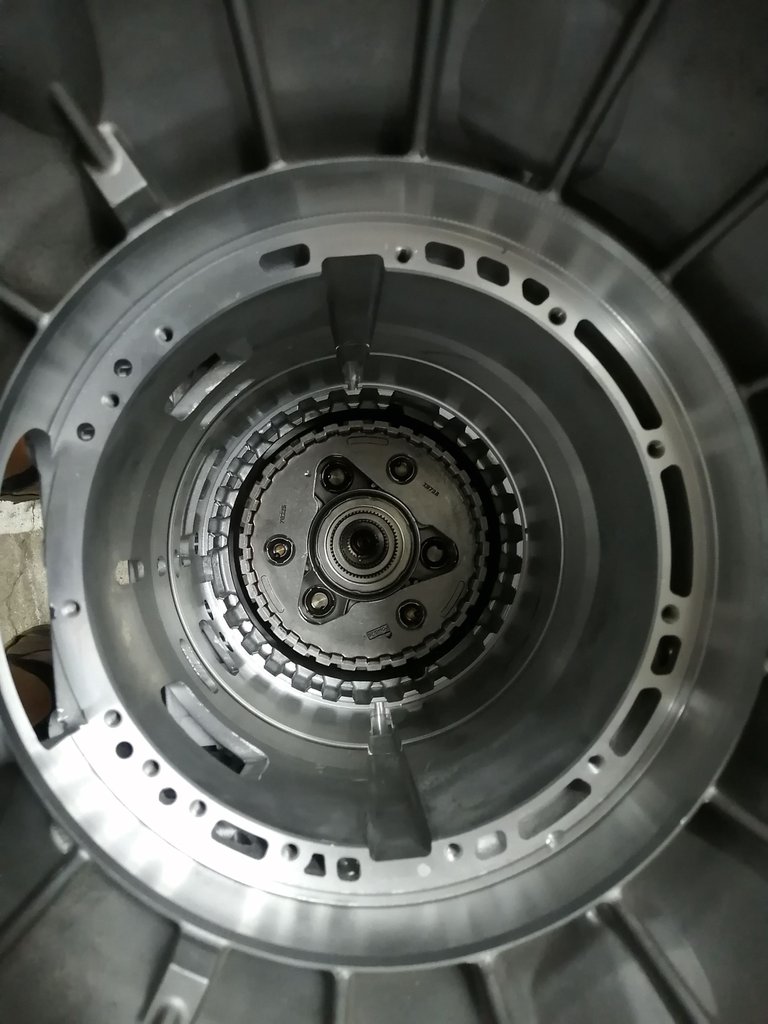
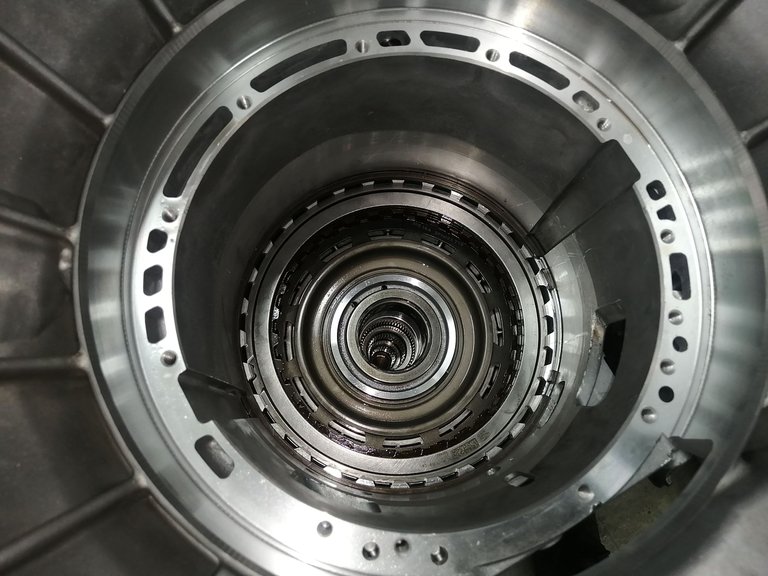
The casing with nothing in it except the planetary gear cluster.
The first piece that needs to go into this funnel of a transmission would be the planetary gears, now it's hard to believe but that is literally the only actual gears that are in this transmission and it's size is no bigger than my hand, and then it's a bunch of small gears.
The first time I laid eyes on this I was like how does this even work.
Yeah this whole transmission consists of mainly clutches.
Notice the grooves on the outer edge of the center piece? Before fitting the first clutch drum you have to insert some clutches in those grooves.
The casing with the planetary gear from above.
After fitting the first clutch drum it's basically a rinse and repeat process one clutch drum after the other until you reach the transmission pump.
The first clutch drum inserted.
So I fitted the first clutch drum it's more than important to remember a few smaller parts that are easily overlooked, I've said this before building a transmission doesn't require you to be out of the ordinary technicians, all it requires is for you to be able to puzzle things out with a clear head.
Most of all! Most of all you need to have a insane amount of patience and it will be battered and tested on every transmission you need to assemble.
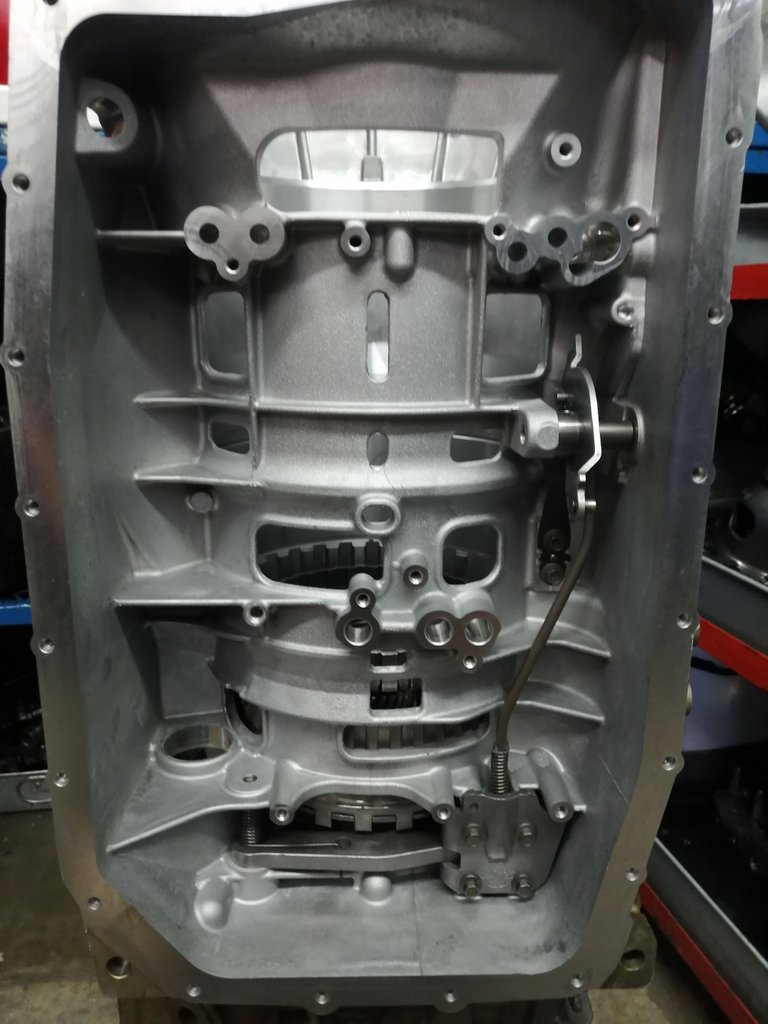
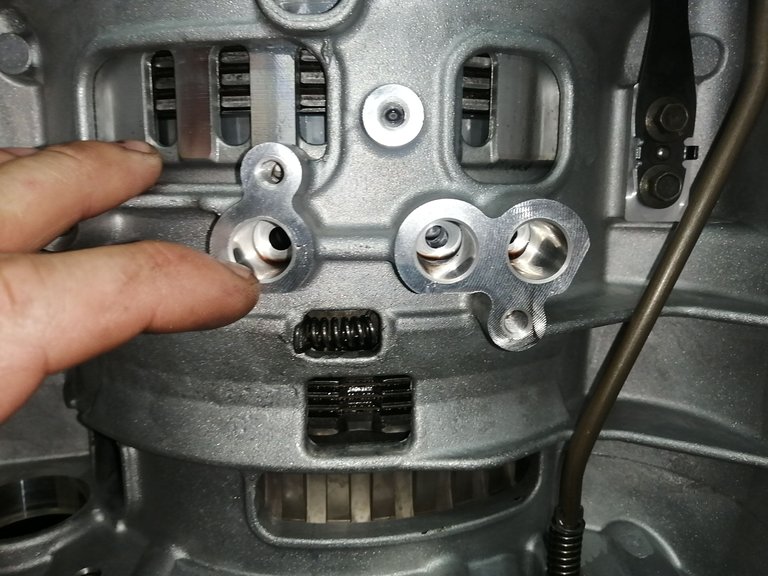
The bottom side of the transmission where the valve body needs to be fitted.
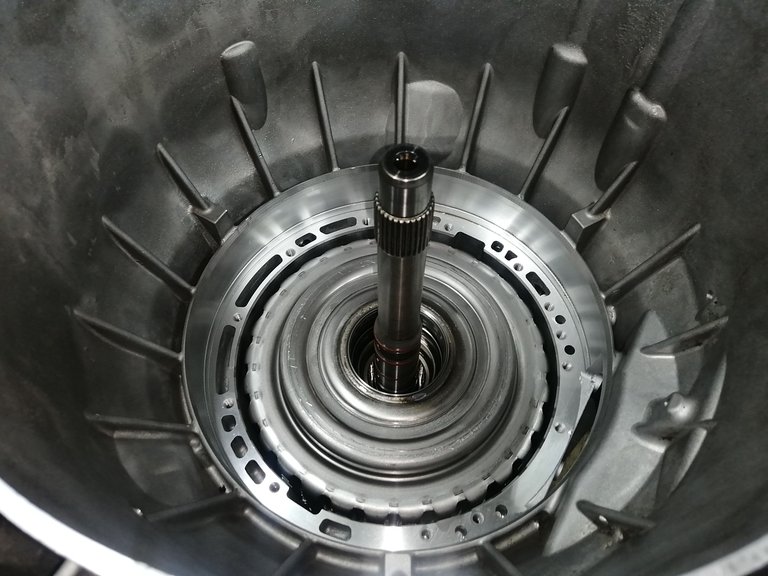
Let's skip a few clutch drums ahead, of course this is the final clutch set and all that is still needed to be fitted is the transmission pump which is pressed over that shaft and seals of the transmission, the final adding would be the torque converter which completely seals of the transmission.
Like I said earlier, if you have done the correct preparations and getting everything ready the total build time of this transmission is around 20-40 minutes no longer, given it does take around four hours to prepare most of the things, but then again that depends a lot on how badly broken the transmission was.
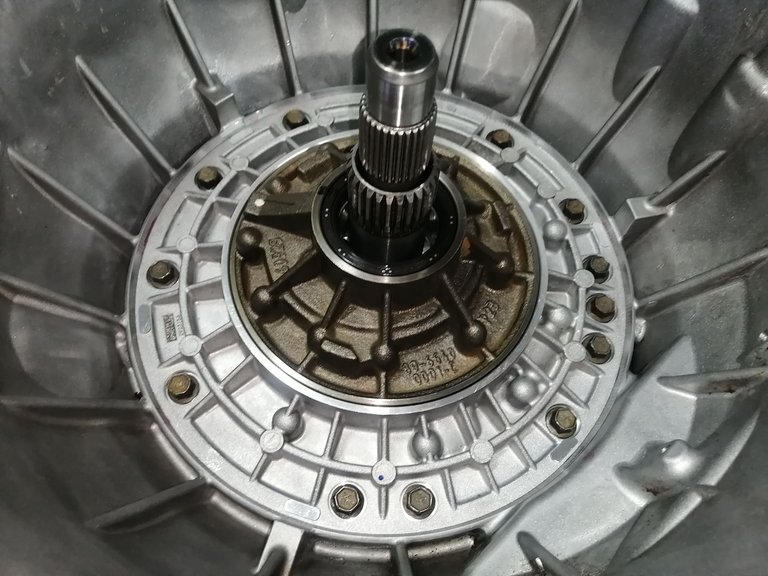
Transmission nearly completed in the build.
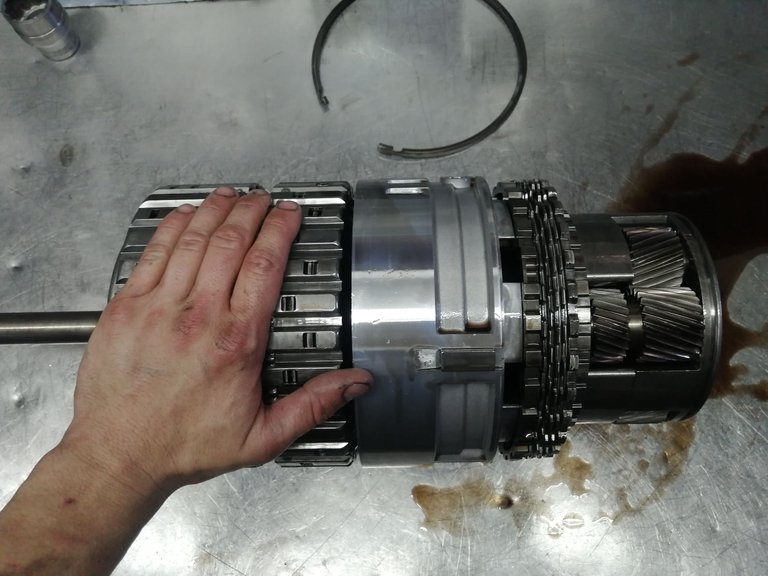
For those who are wondering, this is the entire transmission, from the planetary gear set to the last clutch drums.
I bet most of you can't even believe this, well I won't either since the fully complete transmission is way bigger than this assembly. Imagine that this thing houses six gears and a reverse gear and the clutches. When I first realized exactly how small this thing really is I was baffled and this after I've done a few tear downs on them!
If you spread the parts out it doesn't look like they all can fit in here but the one part slides over the other and that saves space.
The whole inside of the transmission.
The last part that needed fitment was the pump, now for this one I like to add a bit of grease as there are seals that can not be nipped at all and with the help of a bit of grease it may slide right through into position.
These are one of those seals that can get a pinch and you won't know it until the transmission is being tested in the vehicle. One might say you can remove it after you fitted the part to make sure you didn't pinch it but you still need to refit it leaving room for you to pinch it then, it's a hope game but when done with care the chances of you pinching it is next to 0.
The greased up pump.

She's looking real beautifull now! I can tell you now the building isn't the best part of it all it's the seeing how the vehicle drives after it is fitted and when it's done right the first time AHHHH it's a genuinely amazing feeling!
Something that not everyone can do, but we all have our fields of expertise!
Pump fitted into casing.
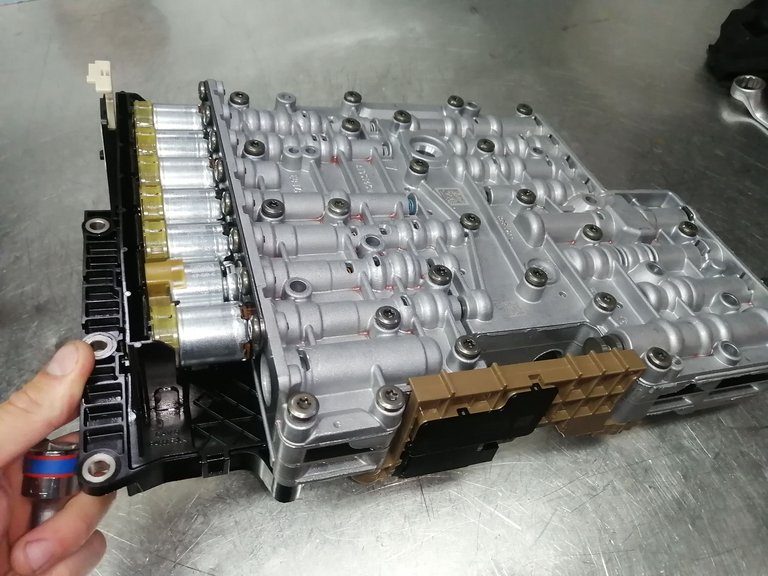
Last but not least I can now add the valve body and close up the final cover of the transmission.
The valve body is almost like the veins carrying the blood around the transmission, the heart would be the torque converter.
After the valve body is fitted this transmission can be re-fitted into the vehicle it came out of.
The valve body already opened up and cleaned.
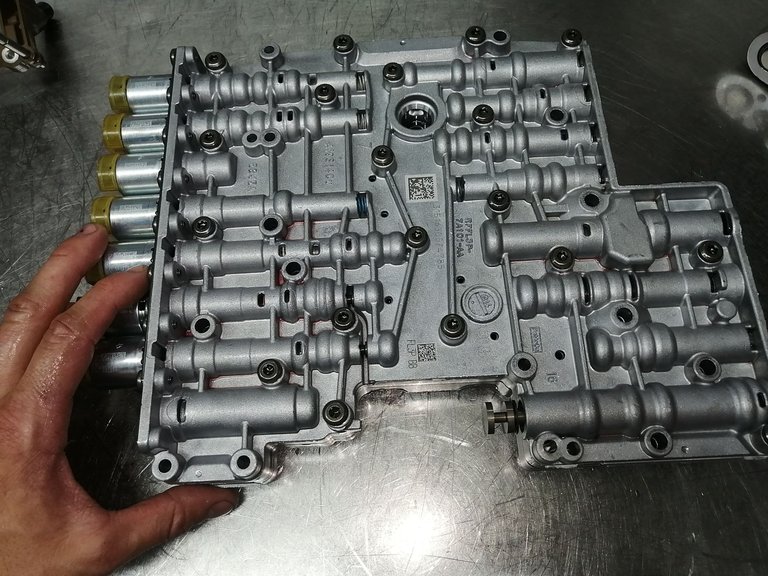
Such a pretty thing ey.
Now I'm very happy to be able to say my first build on the 6R80 went smoothly and it didn't pose any problems during or after the testing of the transmission.
So I am now 1 for 1 on the 6R80's but sooner or later I will have a bugger up that is for sure, with that said we can always try to keep the count low on the comebacks!
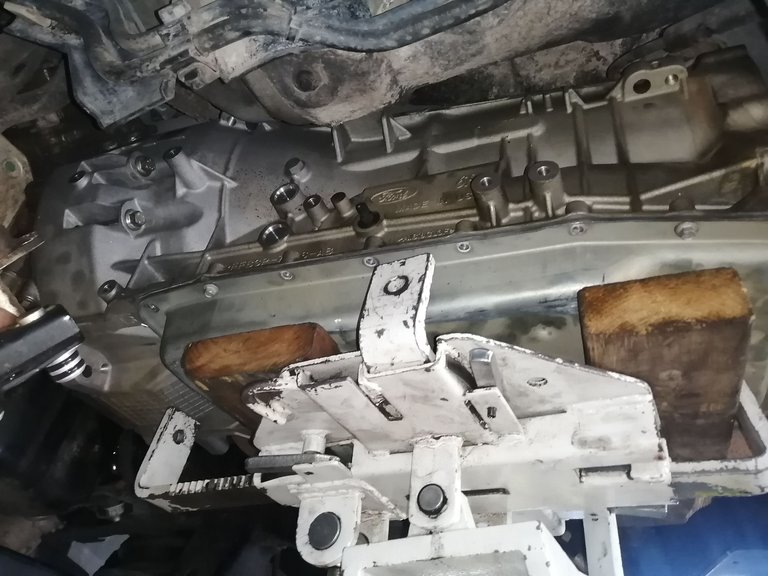
Transmission being re-fitted.
Dated 24/03/2023


Connecting the people of #HIVE across South Africa. #hive
Yay! 🤗
Your content has been boosted with Ecency Points, by @technicalside.
Use Ecency daily to boost your growth on platform!
Support Ecency
Vote for new Proposal
Delegate HP and earn more
Today I learned that these transmissions are basically onions, with thousands of layers, and each and everyone may (or may not) bring a tear to your eye, at any moment.
Laughs, I've never heard someone describe it as such!
BUT
I don't think you could be more right 😂😂that definitely nails the nail!
!PIZZA
My father was a fitter and turner, I heard a lot of things described in very interesting ways.
PIZZA Holders sent $PIZZA tips in this post's comments:
@technicalside(5/5) tipped @holoz0r (x1)
Join us in Discord!
6r80 those transmissions are used a lot in my country in the Explorer from 2006 to 2010, they are quite simple but when they get complicated they are very complicated, what I learned to avoid problems is to change the torque converter when they are repaired.