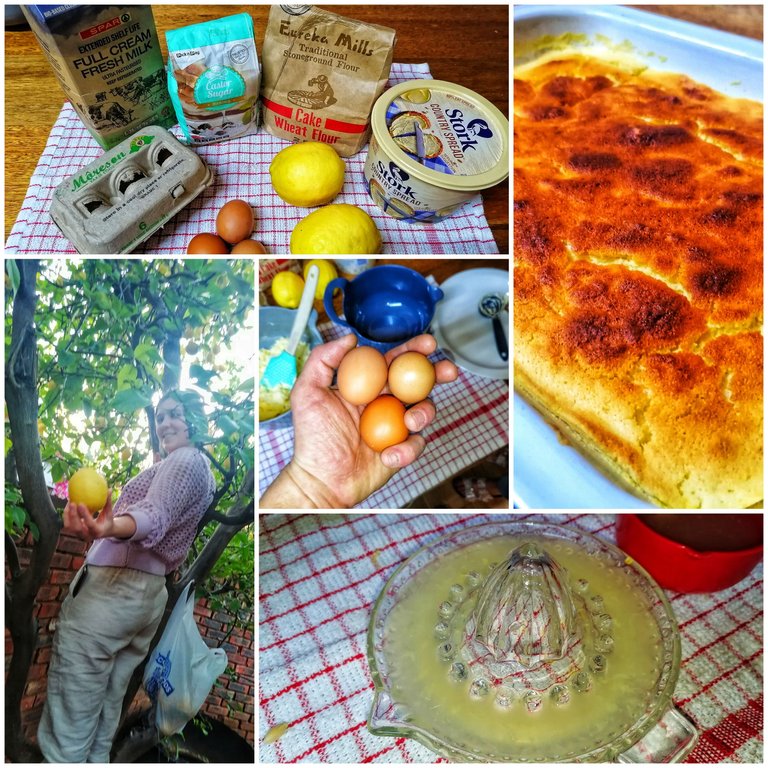
Men Can Also Bake: Lemon Pudding

Hello There Food Lovers Of Hive!
It's been quite sometime since I last shared a foodies post, must have been more than three years ago! So let's give this another shot!
The previous weekend me and The Betty went to fetch her book she ordered and we stumbled across "Knuppeldik Aan Koningskos!" and I decided that I want to give this a try again! After all I did always help The Granny when she needed to bake cakes!
Today I thought we should try a Lemon Tart. Mainly because we had a "braai" at someone's house and they had a lot of lemons and they even asked us to take as much as we could carry!
We ended up taking a whole bag!
This Lemon Tart or whatever people may call it wasn't taken from the "Knuppeldik Aan Koningskos" book but instead this is a random recipe that The Betty gave me!
Before we go on any further I would like to thank @misshugo for helping me with this! And yes I made it and I also did most of the work! It was only every now and then where I needed The Betty's help! This proves to show that men can also cook... or bake or whatever you want to call it.
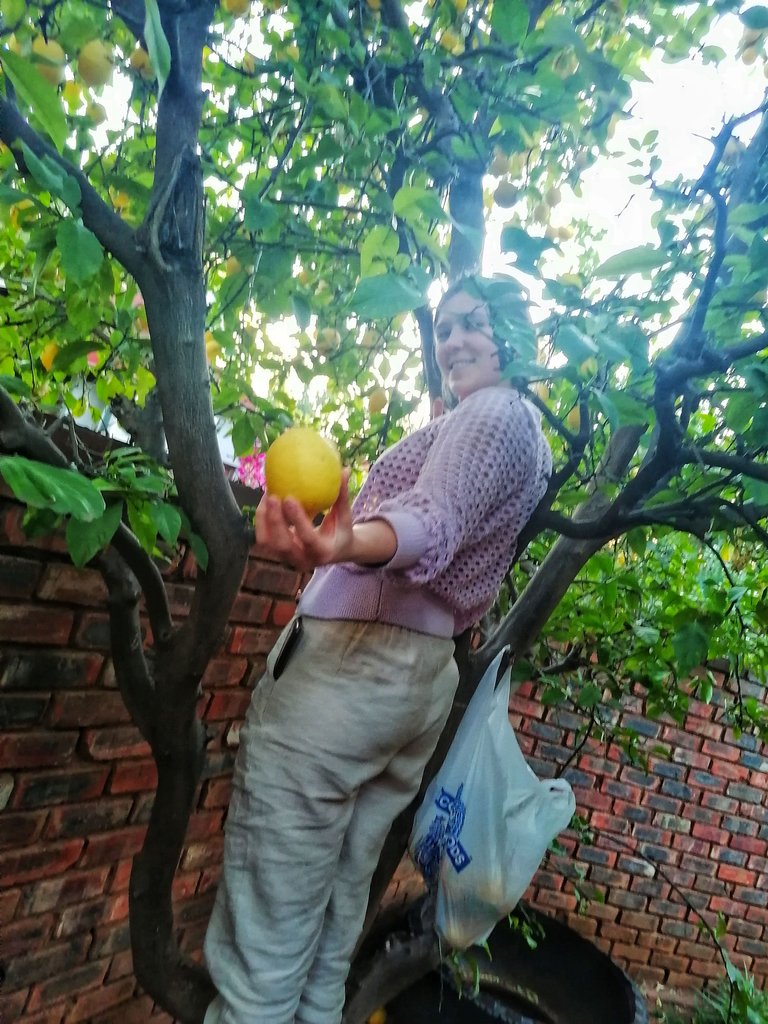
The Start Of It All!
Well, this was the start of it all! The real start! You might wonder why I sent The Betty up the tree.. it's simple. I was too damn long when I got on the little ladder and when I got off I was too short! The Betty on the other hand was just the right length, so while she plucked the lemons I made sure she didn't fall off the ladder!
I also think that since these lemons grew naturally and without any added hormones or faster growing stuff, well they might just make the pudding even more delicious!
The Needs And Hows!
This is a very straight forward thing to bake, really it is! You don't need a lot and what you need is basic ingredients that mouse households already have, so if you're lucky you don't even need to leave the house. Although you might need to get lemons but that's about that.
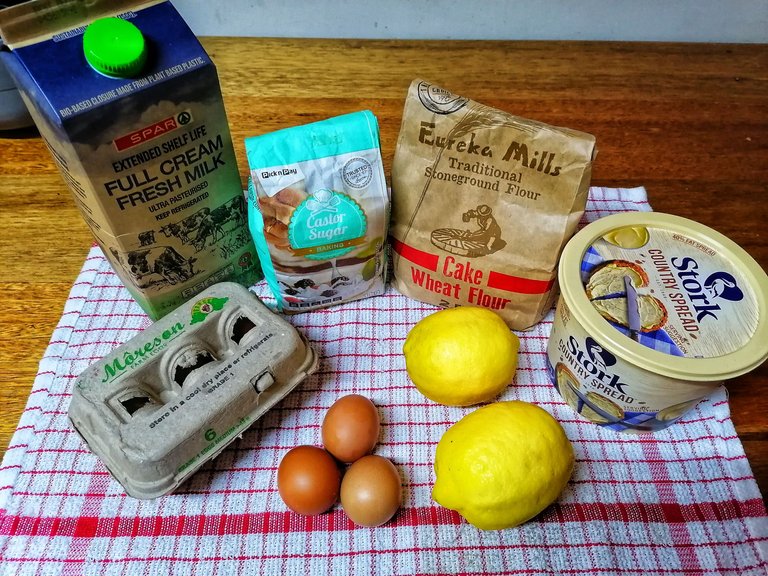
Ingredients!
- 90 ml (6 Tablespoons) Soft Butter or Margarine.
- 320 (1 and a 1/2 Cup) ml Castor Sugar.
- 4 Eggs, Separated at Room Temperature.
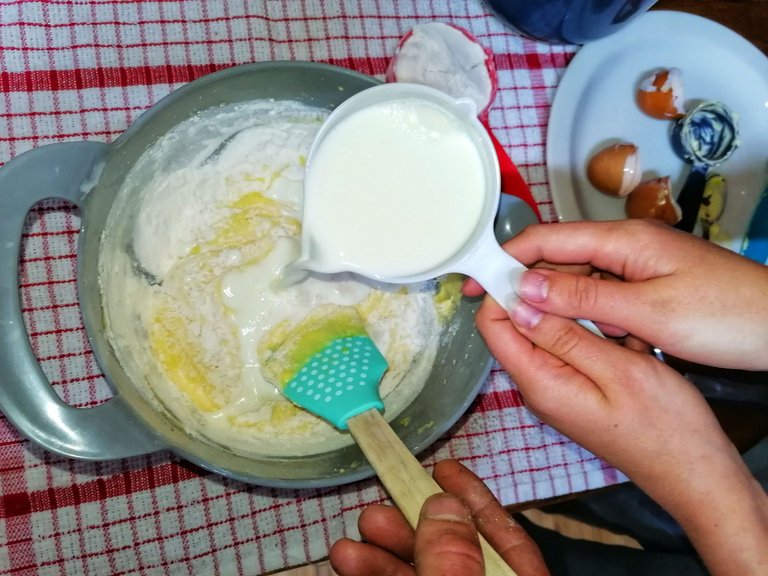
- 500 ml (2 Cups) Milk.
- 125 ml (1/2 Cup) Cake Wheat Flour.
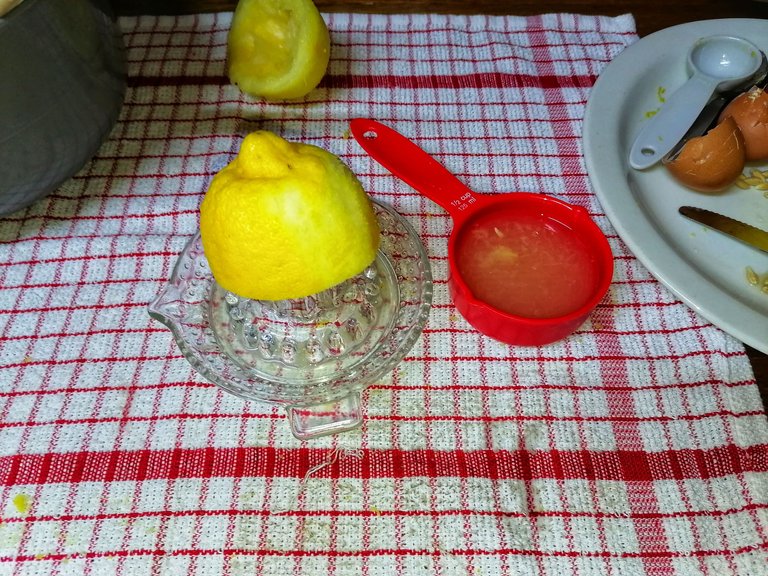
- 125 ml (1/2 Cup) Lemon Juice.
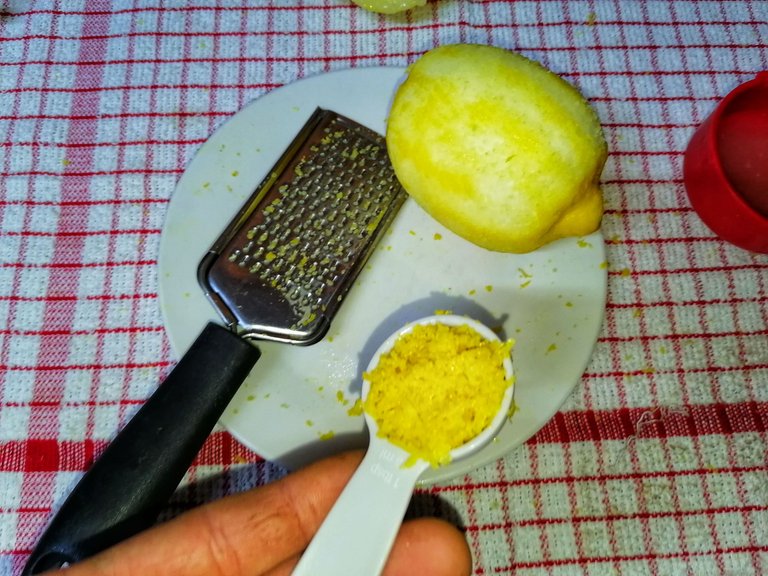
- 10ml (2 Teaspoons) Grated Lemon Peel.
- At-least 2 lemons.
Method To The Madness!
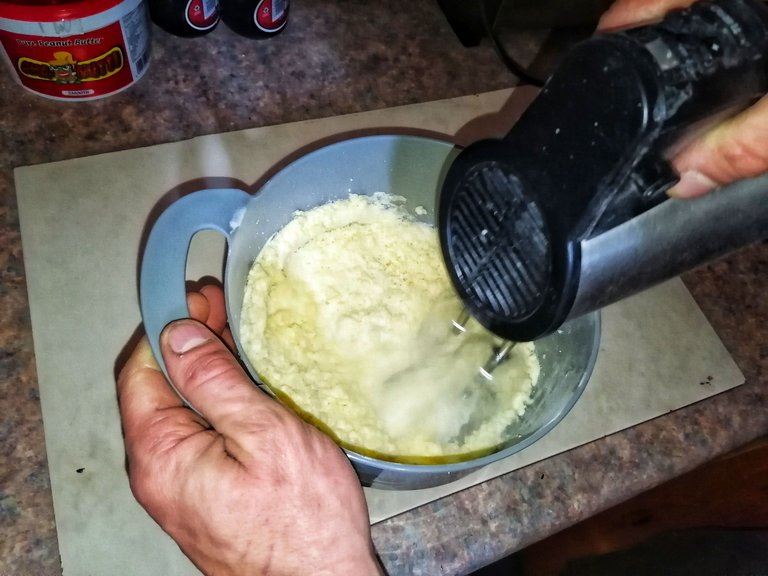
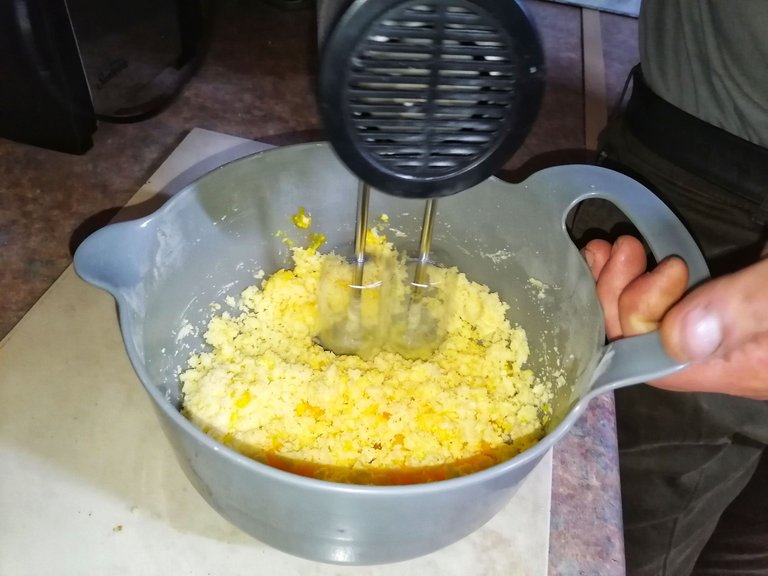
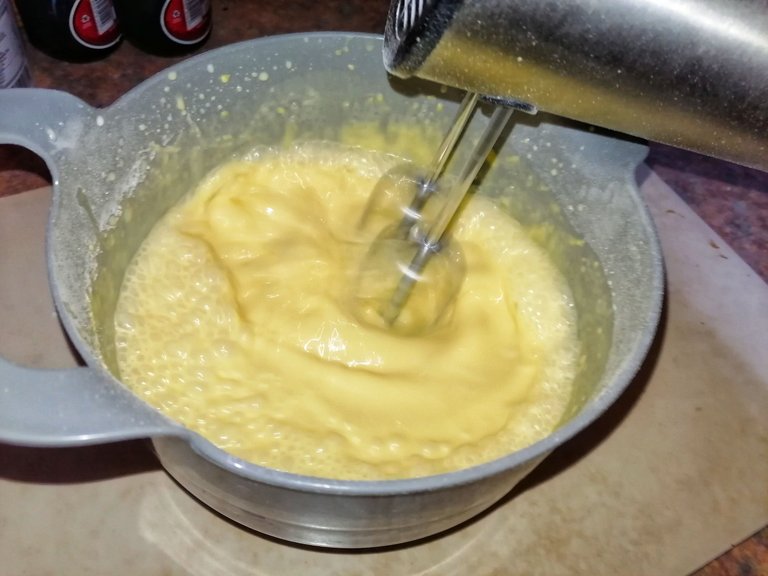
Preheat the oven 180°C (350°F) Then mix the soft butter or margarine with the sugar until it's creamy.
After you've separated the egg yellows from the white you can mix the egg yellows in with the sugar and soft butter/margarine. Stir properly.
Next you can mix the milk and cake flour in with the mixing along with the lemon juice and the lemon peel you grated.
_Beat the egg whites until it's very stiff. (It needs to stay in the shape if you move it around) then you can slowly and carefully fold the egg white that you beated in with the mix. (Be sure not to press to hard on it, you want it to stay as fluffy as it is.)
Pour everything into a pan that was prepared with some margarine so that the lemon pudding doesn't stick to the pan when you're done.
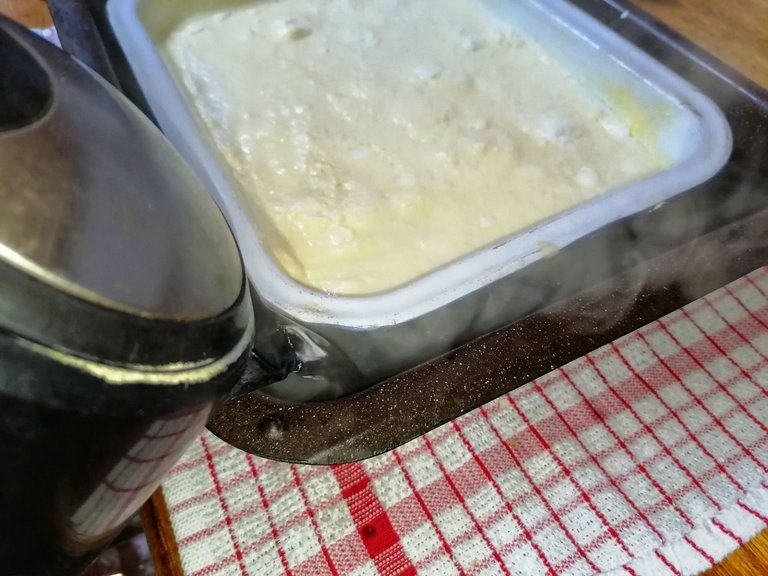
VERY IMPORTANT! Place the pan with the mixing in another pan and at boiling water to the pan, enough that the pan with the mix in can sort of float around in the other pan.
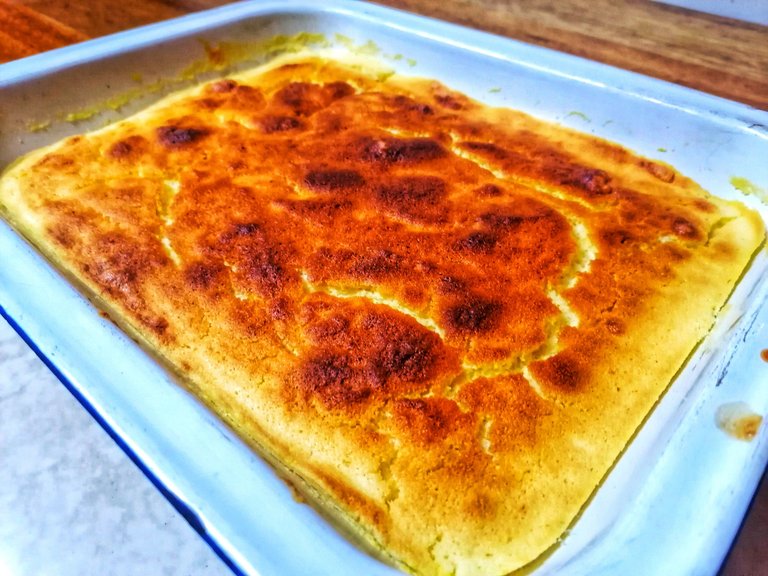
Stick into the pre-heated oven and bake for approximately 45 minutes!
The pudding will form its own sauce, so no need for anything further other than checking up on the pudding.
Let's Begin!
Fairly straight forward with this.
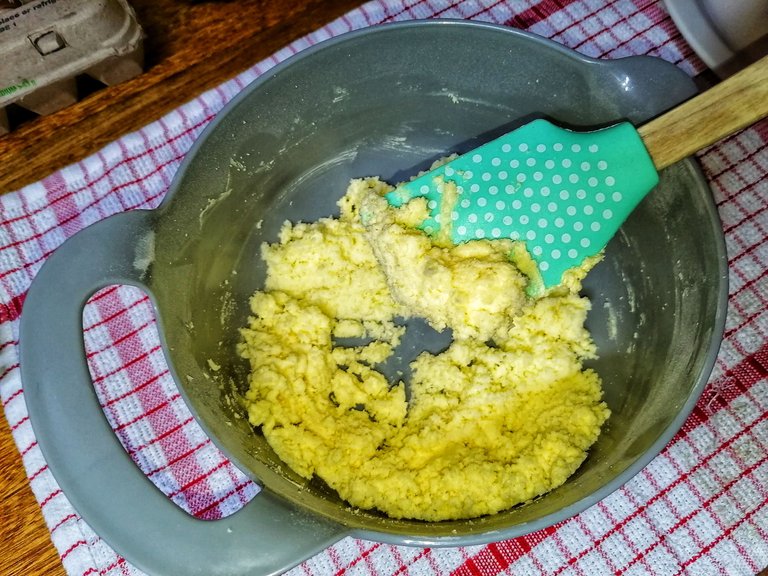
After measuring out the correct amount of butter which is 6 tablespoons (It was a messy thing! Laughs) I then measured off a cup of sugar and added it to the butter.
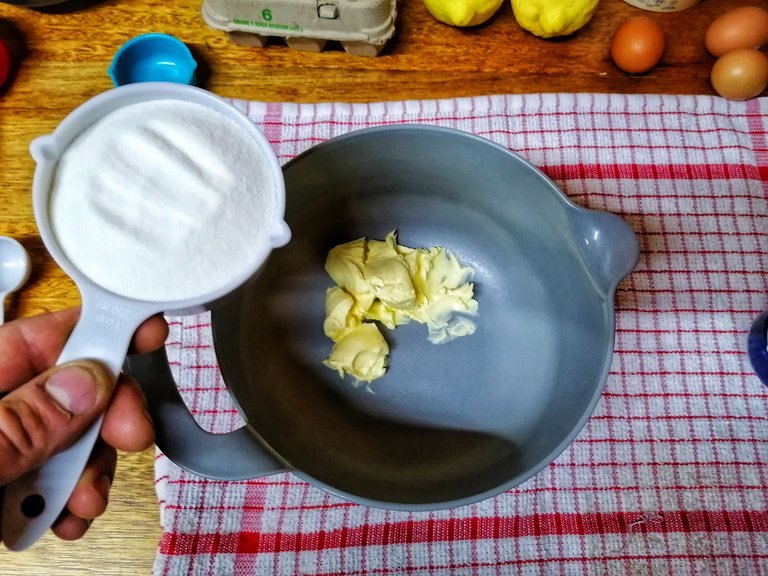
Start slowly.
Once you've poured the sugar and butter together I prefer to mix it in a little, not much just so that the sugar doesn't fly away when you start beating it.
Then you can mix it all together until it's nice and fluffy or creamy as most people say.
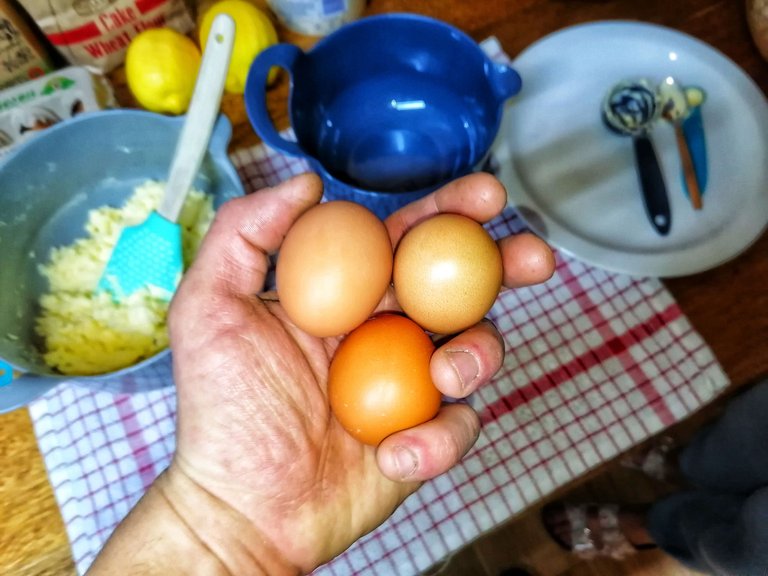
You can then grab your eggs! Remember it's four eggs not three, I only held three in the hand because it made for a better photo.
I felt the need to wash the eggs off with some luke warm water, I realized that they don't do that anymore, always getting dirty eggs.
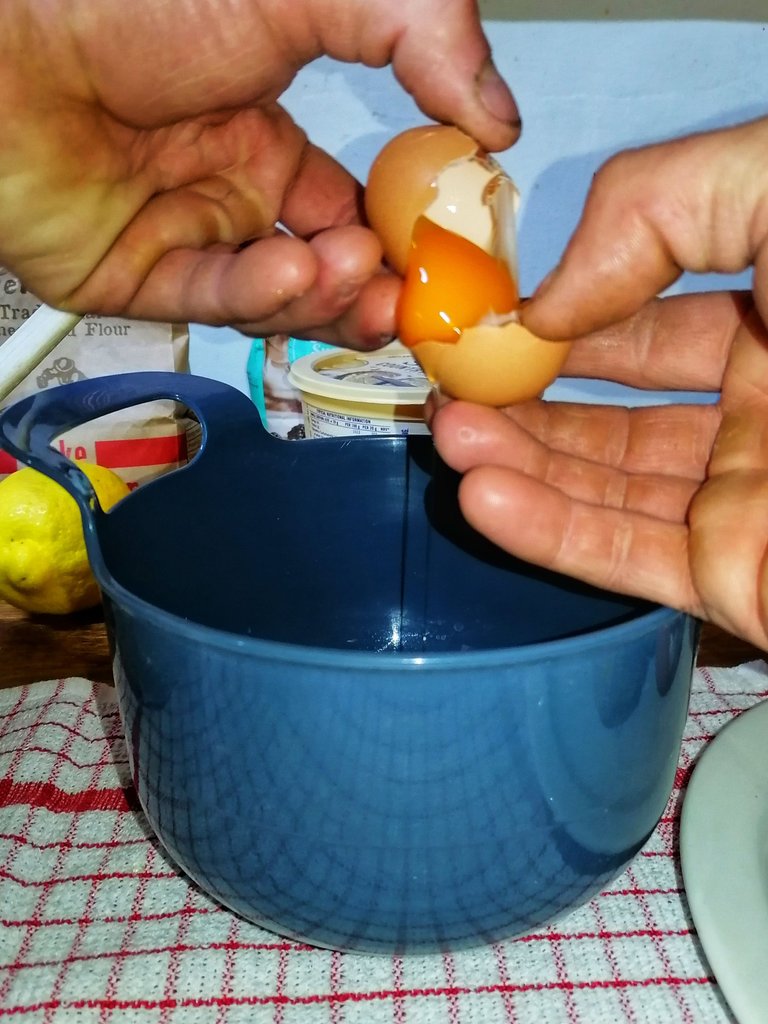
Crack each egg open individually and then separate the egg whites from the egg yellows.
Fortunately for me the granny taught me how to do this many moons again! That felt nice! Laughs!
The only partial problem I encountered was to not break the egg shells too much, I have big hands and sometimes I don't even know my own strength! Laughs! Just joking!
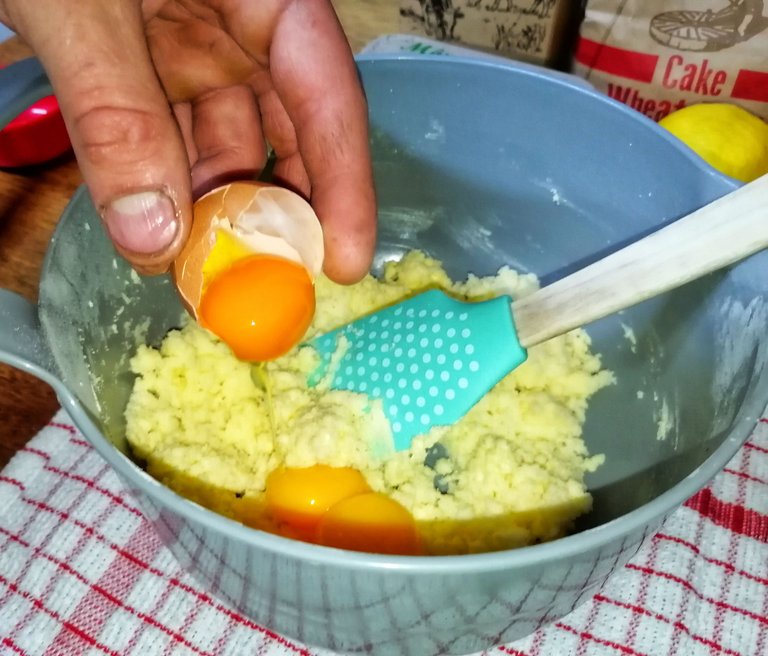
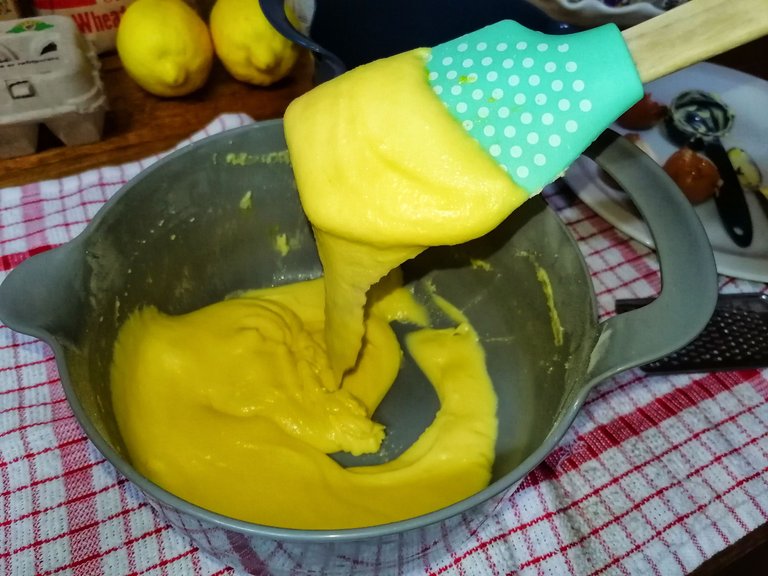
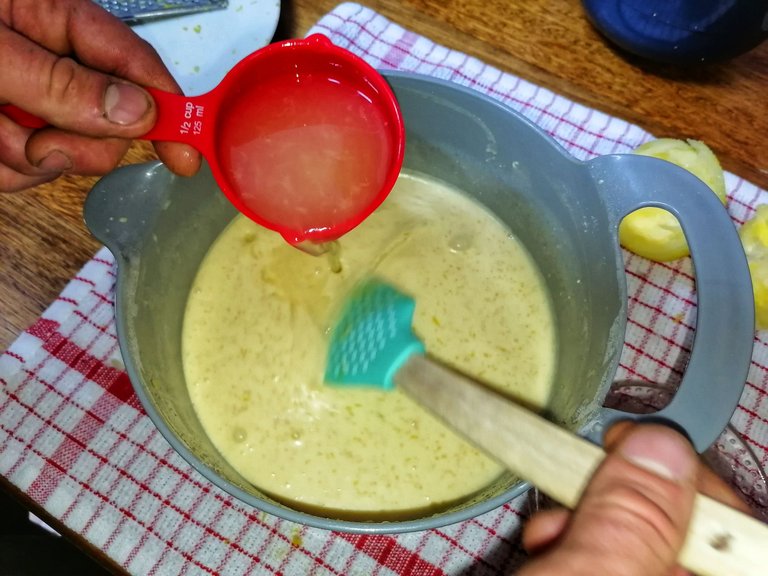
You can then add the cake wheat flour to the mix. We made our own little adjustments to the recipe but I'm sure if you follow the recipe you'll get the same results, we just made a little more so we had to adjust it a little.
I added a quarter cup of cake wheat flour. So that would be 200ml of cake wheat flour. (Remember this only applies for me since we made a little more.)
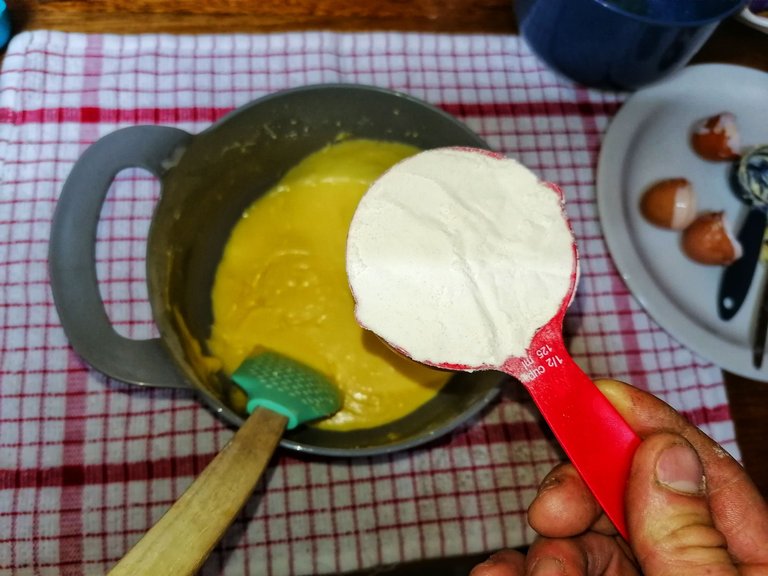
Before putting this under the beater I decided to just roughly mix it all together, just in case anything wants to go airborne again. If you have a big enough bowl this isn't needed but the bowls we have are a tad bit too small!
A BIG thanks to @misshugo for giving a helping hand over here with the milk!
Then it's down to what really matters!
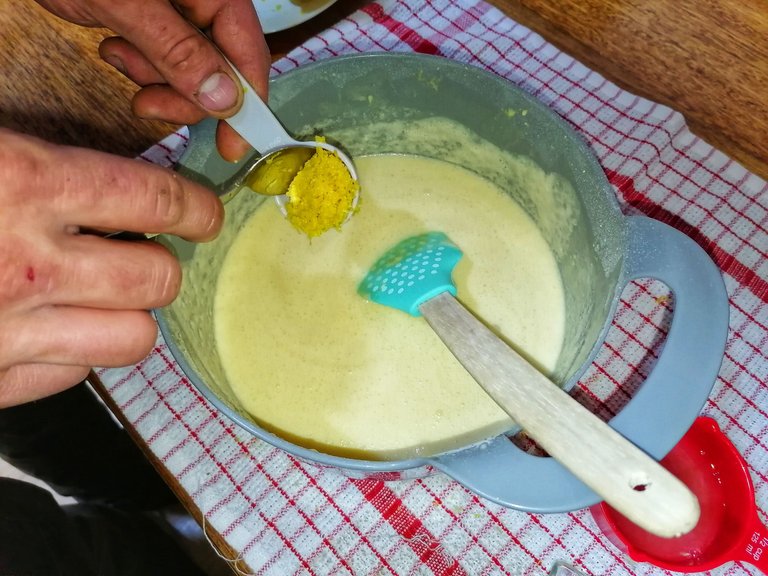
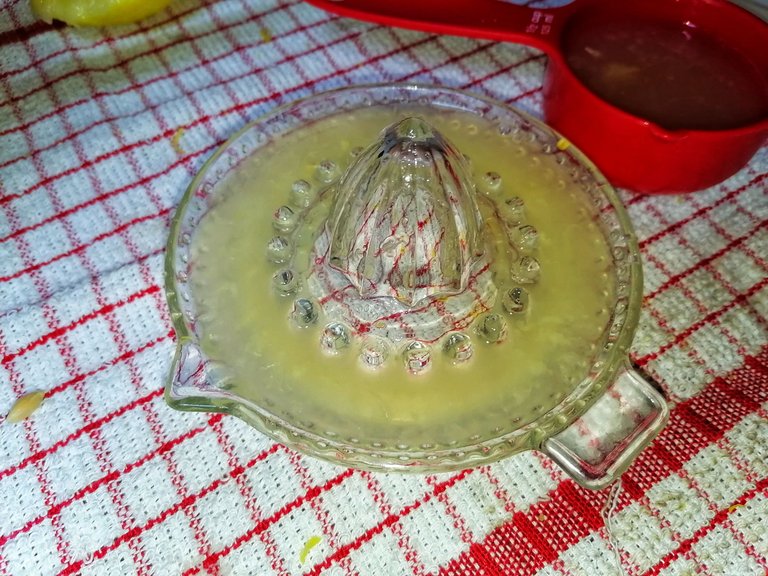
Grating the peel off the lemon! Be sure to move the lemon around the whole time, you don't want to dig in too deep at once spot. You just want the top yellow layer of the skin.
I can't really say how many lemons you would need for this because we have two HUGE lemons here, but you need at-least one table spoon full or around 15 ml.
We grated 1 and a 1/2 of the lemons.
Well we probably need some lemon juice as well right?
Now for the people who have bottled lemon juice this step obviously doesn't apply to you.
We pushed out the fresh lemon juice and again here we tweaked it a little, we added 3/4 cup of lemon juice instead of 1/2 cup of lemon juice.
I don't mind I like sour things!
You can then mix it all together, no need to use the beater. Simply mixing it with the spoon will do the trick!
If you used fresh lemons be sure to remove all the seeds that might slip out, there was a few smaller pieces that we didn't notice at first so be catfoot with that.
Remember that egg whites that was separated earlier.
I hope it wasn't thrown away! Laughs you'll be needing it now!
You can beat the egg whites until it's as stiff as you could possibly get it! Be sure to make sure that it stays in the shape if you push it up to a corner or pull it out with a spoon.
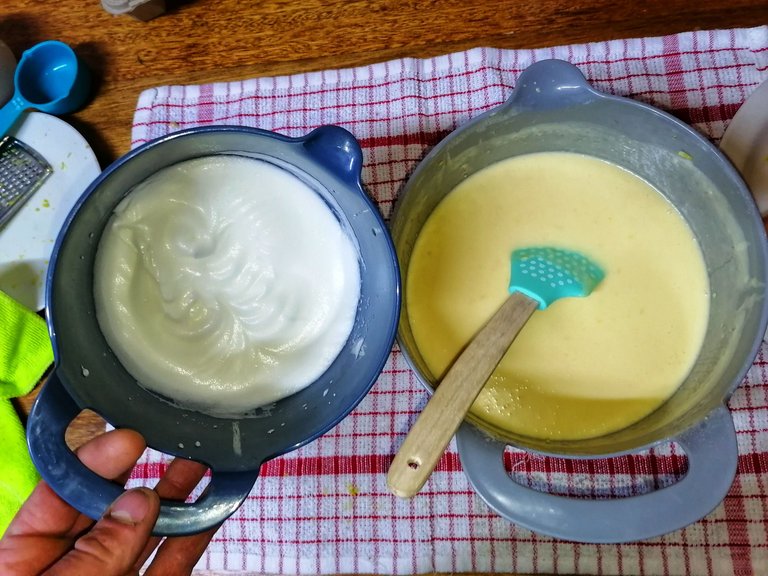
You can then fold it in with the mixing. Be careful not to press too hard because all those clumps that are still there. Well we want them to stay there, it will make the pudding fluffy and that fluffyness will add to the eating pleasure!
Rather let those with softer hands mix this in!
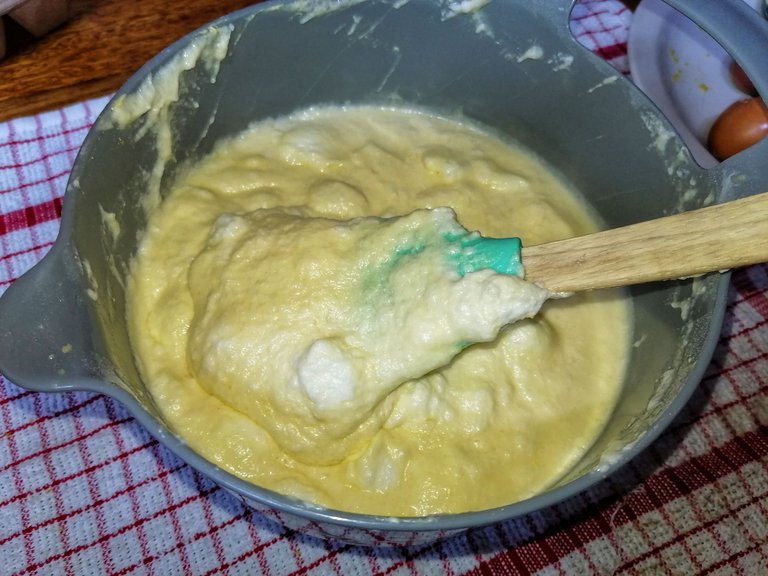
Next, well then you can chuck that whole bowl of mixing into your buttered up pan. Hopefully there is still some fluffyness left!
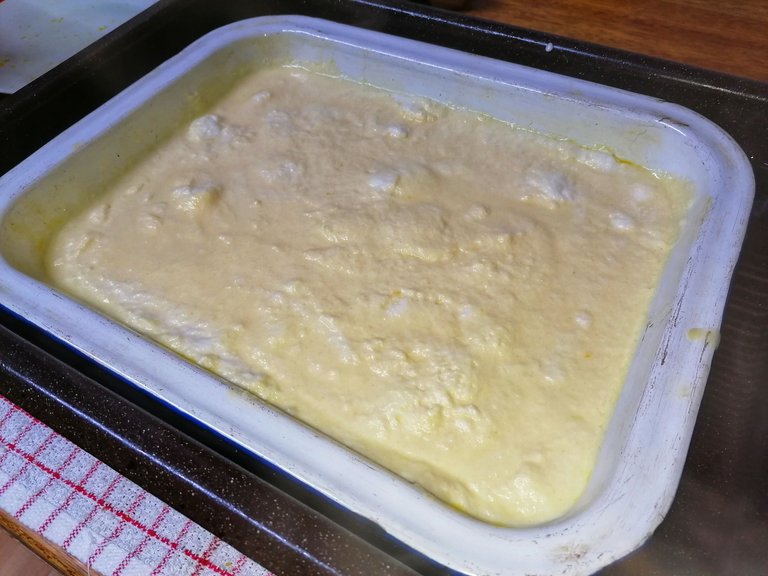
Notice that the pan with the mixing in is placed into another bigger pan and then boiling water needs to be added into the bigger pan, just enough to make the pan with the mixing in float.
Be sure not to let water into the pan with the mixing, especially when carrying and placing it into the oven. I almost made a big mistake but luckily I saved it!
Once it has baked for at-least 45 minutes it should be done or at-least very close, it all depends on if the oven was pre-heated correctly.
I think it is wise to come check up on the pudding after about 30 minutes into the baking, we don't want it to burn right. But also don't open the oven too much or at all if it's possible.
Oh boy oh boy I can not wait to dig into this! I've got to wait since half the house decided to take an afternoon nap! That's not a problem, it will be enjoyed eventually right!
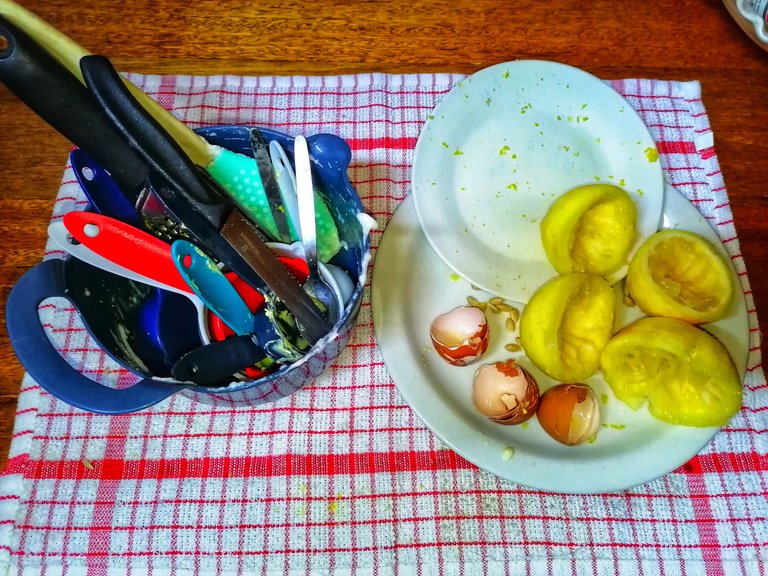
Last And Most Important!
The dishes ain't going to clean themselves and since I asked The Betty to help me and promising her that I would clean up and wash the dishes. Well the time for my payment has come! Let's get them squeaky clean!
To everyone out there I hope you have an amazing week ahead of you! Until next time!
Dated 10/01/2023


Connecting the people of #HIVE across South Africa. #hive
Definitely this man can bake.
He even shares the lemons ...
😂 You can't not share stolen lemons!!
!PIZZA
!LUV
@riki1, @technicalside(1/3) sent LUV. | connect | community | HiveWiki | NFT | <>< daily
! help(no space) to get help on Hive. InfoCongratulations @technicalside! You have completed the following achievement on the Hive blockchain And have been rewarded with New badge(s)
You can view your badges on your board and compare yourself to others in the Ranking
If you no longer want to receive notifications, reply to this comment with the word
STOPCheck out our last posts:
$PIZZA slices delivered:
@technicalside(1/5) tipped @riki1