Spent More Time Building The Clutch Than The Whole Of The Transmission

A new day always brings with it new learning opportunities and when learning can be made fun I suppose it is rarely seen as learning but more of a joyful experience. If that makes sense at all.
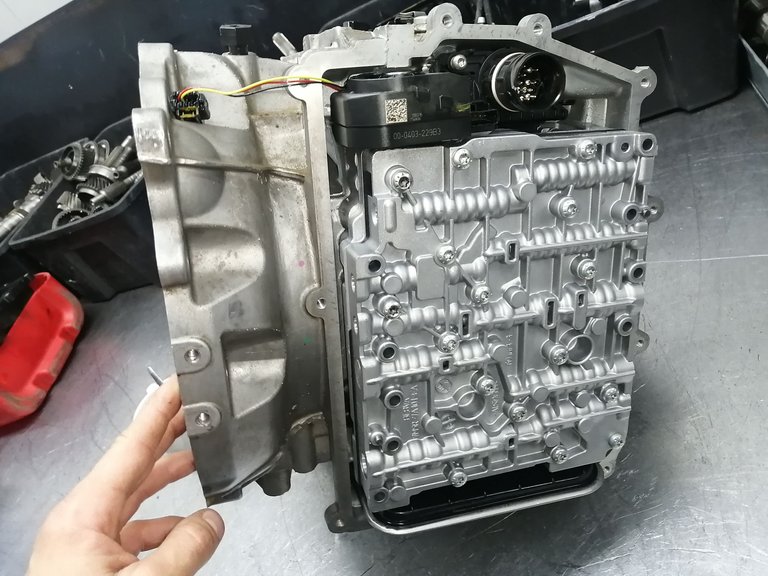
I wrote a post about a DCT 450 valve body that I had to clean up and assemble, in this post I mentioned that I've never done one before and well that in it self is already a learning curve, but yesterday I had to assemble the transmission as well it wasn't hard since I did a teardown on it.
Unfortunately I got so caught up in the build of the box that I never took photos, actually I wasn't in the mood, I wanted to get some different content out there. But I still have a clutch to assemble on this one.
Have you ever had to build a clutch from scratch? Well okay given this is no ordinary bolt on clutch.
We have a few minor things that we have to attend to on the transmission but the overall big job is the clutch and here is why.
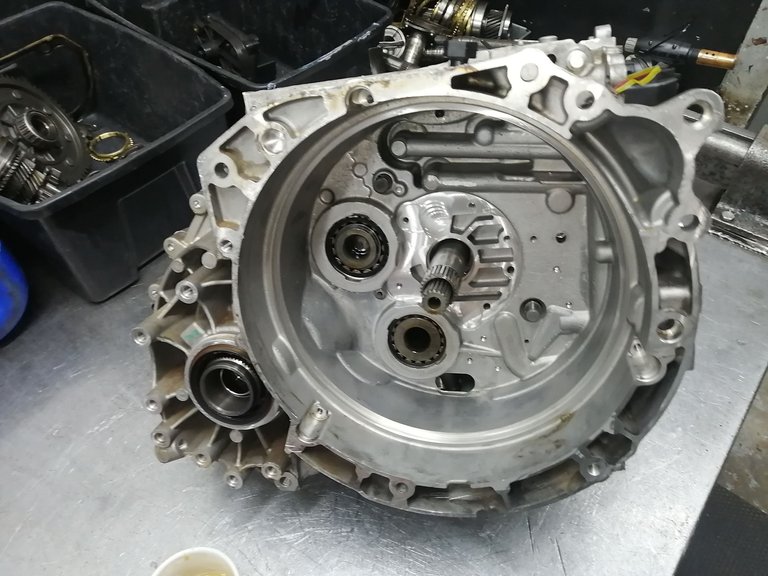
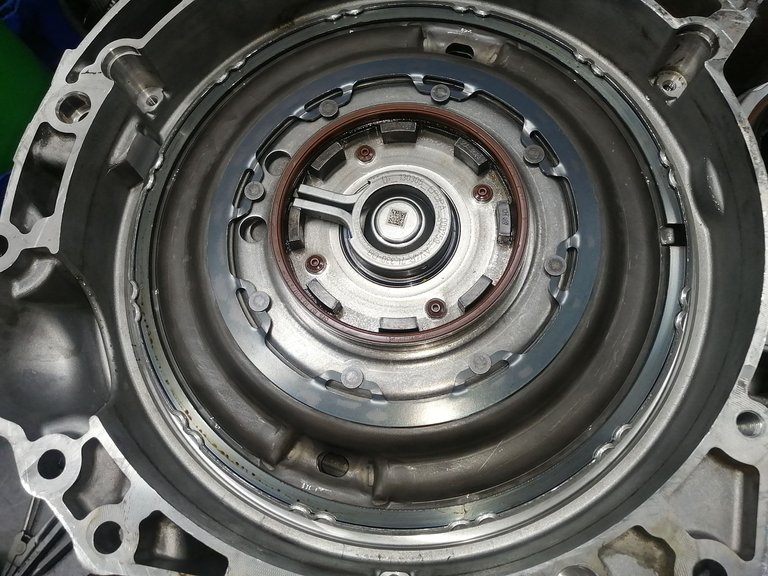
This is the valve body I had to clean and assemble all tucked in nicely on it's place, I still have to bolt it down though but we shall get to that later on.
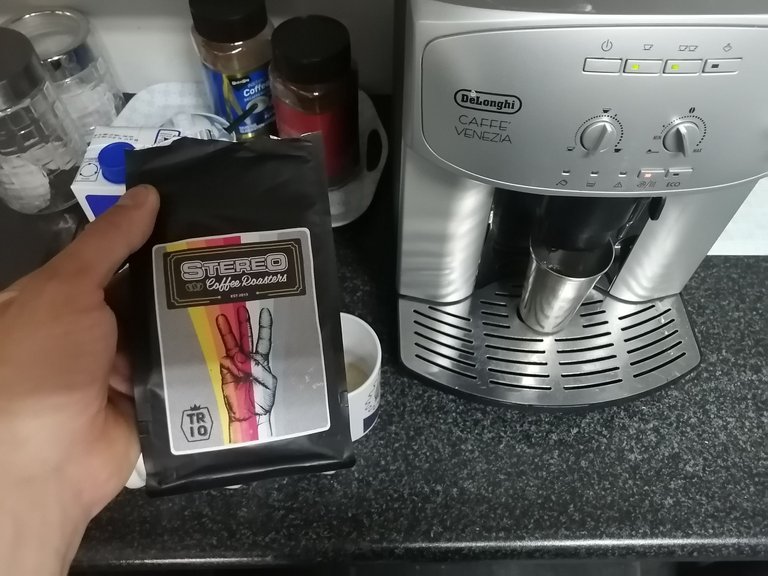
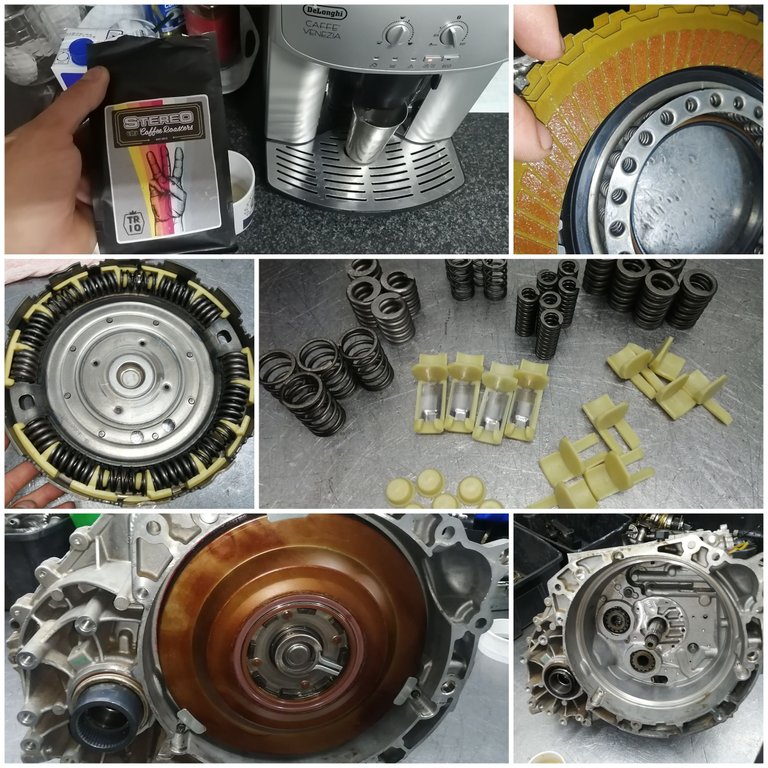
But why be in a rush? The day is still very young and I think a nice cup of strong coffee would go down splendidly. Now machine coffee is always better and I've been spoiled by Bossman with the bean coffee ever since I got accustomed to it I don't really want any other coffee. But with that said the beans were all finished and drank up so for the last two days I had to endure very shitty coffee but thanks to @misshugo we are able to enjoy some NICE coffee at the workplace again.
Thanks a million @misshugo.
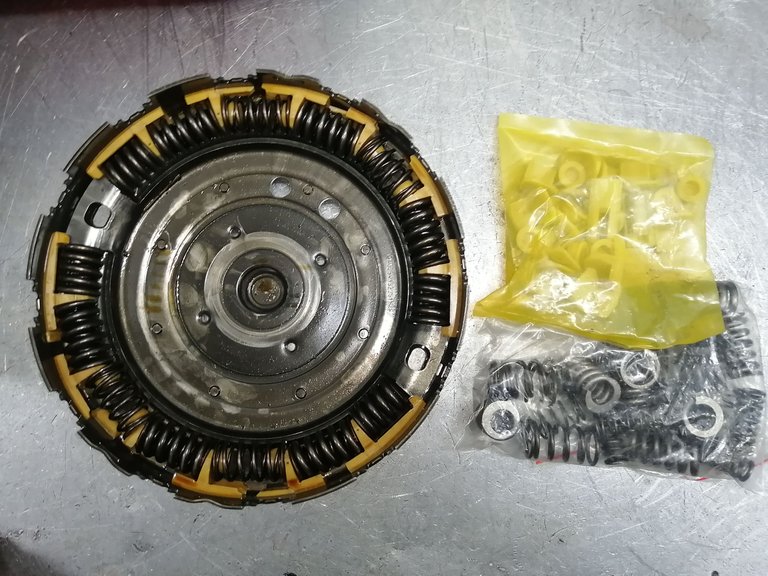
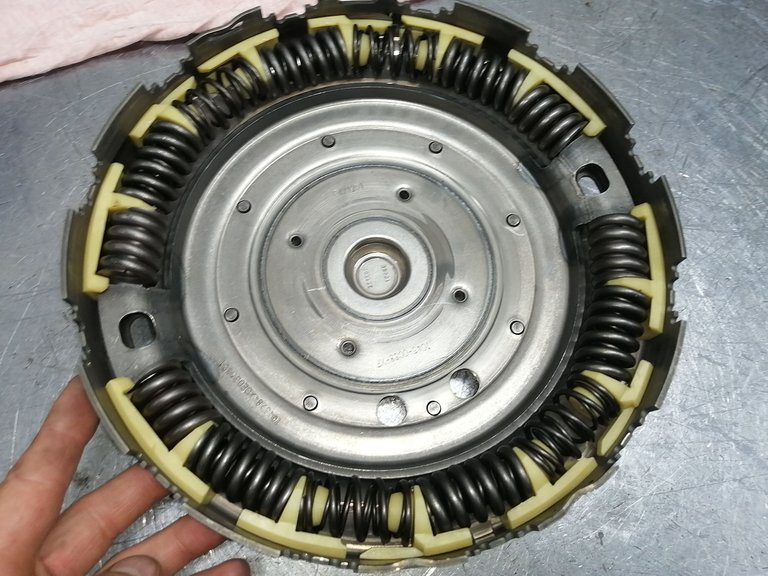
Yes yes I know the base is still very dirty, but that's okay.
The first thing I need to do is know where I need to place the new springs and the new retainers of the springs. It is easy to mess them up and it would not be noticed until the car has driven a fair amount of mileage so longevity on the transmission would be non existent.
We got a full spring kit for this job since the transmission is going to be couriered away to another town everything has to be absolutely perfect.
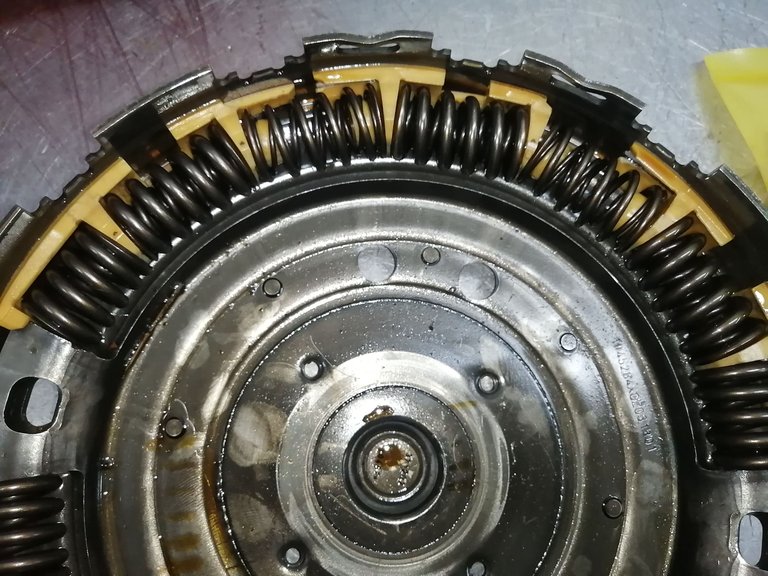
Grabbing a closer look incase I manage to screw up then at least I have something to fall back on but thinking about it now it's a fairly easy pattern to remember.
The two very thick springs on the ends, then the slightly less thicker but still thicker springs after that and then it's the least tensioned springs after those, and of course you'll be left with two springs and they can only go in the middle. I doubt I will ever forget this. However the retainers are a different story though, but with one thing down the rest will come.
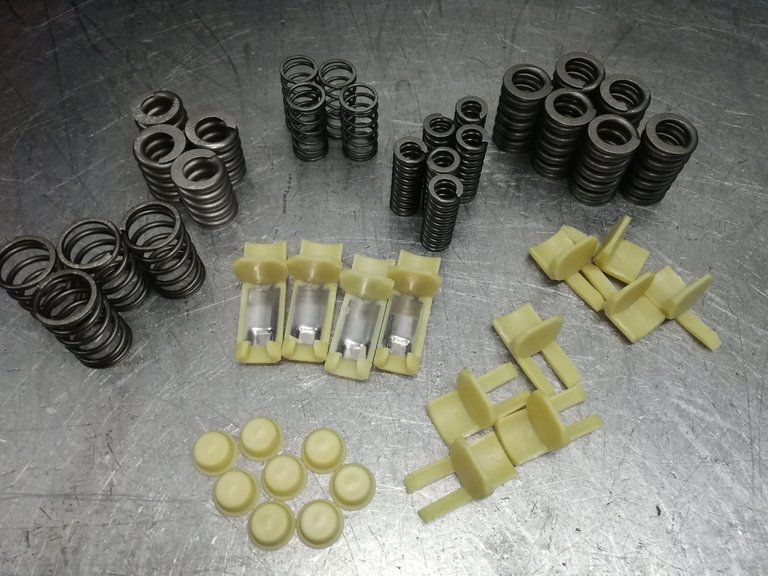
Packing the new springs and retainers out neatly so that I can visually see everything that I need to work with. It felt like a mini chess game without a live person as an opponent.
I suppose I'll be my own opponent today.
Take note that all the springs house a smaller spring on the inside of the bigger spring, that's mainly why there are so many springs now.
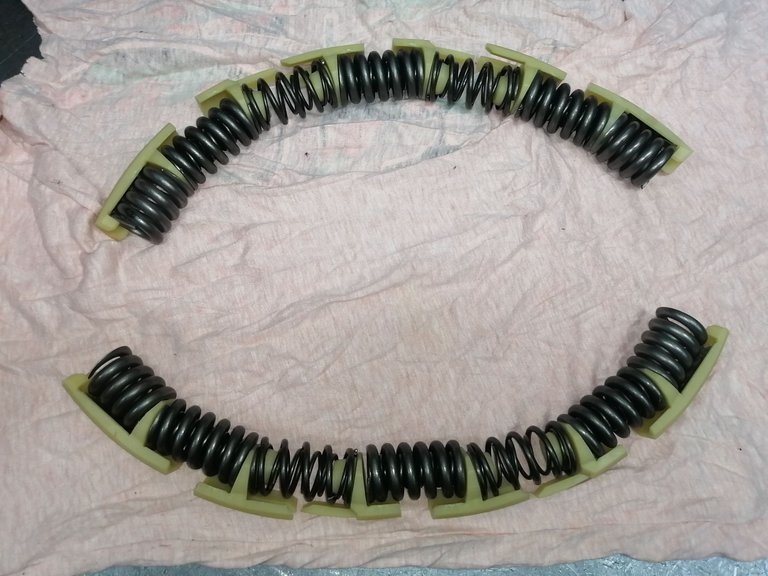
Before I removed all the springs from the clutch housing (That dirty plate I was referring to.) I decided to pack them in the order they need to be then I can only remove and insert as I go. Of course giving the clutch casing a thorough washing in between.
But this way you can absolutely not make a mistake, unless you're still asleep or very much daft in the head. It will take a very special kind of stupid to screw this up, and believe me it happens.
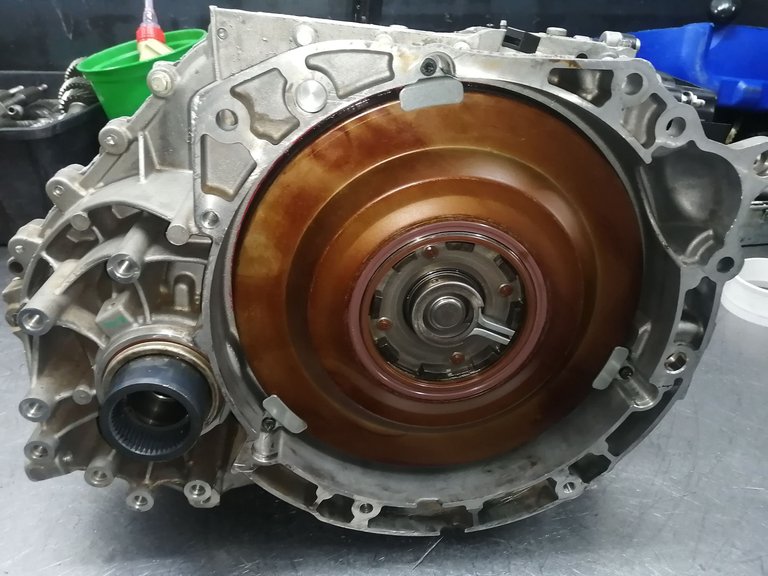
She's now ready to rumble or tumble... well not quite but almost!
Damn it looks nice when new parts are being fitted!
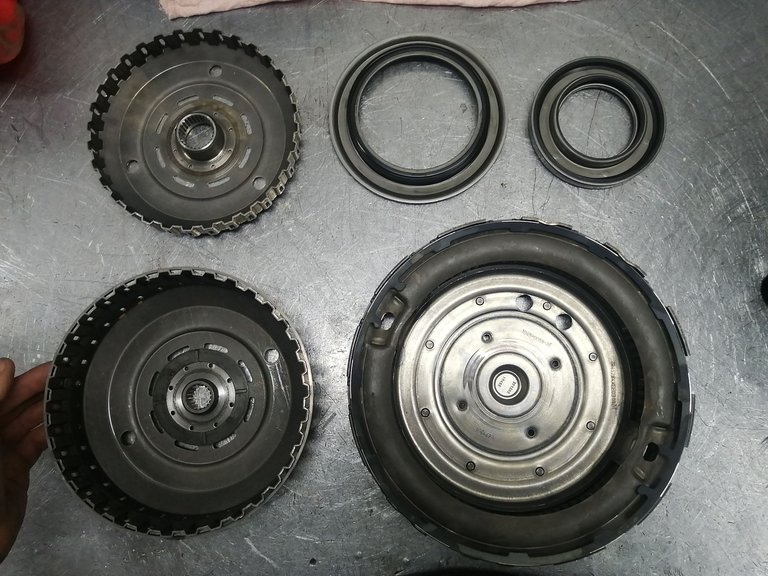
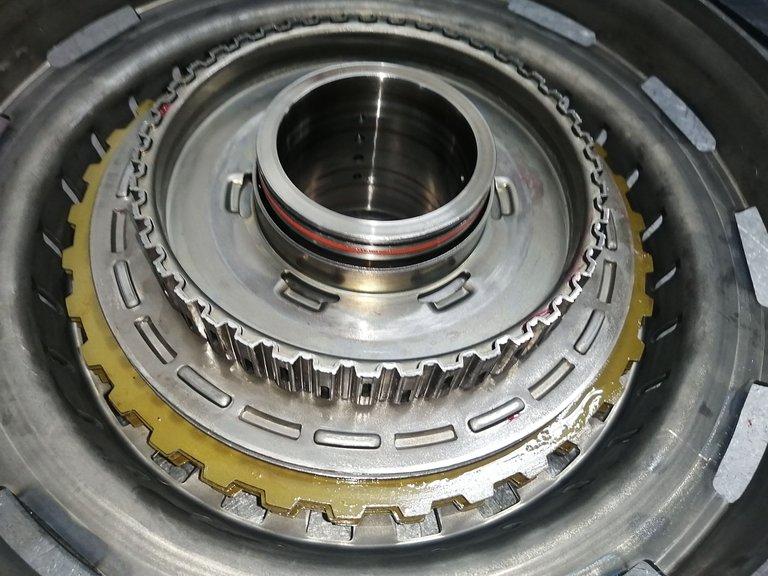
After finishing up and making sure the spring set in the clutch is correct and well placed I prepared the pump gear and pump in the front of the casing first, that way when the clutch is done I can just pop it in and secure it in place.
It feels nice building something and having 0 bolts or nuts left on the table the first time!

Once everything is set and ready I started gathering everything I needed for the clutch system, notice that you don't see the springs anymore in that biggest drum? It gets a little cover that secures them in place and this is already added in the photo, along with the other two drums and two seals.
Although this is not quite everything I still have two pistons in the packaging behind me and the clutch discs itself are not in this photo either.
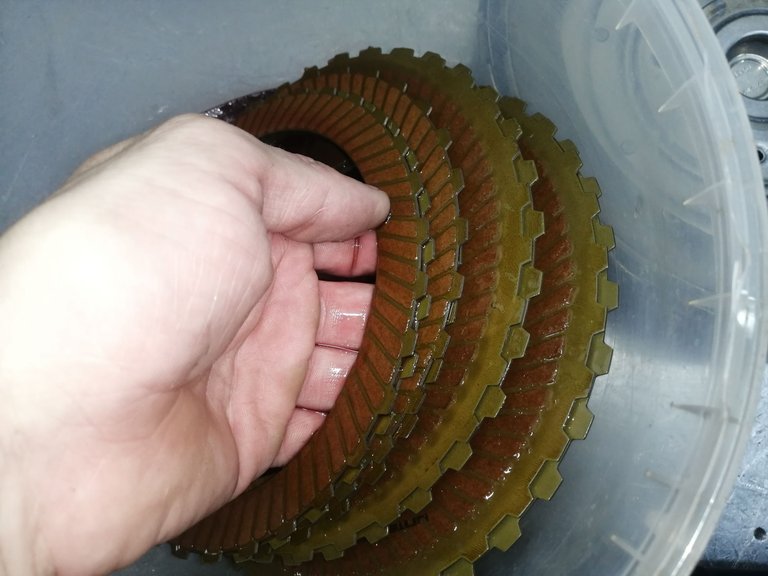
Now this is something seldom done by repair shops, In fact I wonder if anyone ever does this.
Since these are brand new clutches we leave them in oil to soak it up throughout the whole disc. After all it is a wet clutch and it has to be... well wet. So soaking them to be ready to "clutch" when the vehicle is started seems like the best possible option.
And besides it doesn't take up a lot of effort and the oil can always be re-used for future purposes.
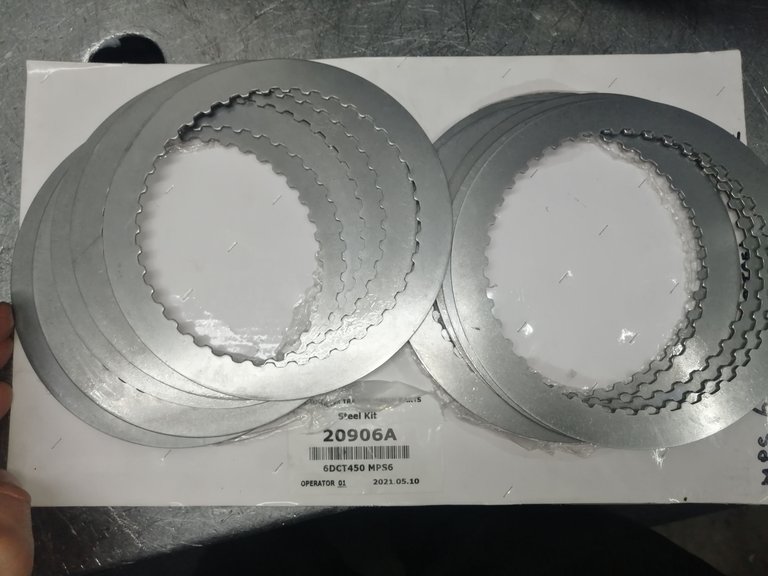
Now this transmission had a big burn on the clutches so getting new friction plates was an absolute must, they literally had dents in them so badly they were burned up.
No need to let the friction plates soak up oil, it would prove pointless!
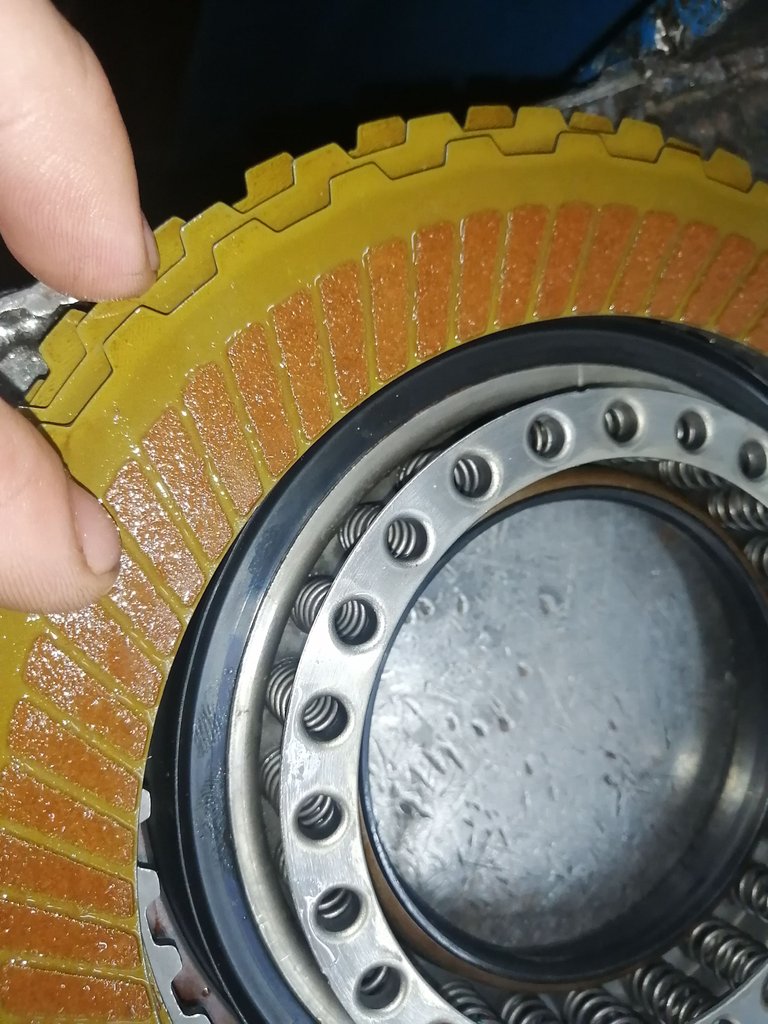
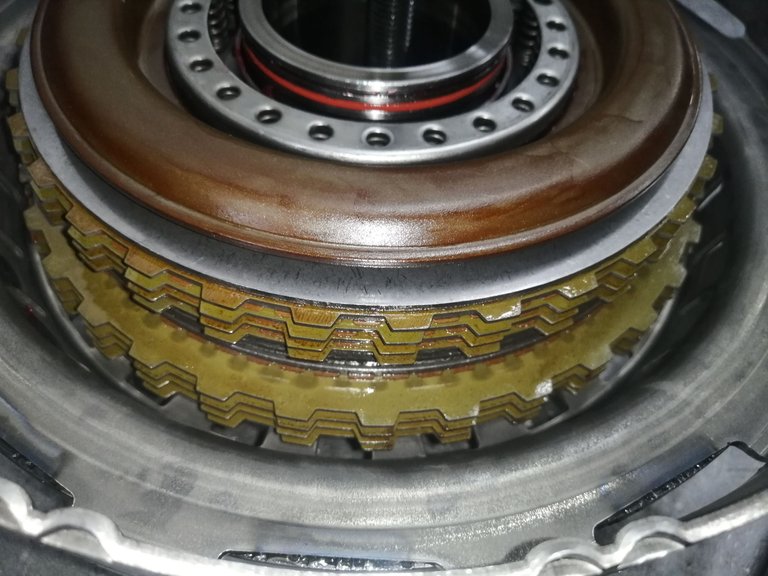
This is where things get tricky... You have to place the clutch discs the right way around, weird but yes it has an "up" and "down" side. I worked of the previous clutch so no chance of getting it wrong but this is definitely something I want to focus on to be able to know the right side from heart.
Can you see they are somewhat tilted and tapered? The tilted side is for the oil to be thrown into a certain direction.
Sorting out the throw out direction I can then stack the clutches one after the other, it has two sets of clutches for the two cluster shaft the transmission has.
This means that one clutch will work on the cluster shaft that has lets say for an example R,2,4,6 and the other cluster shaft works with 1,3,5 so you can transition through gears a lot easier.
The nice thing about this is that if one clutch pack fails you can still have some gears, even though it isn't recommended to drive as such but at least you wont be completely stranded... Unless you happen to burn both clutches!
Once the clutches is secured in their drums I then went forward and placed them inside the transmission, now this means that I am almost done!
Just a few more covers and this powerfull transmission can be on its way to it's destination to be fitted and enjoyed once more!
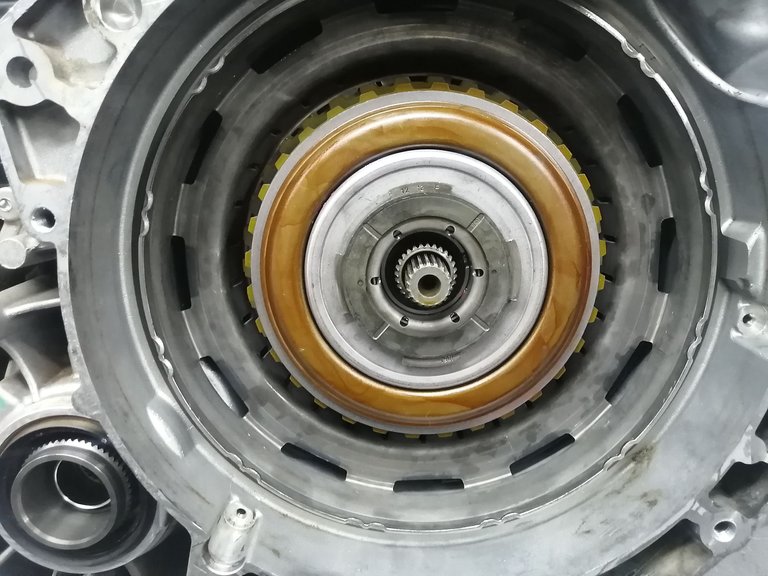
I love how the new parts looks golden and coppery, it certainly adds some beauty to this ugly transmission!
Dated 16/03/2023


Connecting the people of #HIVE across South Africa. #hive
I'm glad someone is enjoying the coffee 😂. That coffee has a lot of stories to tell 🤣😅
Coffee is essential when you're doing complex mechanical work. It makes sure you stay focused 😁