The $2 Fix Compared To The $80 Part
Well Hello There Fellow Technicians And Hivers
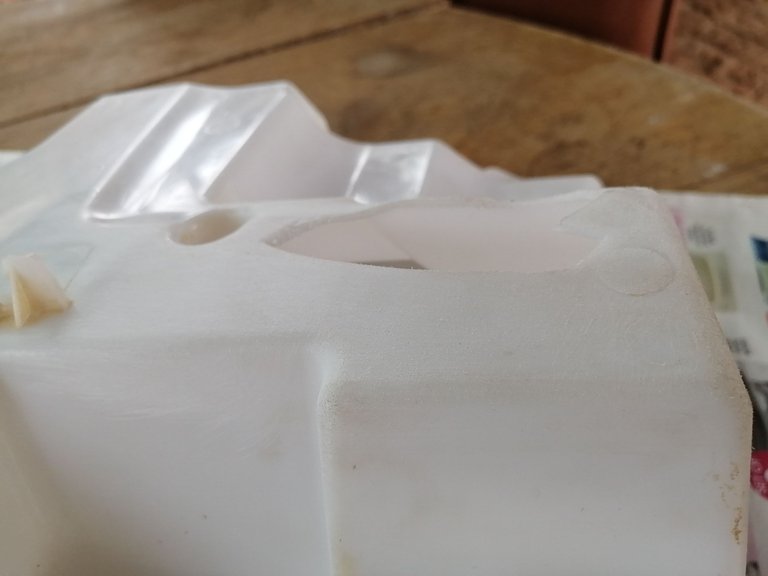
Would you take a look at what I came down on!
A few months ago around September last year I hit a little deer on my way home, the bloody thing just popped out of nowhere! Needless to say I had to replace the bumper of my vehicle and have it resprayed. Looks great for those who were wondering. But the bumper was not the only part that got damaged, along with the bumper I found my window washer bottle absolutely destroyed.
At the time of the accident I thought something insane has happened due to the water streaming out of the engine bay and at first I thought that I blew the motor coolant bottle but luckily it was something that I could drive without for a while.
So while the bumper went in for resprays I attended the problem on my window washer bottle myself.
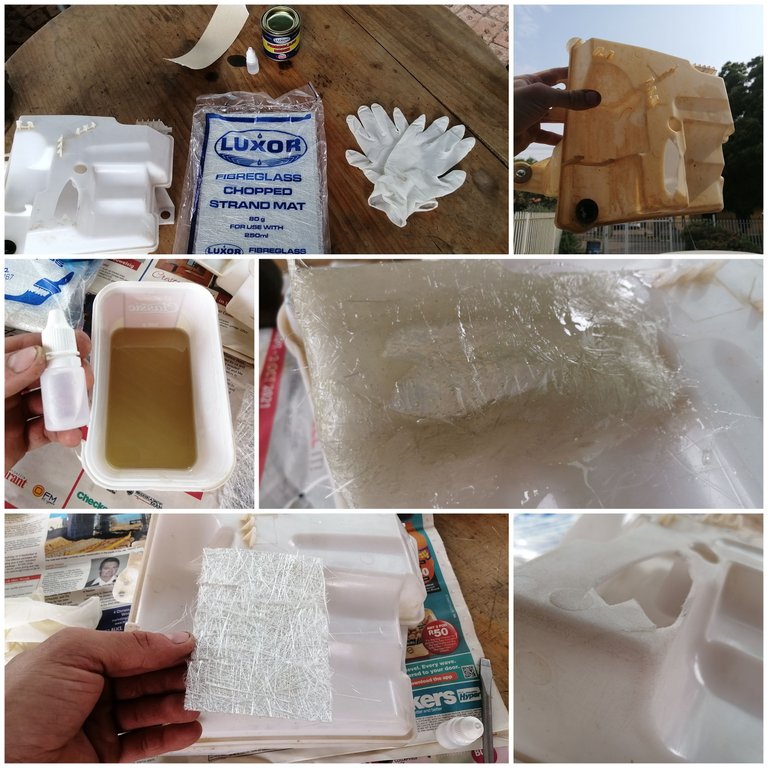
You see I was not happy with the price I had to pay to replace it so I bought a pack of fibreglass with a tub of resin. I mean a $2 fix compared to a $80 replacement part hell nah and that just to hold some water?
Lets have a look.
Hmmmm yeah it looks totally buggered up to me, but I am not willing to pay such a high price just to have that little hole fixed!
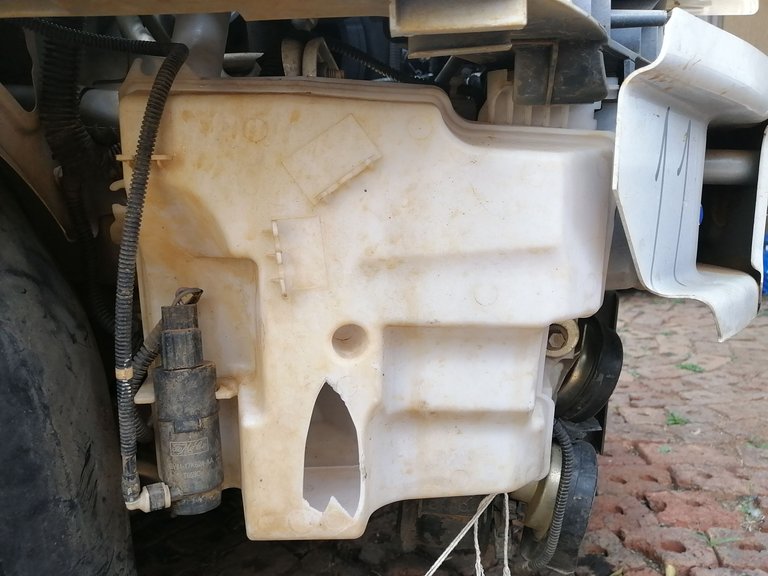
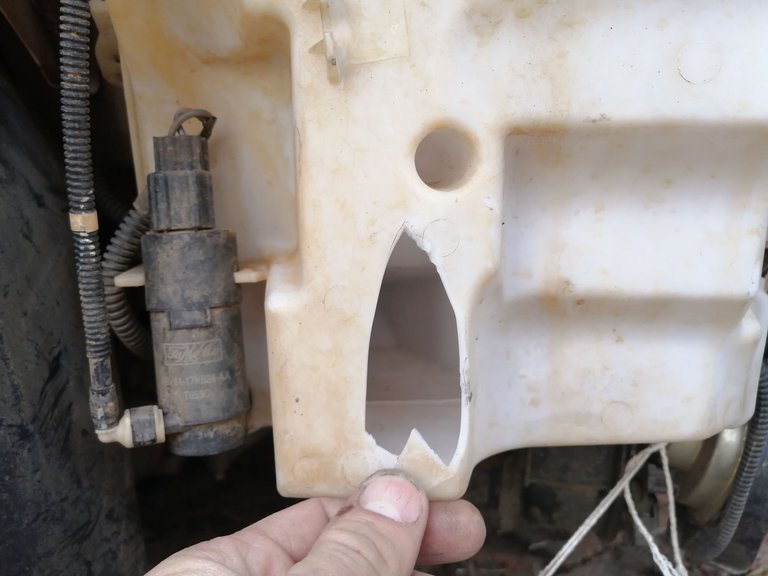
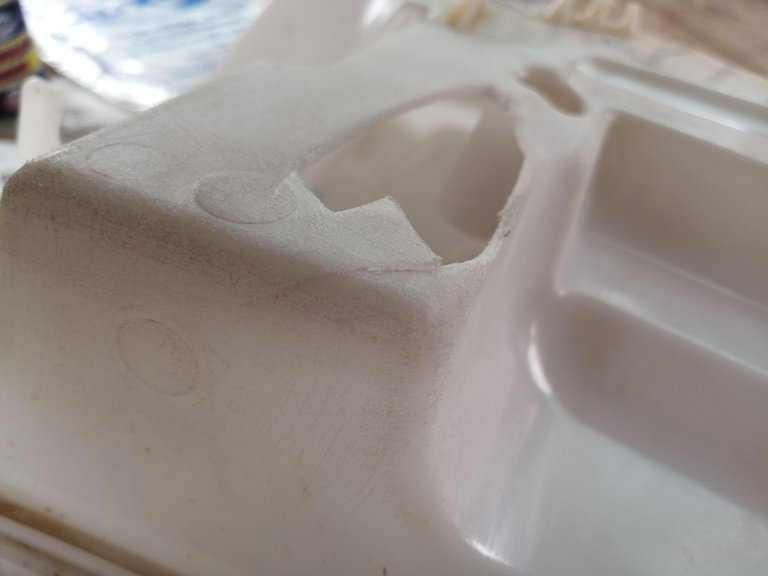
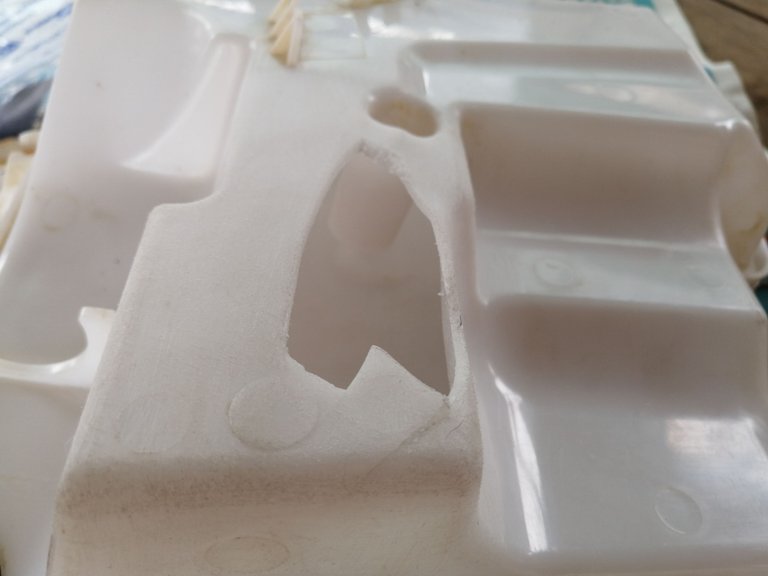
Okay I might be going out of line saying that it's only a small hole when its clearly bigger than my damn thumb!
I'm especially glad that it didn't break through to the edge that would have caused some struggles with the fibre-glass
The most important part of this whole exercise I am trying to is to clean it off properly can't have even a little bit of dust or ground on the surface that I am planning on sticking the fibreglass!
None what so ever!
So this will be going for a good scrubbing on which I can absolutely not slack at all! I swear I can't even stress this enough!
With the bottle properly washed about six times over and over and having prepared everything, we all know preparation is key and here I want to faults this in itself would already be a messy job and I don't want to make it even more messy for myself!
Hence the surgical gloves.
Now mostly everyone told me that what I am trying is bound to end in failure and who would blame them for believing everything that people tell them, I have promised myself that I wont learn out of other people's mistakes I can only learn from my own, and so if someone tells me that it can't be done I will try it myself to SEE for MYSELF that it can not be done.
So here I am standing at the precipice of a success or possibly a failure and if it leads to failure, well then I'm two dollars shorter than I was yesterday!
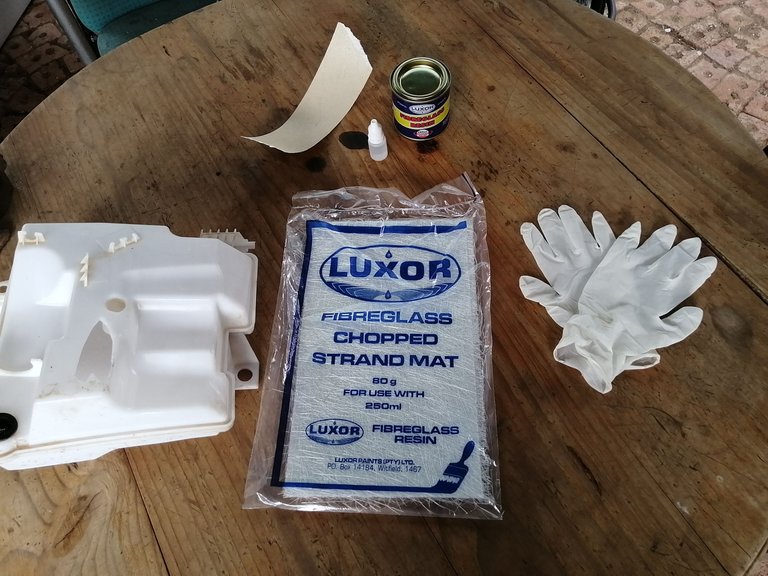
Before applying anything at all there are a few things that needs tending before we can stick on the fibreglass!
After cleaning it properly the most important thing to do then is make sure the surface is roughened up, a smooth surface will result in the fibreglass not sticking properly to the bottle and well then in the long run you might get some water leaks, water leaks that I would love to avoid in total!
I know it is really hard to see but I gave it a good gritting with some P80 grit paper, you can go more coarse but going finer isn't really recommended although it will still work but the coarser it can be the better!
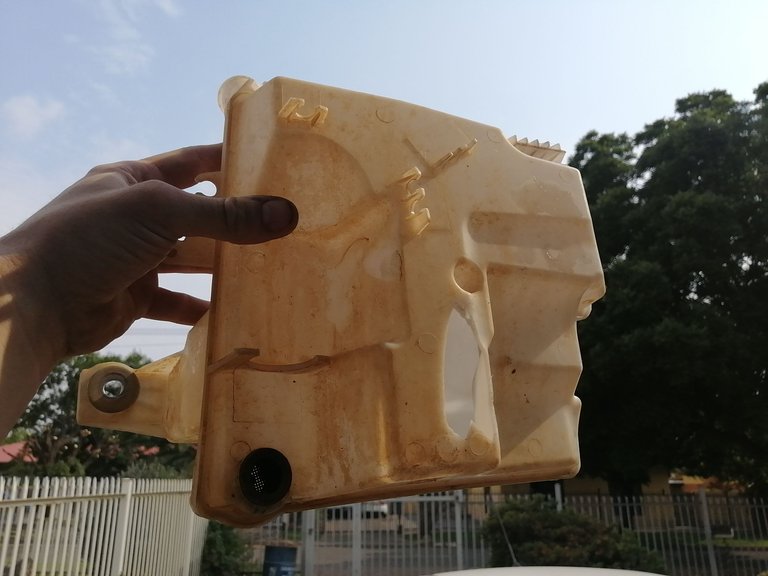
Damn I don't think this water bottle has ever been this clean.
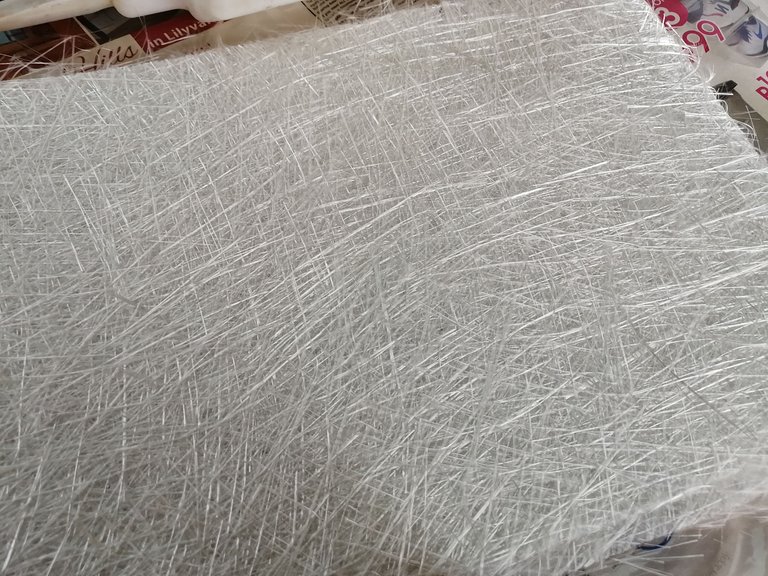
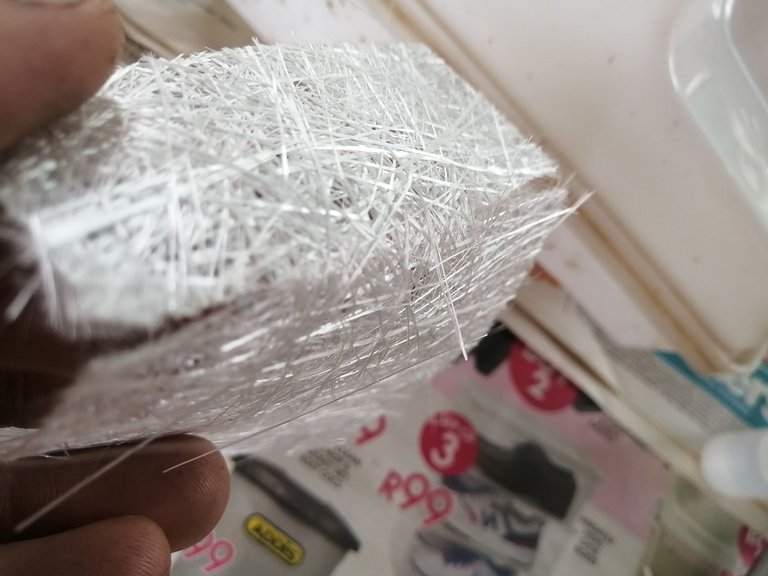
Okay let's see if this piece if big enough.
Oh wait this might be way too much! No no no lets cut it up into a smaller more workable piece.
I think I might have bought wayyyyy too much fibreglass but then again this was the smallest packet I suppose I can store this somewhere until I might need it one day. (P.S I will probably go buy fresh fibreglass if I am ever to need some more, laughs.)
Well I've got my little workable size fibreglass patch ready to go. Don't get me wrong this would not be the only piece I am going to add to the damaged part. But getting the base ready to dry so that I can build upon that base. Seems logical enough doesn't it?

See I even cutted in where I needed the patch to fold over like I want it to. Little did I know that it would not matter even a little bit of how I cut it the moment I dip it in the resin.
But at least it felt like I was doing a proper job than most people would have. See I like being precise and I learned the hard way that resin and fibreglass is everything but precise.
It's a bloody mess to tell you the truth!
Finally I can add the resin and the epoxy hardener! Laughs I have absolutely no idea what I am doing and how much I should be adding. Everyone tells me to just add a squirt or two, that's all great and stuff but then how much resin to I add.
See it's all a fuckery situation from here onwards.
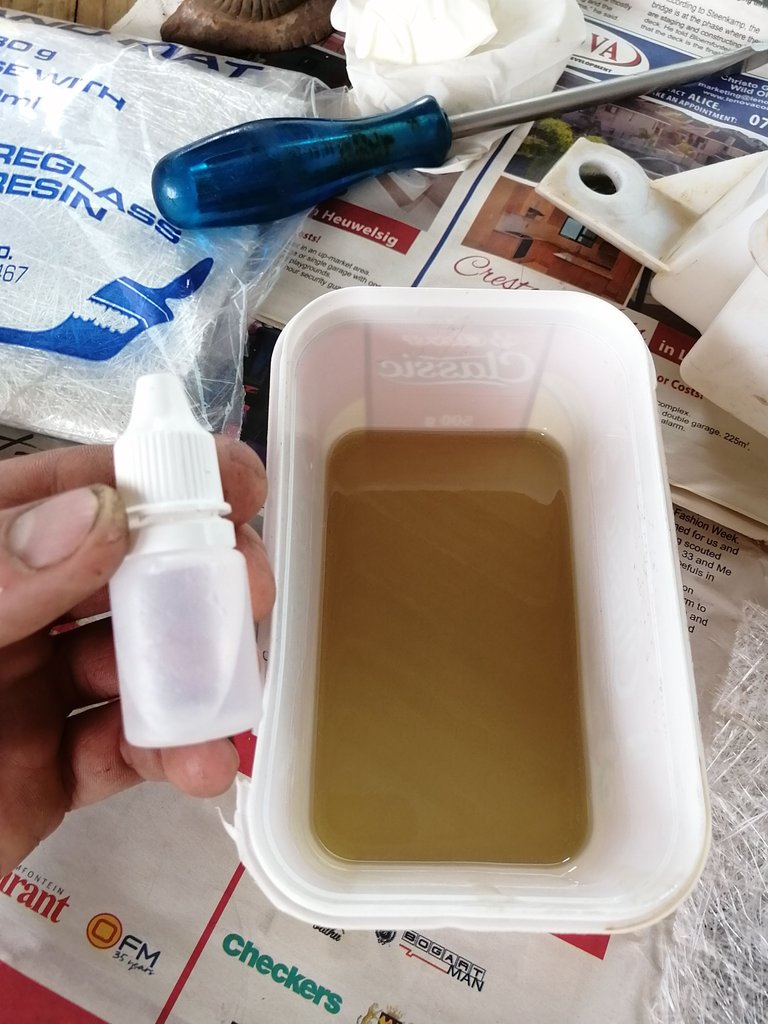
Now before I just go ahead and stick this on there I decided to add some resin everywhere I want the patch to make contact and not knowing exactly where it will make contact or not I decided to just add extra borders, just to be sure eyy.
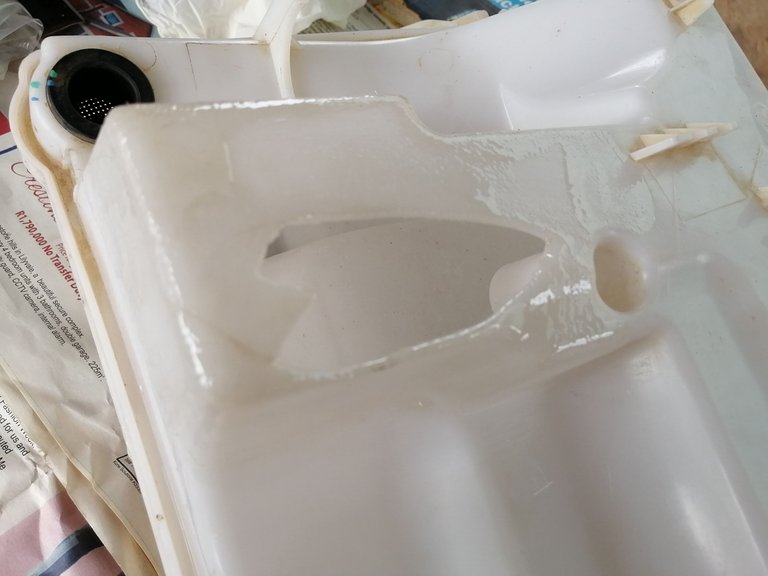
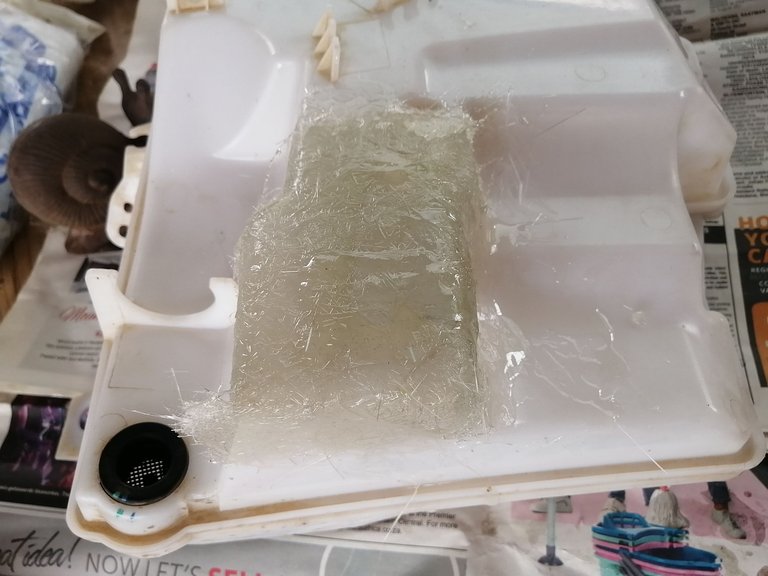
After letting each layer dry for at least 5-10 minutes before adding additional layers and by the time I knew it it was properly encased with a thick layer of fibreglass, I can tell you now that if I were to get into another accident this bottle would most assuredly not break in the same place!
It might break around the entire patch but there is no way in hell where it will break in the same spot.
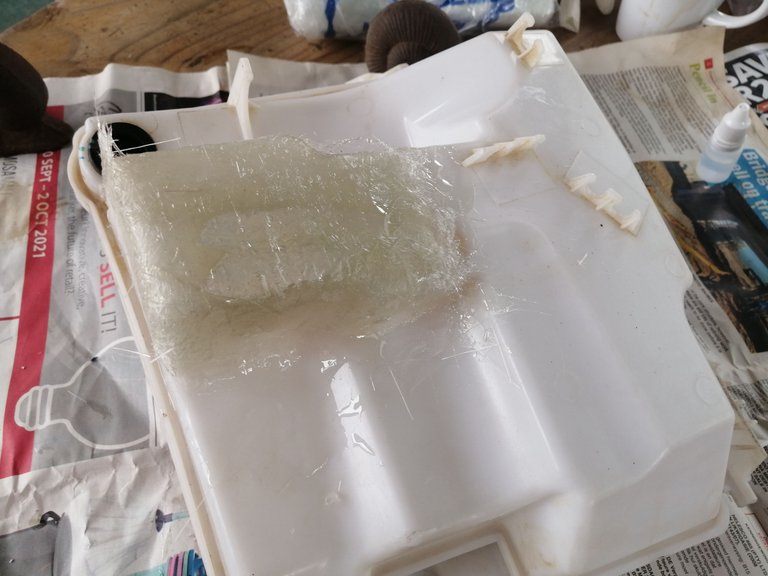
This is sort of where I started getting panicky, or well not panicky but I started doubting myself if this was actually working, it started forming bubbles in between the layers and I had to constantly rub them out and I thought to myself this thing is going to leak for sure!
Aslong as it was able to hold water for at least three days I would be happy!
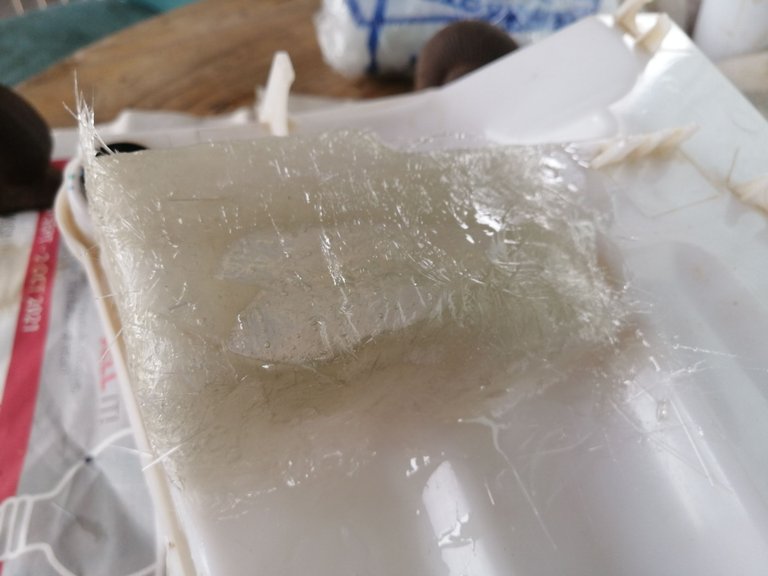
After letting it sit for about three days to have it hard as a rock I then cut off all of the edges that stood out and sanded the roughened edges. It was quite a daunting task, make sure you are in a well open area before trying this those crystal fibres can really go deep into your lungs and cause a prolonged negative effect on your health. Most of all remember that mask!
Now most would say "Good fuck you are a ratchet bastard" well I'll take that... This is more than ratchet! This is a backyard fix in its ultimate...
But you know what, it's at least done properly. It might not be neat but its done the proper way!
Oh and well yeah, it has been close to six months and I am still waiting on a leak to appear, so I'll say job frikkin done perfectly.
Yeah a little self praise is always needed!
Be sure to stay updated I'll be posting some happenings on the bumper removal, the one I properly banged up.

Dated 13/03/2023


Connecting the people of #HIVE across South Africa. #hive
The deer went home and did the same thing to its forehead. Seriously though, congratulations on a successful experiment. I think that’s a specialty job in the boat world. I’ve seen guys make the craziest cracks disappear.
Glad you know to keep that fiberglass away from your lungs. Those chemicals fumes are probably nasty too. I run away from the guys repair fiberglass on the dock.
Thanks for another DIY lesson.
That's a smart way to repair and save money! I did my bathroom with that shit and also had to sand it a bit and I felt like I was sunburned on my face and arms afterwards. It does what it has to but it is the worst shit to work with.
Hello friend, good job, here I have a similar container with a small crack, I am going to put this idea into practice just as you did with fiberglass, regards.
https://twitter.com/1205092265615659008/status/1635547139248996352
The rewards earned on this comment will go directly to the people( @technicalside ) sharing the post on Twitter as long as they are registered with @poshtoken. Sign up at https://hiveposh.com.
Economical and simple friend @technicalside