The Very First Transfer Case Assembly

Well Hello There Fellow Technicians And Hivers!
It's been quite some time since I've done anything transmission related, well in a sense of building something with gears in them. (I hope that makes sense?)
Okay well this isn't really a transmission in it self, it's a transfer case, and last week I assembled my very first one! It was a really fun and interesting thing to build, with that said it's also tricky but easy at the same time.
What is a transfer case?
A transfer case is used in 4x4 and AWD (All Wheel Drive) vehicles. If you don't have either or then your vehicles doesn't have one of these. The concept on these differ a lot from each other but ultimately it performs the same task through and through. Short and simple it transfers the power from the gearbox to the wheels hence the name transfer case.
My first transfer case build.
Well here I am re-building my very first. This last two maybe three weeks has been a major learning curve for me and I am thankful and happy about the bits and pieces of knowledge I am acquiring.
I know it looks like a colossal mess of gears and bolts twisted into madness.
It's quite simple actually, with a bit of Lego building skills behind me as a toddler it really ain't that hard! Oh who am I kidding sometimes it can get quite tricky! But I've got a phone a friend in the workshop and that person I call "Bossman."
Let's get right into it.
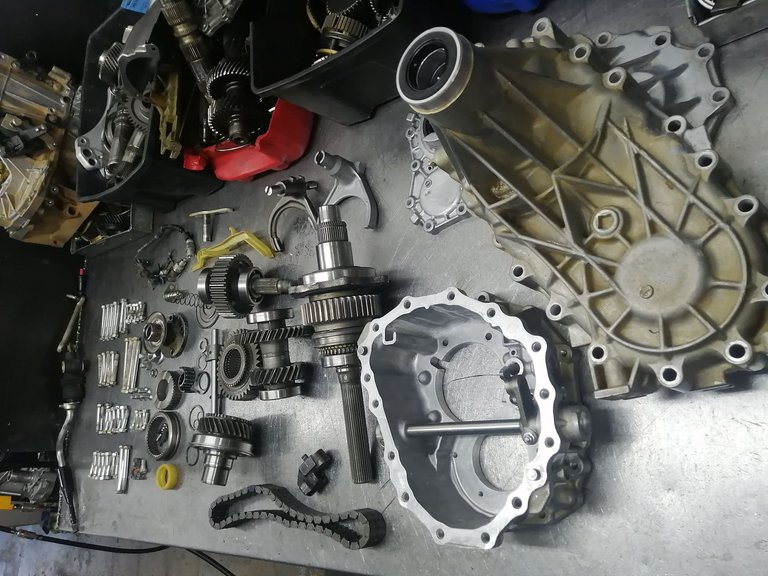
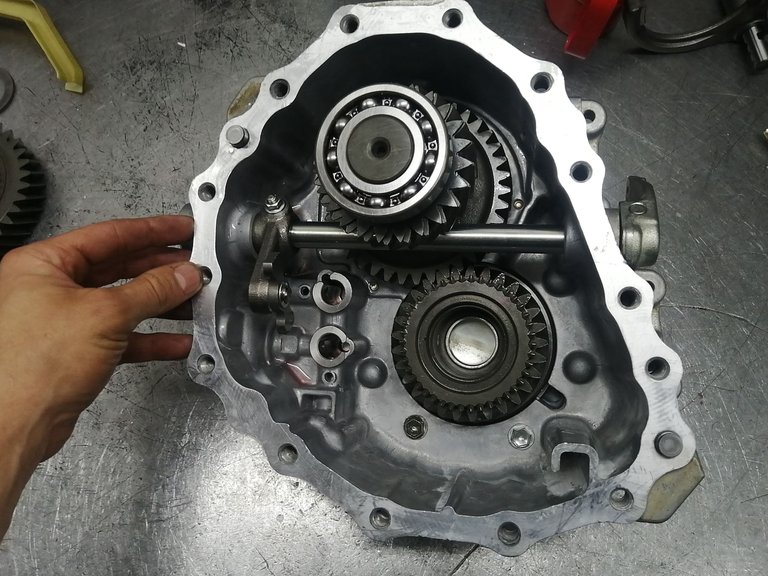
Well I know there is a lot of bolts and parts lying around on the table. Okay I do have to add that some of those bolts also goes into the transmission which I will be slapping together after the transfer case, lets focus on the transfer for now which consists of everything to the right in the photograph. Ignore the bolts they aren't that important.
Building in sections.
This no doubt has to be built in sections and in a particular way. First I have to take the biggest shaft and the gear that has the straight teeth on them, notice that the gear on the big shaft also has straight cut gears on it. This is so that the chain can run on them, easily identifiable, wont you say?
Needless to say that both gears have to be lowered into place with the chain fitted into place, this isnt some bike chain that you can somehow stretch over!
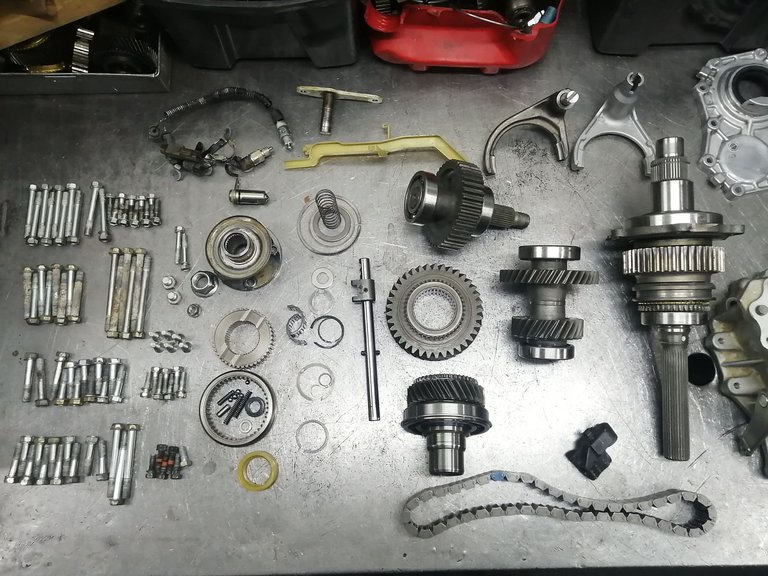
The next section/piece.
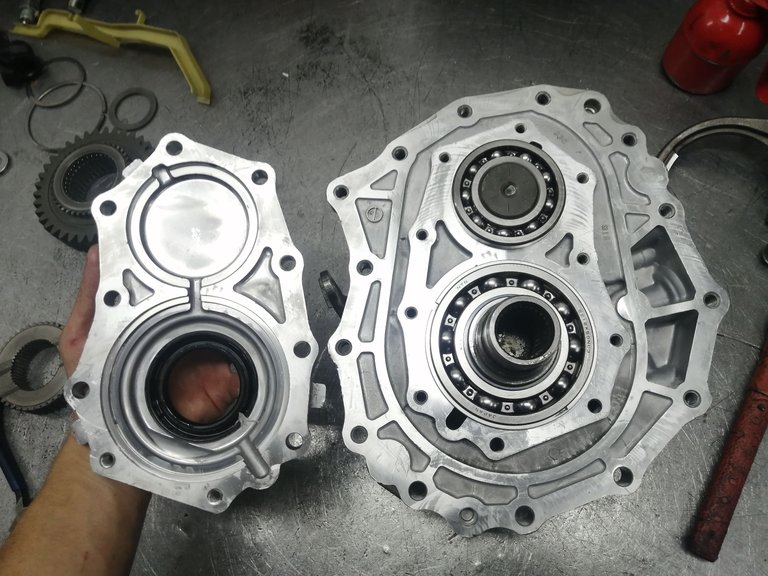
Okay pushing the casing that holds the big shaft along with the two straight cut gears and the chain one side. I now have to grab the second gear housing casing and start building the parts into that housing.
Notice the small metal shaft stretching from one side to the other? That shaft stays in place when stripping down one of these transfers, well unless you somehow managed to damage it, but they rarely damage. The top gear piece has to be lowered in sideways in some sort of manner (It's hard to explain so I'll leave it be.)
The gear at the bottom pushes in from the other side, the gear piece at the top enters from the visible side top side.
Fitting the front cover.
Because the gears I fitted now are hand pressed, meaning you can get them into position without using a hydraulic press, this means that with a little bit of oil they should slide right in.
I have to fit the front cover that joins in directly with the transmission before I can go further to avoid the gears from falling out the whole time.
Adding a little bit of silicone sealer to the front cover I can fasten it right into place.
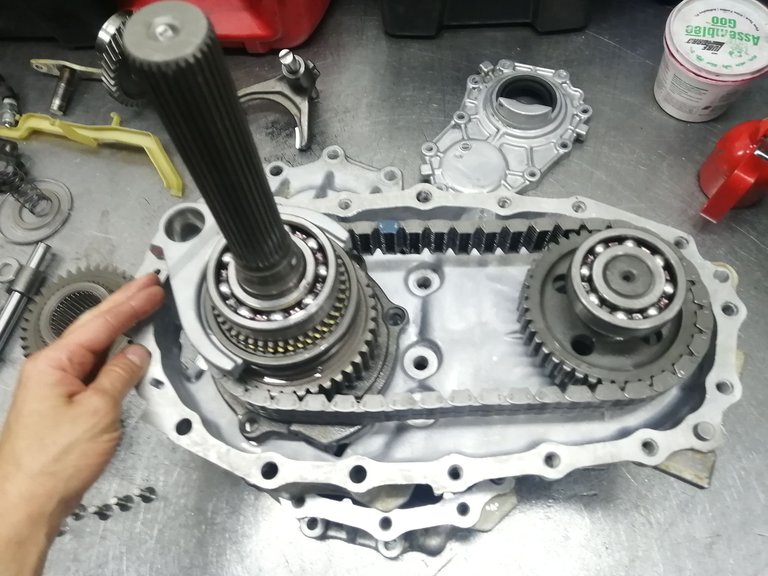
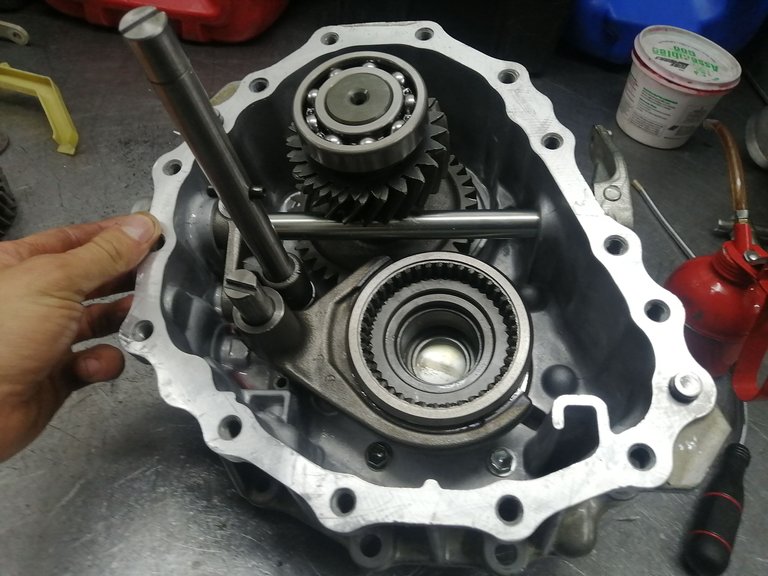
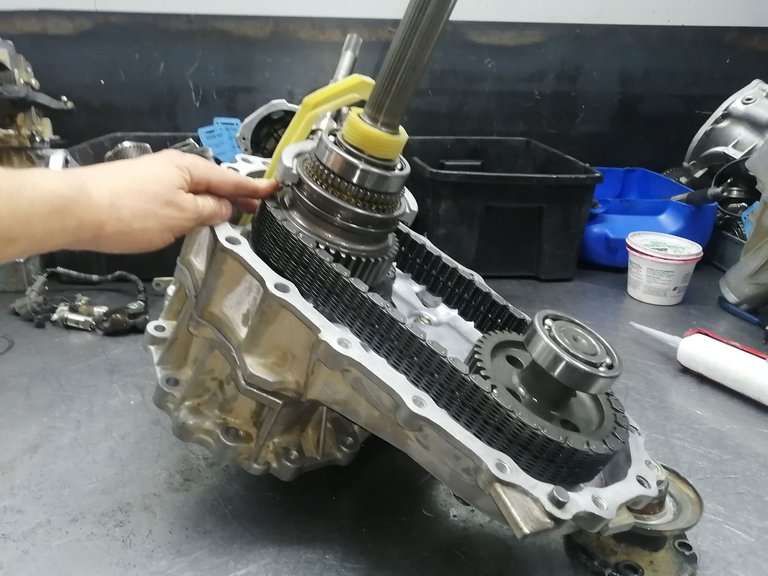
Flipping it back over to fit the selectors.
Now this is where you can make a critical error and not even notice it, the long metal shaft that goes up (sort of to my face) well that has a locking pin that needs to be fitted beneath it, it's very small and one can forget it easily and only notice after you've completely closed it.
The selector also has to be lowered into place while at the same time locking it in with the selecting pins. (The selecting pins on the selector shaft is not visible in this photo)
Now comes the steady hand.
Okay so another tricky spot!
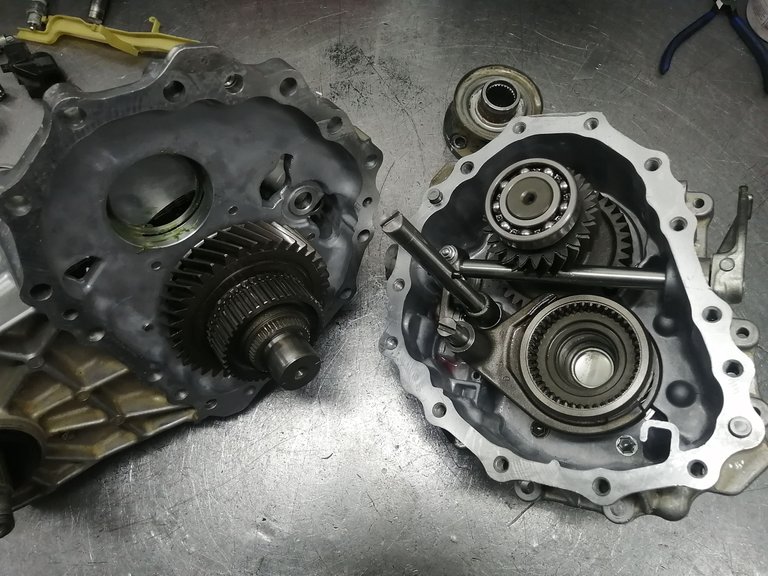
The housing with the long shaft and straight cut gears that the chain runs on which I assembled first. I have to slide that one over this piece that I just assembled, preferably as straight as possible, I don't really want to bend or break anything do I?
Oh I shouldn't forget the silicone sealer!
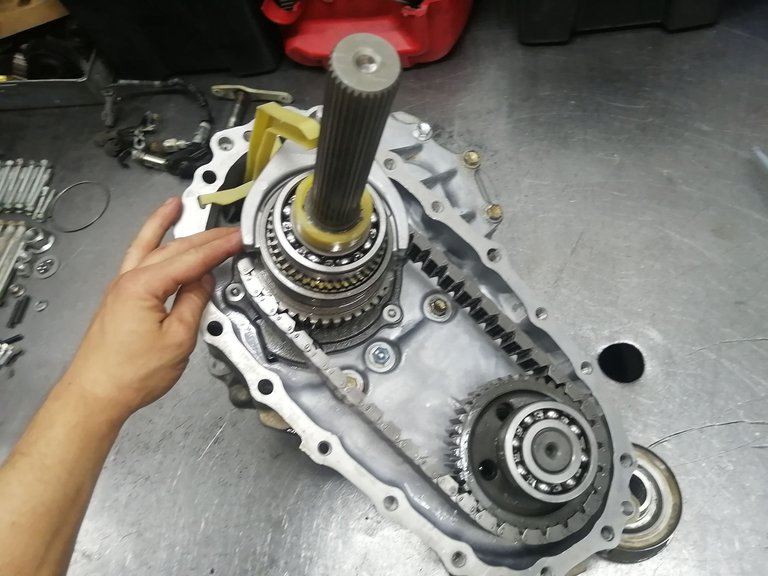
All fitted into place.
Now all that needs fitting with this section showing in the picture. The yellow plastic parts, notice them? The smaller yellow plastic part fitted over the long shaft is what we call the speedo drive, it just measures the speed of the vehicle and shows that on the cluster, nothing special (Depends on how you look at it, I mean the vehicle can run absolutely fine without it. It just wont display the speed on the cluster)
Next is the long thin plastic part, this is very important! That part feeds oil to the front that splashes over a gear. If that part is not fitted it will cause damage to the transfer and that you don't really want, seeing that I am currently rebuilding the transfer I suppose it would be unwise or well stupid to forget that part.
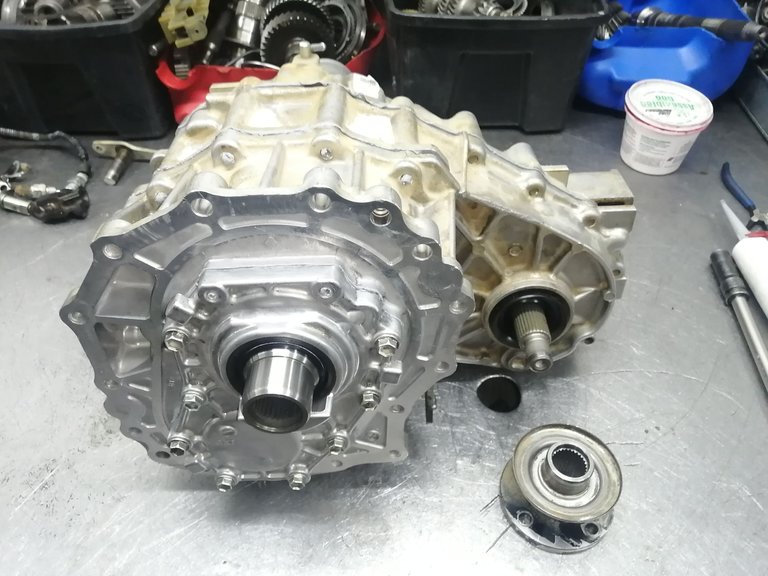
The last casing and we are done.
Why I didn't get a picture of the last casing is above me, I must have gotten too busy and thought that I did get one. Well I suppose I cant say much about that, well there really isn't much to say about it either it just pops right over and bolts down.
She's done and ready to be shoved aside.
Let's make way for the transmission by putting her aside. She only needs the flange as you can see in the picture, the piece lying infront of the transfer case. We have to get a new one because that one is semi worn out where the seal needs to run, it can be polished clean but the customer asked us to replace that.
So replace we will!


Connecting the people of #HIVE across South Africa. #hive
https://twitter.com/1205092265615659008/status/1597323598032932864
The rewards earned on this comment will go directly to the people( @technicalside ) sharing the post on Twitter as long as they are registered with @poshtoken. Sign up at https://hiveposh.com.
Your technician is amazing, friend.
Congratulations @technicalside! You have completed the following achievement on the Hive blockchain And have been rewarded with New badge(s)
Your next target is to reach 50000 upvotes.
Your next target is to reach 2500 replies.
You can view your badges on your board and compare yourself to others in the Ranking
If you no longer want to receive notifications, reply to this comment with the word
STOPCheck out the last post from @hivebuzz: