Worth It Or Not? Gaining Some New Mazey Experiences

Well Hello There Fellow Hivers And Technicians
Today I was able to experience something new. Well when I say new I mean a new type.
Valve-bodies, I have done a few of these in my short career working on gearboxes. However I have never really done this specific one, although most of them are similar it's still fun to try something new every now and then and today was one of those days for me.
Let's share a little back story.
I mentioned this vehicle in a post last week, it's a Nissan Juke and to be quite honest I have no love for the vehicle but that's besides the point. This client, well he doesn't have money he has enough to change a few things in the gearbox, we replaced a few seals and gasket inside and we also had to replace all of the clutch stacks inside the gearbox. The problem we have now is that those clutches probably failed due to valve-body issues and after assembling the vehicle we found that to be the problem.
Now we did a diagnostic scan on the vehicle and it came up clean. This is where things get "Dicey" so to say.
"How do you find a problem where no problem is shown?"
Well as we have learned many times before, these valve-bodies on the Nissan's they love to fail. Actually I think they love to make you work and work and put in some more effort! Given that is doesn't show any Fault Codes. Not even a "Insufficient pressure" just nothing.
Needles to say this leads us to where we are now.
Please keep in mind that this is not a how to process, it's merely just me documenting some stuff.
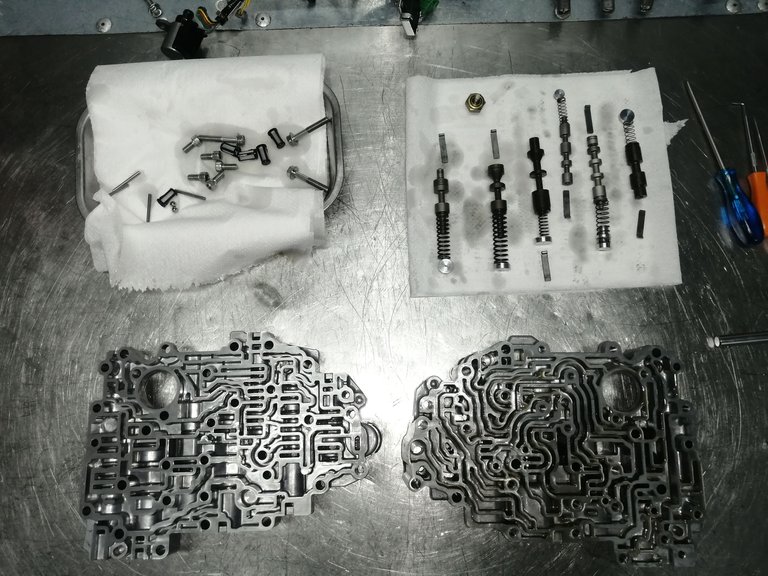
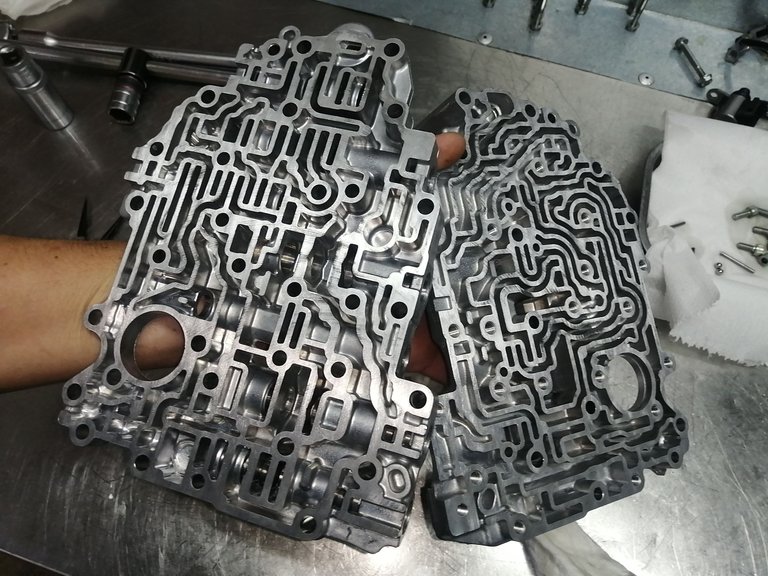
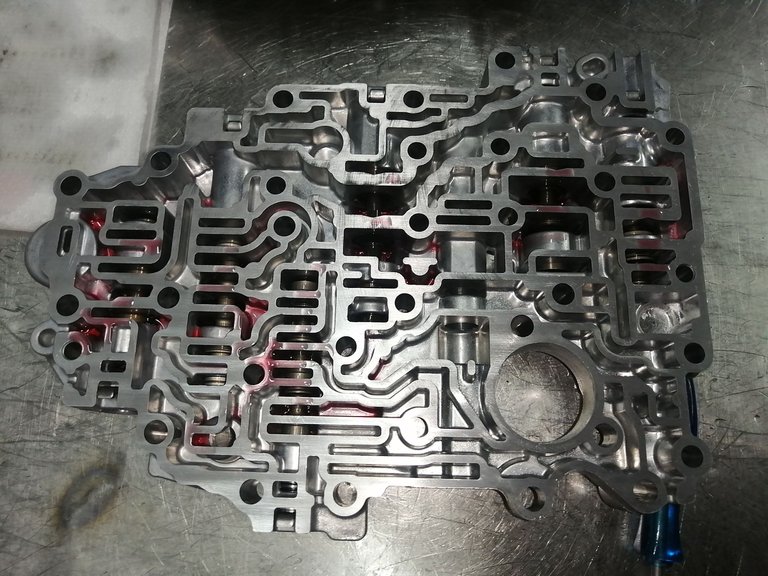
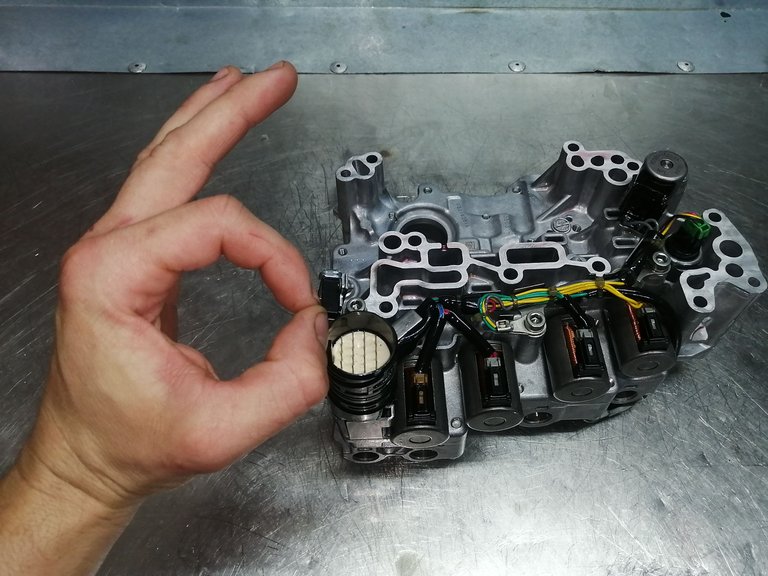
In the photo below you can see that I already tore down the Valve-body
In the upper left corner are the internal filters of the Valve-body they are very small, although not as sensitive as you might think.
Top right corner is all of the pistons that pushes and fits into the Valve-body casing (These are what actually regulates the oil pressure tso that certain gears can be selected.)
The bottom left and bottom right are the casings for the Valve-body both of them bolt together with a plate in between them. (Didn't get a picture of the splitting plate.)
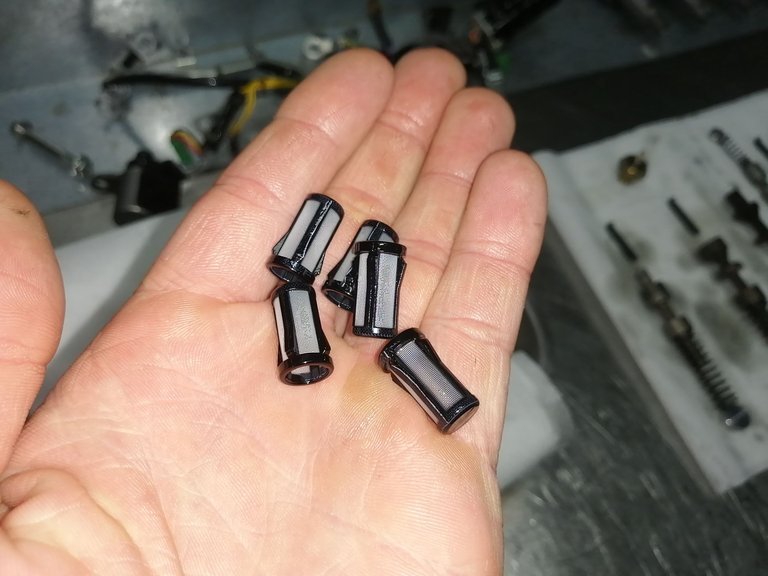
These are the filters I mentioned in the previous section. There are 5 of them and they appear to be very clean. Okay but we did rinse the Valve-body when we rebuilt the gearbox.
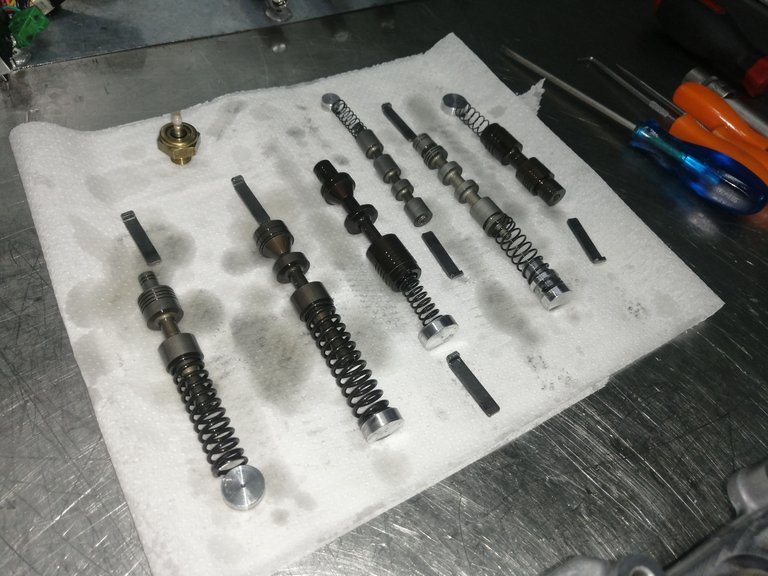
The six pistons that regulates the gears, needles to say five forward gears and one reverse gear.
This is where I think the problem lies, again this is only speculation. Normally you don't really fix these, and when I say these I refer to only the Nissan Valve-bodies they are stubborn beyond stubborn!
When I removed the Valve-body I asked my co-worker.
"Sir Bossman, do you think this'll work?"
His reply was short and hinted toward a laughter.
"No, but we gotta try."
I did find that two of those pistons were sticky, and didn't push back into place immediately I had to sort of tap them to get them to release. So here is the thing, we can try but aluminum sets out quite fast and a lot more than metal. This means that even if I can get them to not be sticky while the Valve-body is removed, it doesn't mean that when it actually heats up it would still be the same scenario.
The two pistons that were sticky was the one that is farthest to the right and the third one from the right.
Basically those with the springs at the top.
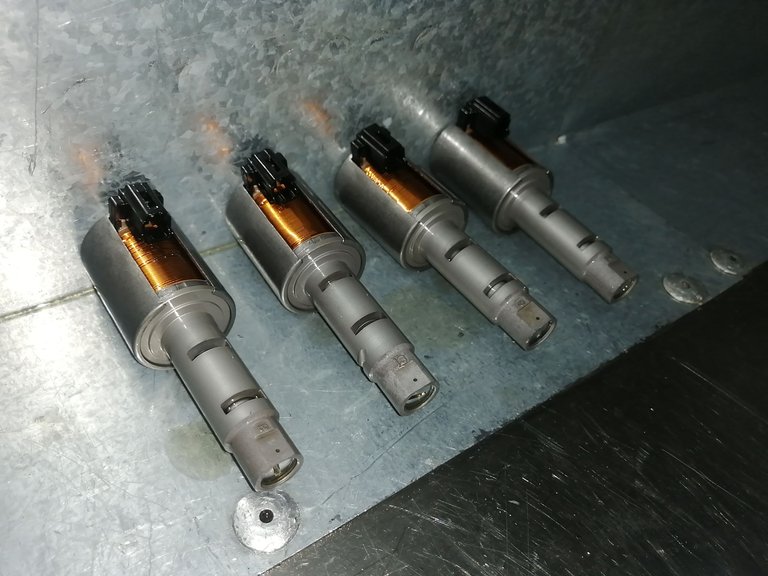
These are the solenoids regulating the oil, they cause a pressure build up or pressure release that in turn works on the pistons.
So when these solenoids activate or deactivate they open or close channels leading to the pistons. Lets say a channel is closed and oil does not push on the piston anymore, the spring you see with each piston in the picture above needs to push that piston back into place.
So when I say they are sticky this means that the spring doesn't have enough pressure to push it back, this is not because of the spring losing tension this is because of the piston hitting against a channel side.
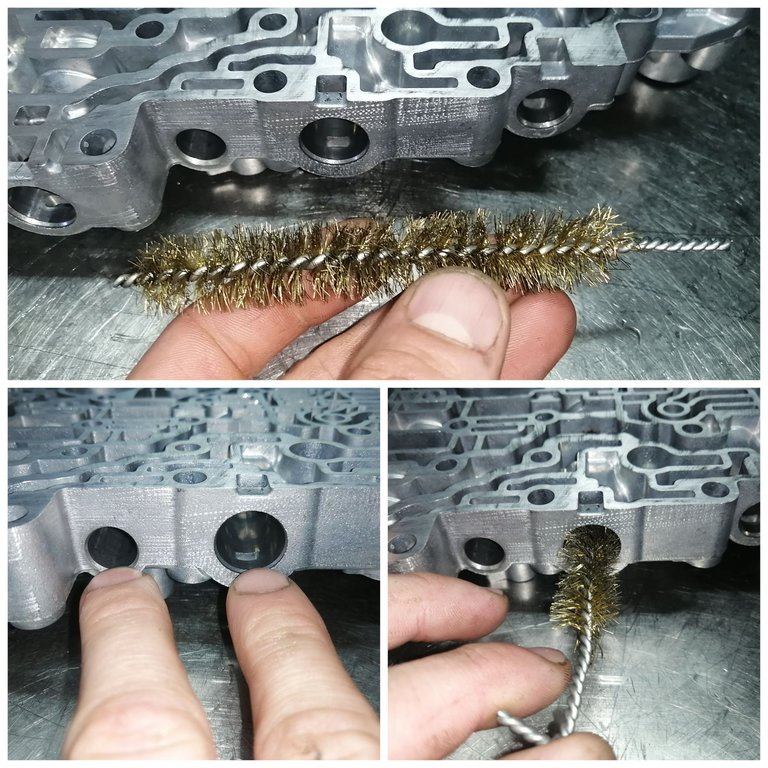
The two casings after I washed them out with paraffin and rinsed with water and dried with pressured air.
Cleaning the piston chambers is always a must, but first you have to wash them properly to rinse out any unwanted pieces of metal.
After washing the casings I took a wire brush, the copper ones and sort of polished the pistons chambers with them. I want to say honed them but that isn't exactly the right word.
This helps to remove impurities and small pieces of aluminum that might be stuck to the bore holes.
I don't like using the metal wire brushes they are a bit more tensile and might just cause scratches on the inside of the bores. you'd end up with more troubles, troubles that can't be reversed!
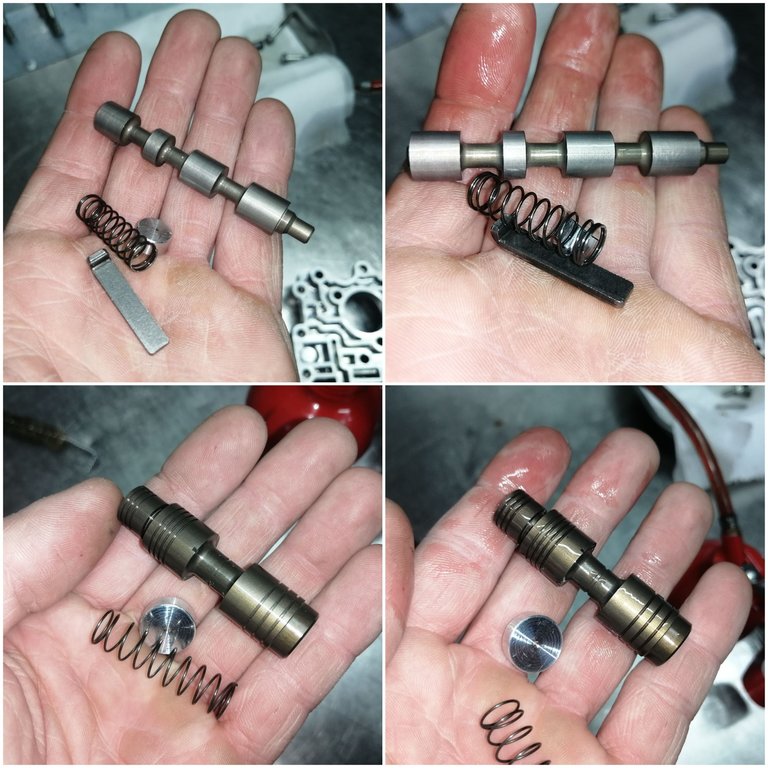
Refitting all of the pistons along with their springs back into place
Once I polished the inside of the cylinder tubes I then rewashed the casings "Yes again" to remove anything that might have gotten loose or perhaps in the off chance a wire or two fell of while polishing.
I then sanded of the straight edge of the thickest part of the pistons, but only the edges so that it's not quite 90 degrees anymore. What we want is somewhat of a taper on the edge, this might help for it not to hit the casing inside and stick as we would say.
It's hard to see but before I refit these pistons I gave them a little bit of oil, naturally we do this with any surface that runs on another metal surface. Most technicians would know exactly of what I speak.
"Only showing the two that caused the troubles, no need to show all of them."
Before I closed up the casings I gave them all just a little bit more oil, you can never add too much. The more the merrier!
So most Valve-bodies have these little goons inside of them, luckily this one only has two of them but I have seen some with 12 of them. Trust me it's not easy knowing where they belong, especially when the grow in numbers!
| The two regulating bearings. | Tucked neatly into their respective places. |
|---|---|
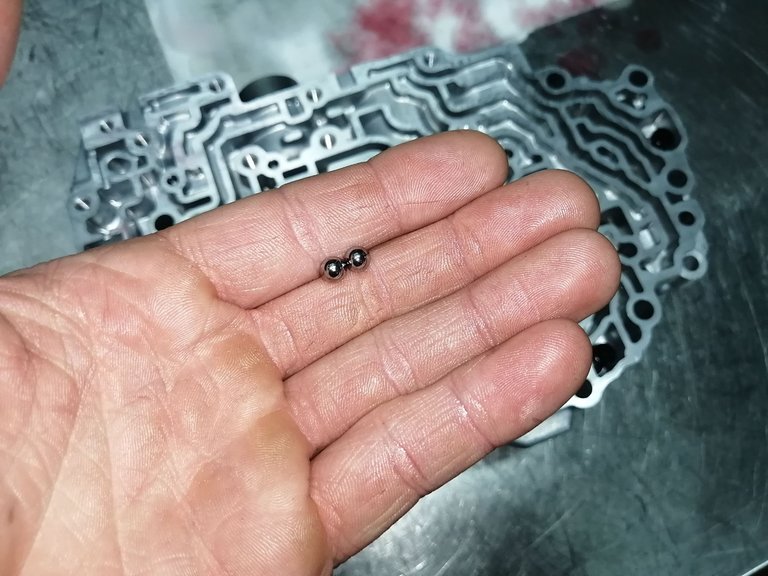 |  |
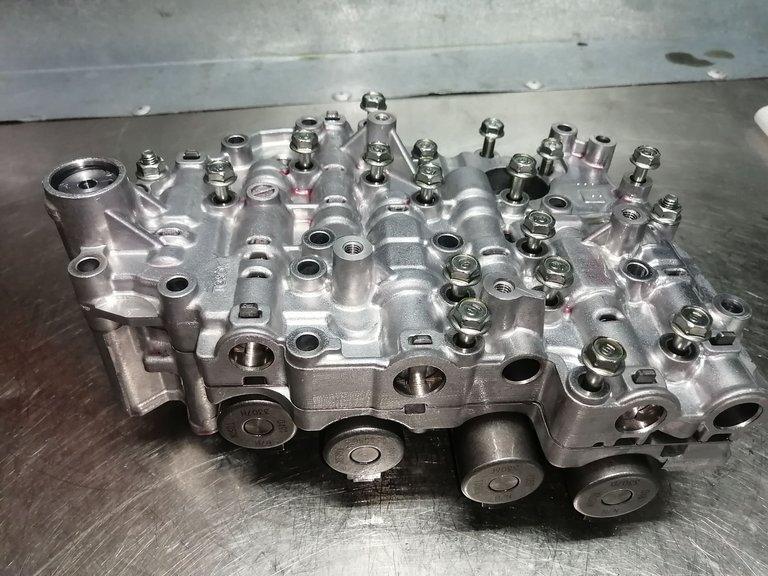
After fitting back the goons along with the filters I shared at the start of this post I was now ready to close this back up
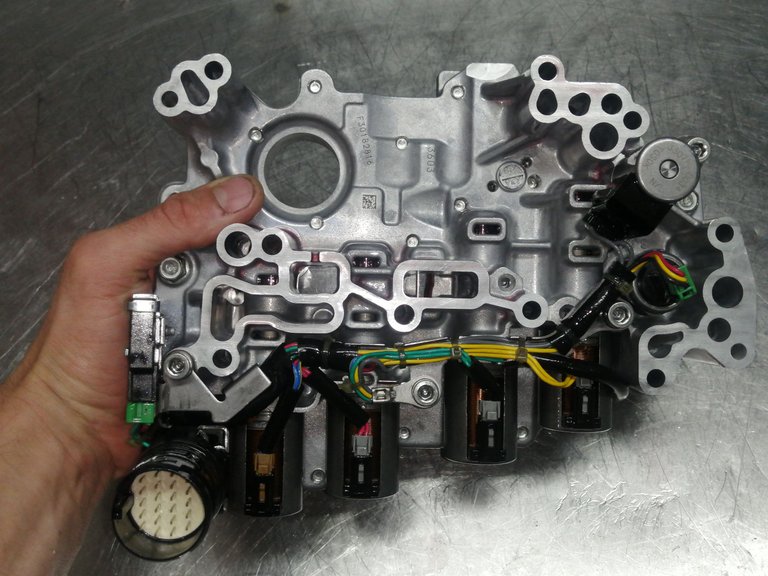
I had very little to do now, closing it up and adding the harness to the Valve-body.
But first when closing these it's wise to enter all of the bolts in their respective places! This will help a lot with the alignment of the two casings and the plate in the middle. I tend to do this because they don't have dells that align them where they need to be!

Perfecto Or?
Well the day caught up with us, so tomorrow morning first thing I will refit this to the vehicle.
But if what I did will work I have no clue. I really hope this fixes the problem we have otherwise the client might have to rake up a few extra bucs! And that might not be an option for him!
Either way working or not, we will find a solution at the end of the day! We always do!
See you all on the other side and let's hope this works!!!
To everyone who made it this far into my post Thank you for the read and the support.
If you found this entertaining or educational please consider a re-blog and up-vote.
Most of all please leave a input in the comments below, whether is good or bad critic I would like to know, whether its your opinion or your way of doing things in a different manner I would like.


Connecting the people of #HIVE across South Africa. #hive
https://twitter.com/1205092265615659008/status/1587176445377495040
The rewards earned on this comment will go directly to the people( @technicalside ) sharing the post on Twitter as long as they are registered with @poshtoken. Sign up at https://hiveposh.com.
Congratulations @technicalside! You have completed the following achievement on the Hive blockchain and have been rewarded with new badge(s):
Your next target is to reach 15000 upvotes.
You can view your badges on your board and compare yourself to others in the Ranking
If you no longer want to receive notifications, reply to this comment with the word
STOPTo support your work, I also upvoted your post!
Check out the last post from @hivebuzz:
Congratulations. Your skill is much needed nowadays.
The perfecto sign at the end, my god hahaha, dude that is not a maze that is hell incarnated, you aren't doing work, you're doing art just by maintain such maze up and running, but I'm going to ask, did it worked?
Well... Im not sure... I can say yes because the vehicle is running and have been handed over to the client..
However I do have faith in the quality of work I give.... BUT it's working now yes... As I mentioned in the post.. Those things dont like to be repaired on the Nissans... The ford's and those vehicle are easier to work on..
So it's driving but for how long I cant be sure... We did notify the customer that he should start saving up for a replacement....
Although they aren't expensive. Around 600 to 700 usd.
Given it is ALOT of money yes.. But for what you're getting not really.. They are cheaper than I thought...
Still alot though 😂😂
700 usd can buy you a car un venezuela... So yeah is a lot.