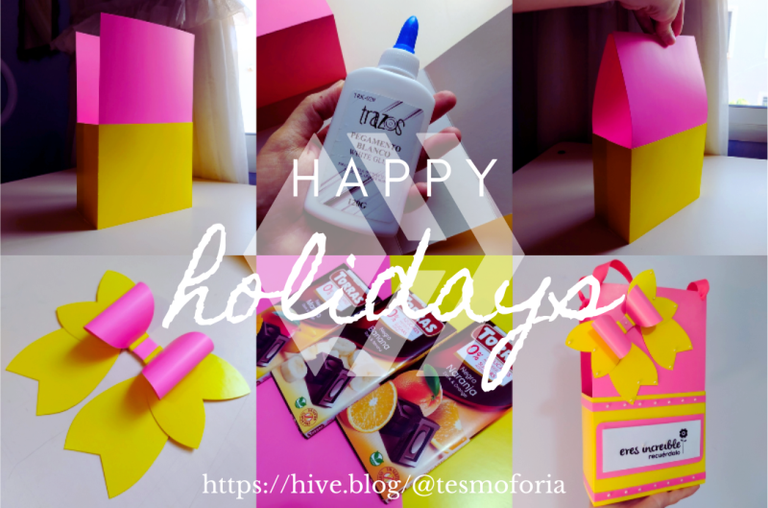
🎨 {27/12/23} ✦ D.I.Y: 🎀 💛 🎁 "Beautiful and easy gift bag in a few steps" 🎁 💛 🎀 ✦ 🇪🇸 │ 🇺🇸
✦ This will probably be the last tutorial of the year, 2023 has been a carousel of emotions and I am happy to resume my regular activity on Hive, I hope to improve in many ways in 2024! ✦

🇪🇸 ~ ¡Hola a todos!, espero pasaran una hermosa y tranquila Navidad, yo me encuentro algo enferma (otra vez) y estoy en cama recuperándome desde el 24 (ノдT) 💔 y mientras espero a sentirme mejor llevo algunas horas entretenida editando esta pequeña aventura crafteril de finales de Noviembre 😉
🇺🇸 ~ Hello everyone, I hope you had a beautiful and peaceful Christmas, I'm a bit sick (again) and I'm in bed recovering since the 24th (ノдT) 💔 and while I wait to feel better I've been busy editing this little crafteril adventure of late November 😉
Una amiga me pregunto por ayuda para fabricar una bolsa de regalo para la dinámica de "amigo secreto" de su trabajo; este fue un proyecto en conjunto porque ella escribió los mensajes que verán mas adelante en este post, mientras yo construía la bolsa/caja (^▽^)/\(^▽^) no recuerdo cuándo fue la última vez que hice una manualidad a dúo 💖
A friend asked me for help making a gift bag for her work's "secret friend" dynamic; this was a joint project because she wrote the messages you'll see later in this post, while I built the bag/box (^▽^)/\(^▽^) I can't remember when was the last time I did a duo craft 💖
• 𝕊𝕋𝔼ℙ 𝔹𝕐 𝕊𝕋𝔼ℙ 𝕋𝕌𝕋𝕆ℝ𝕀𝔸𝕃 •
« Beautiful gift bag, quick and easy! »

✦ My friend told me she wanted to replicate this craft, but I proposed to do something different in a similar style. I modified the original measurements to make the bag bigger, taller, and with more decorations ✦
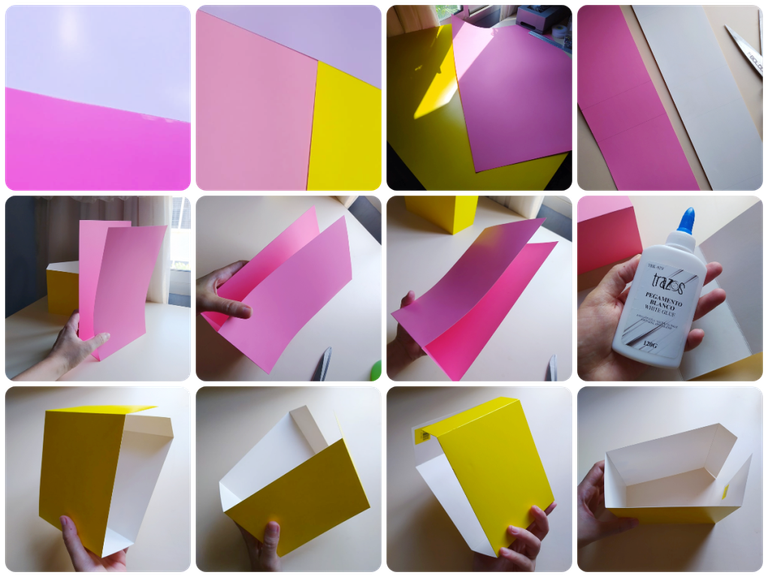
Para comenzar, recortaras 2 piezas de cartulina del color de tu preferencia. La pieza número uno debe medir 57 x 14 cm, y la segunda pieza debe medir 42 x 12 cm. Las medidas de la pieza amarilla son 12 x 7 x 12 x 7 cm, y las medidas de la pieza rosada son 25 x 7 x 25 cm ✅
To begin, you will cut out 2 pieces of cardboard in the color of your choice. Piece number one should measure 57 x 14 cm, and the second piece should measure 42 x 12 cm. The dimensions of the yellow piece are 12 x 7 x 12 x 7 cm, and the dimensions of the pink piece are 25 x 7 x 25 cm ✅
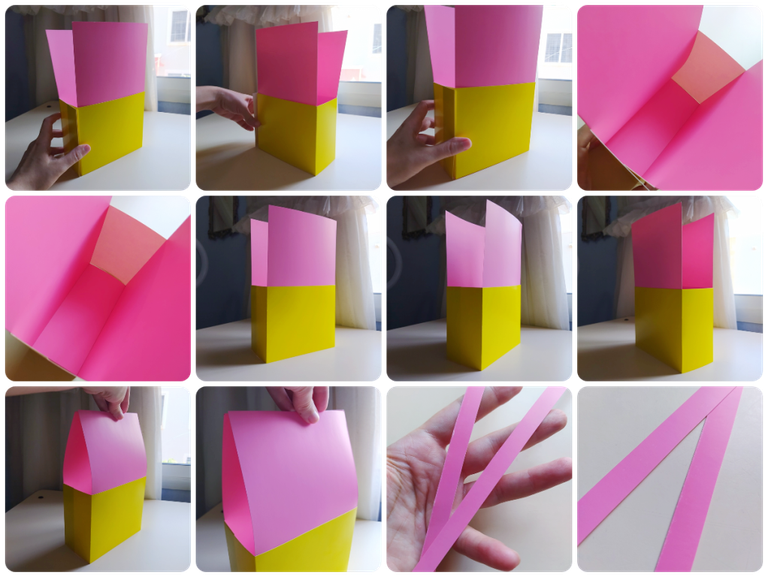
✦ From this point you can make the holes in the top of the pink part ✦
Con pegamento escolar o pegamento en barra vas a unir la parte rosada y la parte amarilla de forma permanente. En la parte superior y la parte inferior de la pieza amarilla pegaremos cintas de cartulina rosada a 1 cm de distancia del borde.
With school glue or glue stick you are going to join the pink part and the yellow part permanently on the top and the bottom of the yellow piece we will glue pink cardboard strips 1 cm away from the edge.
✦ I think her idea was very cute, she was very committed to her role as a secret friend hahaha! ✦
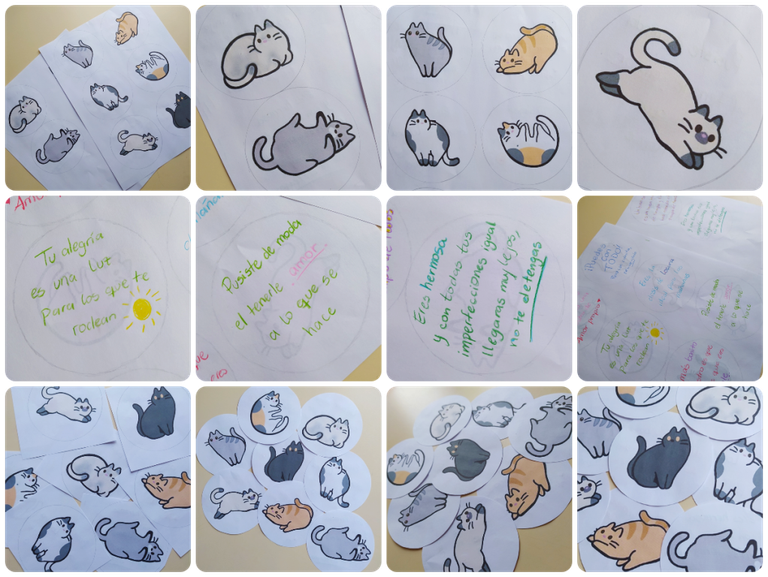
Mi amiga mando a hacer unas impresiones de gatito super cuties, que recorté en círculos y ella le escribió mensajes bonitos en la parte de atrás. Este regalo era para una señora mayor y ella quería hacer un detalle especial y personalizado.
My friend had some super cute kitty prints made, which I cut out in circles and she wrote cute messages on the back. This gift was for an elderly lady and she wanted to make a special and personalized detail.
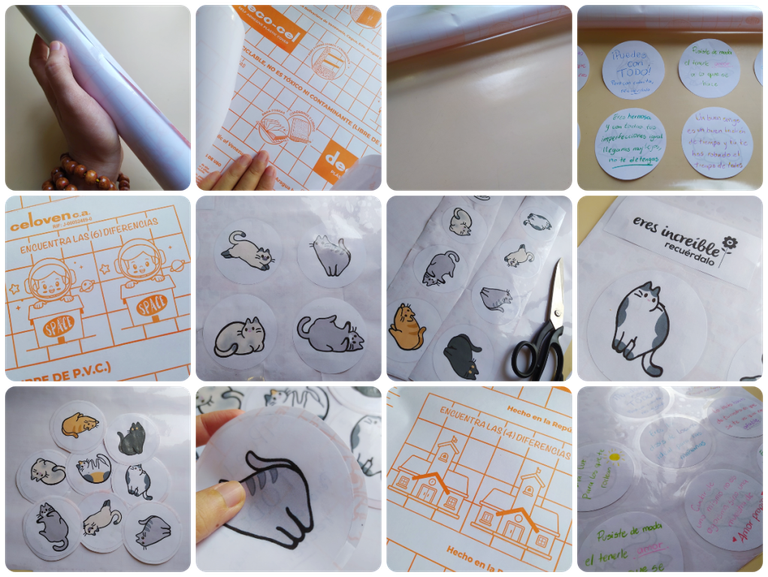
✦ The adhesive paper had on the back a set of very nice illustrations! ✦
Para hacer de estos lindos círculos algo mas durable y resistente le recomendé forrarlos en papel adhesivo transparente. Esta fue mi parte favorita, mi mamá me enseño cómo forrar cuadernos con papel contact desde niña para que me quedaran limpios y sin burbujas de aire 💖 👌
To make these cute circles more durable and sturdy I recommended lining them in clear adhesive paper. This was my favorite part, my mom taught me how to line notebooks with contact paper since I was a little girl so they would stay clean and without air bubbles 💖 👌
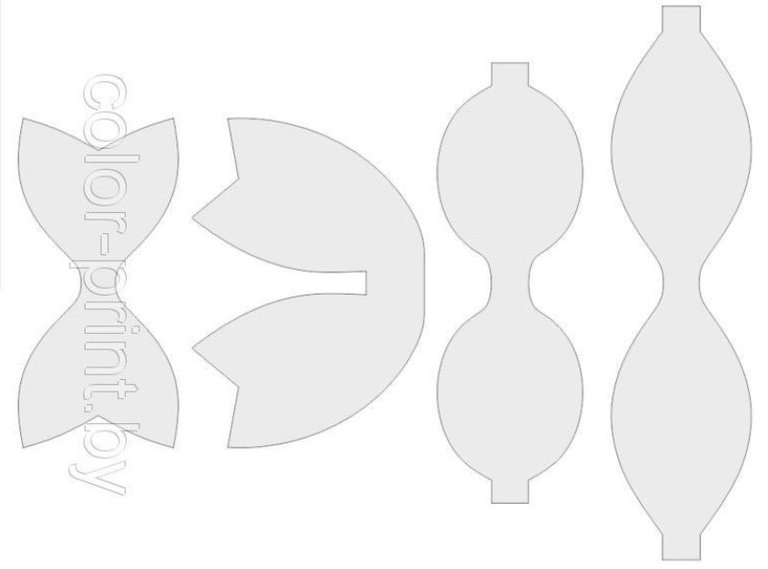
✦ This type of molds are very useful and can also be used to make bows on paper or cardboard, not only on fabric ✦
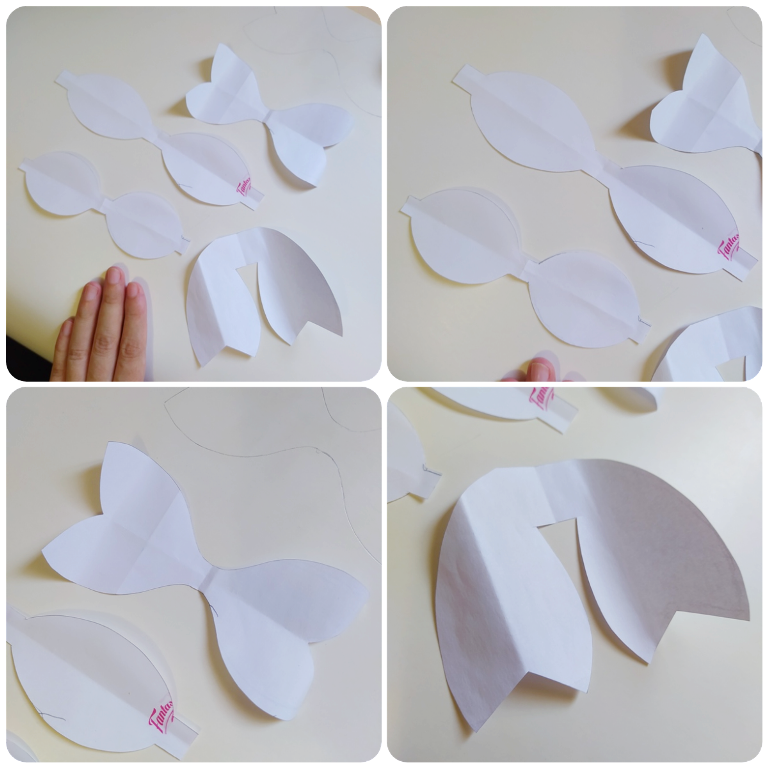
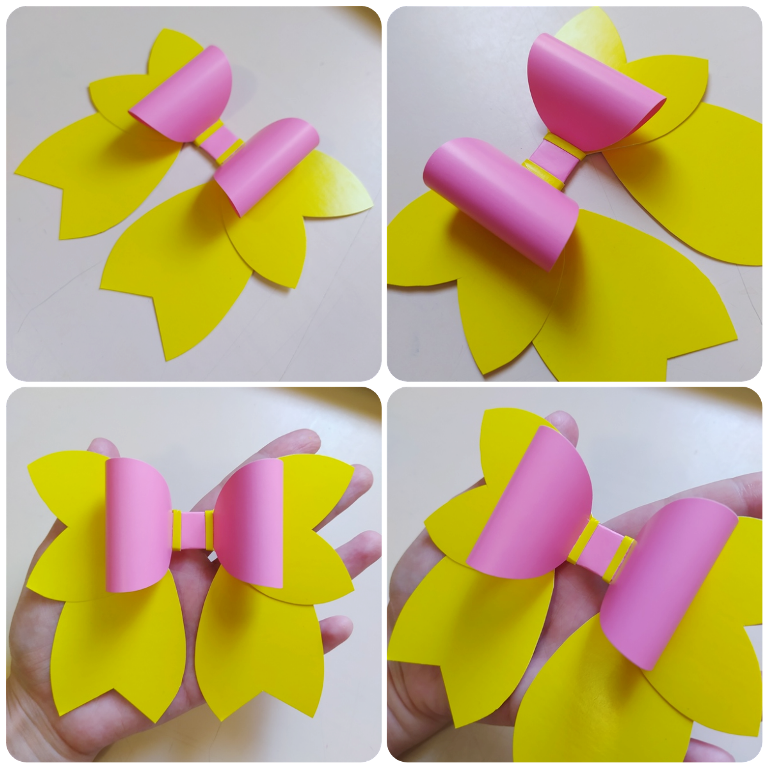
Como decoración principal escogí hacer un lazo doble del mismo color de cartón que utilice para la bolsa/caja.
As the main decoration I chose to make a double bow in the same color of cardboard that I used for the bag/box.
✦ The size in which you replicate the molds to your liking! ✦
Utilice papel normal para calcar los moldes del tamaño que me gusta, aunque puedes imprimir el archivo tal cual se descarga de Pinterest.
I used regular paper to trace the dies to the size I like, although you can print the file as it is downloaded from Pinterest.
✦ The light that day was very beautiful ✦
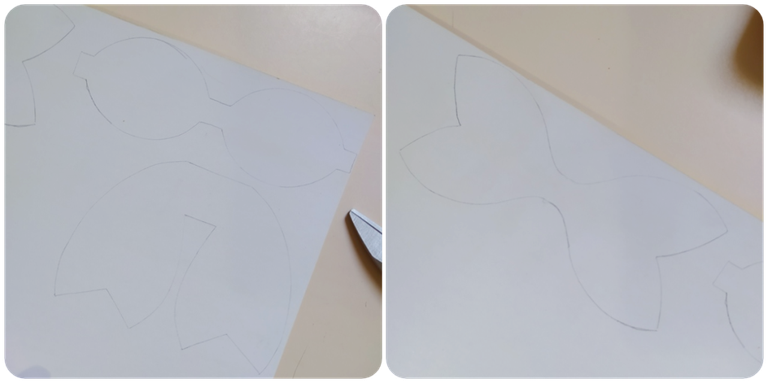
El resultado debe verse así. Y estas piezas son las que transferiremos a la cartulina.
The result should look like this. And these pieces are the ones we will transfer to the cardboard.

✦ I recommend not to put too many decorations on the ribbon, by itself it is quite beautiful and it would be easy to overload it unnecessarily ✦
El proceso para armar este lazo es exactamente el mismo en como hacemos uno de tela.
The process for making this loop is exactly the same as making a fabric loop.
✦ I love it! It's the first time I make a cardboard bow ✦
Si no te gusta este modelo de lazo, puedes sustituirlo por otra cosa, como un pompon de papel o una flor, también una figurita de origami quedaría bastante bonito.
If you don't like this bow pattern, you can replace it with something else, such as a paper pom-pom or a flower, also an origami figurine would look quite nice.
✦ The message on the front is also laminated! ✦
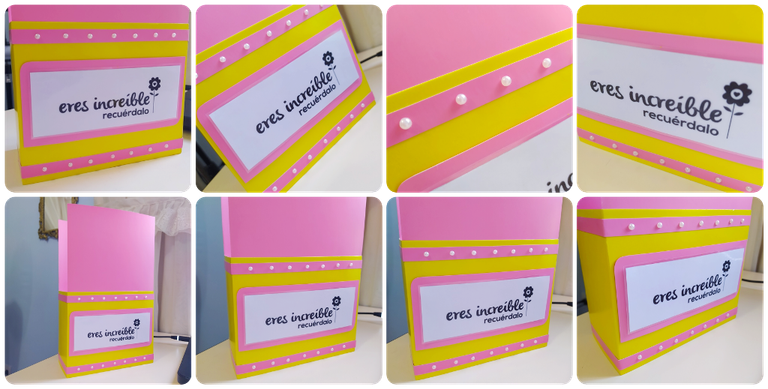
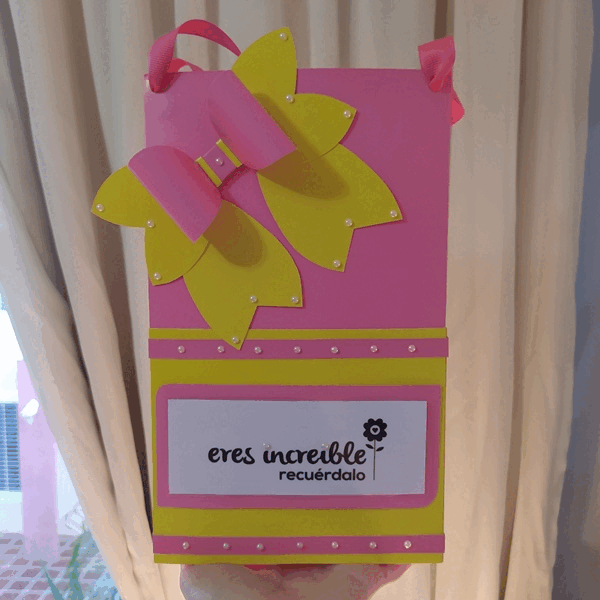
Para decorar, aplique una línea de perlas pequeñas en la parte delantera de las cintas rosa que instale al inicio, y un mensaje plastificado que duce "Eres increíble! Recuérdalo", éste fue a elección de mi amiga, tuvimos varias opciones pero esa era la mejor.
To decorate, I applied a line of small pearls on the front of the pink ribbons I installed at the beginning, and a laminated message saying "You are amazing! Remember that", this was my friend's choice, we had several options but that was the best.
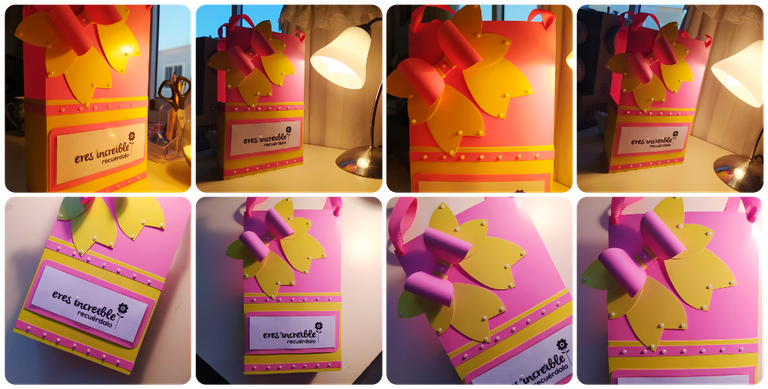
✦ I AM VERY MUCH IN LOVE WITH MY NEW LIGHTING ✦
Cuando termine este proyecto ya era de noche y estaba estrenando lámparas e iluminación nueva en el cuarto que mas me gusta. ¿No es bonito? 🥰
By the time I finished this project it was already dark and I was unveiling new lamps and lighting in the room I like the most. Isn't it nice? 🥰
✦ For the handles, some silk or satin ribbon is fine. A maximum of 1 or 2 cm wide, and approximately 20 to 30 cm long for each one ✦
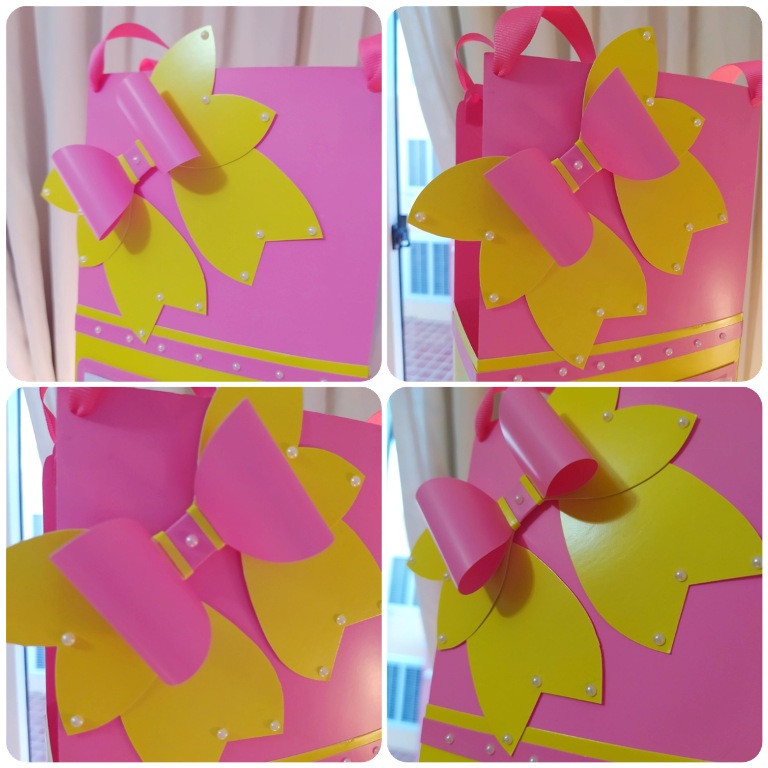
✦ Pearls in specific points to raise the beauty ✦
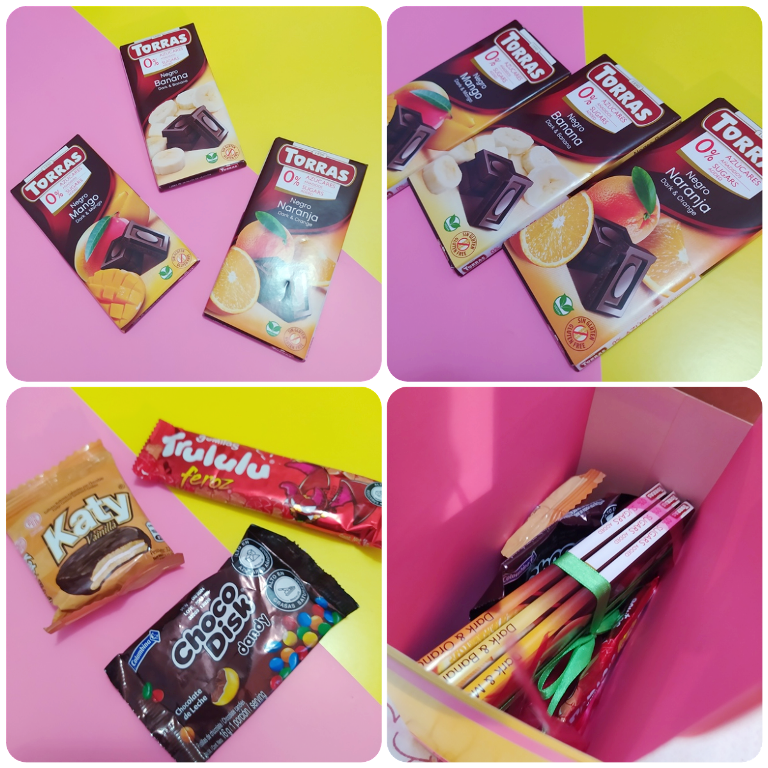
✦ Some candy next to the kitty notes! ✦
 |  |  |
|---|
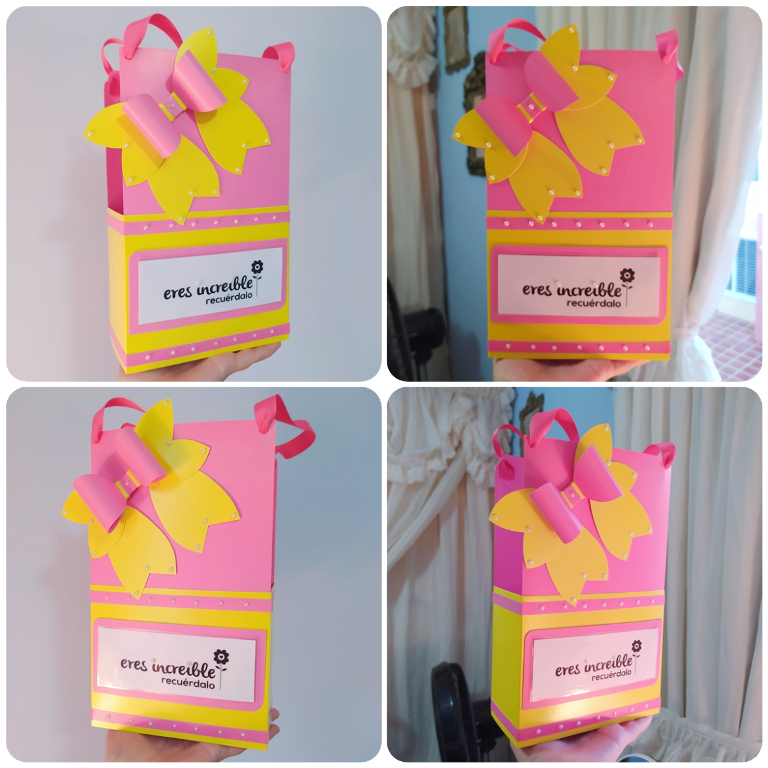
¡READY! ٩(ˊᗜˋ*)و ♡ ¿Eso fue muy lindo verdad? Puedes hacer esta bolsa de regalo con otros tipos de cartulina o papel y experimentar tanto como quieras con otro tipo de decoraciones.
READY! ٩(ˊᗜˋ*)و ♡ That was really cute wasn't it? You can make this gift bag with other types of cardstock or paper and experiment as much as you want with other types of decorations.
Ha sido un año divertido y espero ansiosamente 2024 para ver todo lo genial que sucederá en Hive DIY, es muy emocionante ver cómo ha evolucionado la comunidad y cómo ha crecido el proyecto, ¡les deseo a todos mucha salud y altos niveles de creatividad en este proximo año nuevo! °ʚ(´꒳`)ɞ°
It's been a fun year and I look forward to 2024 to see all the great things that will happen at Hive DIY, it's very exciting to see how the community has evolved and how the project has grown, I wish you all much health and high levels of creativity in this coming new year! °ʚ(´꒳`)ɞ°


✨ 🍓 All texts and images by @Tesmoforia 🍓 ✨
🚨 ¡Please do not take, edit or republish my material without my permission! 🚨
💌 ¿Do you wish to contact me? [email protected] 💌
🌙 Banner, signature and separators by Keili Lares
So pretty!!
Thank you! 💖
Your content has been voted as a part of Encouragement program. Keep up the good work!
Use Ecency daily to boost your growth on platform!
Support Ecency
Vote for new Proposal
Delegate HP and earn more
This is a lovely gift box. A wonderful and simple craft.
Omg thank yooouuu ! ! ! 💖 💖 💖
https://twitter.com/hivediy47901/status/1740565688899850293