DIY Tutorial - Headband & Bow Organizer

Lost hair accessoiries
It's a common issue amongst us girl-mommies. Elastics, hairclips, headbands & bows being thrown in a corner somewhere or hidden in a closet without us knowing that it was ever put there and when you need that one item for today's outfit, the pre-school time suddenly goes from being under control and running on time to last minute hunting for the right item and getting close to being late. It's something I decided I wanted to avoid from day two of the school year.
We still have not done anything about accessories for the walls and other decorations so I figured this would be a good start to make the bedroom look a bit more appealing by creating a headband and bow organizer while my daughter was at school. I know that she always appreciates it when I create something for her so I got to work.
Needed supplies
As I have bought quite some supplies over the past months, I was sure that I could collect a few needed items to create this organizer. I decided to go for a simple yet effective design. Only a few supplies were needed:
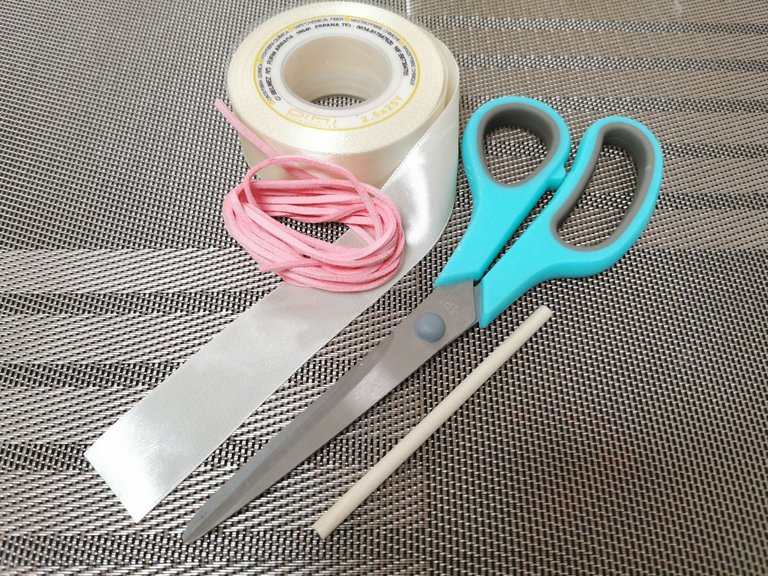
Besides the ribbon of your choice, you will need a cord, a stick, and scissors. Depending on how you prefer to glue things together, you can use a glue gun or regular glue. I used a glue gun myself. The stick I used is a cake pop stick, I knew they'd come in handy for crafts!
The process
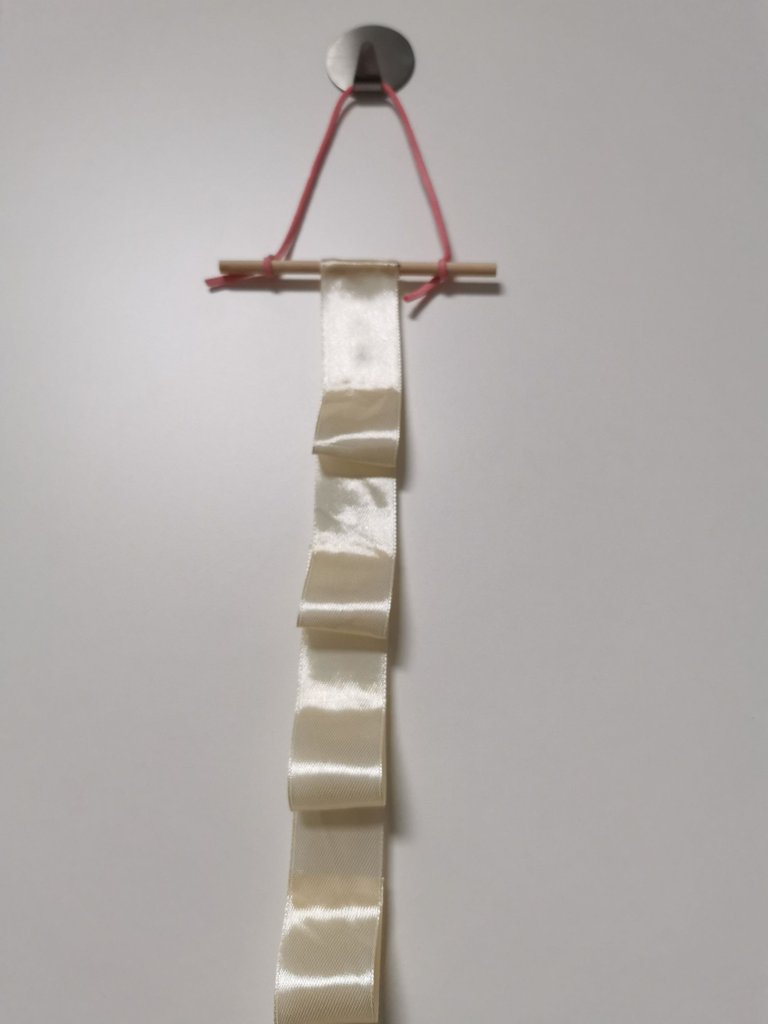
I think this design is so simple that anyone can make it, you honestly don't need super crafting skills and I challenge you to just give it a try because it will bring great pleasure once you finished it! We start by attaching the cord to the stick as shown below:
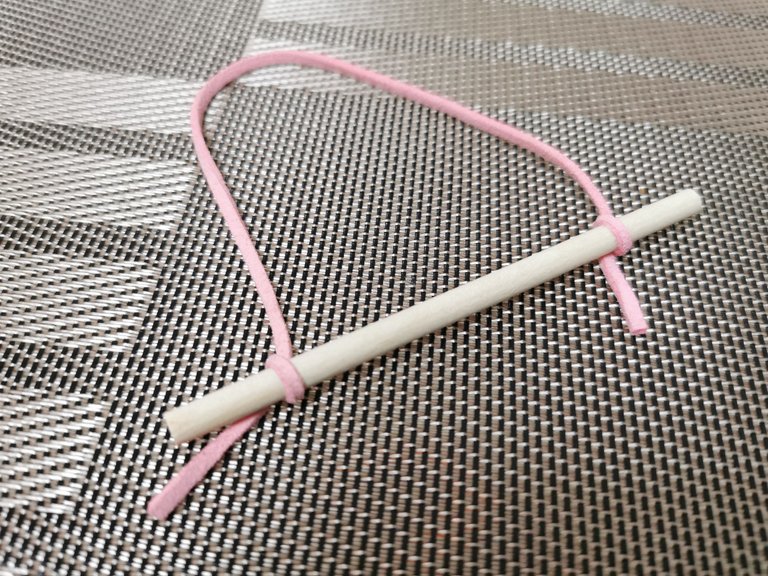
I never cut off the cord immediately because sometimes along the way, you may discover some adjustments are needed so I always do this last.
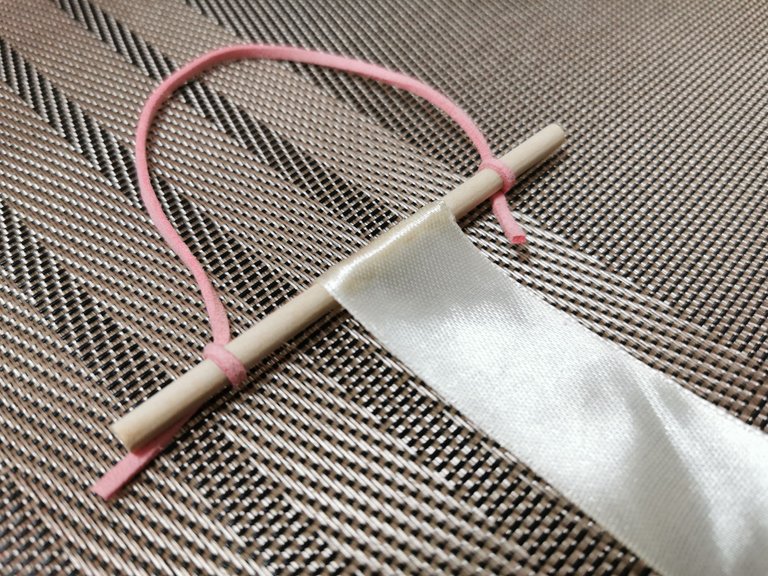
Now you glue the ribbon to the stick by simply rolling it around it and adding some glue. Be careful if you use a glue gun here because you need to press the ribbon and it will get hot on your fingers!
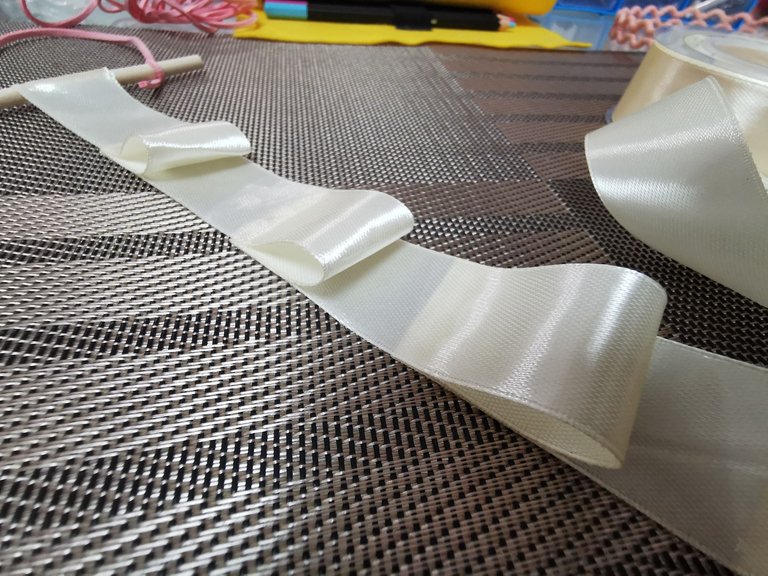
Starting at the top of the ribbon, fold it as shown in the image and glue it to secure the loop. Now fold it back and secure the loop so it will stay in place as you can see in the image. Repeat until you have enough loops, I created 10 as I know all headbands and bows will fit on it, of course you can choose to make it smaller or bigger.
The End Result
I added a towel holder with double-sided tape at the door of the wardrobe as it's plain white and quite boring as is. Now it looks much nicer:
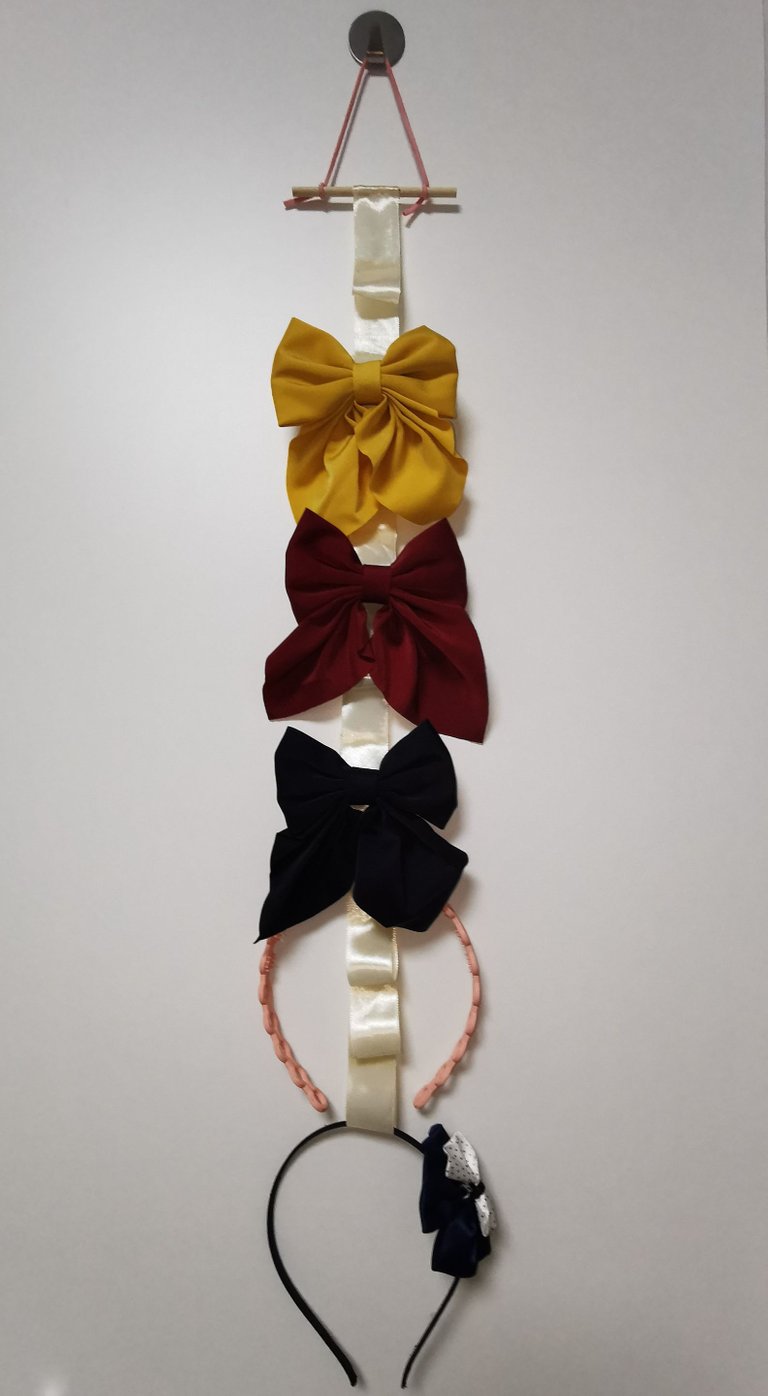
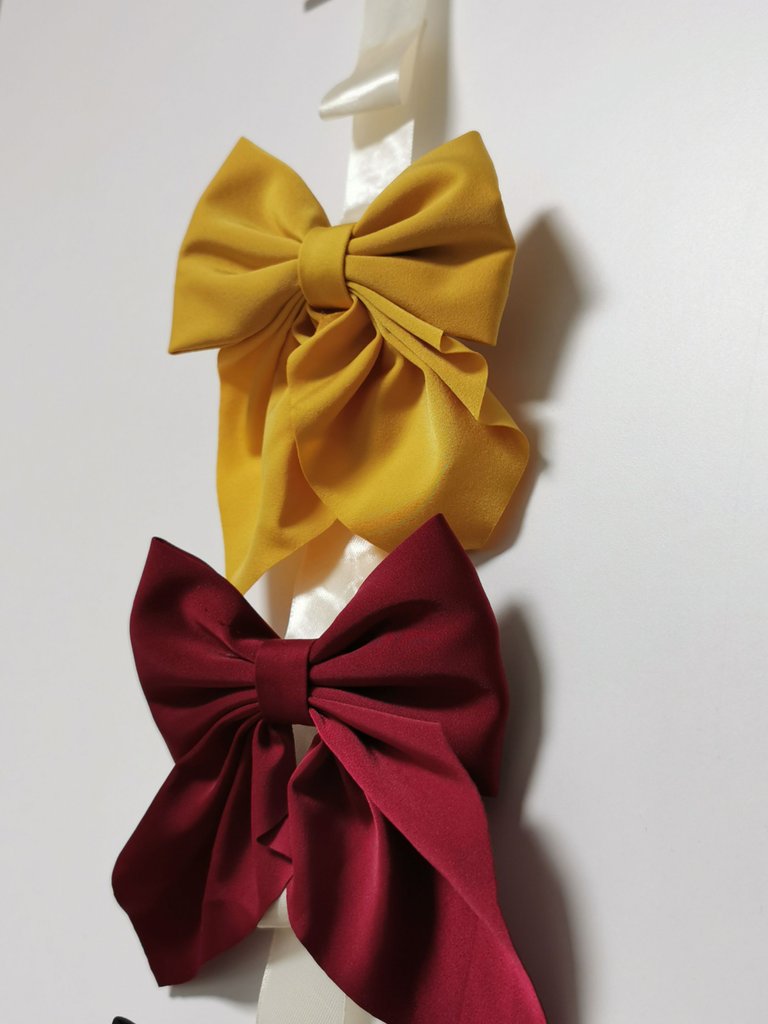
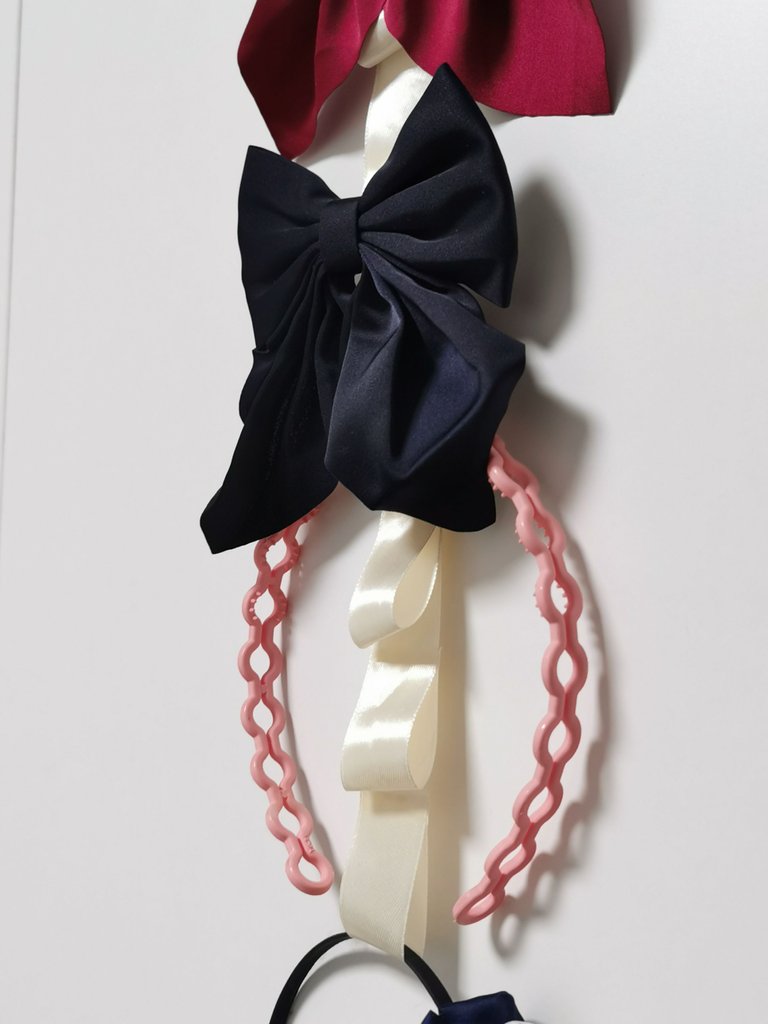
Also perfect to attach the bow hairclips as you can see.
I decided not to pimp the ribbon any further because once all loops are used, you won't see the decorations anyway.
I hope you enjoyed this tutorial and if you have the same issue we had, I'd say: start crafting! You will be happy that you tried it, trust me! Thanks for stopping by and see you in the next crafting tutorial!
https://twitter.com/makehivethrive/status/1572905382191968257
The rewards earned on this comment will go directly to the people( @thisismylife ) sharing the post on Twitter as long as they are registered with @poshtoken. Sign up at https://hiveposh.com.
What a simple yet elegant solution! And it actually looks pretty on the wall. I might need one for the inside of my clothing cupboard, because the drawer is not the best place to store bows. They end up a mess that I have to go scratching through to find anything. Bookmarking this!
Oh then this will make you very happy. It's such a simple craft and such a big pleasure when all these things are organized. I have tons of other things to create something similar for but at least I got one done now :)
Happy crafting and make sure to share it :)
!CTP
Greetings, what a nice and great idea. Thanks for sharing💜
You're welcome!
Hi! Great job and very cool step by step, the photos turned out amazing. These convey elegance with the neutral background, very nice post.
Beautiful, simple and elegant. The color of the ribbon I love it, good job I liked it very much. Blessings to you
Very nice - Not my kind of clothing accesories XD but I love your creativity ❤️ A Double Cheese !PIZZA to it! Take care (:
- EvM
PIZZA Holders sent $PIZZA tips in this post's comments:
@elyelma(3/5) tipped @thisismylife (x1)
Join us in Discord!