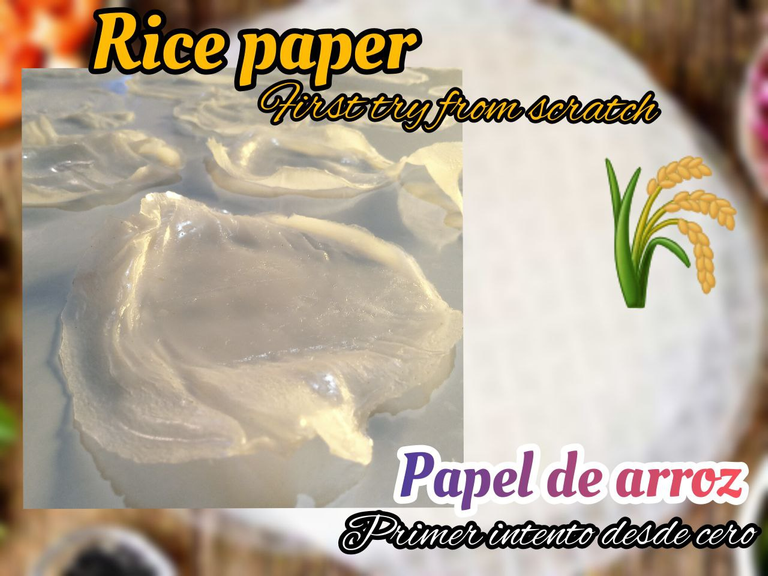
RICE PAPER | first try, making it from scratch with acceptable results [ENG/ESP]
PAPEL DE ARROZ | primer intento, haciéndolo desde cero con resultados aceptables
Hello, bees!!! I had a day of experiments, and it was quite a process but it was totally worth it. I've always wanted to cook with rice paper but when I went to buy it, it was quite expensive; I don't remember the price but it was enough to scare me. So I was looking for a recipe to make it at home, it was hard to research but I found one video that explains it very easily and clearly. The complicated part is the technique, which I still have to improve, but I feel great with this first try.
¡¡¡Hola, abejas!!! Tuve un día de experimentos, y fue todo un proceso pero valió totalmente la pena. Siempre he querido cocinar con papel de arroz pero cuando iba a comprarlo era bastante caro, no recuerdo el precio pero era suficiente para asustarme. Así que estuve buscando una receta para hacerlo en casa, me costó investigar pero encontré un vídeo que lo explica de forma muy fácil y clara. Lo complicado es la técnica, que aún tengo que mejorar, pero me siento muy bien con este primer intento.
Original recipe: Making Banh Uot (rice paper)

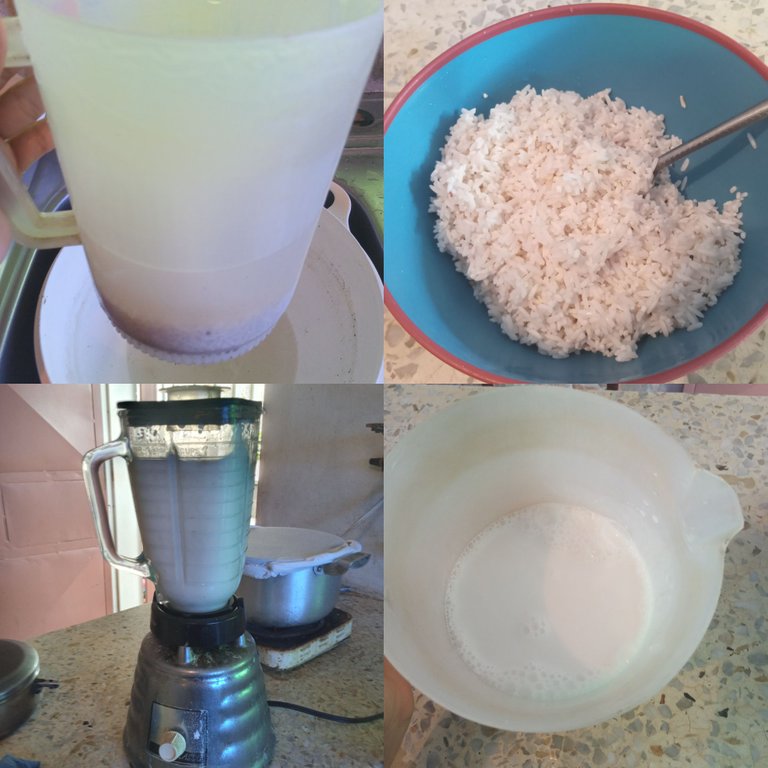
- Step 1: soak a cup of rice in two of water overnight
- Step 2: After that time, rinse three or more times until the water came out clear enough, I did it six times.
- Step 3: blend the rice with two cups of water for 5 to 7 minutes.
Now you have the batter ready.
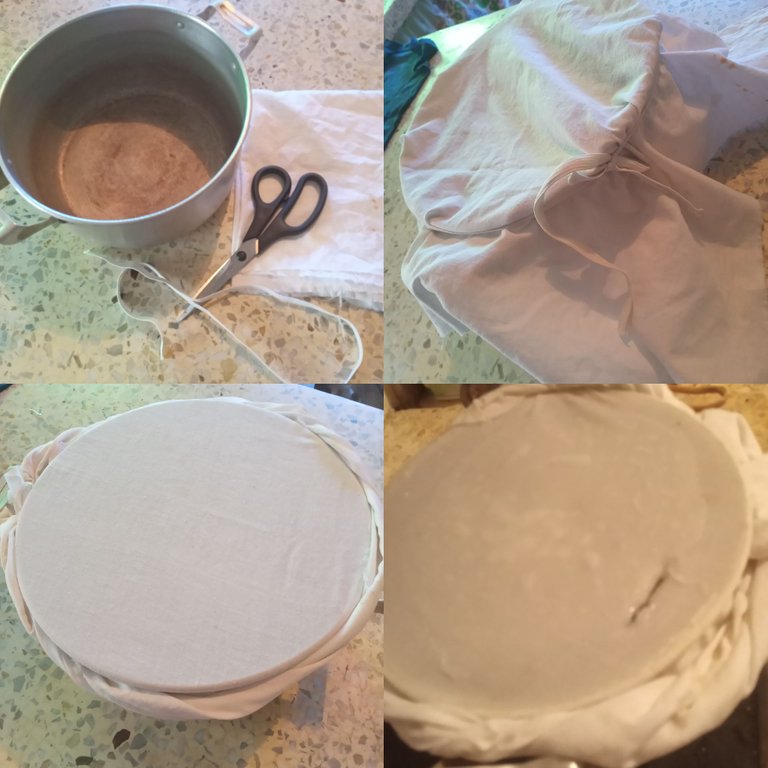
We are going to steam cook, and for that, we need to prepare the pot.
Wrap around the pot, like the skin of a drum, a cloth made of cotton, linen, or muslin, tie it up with an elastic band. like the one in the photo. It has to ve very stiff. Once tied, you can cut the excess cloth or just roll it up as I did. The last step will be to make a small cut so you can pour the water in and out, let the steam escape, and get the stick or the spatula you are going to use wet to facilitate the process.
-Paso 1: remoja una taza de arroz en dos de agua durante la noche
-Paso 2: después de ese tiempo, enjuaga tres o más veces hasta que el agua salga lo suficientemente clara, yo lo hice seis veces.
-Paso 3: licuar el arroz con dos tazas de agua durante 5 a 7 minutos.
Ahora ya tienes la masa lista.
Vamos a cocinar al vapor, y para ello, necesitamos preparar la olla.
Envuelve la olla, como si fuera la piel de un tambor, con un paño de algodón, lino o muselina, y átalo con un elástico como el de la foto. Tiene que quedar muy rígido. Una vez atada, puedes cortar el exceso de tela o simplemente enrollarla como hice yo. El último paso será hacer un corte pequeño para poder meter y sacar el agua, dejar salir el vapor y mojar el palo o la espátula que vayas a utilizar, para facilitar el proceso.


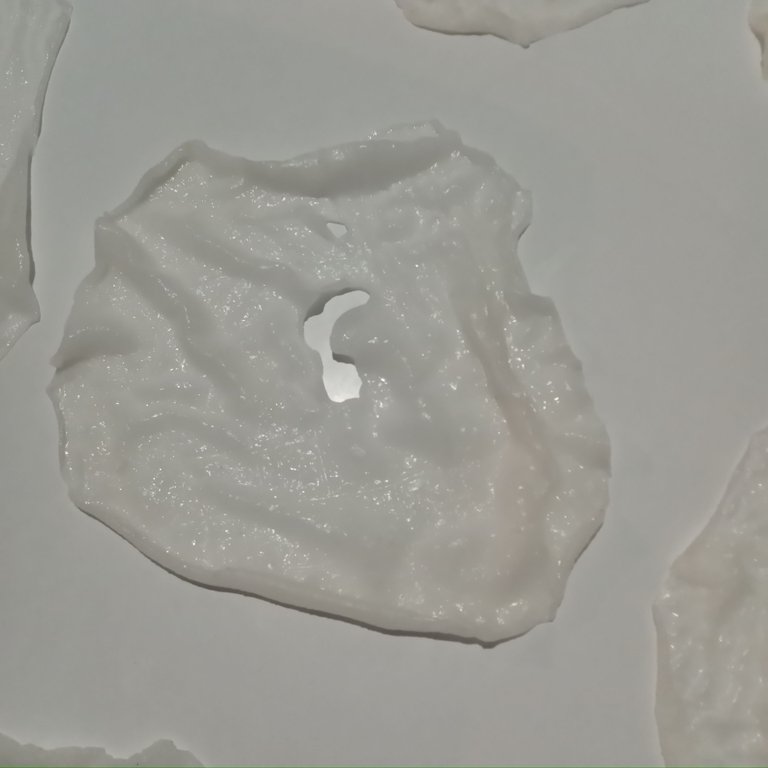
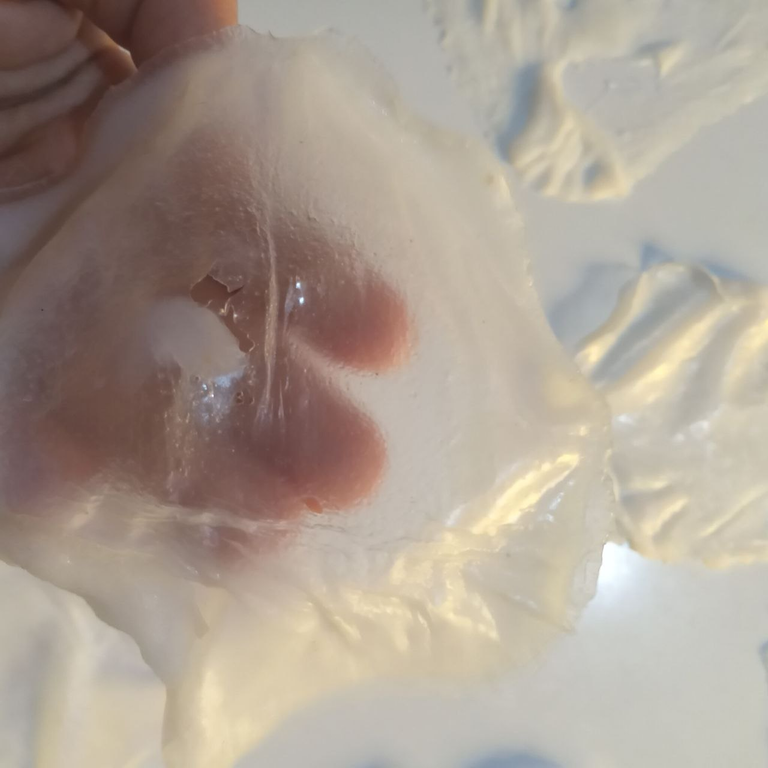
Once is really boiling and you can see the steam coming through the cloth, add a portion of the batter with circular movements. Pour it in the middle and move in circles until it is as big as you want. It has to be like one or two millimeters, very thin.
Stop moving the spoon when it starts to feel sticky, so you don't remove it by accident. Then put the lid and let it cook for one minute, no more, it gets very sticky when is overcooked.
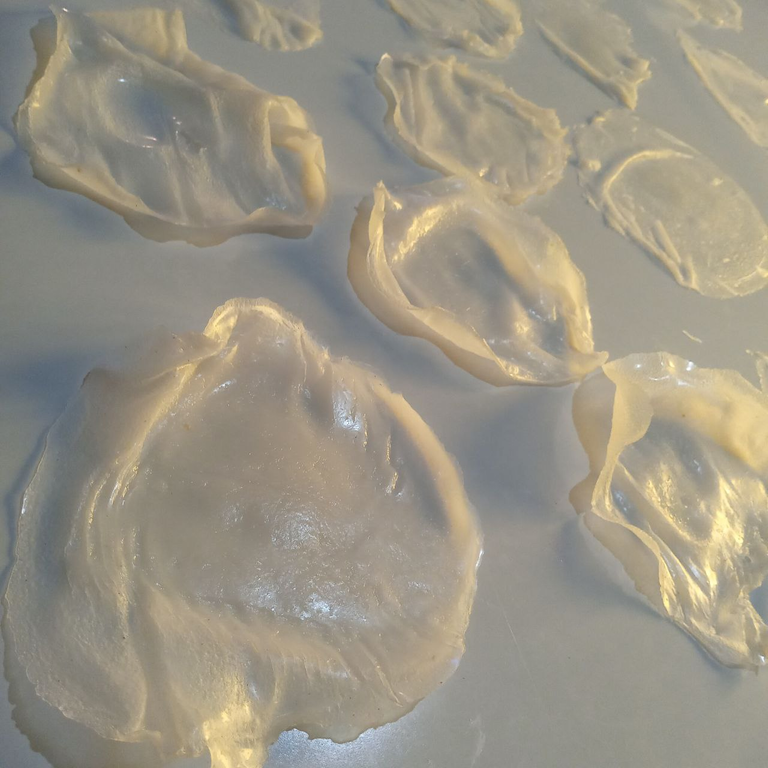
Get your stick or spatula wet, it has to be a long one, not wide, just long. It's very important that it is wet so the rice doesn't stick to it before you can pick it up. Pick it up and place it on the surface you are going to use to let it dry, preferably with a grille that allows air circulation, if you want then dry or use them immediately to make wraps.
Tenemos nuestra masa y nuestra olla listas. Esa es la parte fácil. Ahora, llena la olla con agua, hasta que llegue a una pulgada cerca del borde, para que no se desborde mientras hierve.
Una vez que esté realmente hirviendo y puedas ver el vapor saliendo a través del paño, añade una porción de masa con movimientos circulares. Viértelo en el centro y muévelo en círculos hasta que sea tan grande como quieras. Tiene que ser como uno o dos milímetros, muy fino.
Deja de mover la cuchara cuando empiece a estar pegajosa, para no remover la masa por accidente. Luego pon la tapa y deja que se cocine por un minuto, no más, se pone muy pegajosa cuando se pasa de cocción.
Moja tu palo o espátula, tiene que ser uno largo, no ancho, solo largo. Es muy importante que esté mojada para que el arroz no se pegue a ella antes de poder levantarlo. Recógelo y colócalo en la superficie que vayas a utilizar para que se seque, de preferencia alguna rejilla que permita la circulación de aire, si lo quieres seco, o utilízalos inmediatamente para hacer rollos.
Sound simple enough, but the timing and the technique to do the circular motions really affects whether you can pick up a whole rice paper or just a broken piece, it can also become so sticky you can´t pick it up. Here are some detailes I noted
1: One minute is enough, you can take the lid a little bit before and start separating the edges.
2: Wait until is fully cooked, you'll notice way less resistance.
3: Use a wet stick or spatula so you can slide it under, right in the middle, and pick from there, or from the edges, but make sure it's wet.
4: Don't try to fix holes after the batter changed color, it won't work.
Suena bastante simple, pero el tiempo y la técnica para hacer los movimientos circulares realmente afecta enel resultado también puede llegar a ser tan pegajoso que no puedes recogerlo. Aquí hay algunos detalles que anoté
1: Un minuto es suficiente, puedes levantar la tapa un poco antes y empezar a separar los bordes.
2: Espera a que esté totalmente hecha, notarás menos resistencia.
3: Utiliza un palillo o espátula mojada para poder deslizarla por debajo, justo en el centro, y levantar desde ahí, o desde los bordes, pero asegúrate de que está mojada.
4: No intentes arreglar los agujeros después de que la masa haya cambiado de color, no funcionará.

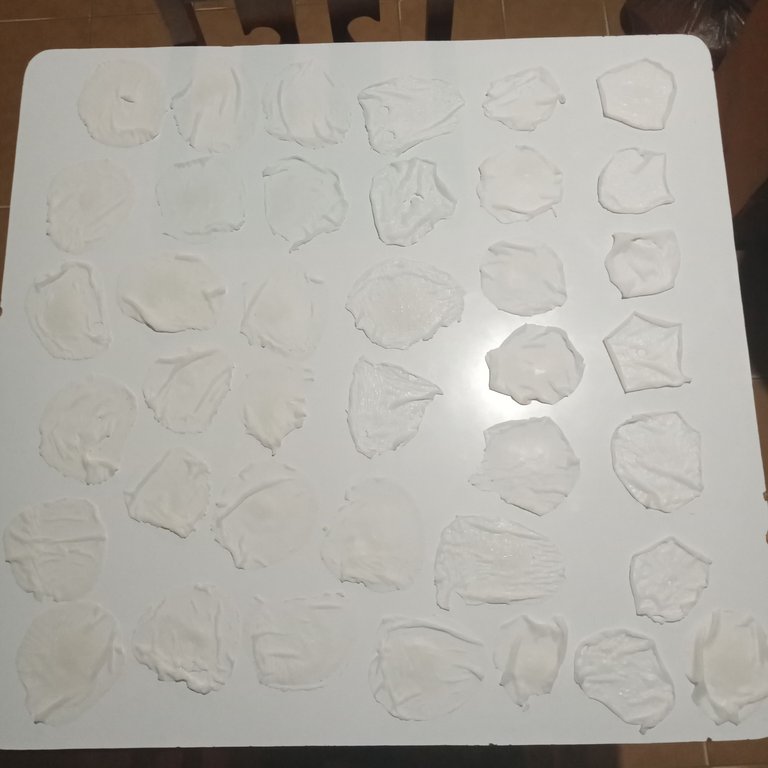
The dry out process is the one I could really practice, but I can say some things based on my results so far:
They harden when they are fully dry, the become translucid.
If the border and the middle have too different thicknesses, they have more probabilities to break.
We have to try to make the borders as thick as the rest so they don't stick too much to the surface.
I used a smooth flat surface, which is acceptable, but it doesn't let them fully dry, they will harden but it takes too long and the pieces are more likely to stick to the surface, so a grid or even a cloth that allows them to breath are better surfaces.
I didn't know if I was going to be able to make the paper, so I didn't create a special place to dry them. I recommend yo either use them right away or have a place prepared before starting.

El proceso de secado es el que realmente pude practicar, pero puedo decir algunas cosas basadas en mis resultados hasta ahora:
Se endurecen cuando están completamente secos, se vuelven translúcidos.
Si el borde y el centro tienen grosores demasiado diferentes, tienen más probabilidades de romperse.
Hay que intentar que los bordes sean tan gruesos como el resto para que no se peguen demasiado a la superficie.
Yo usé una superficie lisa y plana, que es aceptable, pero no deja que se sequen del todo, se endurecerán pero tarda demasiado y las piezas tienen más probabilidades de pegarse a la superficie, por lo que una rejilla o incluso una tela que les permita respirar son mejores superficies.
Yo no sabía si iba a poder hacer el papel, así que no creé un lugar especial para secarlos. Les recomiendo que los utilicen enseguida o que tengan un lugar preparado antes de empezar.

This was my experience making rice paper so far, I'll show you later what can I do with it, if it works as it should, well, I can say the fresh version does work, but the dry ones are not even fully dry yet and it has been 24 hours so, working on that drying area. Some day in the future I'll show you my improvements.
If you can't find it, you can make it!!! Haha, enjoy!!!
Esta ha sido mi experiencia haciendo papel de arroz hasta ahora, ya les enseñaré más adelante lo que puedo hacer con él, si funciona como debería, bueno, puedo decir que la versión fresca sí funciona, pero las secas aún no están del todo secas y ya han pasado 24 horas así que, trabajando en esa zona de secado. Algún día en el futuro les enseñaré mis mejoras.
¡Si no lo encuentras, lo puedes hacer! ¡Jaja, que lo disfruten!
UPDATE
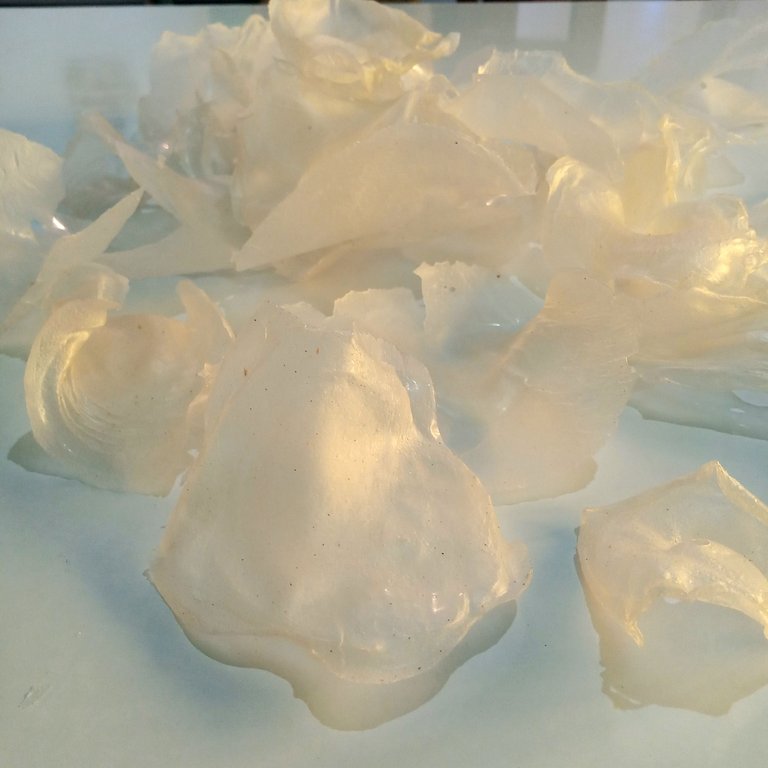
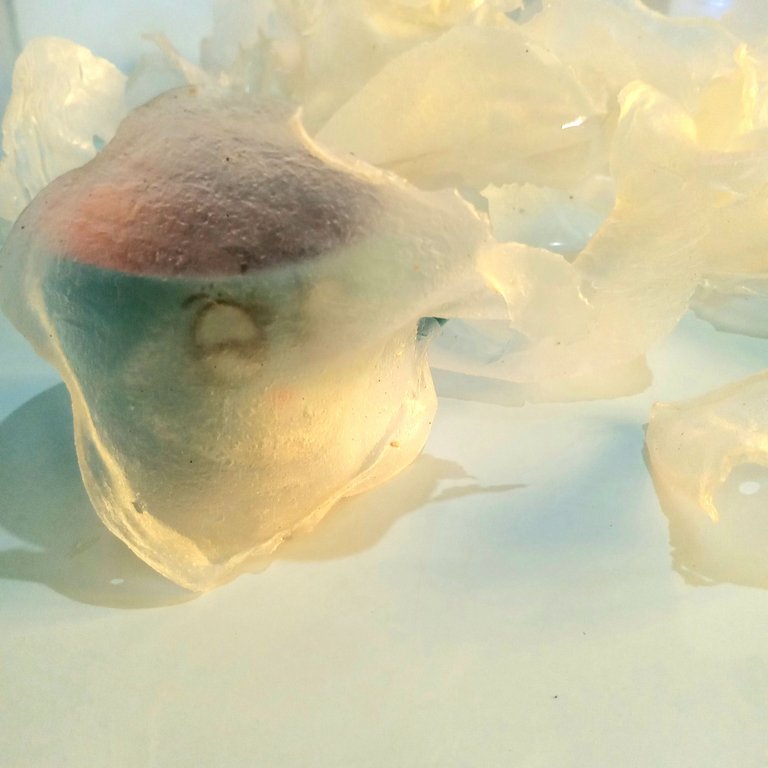
This is how they look fully dry. Because of the non breathable surface, they didn't dry uniformly, so they make this funny shapes. If you let them dry, they'll unstuck themselves, but they'll break themselves too in the process.
Así es como se ven completamente secos. Debido a la superficie no transpirable, no se secaron de manera uniforme, por lo que tienen formas divertidas. Si los dejas secar, se despegarán solos, pero también se romperán en el proceso.
Espero les haya gustado, hasta la próxima publicación
Hope you liked it, until the next time

Designed by @jes.seth
 |  |  |  |
|---|
Rice paper is really expensive and hard to find in my city but now i understand because the process doesnt looks easy at all. I think that i will failed dozen times before j can succeed while i try them
Oh, I did, here are all the completely unsuccessful
And still drying are like five successes and a lot of almost there hahaha but I felt really well too at least getting to this point in my first try. I'll update the end of the post when all the papers are finally dry.
Wow es muy delicado el proceso 🤯
Pero creo que con la práctica se puede lograr hacer muy bien 👍 te felicito
Gracias! Sí es un proceso largo. Cuando una receta tiene ingredientes muy simples, la técnica suele ser decisiva, y es difícil con algo que nunca he visto hacer en persona, fue todo un día de intento y error, pero me gustó el resultado, ahora veré qué puedo hacer con ellos jaja
https://twitter.com/tsunsica_ga/status/1483583816925130753
The rewards earned on this comment will go directly to the person sharing the post on Twitter as long as they are registered with @poshtoken. Sign up at https://hiveposh.com.
La práctica hace al maestro, poco a poco iras perfeccionando la técnica. Para ser la primera vez considero que te salieron bien. Lo importante es que te atreviste a prepararlos y estoy seguro de que pronto lograras hacer unos excelentes papeles de arroz. Te felicito
Gracias @tsunsica por participar en la actividad de PROMUEVE TU PUBLICACION