Starting Strong: Success in HIVE Begins Here!

Click here to English Version.

SUA JORNADA NA HIVE COMEÇA AQUI
Se tem algo que eu aprendi bastante nos últimos 1 ano e 8 meses foi sobre a Hive e hoje irei me aprofundar para compartilhar o máximo de conhecimento que possuo sobre essa blockchain com vocês. No início pode parecer muita informação mas farei o possível para torná-la mais facilmente compreensível para pessoas iniciantes fazendo comparações bobas mas que vão auxiliar muito na assimilação. Se surgirem quaisquer dúvidas, sinta-se à vontade para comentar que eu ficarei feliz em responder. Vamos aprender sobre como iniciar bem na Hive!
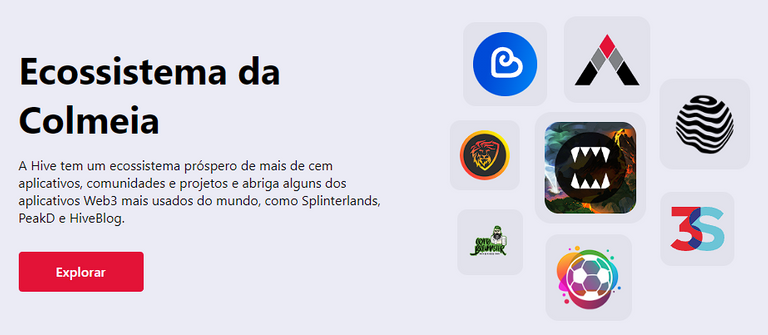
Primeiramente, o que é a Hive? Ela é uma Blockchain que se apoia em uma criptomoeda para criar um ecossistema web 3, ou seja, utiliza toda a estrutura tecnológica das criptomoedas para formar um ambiente descentralizado composto por vários usuários com interesses em comum que podem construir nesse ambiente para torná-lo cada vez melhor. Qualquer pessoa pode desenvolver na Hive e criar aplicativos, projetos, comunidades e qualquer outra coisa que faça sentido nesse ambiente e se o seu projeto tiver qualidade ele será apoiado pelas outras pessoas. O principal fato que nós precisamos entender que diferencia a Hive da web 2 é que não temos uma empresa centralizada que é dona de tudo e a única responsável por fazer melhorias, definir regras e etc. Nesse espaço todos nós fazemos parte da Hive e temos o papel de zelar e aprimorar esse ecossistema todos os dias.
Sabendo disso, se você é alguém que deseja se tornar um criador de conteúdo e está disposto à participar desse ecossistema e dar seu máximo para contribuir com ele, continue lendo esse post pois agora irei falar quais devem ser seus primeiros passos para iniciar bem na Hive.
CRIANDO SUA CONTA
Seu primeiro passo será criar uma conta e sua carteira. Para aqueles que não sabem, uma carteira representa sua posse sobre a conta e os ativos que você possui, aqui na Hive ao criar sua conta serão geradas 4 chaves que você precisará guardar com muito cuidado pois são elas que darão acesso aos seus ativos e à sua conta.
É possível criar a conta através de vários front ends e tenho certeza que essa será uma dúvida de muitos então irei explicar: A Hive é uma blockchain pública, então qualquer pessoa pode criar um site capaz de acessar as informações dessa blockchain e disponibilizá-lo ao público, é isso o que chamamos de front end. Alguns exemplos são:
- Leofinance
- Peakd
- Ecency
- Hive.blog
- Neoxian City
- Splintertalk
- E muitos outros...
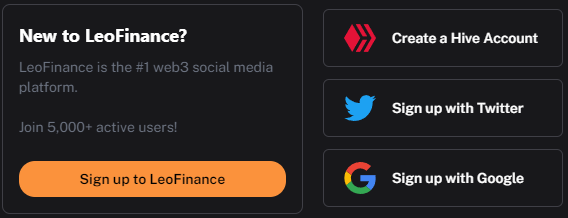
Portanto você provavelmente irá se deparar com pessoas te enviando links diferentes para os posts delas, mas saiba que apesar do site ser diferente todos eles são da Hive. A maioria deles permitirá que você crie uma conta então escolha o que mais gostar para fazer isso, eu utilizarei como exemplo a Leofinance. Ao abrir o site na aba Home haverá um botão chamado Sign up to Leofinance, ao clicar você selecionará a opção Create a Hive Account e depois irá ler as instruções (isso é muito importante, esses dois minutos de leitura poderão te salvar de problemas permanentes no futuro).
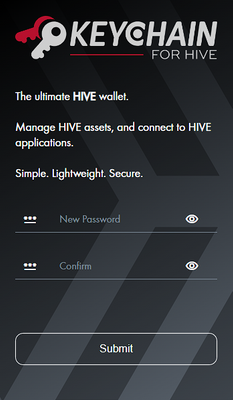
Depois de estar totalmente ciente da importância do seu Username e das chaves privadas você irá preencher as informações, baixar suas chaves e deixá-las anotadas em um lugar seguro (de preferência em um caderno para evitar deixar as senhas online). Agora o próximo passo será baixar a Hive Keychain que é uma extensão usada no navegador para facilitar o controle das suas chaves privadas. Depois que ela for instalada no navegador de sua preferência você deve abrir a Hive Keychain e criar uma senha. Essa senha é apenas entrar na Keychain e poderá ser feita uma senha diferente para cada navegador e computador que você acessar (também é possível usar a mesma senha se você quiser), mas lembre-se: ter acesso à Hive Keychain significa ter acesso às suas chaves privadas então não conecte sua carteira em computadores de fácil acesso e não compartilhe a senha com ninguém!
Após criar a senha você selecionará a opção Use keys/pwd e irá preencher as duas informações username e private key. Cole sua Owner key e faça o login. Antes de continuar, vamos repassar a função de cada uma das 4 chaves:
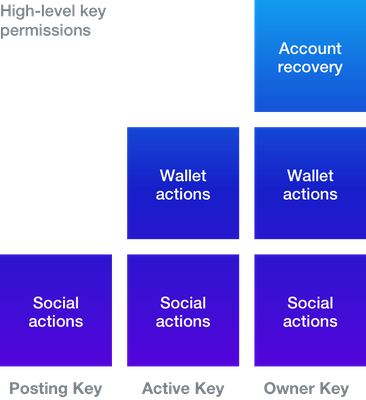
- Owner key: Ela é a senha mestra capaz de gerar todas as outras chaves. Utilize-a APENAS na Hive Keychain e depois mantenha ela inacessível de forma online.
- Active key: Qualquer transação financeira na blockchain utiliza essa chave, então tendo ela é possível mover fundos, comprar ativos e outras coisas nos aplicativos da Hive.
- Posting key: Com essa chave você será capaz de fazer qualquer operação básica na Hive que não envolva seu dinheiro, isso inclui criar posts, fazer comentários, iniciar partidas no Splinterlands e etc.
- Memo key: Essa chave é a menos utilizada pois serve apenas para enviar mensagens criptografadas entre dois usuários (por um custo de 0,001 Hive).
Entendendo a função de cada chave, vamos continuar com o passo a passo. Depois de preencher as duas informações você deixará todas as keys marcadas e vai salvar. Pronto, sua carteira estará finalizada e com todas as chaves criadas. Para vê-las basta clicar no Menu (3 traços horizontais), Account e Manage Accounts. As chaves que você deve manter em segredo são as Chaves Privadas (existem as públicas mas isso não é relevante por enquanto).
FAÇA SEU POST DE APRESENTAÇÃO
Após criar sua conta e configurá-la de forma segura, chegou a hora de se apresentar na Hive! Esta é uma etapa não obrigatória mas deixe-me explicar o motivo dela existir. Estamos em um ambiente onde as pessoas são capazes de monetizar seus conteúdos de maneira muito mais fácil, isso faz com que algumas pessoas tentem abusar do sistema e criem múltiplas contas. Uma das formas de barrar isso são os incentivos de que os novos usuários iniciem sua conta fazendo um Post de apresentação contando sobre quem você é, como conheceu a Hive e seus planos. É muito positivo se você puder compartilhar ao menos uma foto sua conosco mas não se sinta pressionado.
Não existe uma única forma de fazer um post de apresentação mas caso você queira começar bem, eu recomendo que você acesse a pesquisa da tag introduceyourself e leia as postagens que receberam os maiores votos (essa não é uma métrica absoluta mas se alguém foi bem recompensado provavelmente significa que está fazendo um bom trabalho), então aprenda como eles fizeram seus posts, as tags utilizadas e baseando-se nisso você poderá iniciar a sua própria apresentação.
Além de observar essas postagens para aprender, lembre-se de utilizar a tag #introduceyourself para que seu post seja visualizado por muitas pessoas e não economize tempo e esforço para fazer sua apresentação, essa é a sua entrada para a Hive e será possível ganhar muitos seguidores e votos altos logo na primeira postagem.
Outro ponto importante é escolher em qual comunidade postar, isso geralmente dependerá da sua nacionalidade (muitos países possuem comunidade aqui), alguns exemplos são a Aliento que é focada no público que fala Espanhol. Nós brasileiros temos a comunidade HiveBR e estaremos sempre dispostos à receber qualquer pessoa interessada na Hive de braços abertos, então se você cair de paraquedas nessa postagem e precisar de ajuda com qualquer coisa, sinta-se convidado à entrar no nosso Discord e procurar por mim ou qualquer outro usuário.
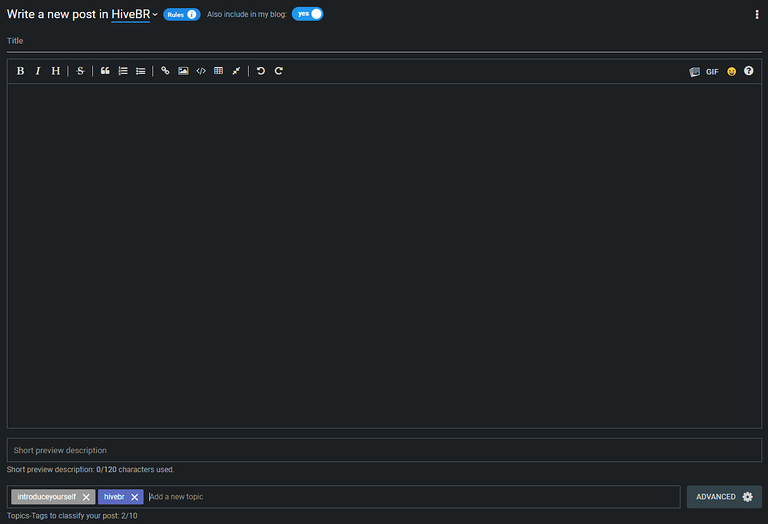
Após decidir em qual comunidade postar é preciso que você siga o perfil dela. Feito isso, basta clicar no botão Write a Post (isso pode variar de acordo com o frontend que você está utilizando) e selecionar a comunidade. Pronto, agora você estará de frente para um quadro em branco esperando que você crie uma obra de arte. Deixe sua criatividade fluir e faça a melhor introdução possível, não esqueça de colocar muitas imagens e as tags que mais se encaixassem no seu conteúdo.
Eu sei que no início tudo parecerá muito difícil e complexo mas eu peço que você tenha paciência e vá aprendendo tudo com calma. Em poucas semanas você já estará habituado com tudo isso e perceberá que valerá cada minuto gasto aqui na Hive.
SE JUNTE A UMA COMUNIDADE
Nesse ecossistema você encontrará comunidades dispostas à contribuir com o crescimento da rede, conhecerá muitas pessoas e com certeza fará muitos amigos nessa jornada. Com o tempo você descobrirá qual o tipo de conteúdo você mais gosta de fazer, seja criar desenhos digitais, postar fotos de viagens, escrever sobre jogos, blogs pessoais ou qualquer outro tipo de assunto provavelmente existirá uma comunidade focada no seu nicho. E se não existir? CRIE UMA! Essa é a mágica do mundo Web 3!
Outros detalhes importantes que você deve saber desde o início:
No começo você precisará de Resource Credits (RC) para criar conteúdos, considere isso como uma "energia" e talvez seja preciso pedir que alguma pessoa faça uma delegação para você (que seria semelhante à um empréstimo de energia 😆). Possivelmente após receber as recompensas das suas primeiras postagens esse problema já seja solucionado e você nunca mais precisará se preocupar com o RC.
É basicamente isso o que eu tinha para falar sobre esse primeiro envolvimento do usuário com a Hive. O processo apesar de parecer complexo na verdade é fácil, basta seguir esse passo a passo com calma e você conseguirá configurar sua conta, a carteira e aprender os detalhes para fazer seu post de introdução, e dai pra frente basta escolher que tipo de conteúdo você quer publicar e pronto, você será um membro ativo da Hive!

Caso tenha alguma dúvida você pode me procurar no Discord ou fazer um comentário nesse post. Muito obrigado a todos que leram até aqui, espero que tenham gostado. Se vocês curtirem meus conteúdos, peço que deixem o seu voto na postagem e sigam o meu perfil para poderem acompanhar as futuras postagens.


YOUR JOURNEY AT HIVE BEGINS HERE
If there is something I have learned a lot in the last 1 year and 8 months it's about Hive and today I will dig deeper to share as much knowledge I have about this blockchain with you. At first it may seem like a lot of information but I will do my best to make it more easily understandable for beginners by making silly comparisons but they will help a lot in assimilation. If any questions arise, feel free to comment and I will be happy to answer them. Let's learn about how to get a good start at Hive!
First, what is Hive? It is a Blockchain that relies on a cryptocurrency to create a web 3 ecosystem, i.e., it uses all the technological structure of cryptocurrencies to form a decentralized environment composed of several users with common interests who can build on this environment to make it better and better. Anyone can develop on Hive and create applications, projects, communities and anything else that makes sense in this environment and if your project has quality it will be supported by others. The main fact we need to understand that differentiates Hive from web 2 is that we don't have a centralized company that owns everything and is solely responsible for making improvements, defining rules and so on. In this space we are all part of Hive and have the role to look after and improve this ecosystem every day.
Knowing this, if you are someone who wants to become a content creator and are willing to participate in this ecosystem and do your utmost to contribute to it, keep reading this post as I will now tell you what your first steps should be to get started well at Hive.
CREATING YOUR ACCOUNT
Your first step will be to create an account and your wallet. For those who do not know, a wallet represents your account ownership and the assets you have, here at Hive when you create your account you will generate 4 keys that you will need to guard very carefully as they are what will give you access to your assets and your account.
It is possible to create the account through several front ends and I am sure this will be a question from many so I will explain: The Hive is a public blockchain, so anyone can create a website that can access the information on this blockchain and make it available to the public, this is what we call a front end. Some examples are:
- Leofinance
- Peakd
- Ecency
- Hive.blog
- Neoxian City
- Splintertalk
- And many others...
So you will probably run into people sending you different links to their posts, but know that even though the site is different they are all from Hive. Most of them will allow you to create an account so choose the one you like best to do that, I will use as an example Leofinance. When you open the site on the Home tab there will be a button called Sign up to Leofinance, when you click it you will select the Create a Hive Account option and then read the instructions (this is very important, those two minutes of reading can save you from permanent problems in the future).
Once you are fully aware of the importance of your Username and private keys you will fill in the information, download your keys and leave them written down in a safe place (preferably in a notebook to avoid leaving passwords online). Now the next step is to download the Hive Keychain which is a browser extension to make it easier to control your private keys. After it is installed in the browser of your choice you should open Hive Keychain and create a password. This password is just to enter the Keychain and you can make a different password for each browser and computer you access (you can also use the same password if you want), but remember: having access to Hive Keychain means having access to your private keys so don't connect your wallet to easily accessible computers and don't share the password with anyone!
After creating the password you will select the Use keys/pwd option and fill in the two pieces of information username and private key. Paste your Owner key and login. Before continuing, let's go over the function of each of the 4 keys:
- Owner key: This is the master password that can generate all the other keys. Use it ONLY in the Hive Keychain and then keep it inaccessible online.
- Active key: Any financial transaction on the blockchain uses this key, so with it you can move funds, buy assets and other things in Hive applications.
- Posting key: With this key you will be able to do any basic operation on Hive that does not involve your money, this includes creating posts, making comments, starting matches in Splinterlands and so on.
- Memo key: This key is the least used as it is only for sending encrypted messages between two users (for a cost of 0.001 Hive).
Understanding the function of each key, let's continue with the step by step. After filling in the two pieces of information you will leave all the keys checked and you will save. There you go, your portfolio is finished and all the keys have been created. To see them just click on the Menu (3 horizontal dashes), Account and Manage Accounts. The keys you should keep secret are the Private Keys (there are public ones but that is not relevant for now).
MADE YOUR PRESENTATION POST
After creating your account and setting it up securely, it's time to introduce yourself on Hive! This is a non-mandatory step but let me explain why it exists. We are in an environment where people are able to monetize their content much easier, this makes some people try to abuse the system and create multiple accounts. One of the ways to stop this is to encourage new users to start their account by making an Introduction post telling them about who you are, how you found Hive and your plans. It is very positive if you can share at least one picture of yourself with us but don't feel pressured.
There is no single way to make a presentation post but if you want to get a good start, I recommend you go to the search for the tag introduceyourself and read the posts that received the most votes (this is not an absolute metric but if someone was rewarded well it probably means they are doing a good job), then learn how they made their posts, the tags they used and based on that you can start your own presentation.
Besides watching these posts to learn, remember to use the #introduceyourself tag so that your post will be viewed by many people and don't save time and effort to make your presentation, this is your entrance to Hive and it will be possible to gain many followers and high votes in the very first post.
Another important point is to choose which community to post in, this usually depends on your nationality (many countries have communities here), some examples are the Aliento which is focused on the Spanish speaking public. We Brazilians have the HiveBR community and will always be willing to welcome anyone interested in Hive with open arms, so if you fall for this post and need help with anything, feel invited to join our Discord and look for me or any other user.
Once you have decided which community to post in you need to follow their profile. Once you have done this, simply click the Write a Post button (this may vary depending on the frontend you are using) and select the community. There you go, now you are facing a blank slate waiting for you to create a work of art. Let your creativity flow and make the best introduction possible, don't forget to put lots of images and the tags that best fit your content.
I know that in the beginning everything will seem very difficult and complex but I urge you to be patient and take your time learning everything. In a few weeks you will be used to all this and will realize that it will be worth every minute spent here at Hive.
JOINT A COMMUNITY
In this ecosystem you will find communities willing to contribute to the growth of the network, you will meet many people and certainly make many friends on this journey. With time you will find out what kind of content you like to do the most, whether you create digital drawings, post travel photos, write about games, personal blogs or any other kind of subject there will probably be a community focused on your niche. And if not? CREATE ONE! That's the magic of the Web 3 world!
Other important details you should know from the start:
In the beginning you will need Resource Credits (RC) to create content, consider this as an "energy" and you may need to ask someone to make a delegation for you (which would be similar to a energy loan 😆). Possibly after receiving the rewards from your first few posts this problem will already be solved and you will never have to worry about RC again.
That's basically what I had to say about this first user involvement with Hive. The process although it seems complex is actually easy, just follow this step by step calmly and you will be able to set up your account, wallet and learn the details to make your introductory post, and from there on just choose what kind of content you want to publish and voila, you will be an active member of Hive!
If you have any questions you can reach me on Discord or comment on this post. Thank you so much to everyone who read this far, I hope you enjoyed it. If you like my content, I ask you to send your vote on the post and follow my profile so you can read future posts.
Obrigado por promover a comunidade Hive-BR em suas postagens.
Vamos seguir fortalecendo a Hive
Wonderfully written. I think it will really be beneficial for the newcomers to this blockchain.
!ALIVE
@underlock! You Are Alive so I just staked 0.1 $ALIVE to your account on behalf of @hafiz34. (5/10)
The tip has been paid for by the We Are Alive Tribe through the earnings on @alive.chat, feel free to swing by our daily chat any time you want.

I hope this post can help many people!
https://leofinance.io/threads/hafiz34/re-leothreads-il9ynrmq
The rewards earned on this comment will go directly to the people ( hafiz34 ) sharing the post on LeoThreads,LikeTu,dBuzz.
Your post was manually curated by @KaibaGT.
Delegate your HP to the hive-br.voter account and earn Hive daily!
🔹 Follow our Curation Trail and don't miss voting! 🔹
Ótimo conteúdo escrito, vale lembrar que para quem se registra como opção através de #LeoFinance tem que ignorar por enquanto a opção Twitter, pois você não recebe suas chaves privadas além de uma conta "Lite" para utilizar na plataforma, isso é, se você perder o acesso ou banido do Twitter, sua conta em LeoFinance também estará sendo perdida. Comentei sobre isso no servidor oficial deles e me disseram que futuramente tera uma opção de resgatar as chaves privadas através dessa opção.
Essa é uma adição muito importante, logar pelo Twitter é só uma alternativa facilitada mas que não nos dá acesso à todos os benefícios que existem ao postar na Hive, por isso recomendei que todos criem suas contas para viverem esse ambiente da melhor forma possível!