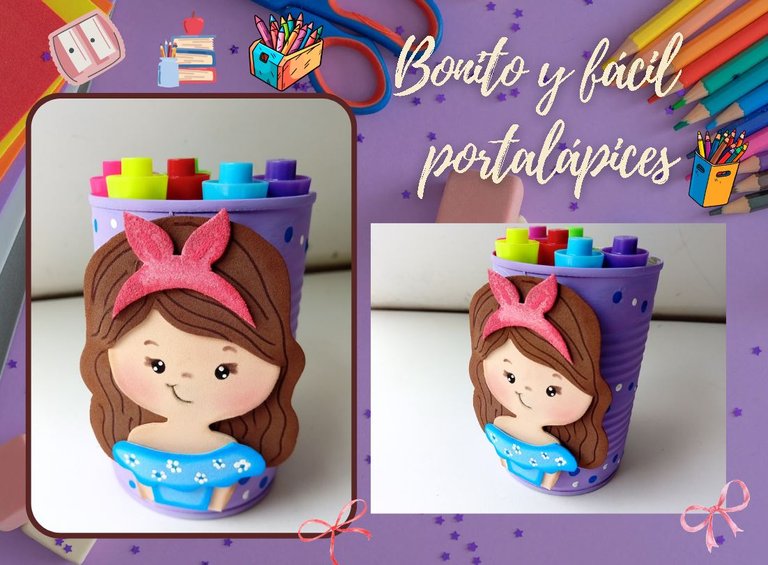
[Esp/Eng] ✨Bonito portalápices // Nice pencil holder✨
✨✏️¡Hola amigos amantes de la creatividad! Espero que hayan pasado un muy buen comienzo de semana.✏️✨
🔸Sin más que añadir, a continuación los dejo con el paso a paso:
✨✏️¡Hello friends who love creativity! I hope you had a very good start to the week.✏️✨
Good afternoon friends. I hope you are having a great week. Today I share with you the step by step to make a beautiful pencil holder. For a while now I have wanted to make a nice, but simple pencil holder to share with you, but I couldn't carry out the idea, since I hadn't opened the can that I will be using in this tutorial, haha. I had many ideas with this can, another of them was to cover it with fabric, but just before starting, I changed my plans and decided to paint it. Also, I wanted to make a cute figure of a girl or girl in foam to obtain a fairly simple and easy result, but tender and very pretty.
🔸Without more to add, then I leave you with the step by step:
♥️ESPERO QUE TE GUSTE,
¡Empecemos!
♥️I HOPE YOU LIKE IT,
Let's start!

✂️ MATERIALES | ✂️ MATERIALS
- Una lata.
- Pinturas.
- Foami azul.
- Foami piel.
- Foami marrón
- Foami escarchado rosa.
- Marcadores.
- Pegamento.
- Hoja.
- Lápiz.
- A tin.
- Paintings.
- Blue foam.
- Leather foam.
- Brown foam
- Pink frosty foam.
- Markers.
- Glue.
- Sheet.
- Pencil.
✏️ PROCEDIMIENTO | ✏️ PROCESS
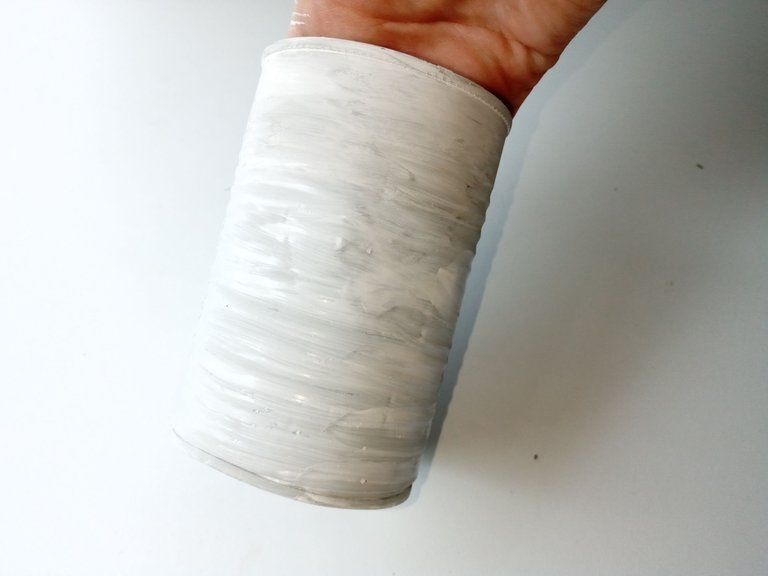
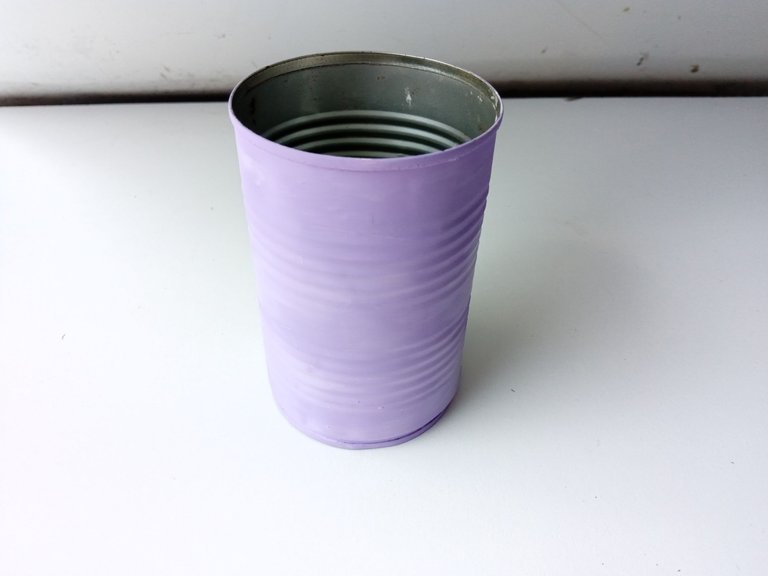
- PASO 1:
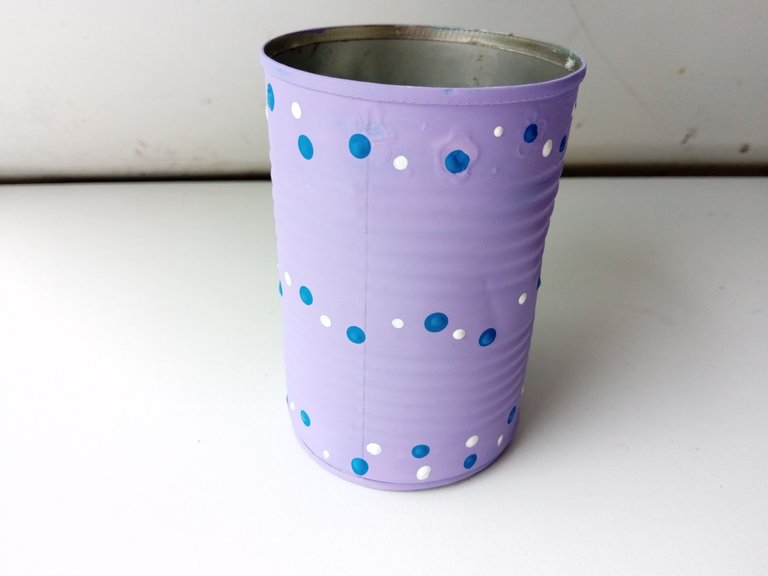
Lo primero que hice fue pintar la primera capa de la lata con pintura blanca, para que al momento de agregar el color protagonista, este tenga un mejor tono o su tono original. Al estar seco, pase la primera capa de pintura, en mi caso utilicé un lila y en caso de que necesite otra capa, pues le pasamos otra capa.
- STEP 1:
The first thing I did was paint the first layer of the can with white paint, so that when I added the main color, it would have a better tone or its original tone. When it is dry, apply the first layer of paint, in my case I used a lilac and in case it needs another layer, we apply another layer.
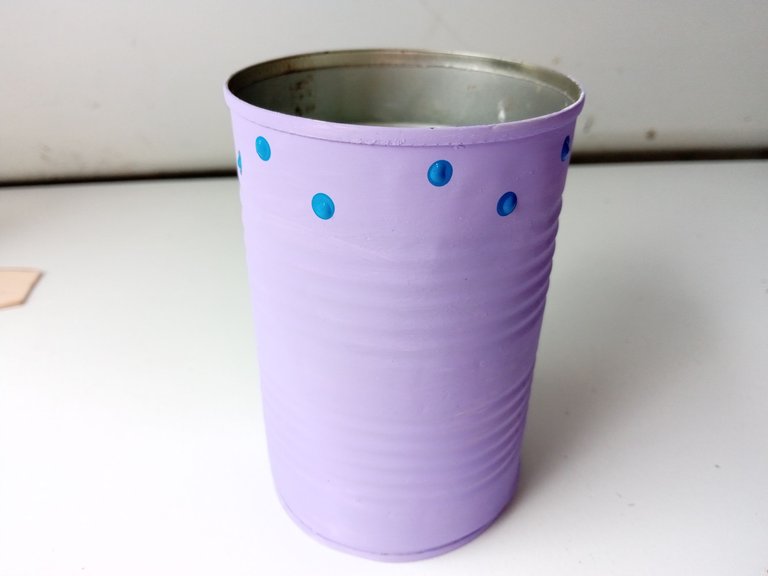
- PASO 2:
Al estar totalmente seco, le quise pintar un diseño con tonos azules y blancos, es por eso que, a las partes lisas de la lata, le pinté puntos azules y luego, puntos un poco más pequeños en blanco. A principio iba a pintar flores en estas partes, pero no me gusto el resultado.
- STEP 2:
Once it was completely dry, I wanted to paint a design with blue and white tones, that is why, on the smooth parts of the can, I painted blue dots and then slightly smaller white dots. At first I was going to paint flowers in these parts, but I didn't like the result.
- PASO 3:
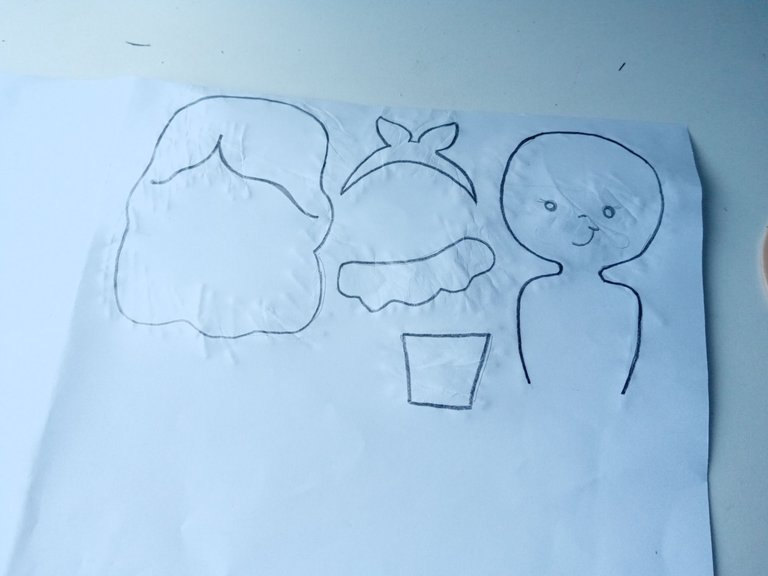
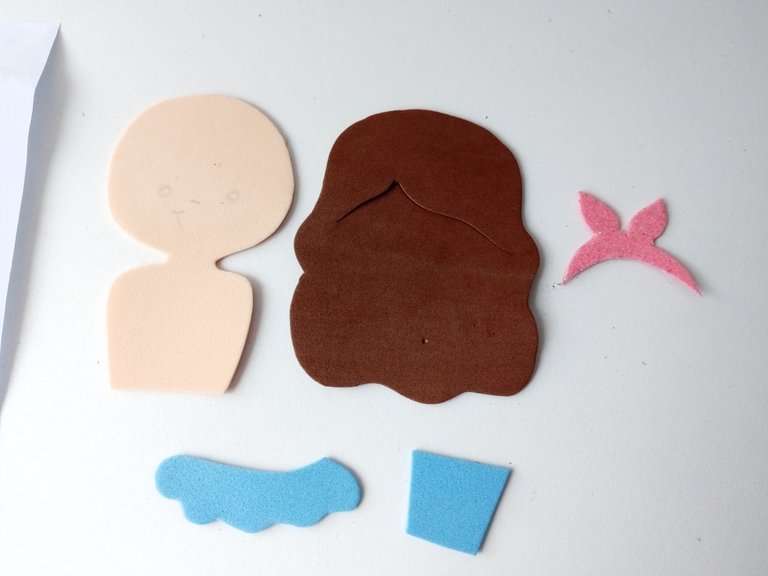
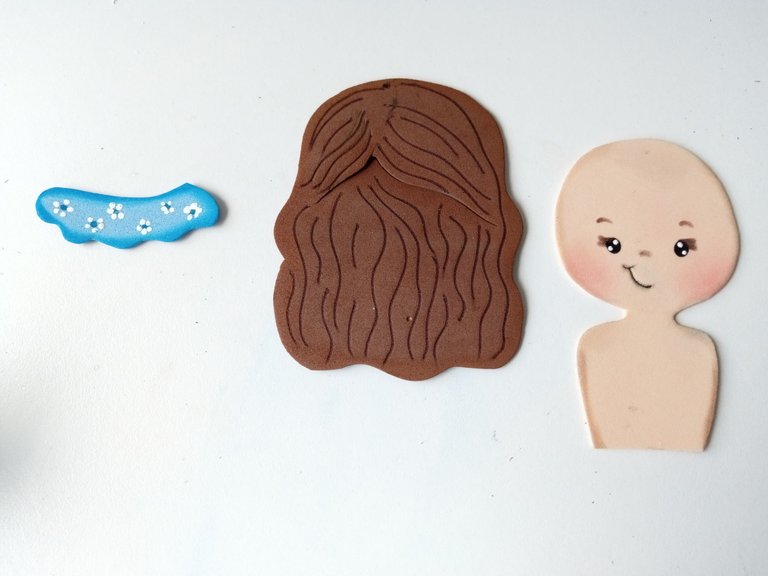
Mientras la lata se secaba, comencé a dibujar el patrón y luego lo transferí a los colores correspondientes de foami, los cuales fueron los siguientes: el cuerpo en color piel, el cabello en marrón, la vestimenta en azul claro y el lazo en rosado escarchado. Luego recorté todas las piezas.
- STEP 3:
While the can was drying, I began to draw the pattern and then transferred it to the corresponding foam colors, which were as follows: the body in nude, the hair in brown, the clothing in light blue, and the bow in frosty pink. . Then I cut out all the pieces.
- PASO 4:
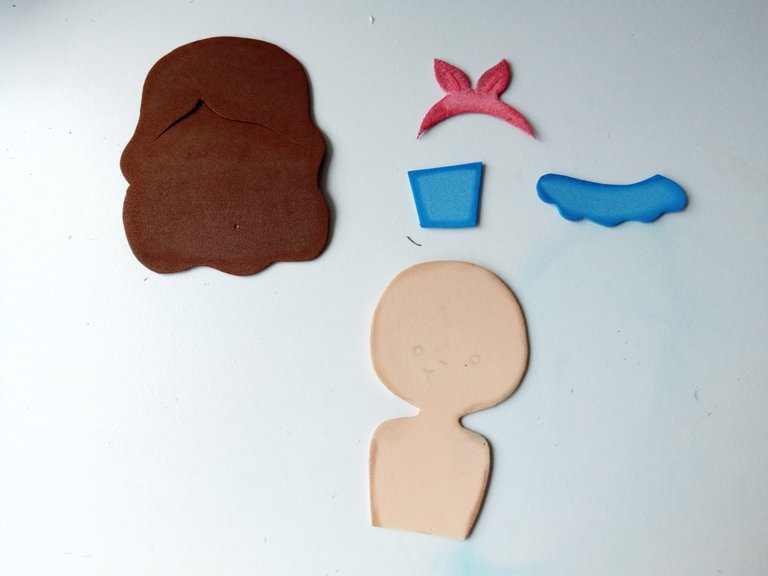
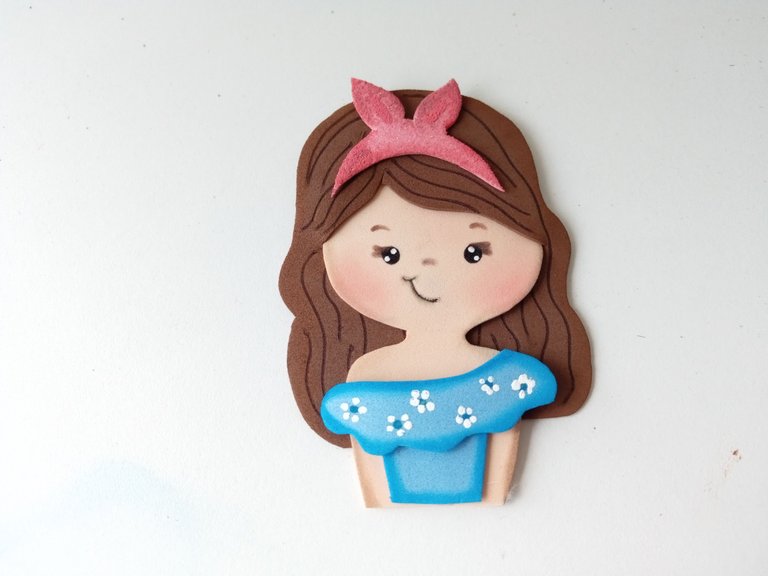
Al tener todas las piezas listas, tomé un tono de pintura más oscuro que el color de cada pieza y con un pañito, froté por los bordes. Luego, di detalles más específicos al cabello, dibujé el rostro con marcador negro, marrón y para las mejillas, un poco de pintura rosada. Por otra parte, le quise dar un diseño diferente a la vestimenta, así que a la parte de arriba le pinté algunas flores.
- STEP 4:
Once I had all the pieces ready, I took a tone of paint darker than the color of each piece and with a cloth, I rubbed the edges. Then, I gave more specific details to the hair, I drew the face with black marker, brown and for the cheeks, a little pink paint. On the other hand, I wanted to give the dress a different design, so I painted some flowers on the top.
- PASO 5:
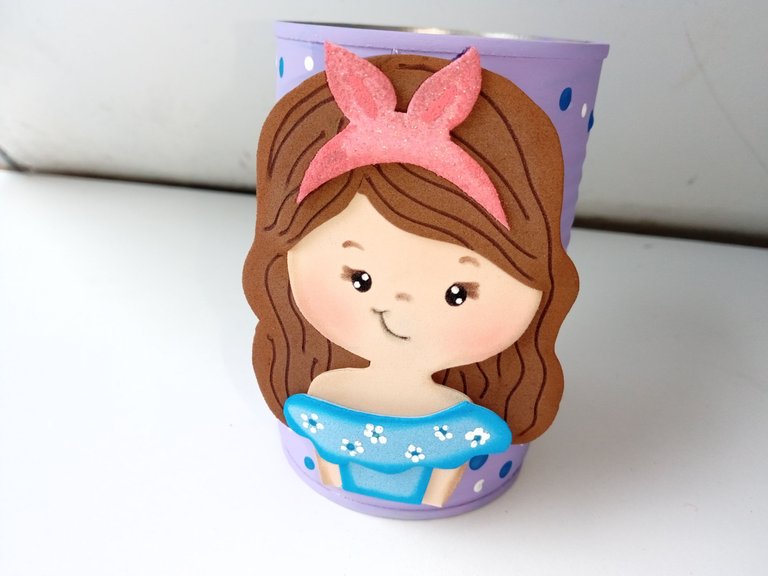
Finalmente, comencé a armar la figura de la siguiente manera: primero, uní la cabeza con el cabello, al cual le hice un corte para insertar la cabeza y luego, pegué la vestimenta y el lazo en medio de la parte superior de su cabello. Una vez lista la figura, pegué en medio del recipiente.
- STEP 5:
Finally, I began to assemble the figure as follows: first, I joined the head with the hair, which I made a cut to insert the head and then, I glued the clothing and the bow in the middle of the top part of her hair. Once the figure was ready, I glued it in the middle of the container.
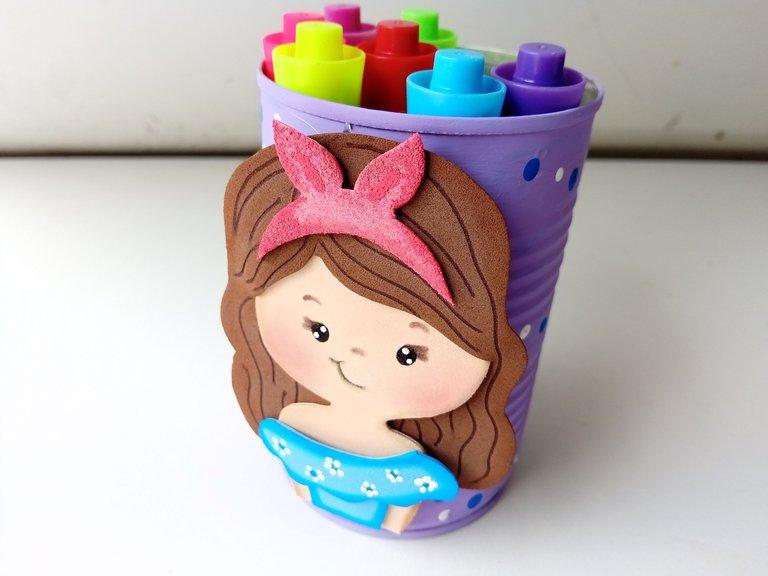
✨✏️¡And ready!✏️✨ This way you can make a beautiful, easy and simple pencil holder for your princess or for yourself, because you can do it with the theme of your choice. I also think it's a nice gift, you can even turn it into a candy bowl, right? Ha ha. I hope you liked this idea and are encouraged to make it.
❤️Until the next post.
✨RESULTADO: | ✨RESULT:


Todas las fotografías son de mi propiedad.
Separador y Fotos editadas en Canva
All photographs are my property.
Photos edited in Canva
Ami que belleza de portalápiz la que has hecho, me enamoré perdidamente 😍 Esa muñequita te quedó preciosa y todos esos detalles le quedan perfectos, que bella creación ami linda 😊
Ay! Gracias mi Mary bella! Estos comentarios son los que animan a uno 💞
Quise hacer algo facilito, pero que tuviera sus detallitos 🤭💕
Te pasaste con esta belleza de trabajo amiga, es absolutamente linda. Amé la expresión de la carita.
Gracias por compartir 😊
Gracias mi Rosa bella! Poco a poco me gusta más es resultado de los rostros que hago 🤭
Gracias Ami bella 💕
Ame el detalle en el cabello amiga, a veces lo intento pero no me sale tan bello como este que hiciste.
Ame los colores, gracias por compartir❤️✨
Ay Ami, me pasa lo mismo 🤭 me parece que no me queda tan bonito y luego que pego todo, me gusta el resultado final 🤭😅
Gracias amiga bella💕
¡Felicidades! Esta publicación obtuvo upvote y fue compartido por @la-colmena, un proyecto de Curación Manual para la comunidad hispana de Hive que cuenta con el respaldo de @curie.
Si te gusta el trabajo que hacemos, te invitamos a darle tu voto a este comentario y a votar como testigo por La Colmena.
Si quieres saber más sobre nuestro proyecto, te invitamos a acompañarnos en nuestro servidor de Discord.
Muchas gracias por el apoyo 💕
Congratulations @valenpba! You have completed the following achievement on the Hive blockchain And have been rewarded with New badge(s)
Your next target is to reach 80000 upvotes.
You can view your badges on your board and compare yourself to others in the Ranking
If you no longer want to receive notifications, reply to this comment with the word
STOPCheck out our last posts:
Muchas gracias por el apoyo amigos 😊
a community encouraging first-hand content, and each individual living their best life.
Muchas gracias por el apoyo ✨💕
Olí dice que quiere uno 😍 quedó hermoso amiga
Con gusto le regaló uno a la preciosa 💕
Gracias Ami bella ✨🌷
This is adorable! I love that little girl! 💗
Muchas gracias! Me alegra mucho que te haya gustado.
Saludos ✨✨
No sólo es un accesorio útil, también es decorativo y bonito con esa muñequita que le da un toque diferente a lo cotidiano.🤗
It's not only a useful accessory, it's also decorative and cute with that little doll that gives a different touch to the everyday.🤗
Totalmente amiga! Los detallitos son los que hacen la diferencia 🤭
Me alegra muchísimo que te haya gustado esta creación! Saludos.💕✨
Ay pero qué adorable! 😍 Esa muñequita tiene tantos detalles que la hacen Hermosa. Realmente hiciste un trabajo hermoso Amiga! Felicidades 🫶🏻✨
Muchas gracias!!! Pues fíjate que quise hacer algo sencillo, pero como dicen , al final los detallitos hacen la diferencia 🤭
Me alegra que te haya gustado! Saludos ✨✨
Está precioso!
Muchas gracias amiga! Saludos ✨
Que bello, es super tierno. Me hubiese encantado uno para Lis, los colores que has usado y la niña, le dan un aire de ternura. Bendiciones.
Muchas gracias amiga! Esa era la idea, elaborar una muñequita tierna 🤭 Me alegra mucho que le haya gustado.
Saludos y bendiciones! 💕
¡¡¡Buen trabajo!!! Gracias por publicar tu excelente contenido en Hive Diy, me gusto mucho tu porta lápiz, se ve muy tierno, a mi hija le encantaría uno de estos.
Tu comunidad artesana ahora es testigo

Muchas gracias por el apoyo, amigos 💞. Puedes personalizado y crear una muñequita muy parecida a tu niña 💕
Lindo y delicado trabajo, me encanto amiga!
Muchas gracias, linda! Me alegra que te haya gustado ☺️
Que hermoso mi Valen, esa muñequita se parece a ti toda tierna y linda 😍 Cada detalle esta precioso!!!