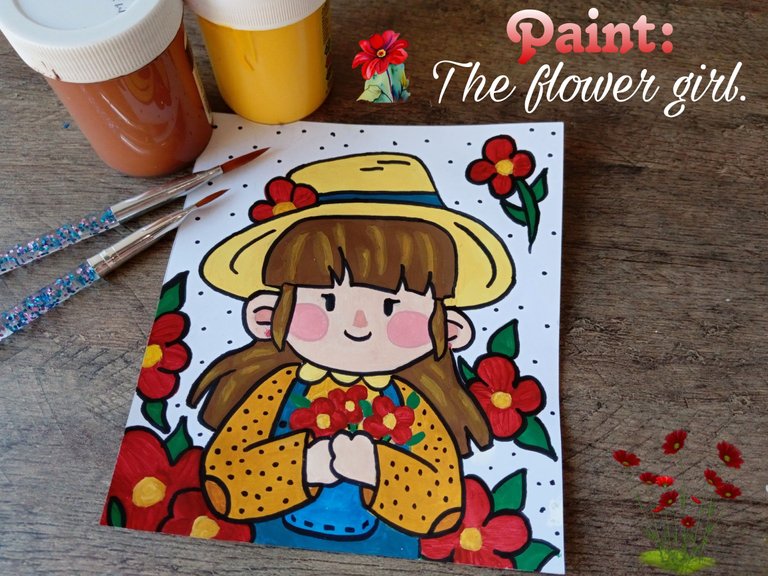
[Esp/Eng] ✨Pintura: La chica de las flores. // Painting: The girl with the flowers.✨
🔸Sin más que añadir, a continuación los dejo con el paso a paso:
✨Hello creative friends, I hope you are doing well and are having a great week. For my part, I am super happy to be back in this beautiful community. On this occasion I share with you the step by step of a beautiful painting about the girl with the flowers. Let's see, thinking a little about what character I could draw and paint, I came up with a thousand ideas, but since I am not an expert at creating characters, my partner, who is an expert, decided to help me capture what I had in mind. Mind you, I told him a little about what I wanted and it was exactly what I had in mind. By the way, since he really liked the result of my drawing, he was inspired to create his version; Therefore, I share the link in case you want to see it.
I wanted to paint a character of a girl surrounded by flowers, but, even though it was a girl, I wanted to think it was me haha, because as I have said a thousand times, I love flowers, so having my beautiful character in digital, I got my hands on to the work for the choice of colors.
🔸Without more to add, then I leave you with the step by step:
♥️ESPERO QUE TE GUSTE,
¡Empecemos!
♥️I HOPE YOU LIKE IT,
Let's start!
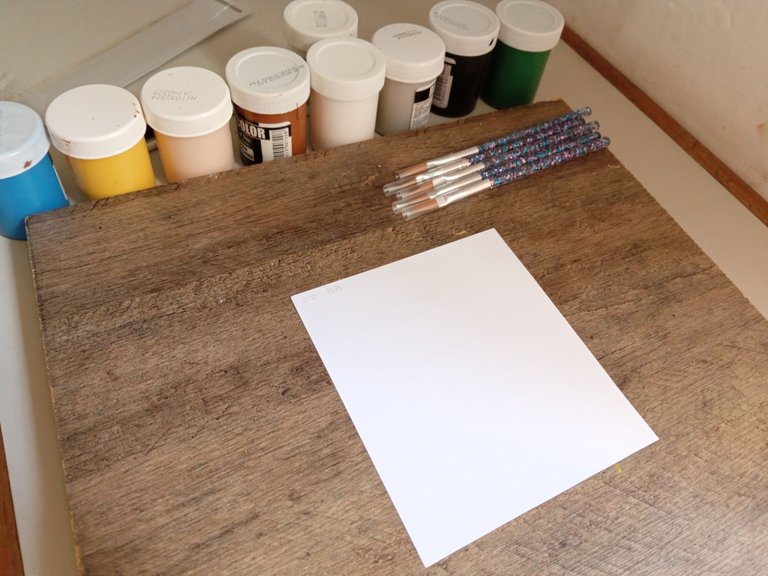
📚 MATERIALES | 📚 MATERIALS

- Cartulina blanca u opalina.
- Pinturas.
- Pinceles.
- Marcador negro.
- Lápiz.
- White or opaline cardboard.
- Paintings.
- Brushes.
- Black marker.
- Pencil.
🌻 PROCEDIMIENTO | 🌻 PROCESS
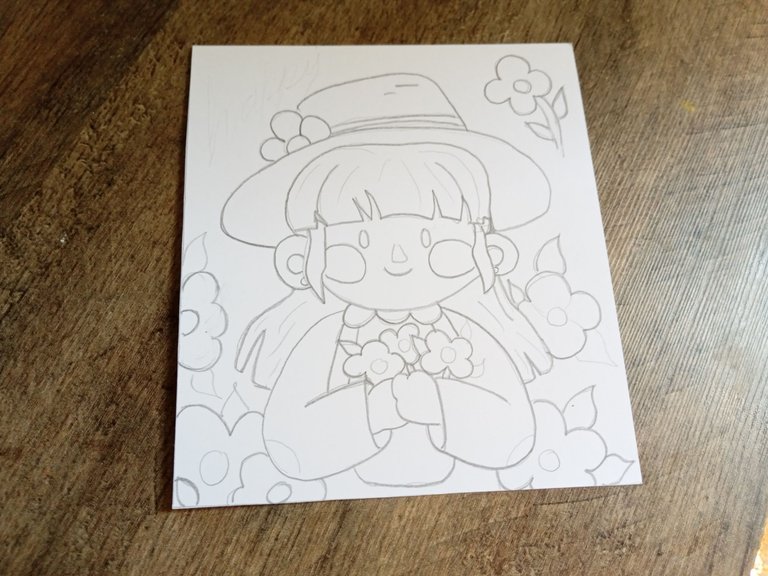
- PASO 1:
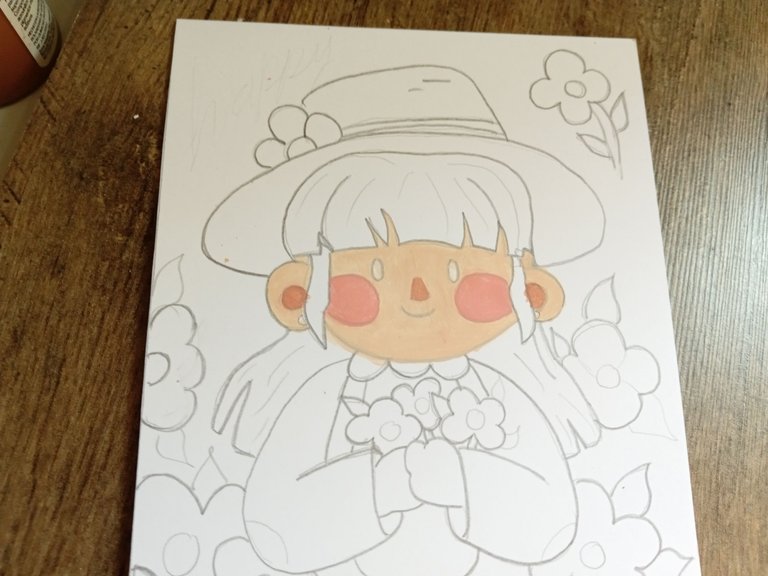
Lo primero que hice fue recortar la opalina al tamaño que quería mi dibujo, suelo hacerlos pequeñitos porque se ven tiernos y para ahorrar materiales; en este caso 14 cm x 12 cm. Una vez lista la opalina, dibujé como pude el boceto que hizo mi pareja en la hoja y remarqué para que, al momento de pintar, no se me tapara tanto la guía de donde debía pintar.
- STEP 1:
The first thing I did was cut the opaline to the size I wanted my drawing, I usually make them small, because they look cute and to save materials, in this case 14 cm x 12 cm. Once the opaline was ready, I drew as best I could the sketch that my partner made on the sheet and highlighted so that, when painting, the guide of where I should paint would not be so obscured.
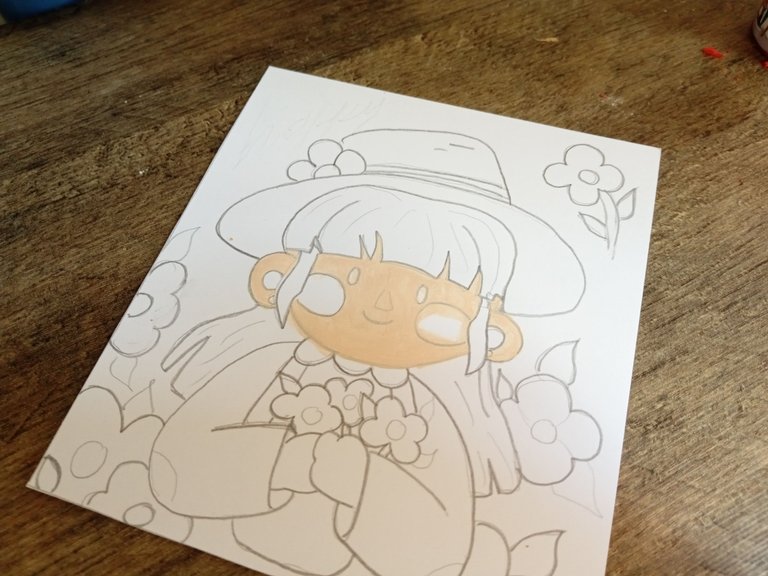
- PASO 2:
Una vez listo el dibujo, seleccioné la paleta de colores que quería utilizar en el personaje y las flores. Esta tarea me resulta difícil, pues siempre intento utilizar colores complementarios para que todo quede en armonía, es algo que he estado aprendiendo, como mencioné, mi pareja se dedica al dibujo digital y digamos que a medida que él aprende algo, al él conservarlo conmigo aprendo muchas cosas, pues es a mí quien le pide opinión en la mayoría de los casos. Sí, a mí que no sé dibujar jaja, pero sé que lo hace porque confía mucho en mi creatividad y buen gusto, jaja.
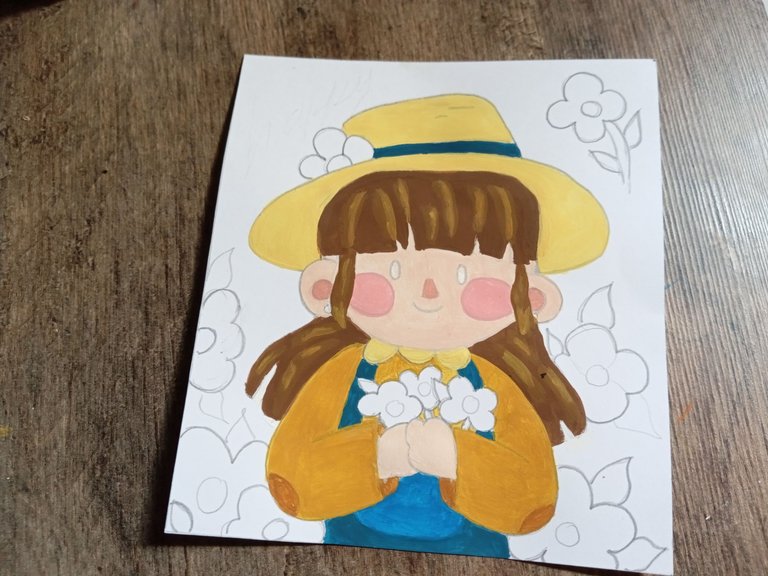
Una vez seleccionado mis colores, comencé a pintar con el color más claro, que en este caso era la piel. Para las mejillas combiné el mismo color junto con una gotita de rojo, y para la nariz y parte interna de las orejas, combiné todos esos colores con una gota de marrón.
- STEP 2:
Once the drawing was ready, I selected the color palette I wanted to use on the character and the flowers. This task is difficult for me, because I always try to use complementary colors so that everything is in harmony, it is something that I have been learning, as I mentioned, my partner is dedicated to digital drawing and let's say that as he learns something, he keeps it with me I learn many things, since it is me who asks for my opinion in most cases. Yes, I don't know how to draw haha, but I know that he does it because he trusts a lot in my creativity and good taste, haha.
Once I selected my colors, I started painting with the lightest color, which in this case was skin. For the cheeks I combined the same color along with a drop of red, and for the nose and inner part of the ears, I combined all those colors with a drop of brown.
- PASO 3:
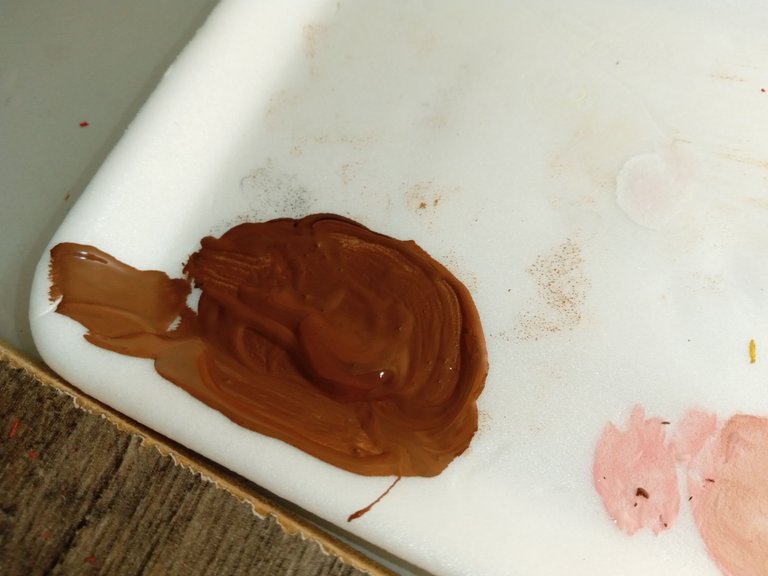
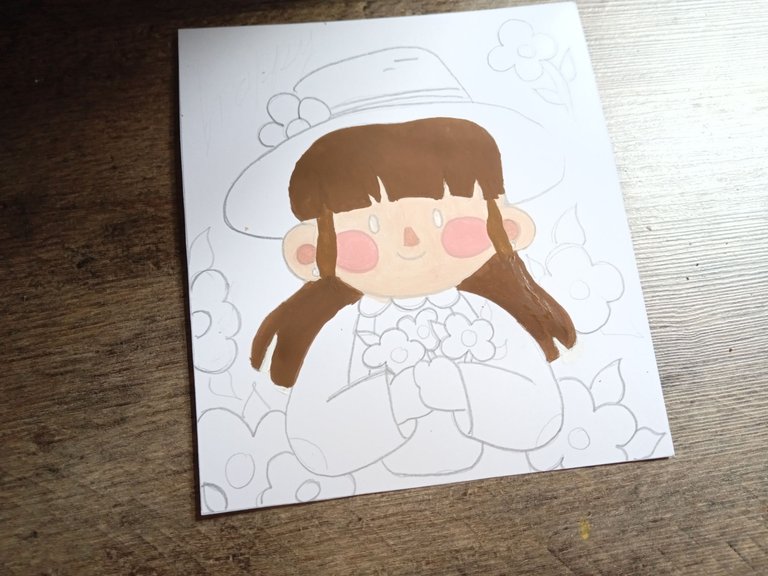
Mientas el rostro se secaba, pasé a pintar el cabello, esta vez seleccioné el color marrón y como este es muy claro, lo combiné con unas gotas de negro, hasta conseguir el color deseado y fui pintando con un pincel delgado para los bordes y luego con uno más ancho para rellenar.
- STEP 3:
While the face was drying, I started painting the hair, this time I selected the brown color and since it is very light, I combined it with a few drops of black, until I got the desired color and I painted with a thin brush for the edges and then with a wider one to fill.
- PASO 4:
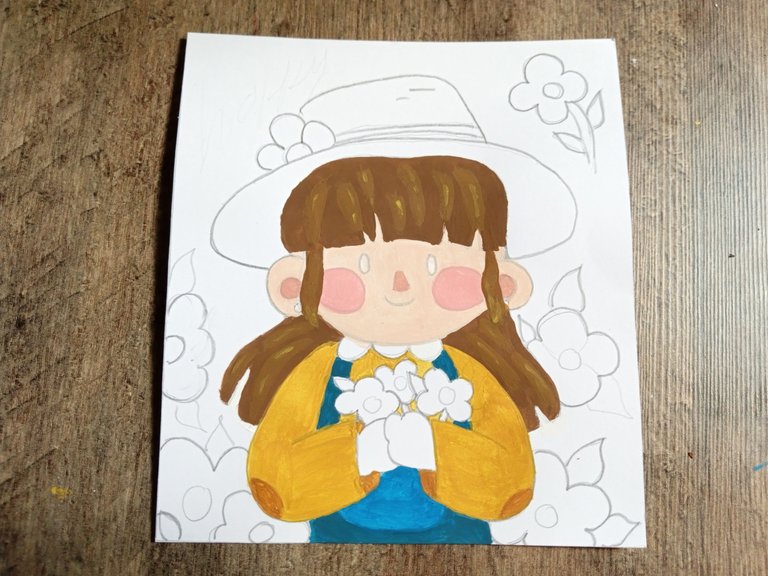
Mientras se secaba, comencé a pintar el overol con un azul marino y el bolsillo con un azul unos tonos más claros. Después, hice unos cuantos reflejos en el cabello con un tono amarillo o mostaza. Cuando el overol se secó, comencé a cambiar el amarillo con unas gotas de marrón, hasta obtener el color mostaza y pintar el suéter. Para las partes más oscuras del suéter, agregué más gotas de marrón.
- STEP 4:
While it was drying, I started painting the overalls a navy blue and the pocket a few shades lighter blue. Next, I did a few highlights in the hair with a yellow or mustard tone. When the overalls dried, I started changing the yellow with a few drops of brown, until I got the mustard color and painted the sweater, for the darker parts of the sweater, I added more drops of brown.

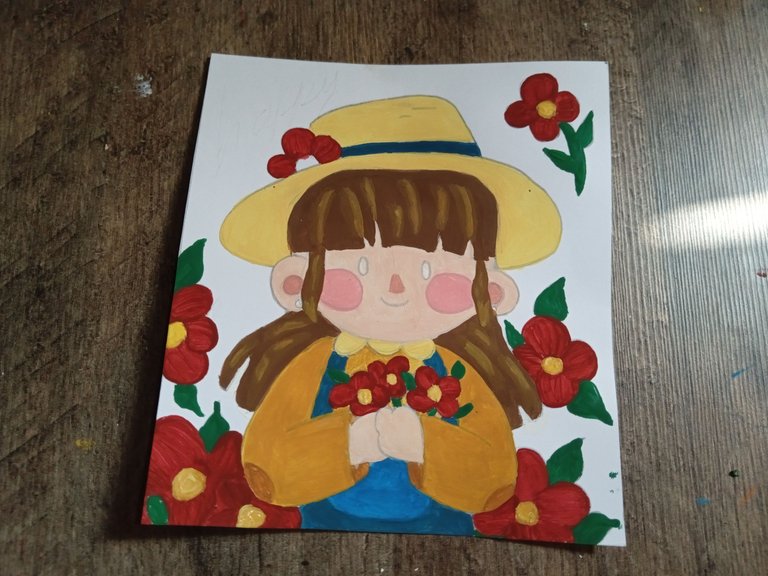
- PASO 5:
El sombrero lo pinté combinando amarillo y blanco para hacer un color crema y la tira la pinté del mismo color del overol. Luego, para las flores combiné rojo y una gota de negro, para el centro amarillo y las hojas en verde.
- STEP 5:
I painted the hat combining yellow and white to make a cream color and I painted the strap the same color as the overalls. Then, for the flowers I combined red and a drop of black, for the center yellow and the leaves in green.
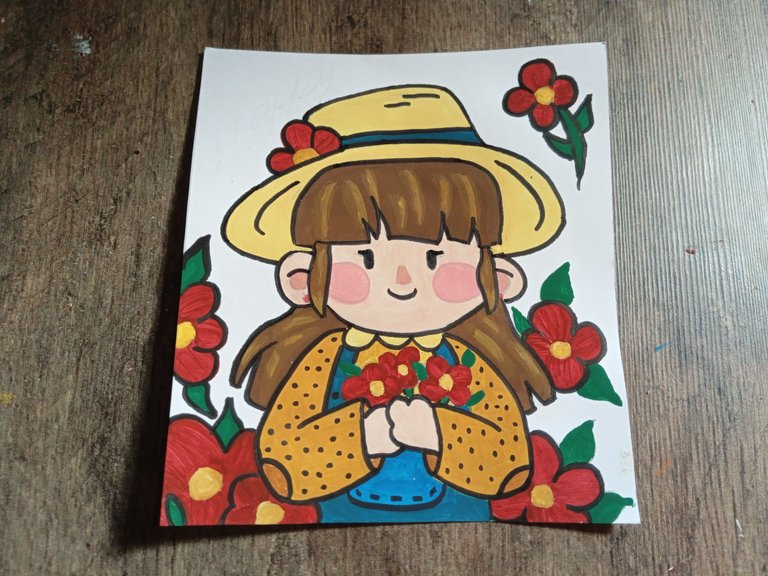
- PASO 6:
Después, delineé y di detalles a todo el dibujo con marcador negro, delineando el rostro, el cabello, los detalles del sombrero, el suéter, las hojas, flores, y por último, hice puntitos por el resto de la hoja.
- STEP 6:
Then, I outlined and gave details to the entire drawing with black marker, outlining the face, the hair, the details of the hat, the sweater, the leaves, flowers, and finally, I made dots on the rest of the page.
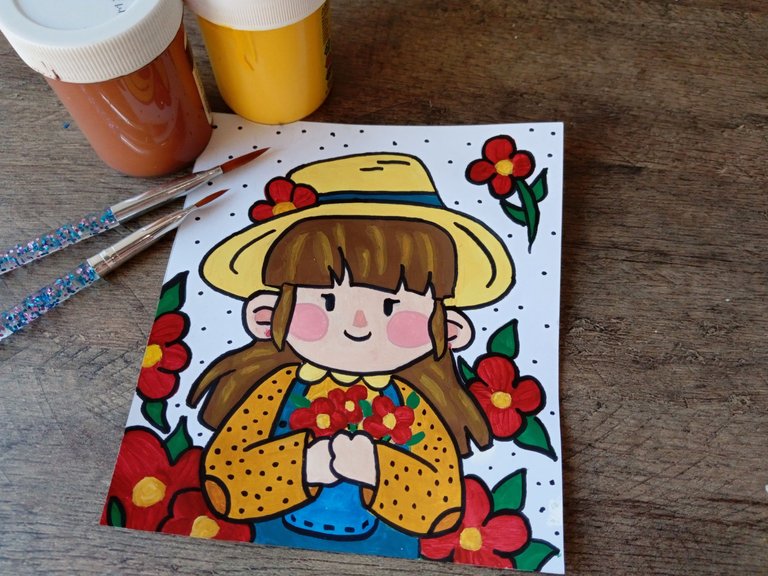
✨RESULTADO: | ✨RESULT:
❤️ Hasta la próxima publicación.
❤️ Until the next post.


Todas las fotografías son de mi propiedad.
Separador y Fotos editadas en Canva
All photographs are my property.
Photos edited in Canva
Has sido curado por @visualblock / You've been curated by @visualblock
Bienvenidas delegaciones / Delegations welcome
Trail de Curación / Curation Trail
Vota por nuestro Testigo aliado - @hispapro / Vote for our allied Witness - @hispapro
Más información sobre el testigo aquí / More information about the witness here
Muchas gracias por el apoyo amigos. ☺️💕
Un dibujo muy lindo. 😊
Yay! 🤗
Your content has been boosted with Ecency Points, by @alizmarpaola.
Use Ecency daily to boost your growth on platform!
Support Ecency
Vote for new Proposal
Delegate HP and earn more
Quedó demasiado tierna y linda ✨
Muchas gracias! 😊 Me alegra mucho que te haya gustado.
Demasiado hermoso ❤️ Perfecto para decorar la Habitación de una niña, te felicito.! Saludos y Bendiciones 😊
Muchas gracias, amiga! Es verdad, sería bonito ponerle un marquitos y colgar varios en la habitación de una niña.
Saludos y bendiciones 💕
From Venezuela, our witness drives decentralization and the adoption of Web3 technology, creating opportunities for the local community and contributing to the global ecosystem. // Desde Venezuela, nuestro testigo impulsa la descentralización y la adopción de la tecnología Web3, generando oportunidades para la comunidad local y contribuyendo al ecosistema global.
Sigue, contacta y se parte del testigo en: // Follow, contact and be part of the witness in:
Muchas gracias amigos 💕
Siempre a la orden Valen. Seria genial si puedes apoyarnos con tu voto testigo, porque con esto fortalecemos mas a la comunidad. Gracias.
Que ternura! Me encanta
Muchas gracias! Me alegra mucho que te haya gustado.✨
Saludos !!
Amiii que pintura tan linda, esta digna de ser enmarcada, me gusto mucho. Tienes una habilidad increible para las manualidades! Espero ver más de tu arte! Gracias por compartir!💛
Te felicito este dibujo te quedo hermoso, me encantó
Te quedó muy bella. Es hermosa 😍
Upvote recommended by @bhattg as part of Encouragement Program
Keep Up the good work on Hive ♦️
Te quedo muy bonito, y que bien que tengas a alguien que te apoye y te asesore con tus dibujos, esto es un hermoso arte, saludos.
Hermoso resultado, me llamo mucho la atención los colores empleados en tu dibujo son muy vibrantes y llamativos ❤️
Contáctenos para saber más del proyecto a nuestro servidor de Discord.
Si deseas delegar HP al proyecto: Delegue 5 HP - Delegue 10 HP - Delegue 20 HP - Delegue 30 HP - Delegue 50 HP - Delegue 100 HP.