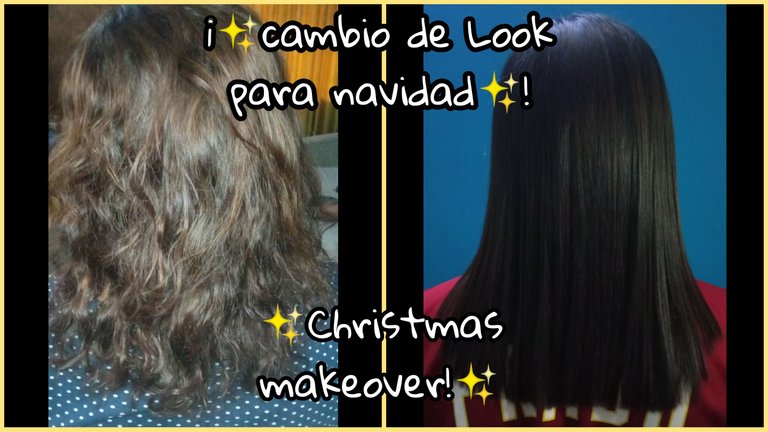
¡Cambio de look para navidad!✨ Christmas Makeover! ✨ Esp-Eng
¡Cambio de look para navidad!✨
Español
Para estas fechas atrévete hacer un cambio drástico con tu cabello, siempre es bueno iniciar el año con un nuevo yo, lleno de energía positiva y pensamientos de esperanza y perseverancia tanto por dentro como por fuera!
Aquí les dejo un cambio de look que le hice a mi mamá, incluye: Cambio de color de cabello, secado, planchado y corte de cabello..
Primer paso:
Materiales
- Agua oxigenada de 20vol
- Tinte negro azulado
- Brocha y envase para nuestra mezcla
- Crema facial y guantes de plástico desechables
Antes de aplicar el tinte en el cabello aplicamos un poquito de crema por el borde de nuestra cara, cuello y orejas, para evitar que nos queden esas partes manchadas de tinte.
Luego,
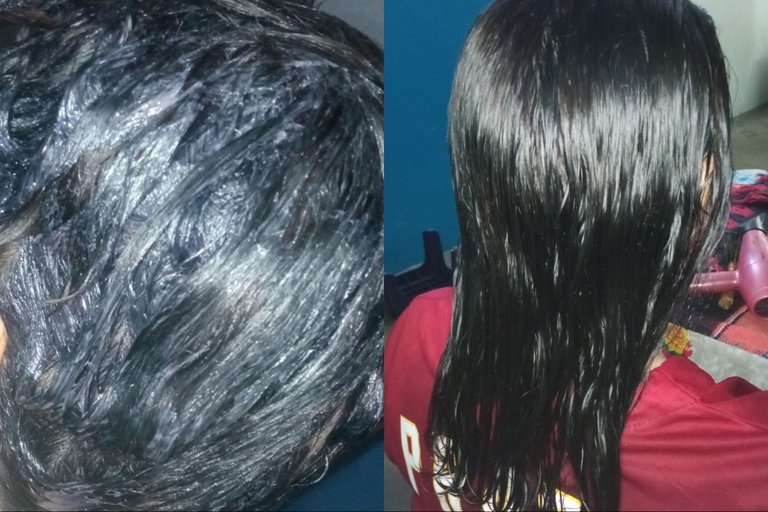
Separamos nuestro cabello y empezamos aplicar la mezcla de adelante hacia atrás, una vez aplicada en todo el cabello esperamos 30 min, lavamos con agua, champú y un poco de acondicionador muy bien.
Seguidamente pasamos aplicar un hidratante en crema para el cabello, así lo protegemos del calor que vamos aplicarle, ya que está débil por haberlo teñido.
Segundo paso:
Materiales
- cepillo para secar
- Secador
- Tijera para cabello
- Peinetas
- Peine
- Plancha
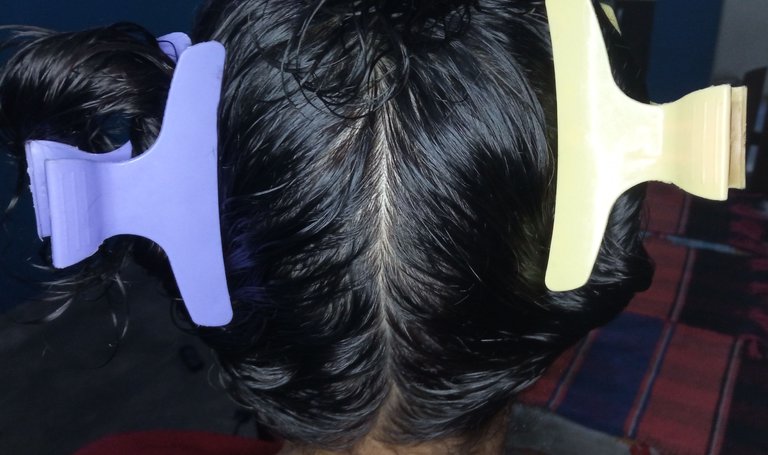
Dividimos en dos secciones el cabello y procedemos a secarlo con el secador.
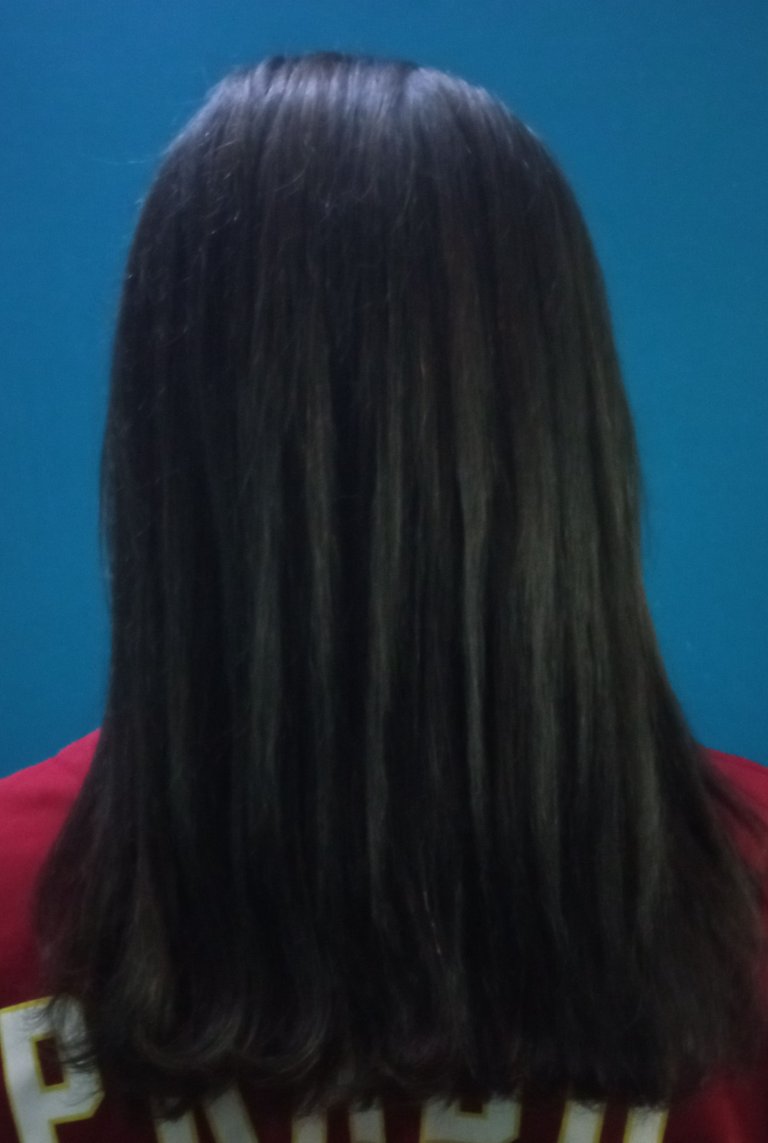
Volvemos a dividirlo y lo planchamos está vez.

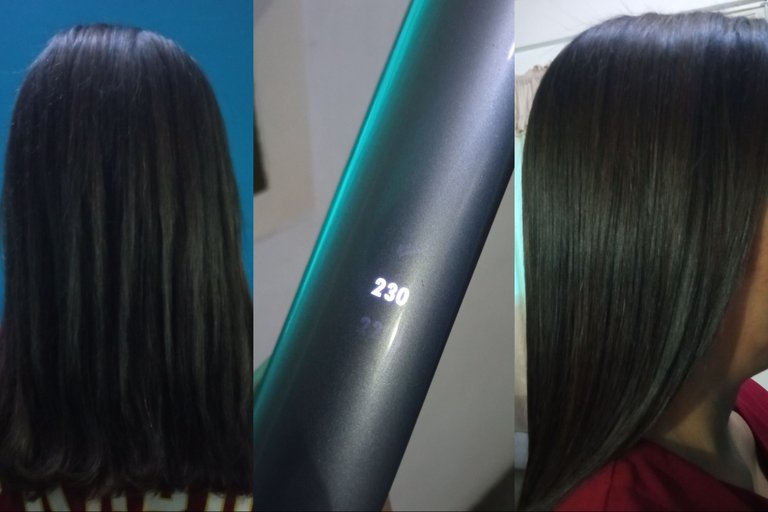
Aprovechamos que está bien estirado para cortarle las puntas, y las cauterizamos pasándole la plancha luego de cortarlas.
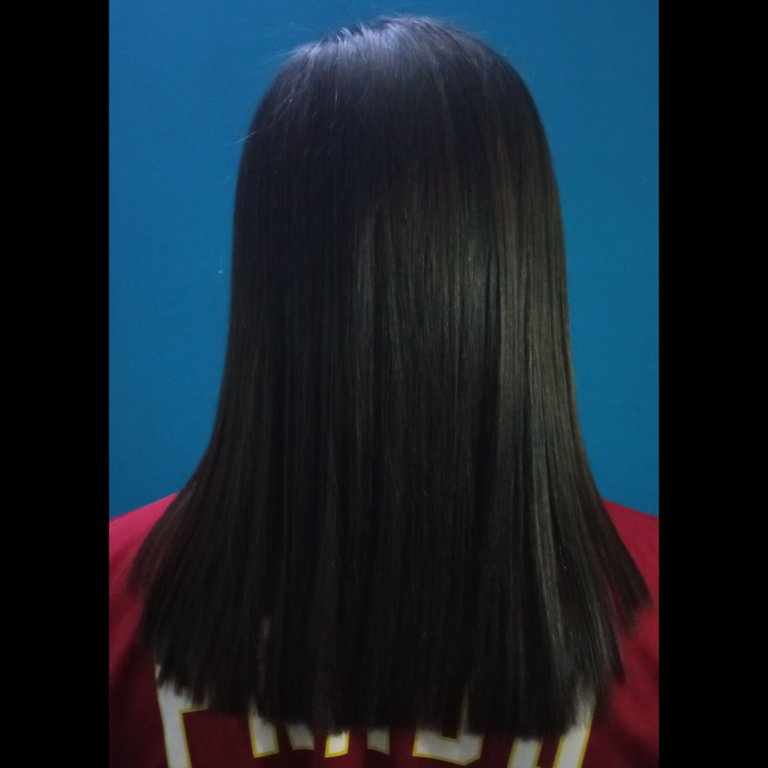
Y miren el resultado, paso de un castaño claro a negro azulado! Sin duda se nota la diferencia.. Espero que les haya gustado y se animen hacer cambios drásticos con su cabello y vida, Eso sí, para mejor!
Christmas Makeover✨
English
For these dates dare to make a drastic change with your hair, it is always good to start the year with a new me, full of positive energy and thoughts of hope and perseverance both inside and out!
Here I leave you a makeover that I did to my mom, it includes: hair color change, blow dry, flat iron and haircut..
First step:
Materials
- Oxygenated water 20vol
- Blue-black dye
- Brush and container for our mixture
- Facial cream and disposable plastic gloves.
Before applying the dye on the hair we apply a little bit of cream around the edge of our face, neck and ears, to avoid getting those parts stained with dye.
Next,
We separate our hair and start applying the mixture from front to back, once applied throughout the hair we wait 30 min, wash with water, shampoo and a little conditioner very well.
Next we apply a moisturizing cream for the hair, this way we protect it from the heat that we are going to apply to it, since it is weak because it has been dyed.
Second step:
Materials
- Drying brush
- Blow dryer
- Hair scissors
- Combs
- Comb
- Flat iron
We divide the hair in two sections and proceed to dry it with the hair dryer.
We divide it again and flat iron it this time.
We take advantage of the fact that it is well stretched to cut the ends, and we cauterize them by passing the iron over them after cutting them.
And look at the result, it went from a light brown to bluish black! You can definitely see the difference... I hope you liked it and I encourage you to make drastic changes with your hair and life, yes, for the better!
Translated with www.DeepL.com
Fotos de mi autoría
Photos by me @vero001212
Hope You like this!❤️
Congratulations @vero001212! You have completed the following achievement on the Hive blockchain and have been rewarded with new badge(s):
Your next target is to reach 600 upvotes.
You can view your badges on your board and compare yourself to others in the Ranking
If you no longer want to receive notifications, reply to this comment with the word
STOPCheck out the last post from @hivebuzz: