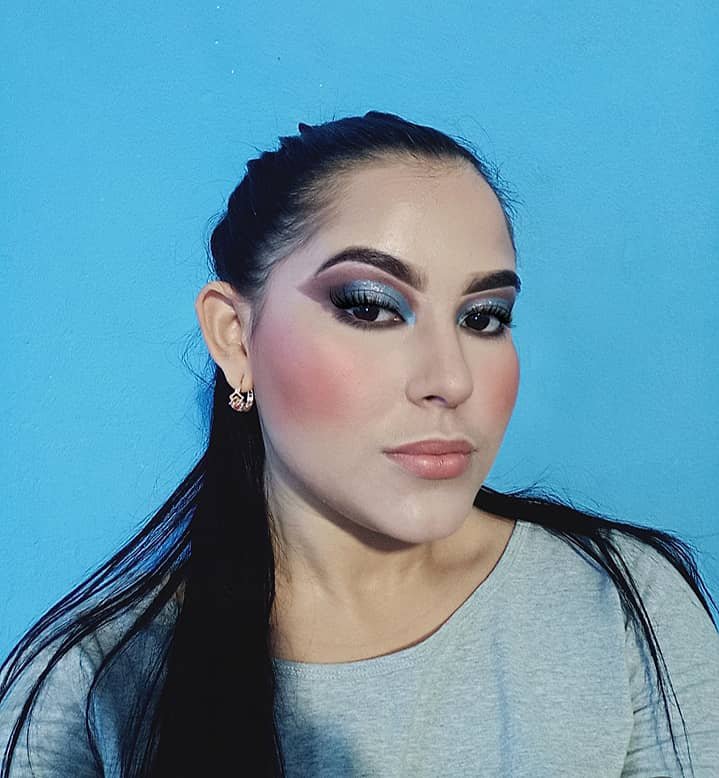
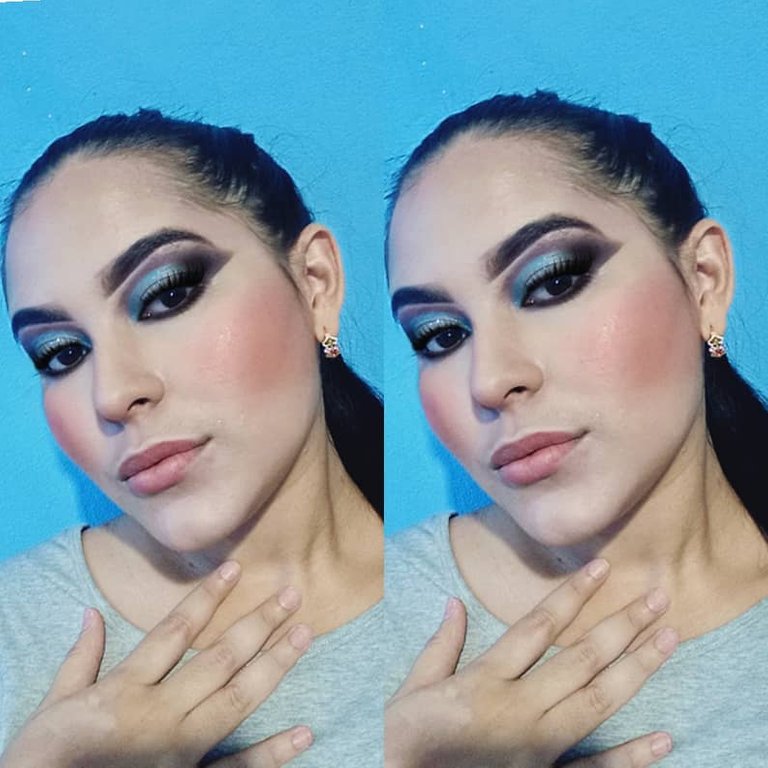
Smoky eye make-up in brown tones combined with metallic blue [ESP/ENG]

”ESPAÑOL”
Hola Comunidad de Makeup Power🖌️🎨
Hola a todos mi amigos de esta plataforma, cordialmente les doy un gran saludo, feliz viernes para todos, arranca el fin de semana y espero que lo pasen súper excelente. Siempre feliz de estar aquí un día más.❤️
Ya que es día viernes, y estamos a fin de semana. Y se que a muchos de nosotras nos encanta salir, pues les traigo este hermoso maquillaje de unos ojos ahumados, en tonos negro y marron, con un tono de azul como color principal, para una noche increíble.
Espero Disfrutes este Tutorial de Maquillaje 🖌️🎨
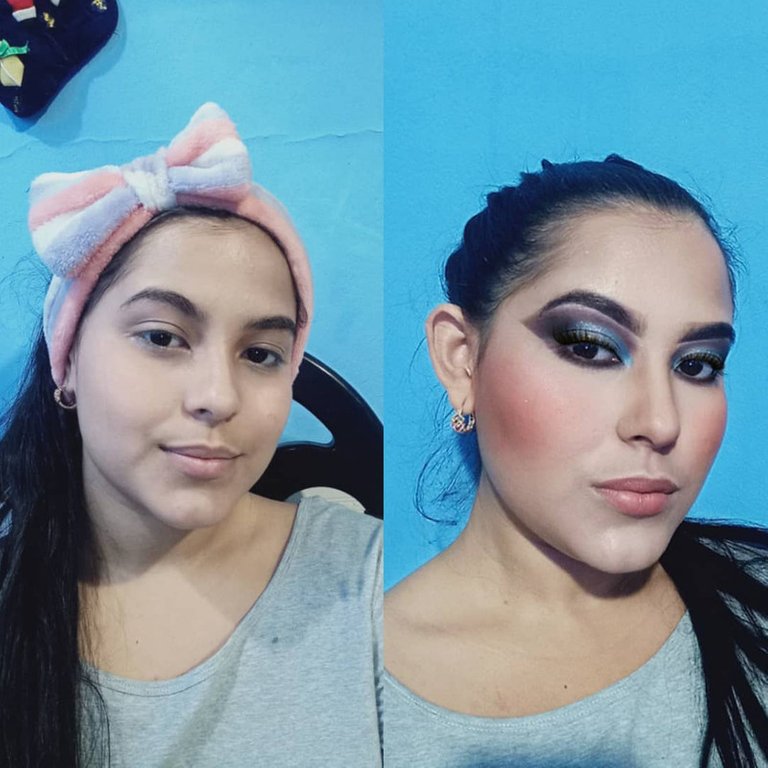
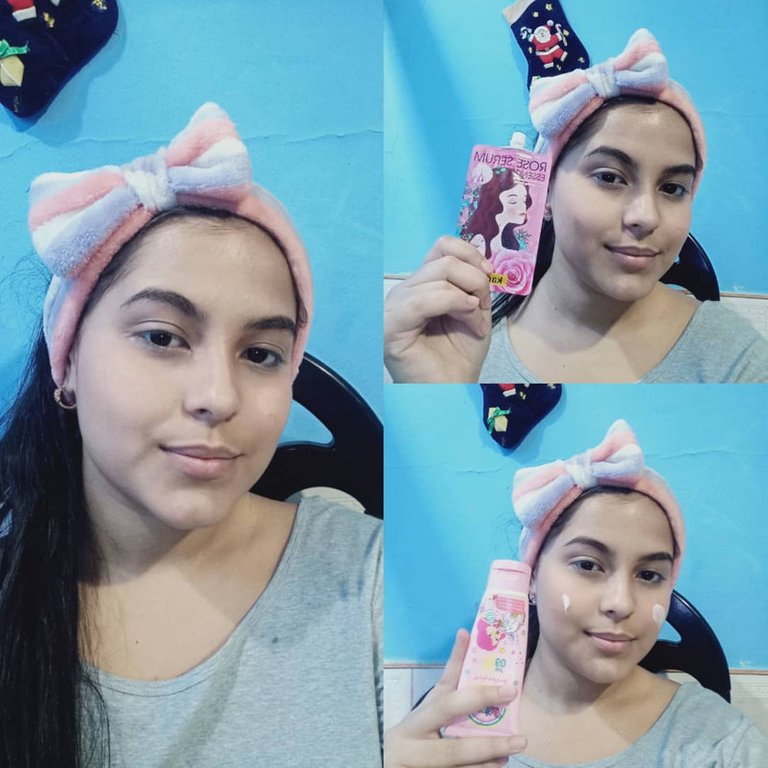
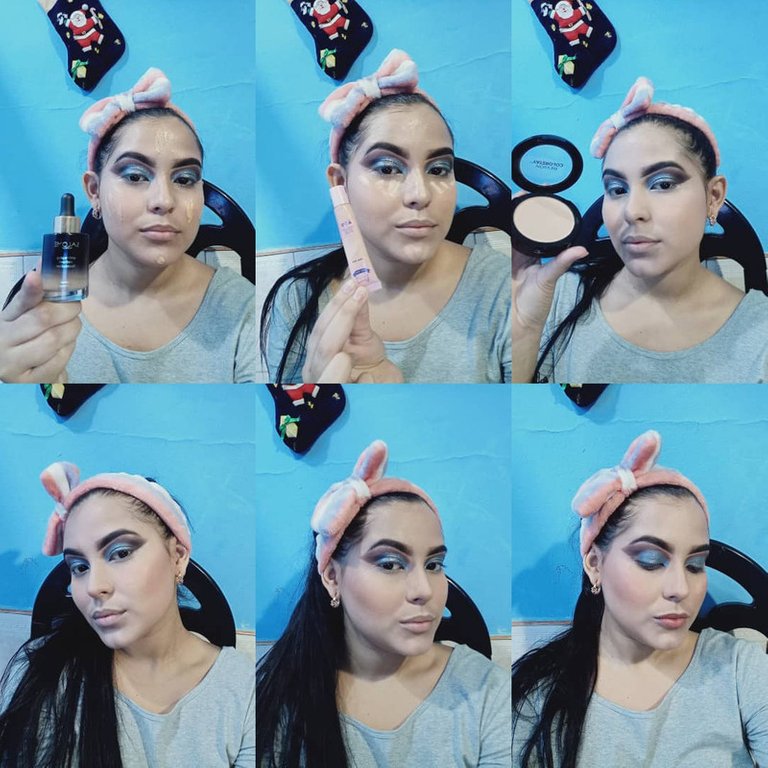
Sin más preámbulo, vamos a comenzar con la recreación del paso a paso de este maquillaje. Siempre un paso que no debes perder es tener tu cara limpia, y siempre tenerla hidratada antes de colocar cualquier producto. En mi caso lo que hago es agregarme protector solar y un serum de rosa.
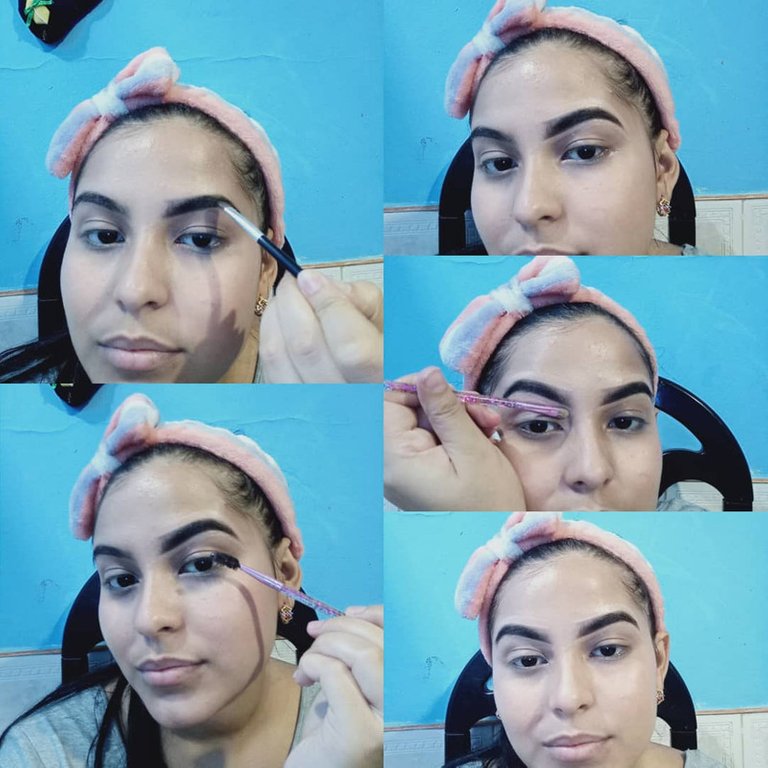
Luego de eso paso inmediatamente a mis cejas, ya que es una de las partes principales de mi rostro, y básicamente, siempre las cepillo antes, luego con un pincel especial, voy agregando la sombra paso a paso, tratando de que queden bien difuminadas, y con una ayuda del corrector trato de definirlas, limpiando por los alrededores. Las cejas es el punto focal del rostro por eso me detengo minuciosamente a tenerlas listas e impecablemente definidas, ya que ningún maquillaje se aprecia bien sin las cejas como marco del rostro .
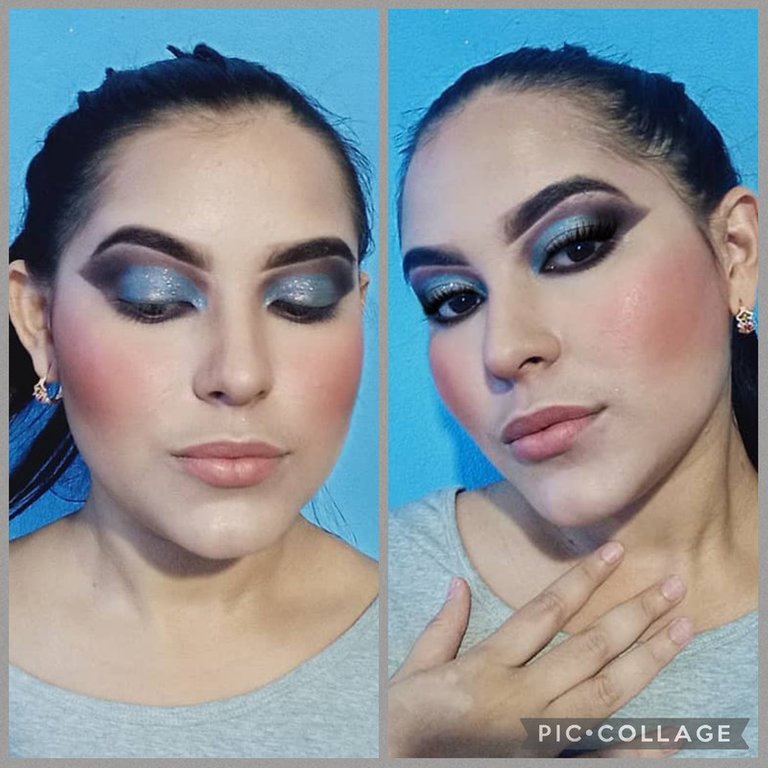
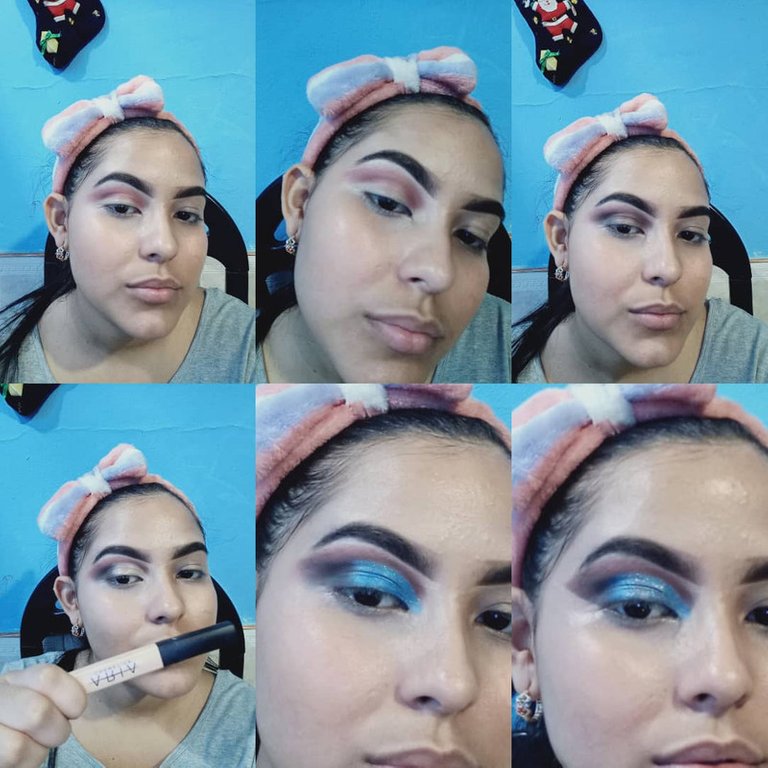
Para estos ojos hermoso, coloco un poco de corrector antes de comenzar, y empecé con mi color de transición en tono marrón a toques, luego con una brocha difuminadora, fui agregando el negro para que haga un contraste entre los dos colores, un tipo de difuminado ahumado.
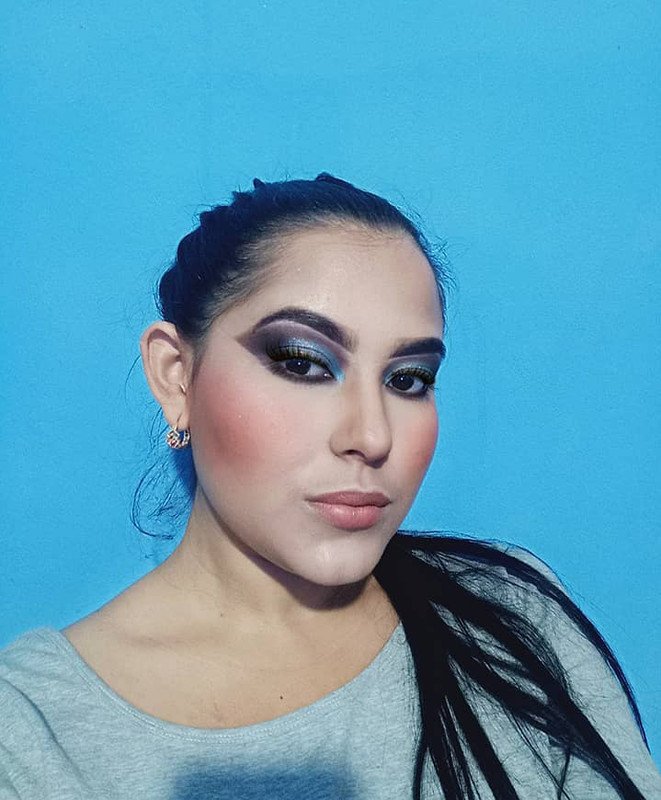
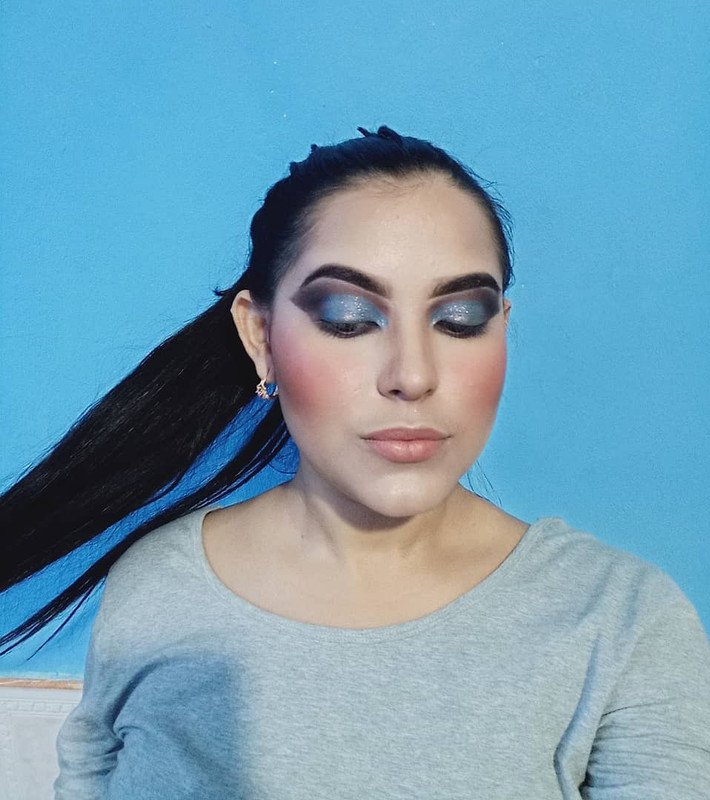
Luego con ayuda del corrector, hago un corte de cuenca, esto también lo hago con ayuda de una brocha para que se vea mejor, aplico mi azul rey, y por encima, le agregué un poco de escarcha para que brillara en la noche y para la parte inferior agregue los dos tonos, marrón y negro.
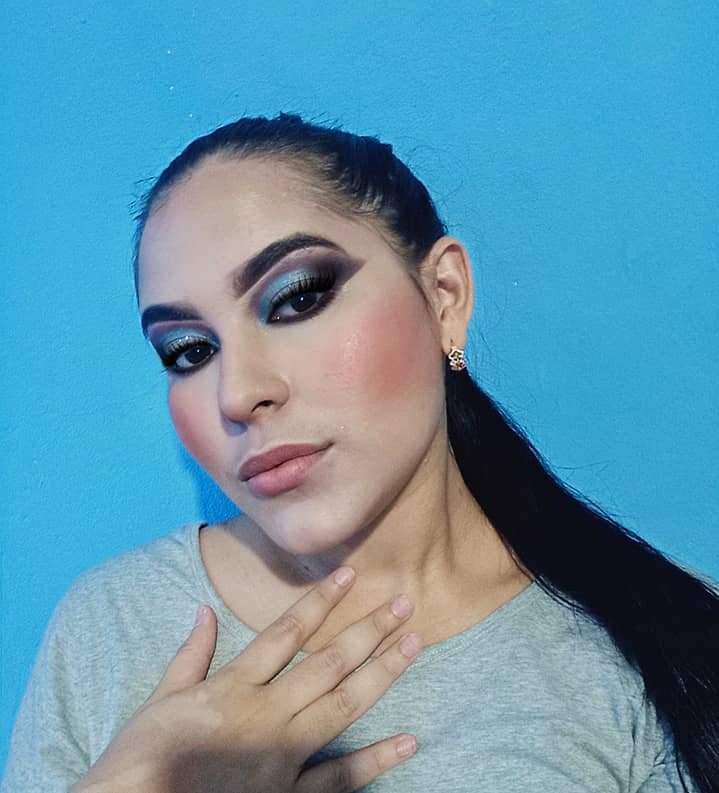
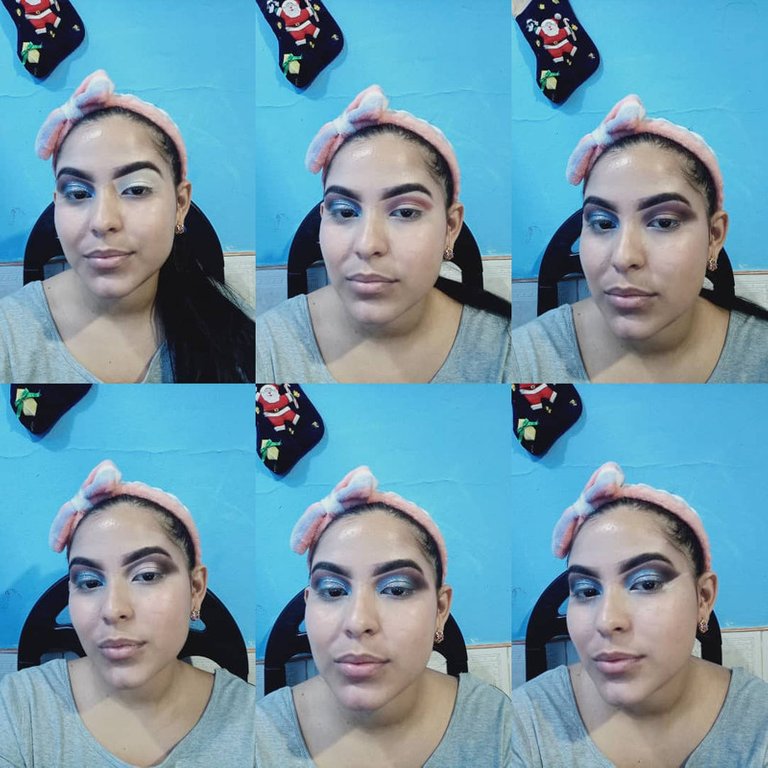
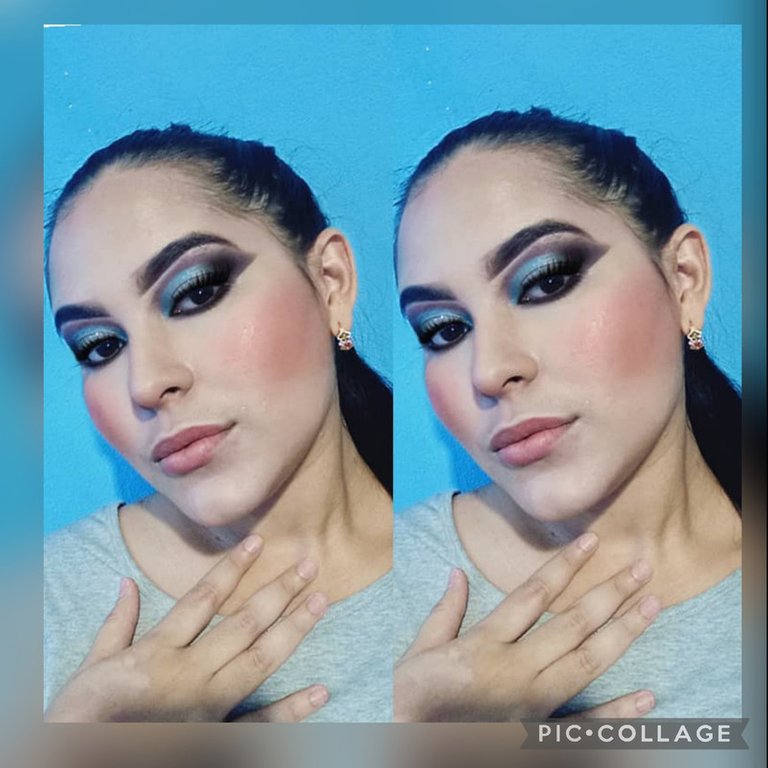
Ya una vez que tengo mis ojos listos y maquillados paso a la preparación de mi rostro, en eso lo que hago es agregar la base y esta la difumino con mi esponja, luego agrego mi corrector y realizo lo mismo, sello con mi polvo, agrego mis contornos, esto siempre lo hago para darle más profundad a mi rostro, lo coloco en la nariz, en los pómulos en la frente y un poco en la barbilla, me coloco mi rubor, iluminador unas lindas pestañas y labial, en esta oportunidad algo suave, ya que mis ojos son una parte llamativa y central de este maquillaje estupendo.
De esta forma lucirás un maquillaje radiante y te vas a destacar a donde vayas.
.
”ENGLISH”
Hello Makeup Power Comunity 🖌️🎨
Hello to all my friends of this platform, I cordially give you a big greeting, happy Friday for everyone, the weekend starts and I hope you have a great time. Always happy to be here one more day.❤️
Since it's Friday, and we are at the end of the week. And I know that many of us love to go out, so I bring you this beautiful makeup of smoky eyes, in black and brown tones, with a shade of blue as the main color, for an amazing night.
I hope you enjoy this Makeup Tutorial🖌️🎨
Without further ado, let's start with the step-by-step recreation of this makeup. Always a step you should not miss is to have your face clean, and always have it moisturized before applying any product. In my case what I do is add sunscreen and a rose serum.
After that I immediately move on to my eyebrows, since it is one of the main parts of my face, and basically, I always brush them before, then with a special brush, I add the shadow step by step, trying to blend them well, and with the help of concealer I try to define them, cleaning around them. The eyebrows are the focal point of the face, that's why I stop meticulously to have them ready and impeccably defined, since no makeup looks good without the eyebrows as a frame of the face.
For these beautiful eyes, I put a bit of concealer before starting, and I started with my transition color in brown tone in touches, then with a blending brush, I added the black to make a contrast between the two colors, a kind of smoky blur.
Then with the help of the concealer, I cut the eye socket, this I also do with the help of a brush to make it look better, I apply my royal blue, and on top, I added a little frost to make it shine at night and for the lower part I added the two tones, brown and black.
Once I have my eyes ready and made up I go to the preparation of my face, in that what I do is add the base and I blend it with my sponge, then I add my concealer and I do the same, I seal with my powder, I add my contours, I always do this to give more depth to my face, I put it on my nose, on my cheekbones, on my forehead and a little bit on my chin, I put my blush, highlighter, nice eyelashes and lipstick, this time something soft, since my eyes are a striking and central part of this great makeup.
This way you will look radiant and you will stand out wherever you go.


Les doy las gracias por visitar mi blog, sus comentarios son muy valiosos para mi.
I thank you for visiting my blog, your comments are very valuable to me.
Me despido, hasta una próxima oportunidad.
I bid you farewell, until a future opportunity.
The translator used in my publication is :Translated with www.DeepL.com/Translator (free version)

Todo lo escrito es de mi autoría @virgi2001
Everything written is of my authorship @virgi2001
Las fotografías son de mi propiedad, capturando el momento con la cámara de mi teléfono Realme 6.
The photographs are my own, capturing the moment with my Realme 6 phone camera.
Los ojos ahumados marrón son un tono arriesgado de conseguir y tú lo haz logrado, combinarlos con el azul metálico los hizo resaltar aún más. Realizar un maquillaje requiere no solo destreza sino paciencia por eso admiro a las que comparten en este nicho .
Muchas gracias siempre lo hago con mucho amor para #hive
https://twitter.com/virgiesteves113/status/1522577911882174469
The rewards earned on this comment will go directly to the person sharing the post on Twitter as long as they are registered with @poshtoken. Sign up at https://hiveposh.com.
Bonita combinación, me encanta esa sombra azul