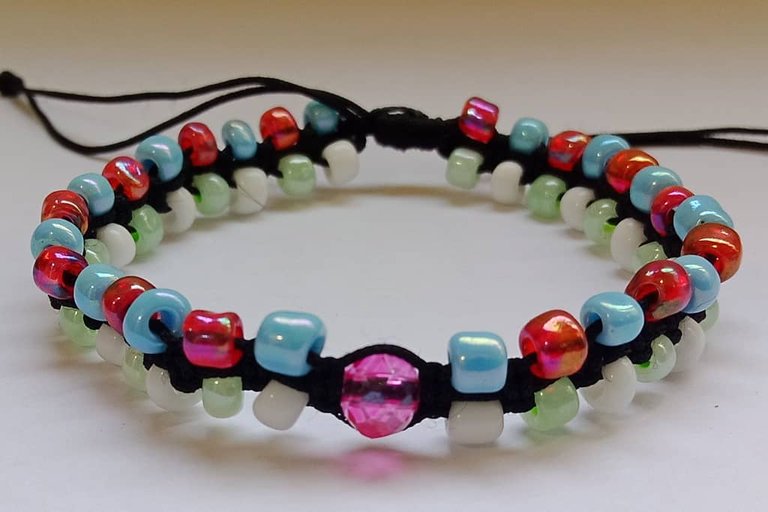
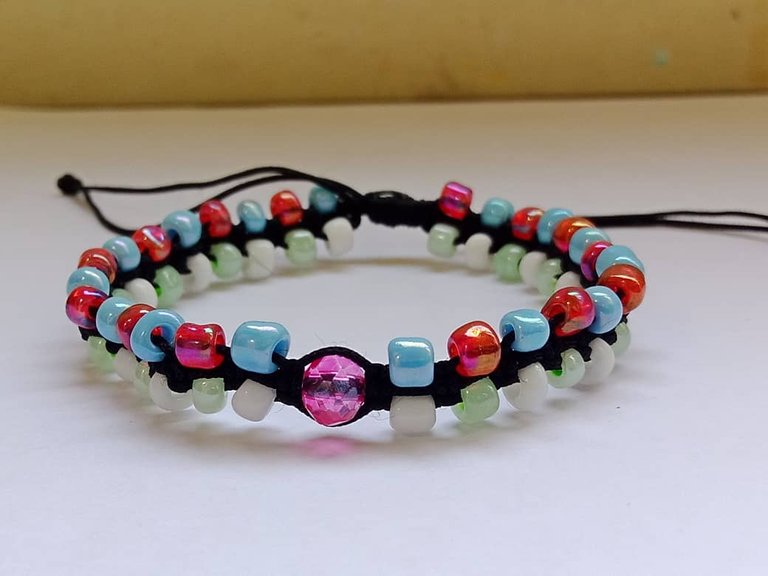
Hermosa Pulsera con Pucas Coloridas **Beautiful Bracelet with Colorful Puccas
No basta con que un artista sea un hábil artesano, debe amar y acariciar su lienzo también.”
Pierre Renoir
Bendiciones abundantes y eternas para todos los miembros de esta fabulosa comunidad. Encantado en saludarles y desearles mucha prosperidad y salud para ir en busca de todas las metas y sueños que tenemos en el corazón entendiendo que Dios bendice a la persona de deseo.
Hoy les comparto una hermosa pulsera macramé de hilo chino con tejido plano y adornada con mostacillas para engalanar y hacer de ésta una joya muy sencilla y llamativa. Es de mencionar, que esta pulsera es muy fácil de elaborar y en tan sólo pocos minutos ya la tenemos lista para lucir.
Sin más tiempo que perder les invito a acompañarme en esta fascinante creación y poner manos al hilo
It is not enough for an artist to be a skilled craftsman, he must love and caress his canvas as well."
Pierre Renoir
Abundant and eternal blessings to all members of this fabulous community. Delighted to greet you and wish you much prosperity and health to go in search of all the goals and dreams that we have in our hearts understanding that God blesses the person of desire.
Today I share with you a beautiful macramé bracelet made of Chinese thread with flat weave and adorned with beads to embellish and make this a very simple and striking jewel. It is worth mentioning that this bracelet is very easy to make and in just a few minutes we have it ready to wear.
Without more time to lose, I invite you to join me in this fascinating creation and put your hands to the thread.

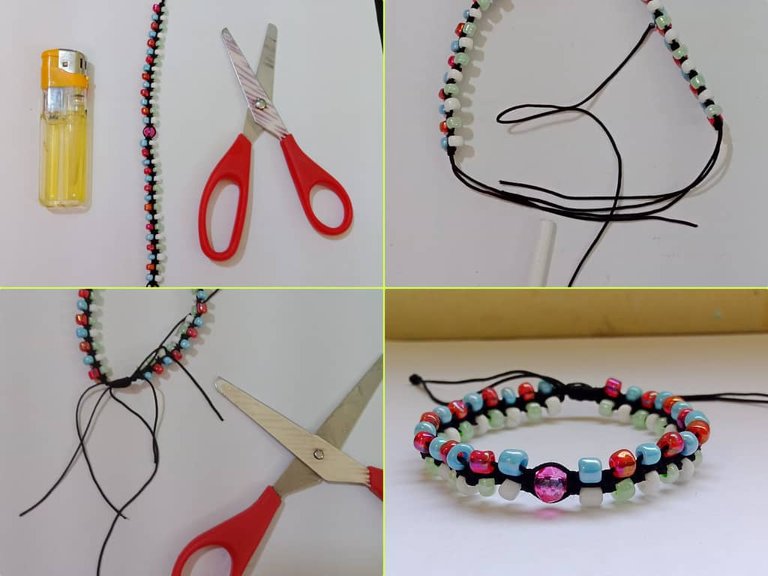
Los materiales que utilicé para realizar esta hermosa pulsera son los siguientes, a saber:
*Hilo chino
Tijera
Mostacillas de varios colores
Encendedor
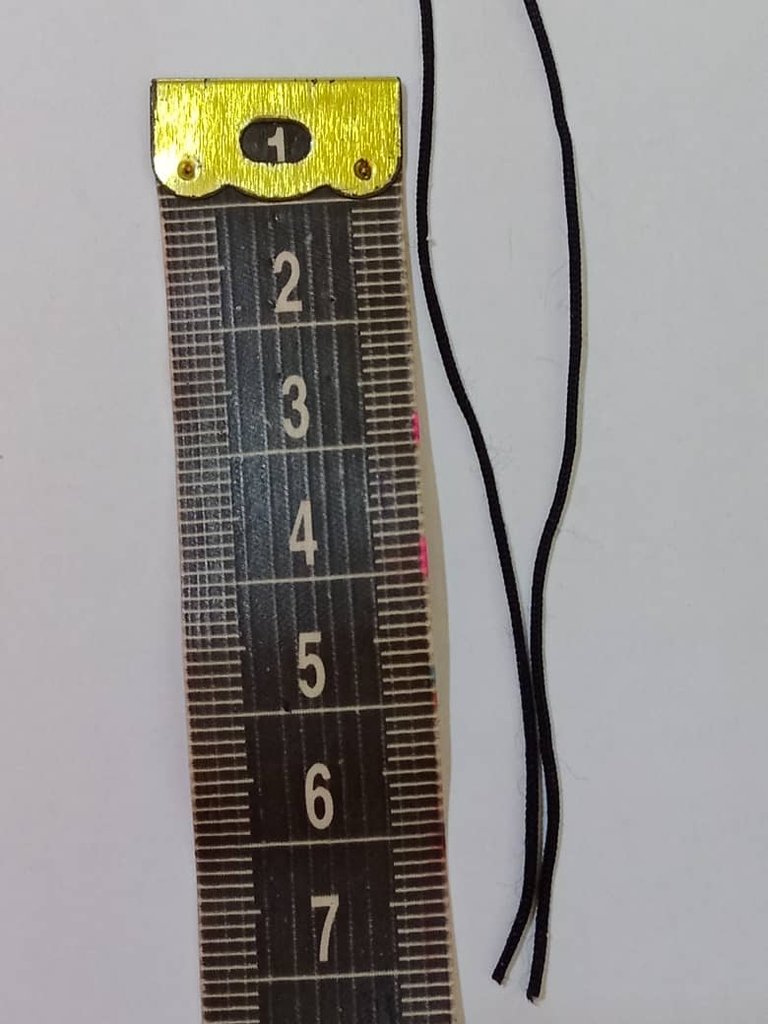
Cinta métrica
The materials I used to make this beautiful bracelet are as follows, namely:
*Chinese thread
Scissors
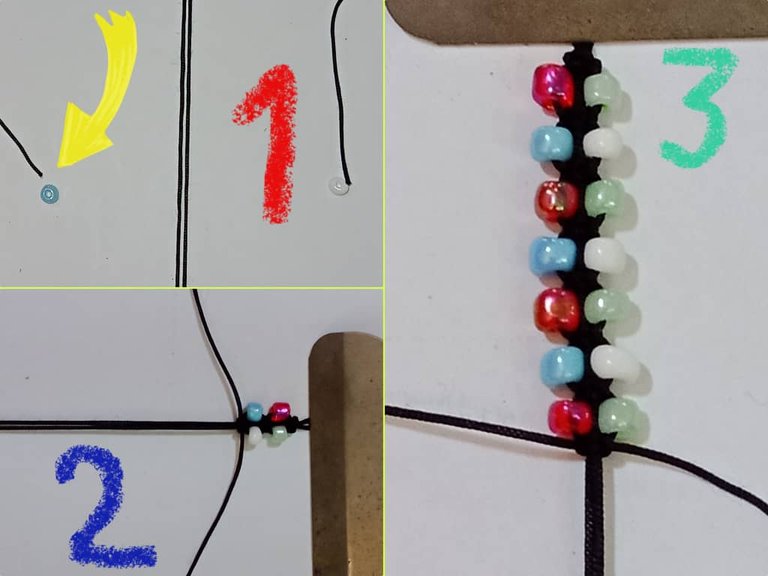
Beads of various colors
Lighter
Tape measure

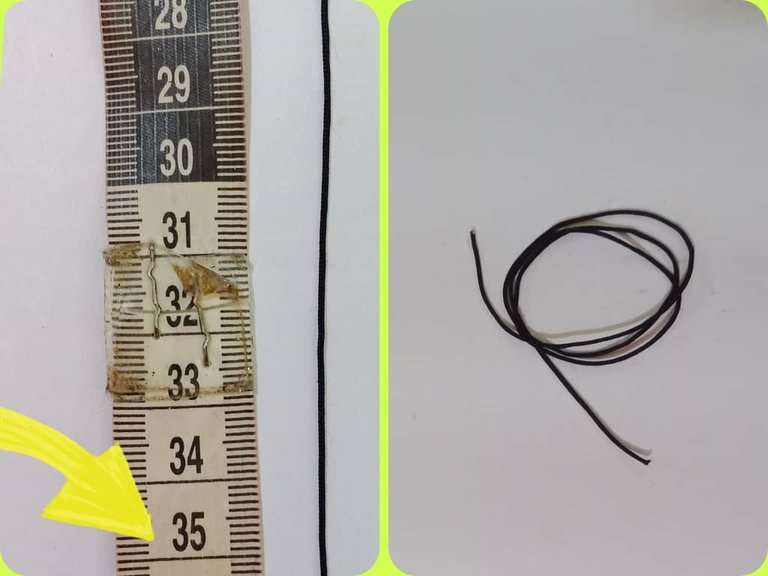
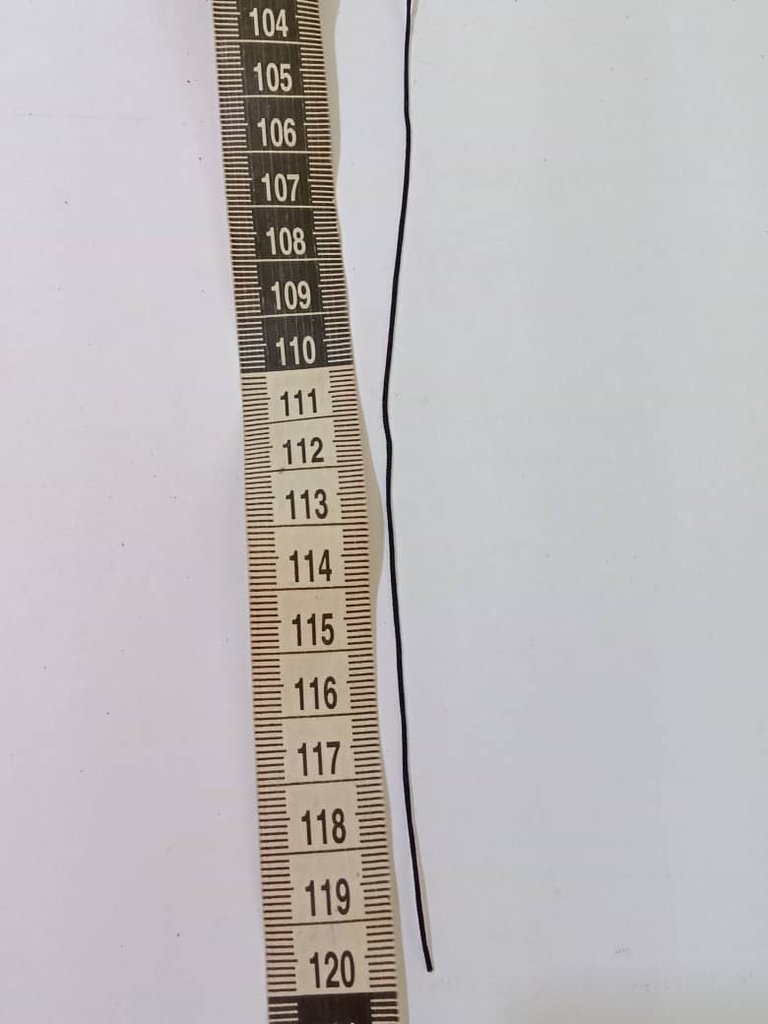

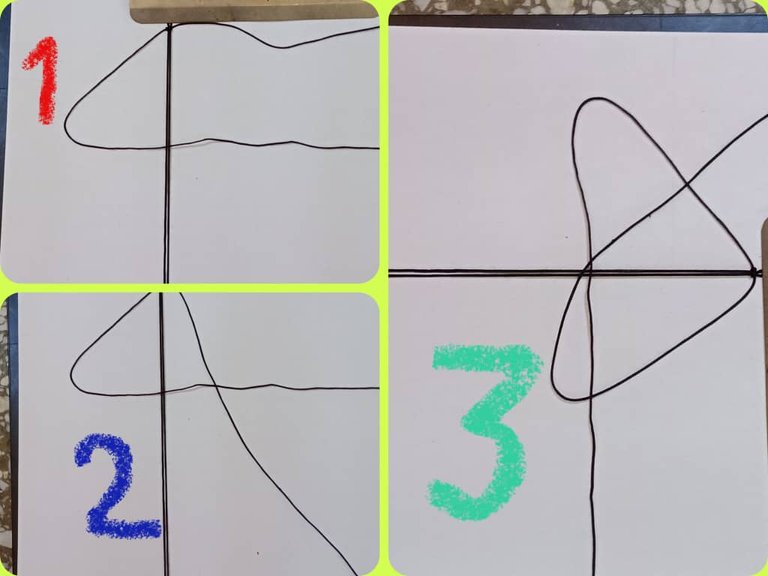
Then we take the base thread to a board at a distance of 7cm from the upper end down. From that measure we start to make the weaving we are going to do.
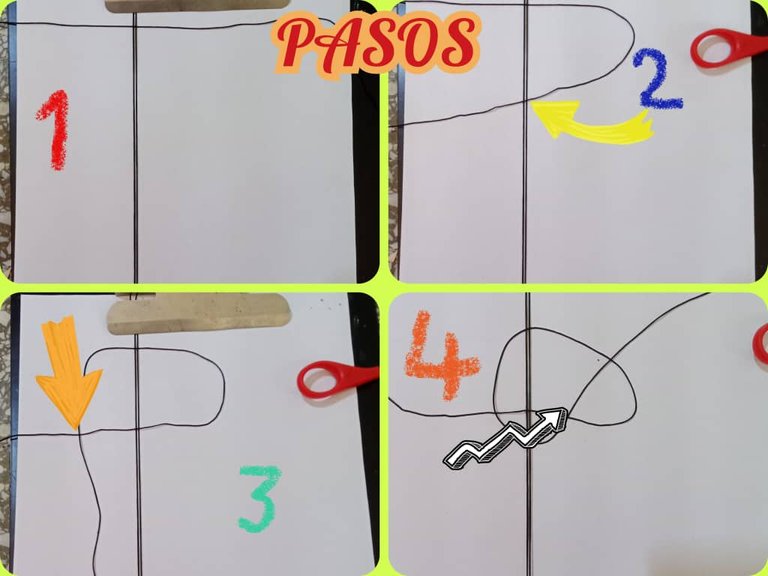
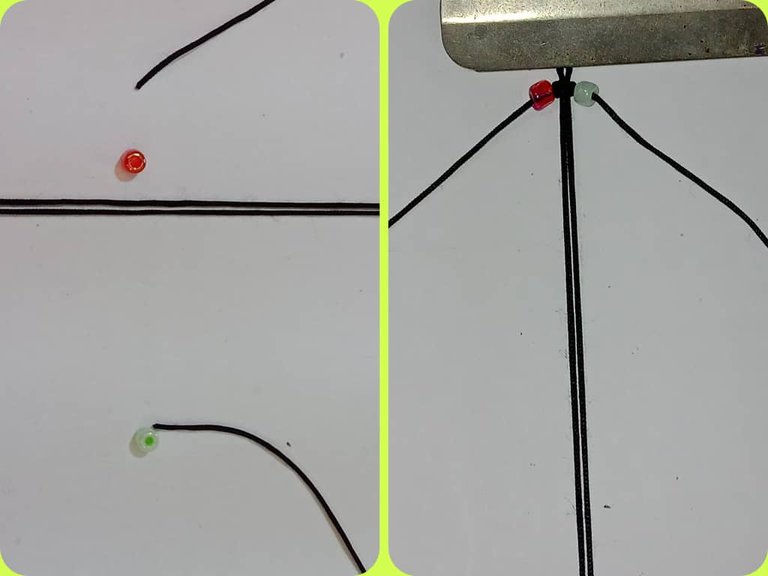
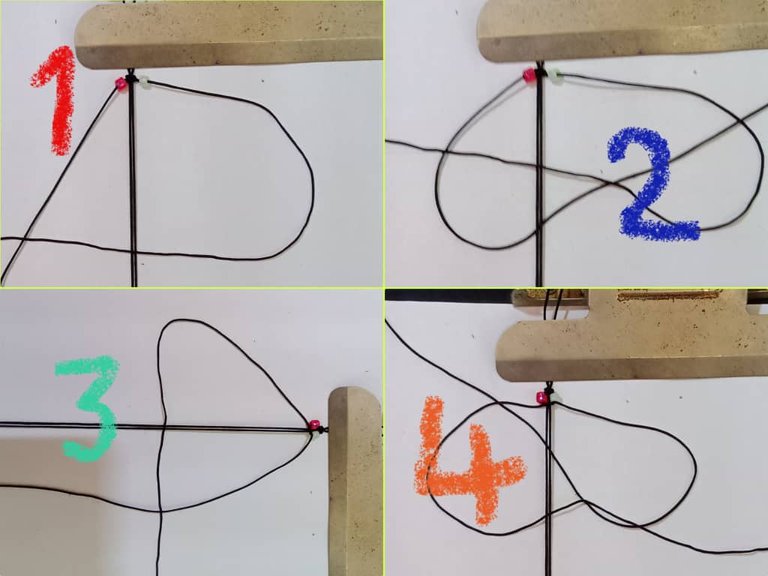
I did the same procedure until I reached 7cm. Then I placed a czech crystal on the base wire to embellish this beautiful jewel.
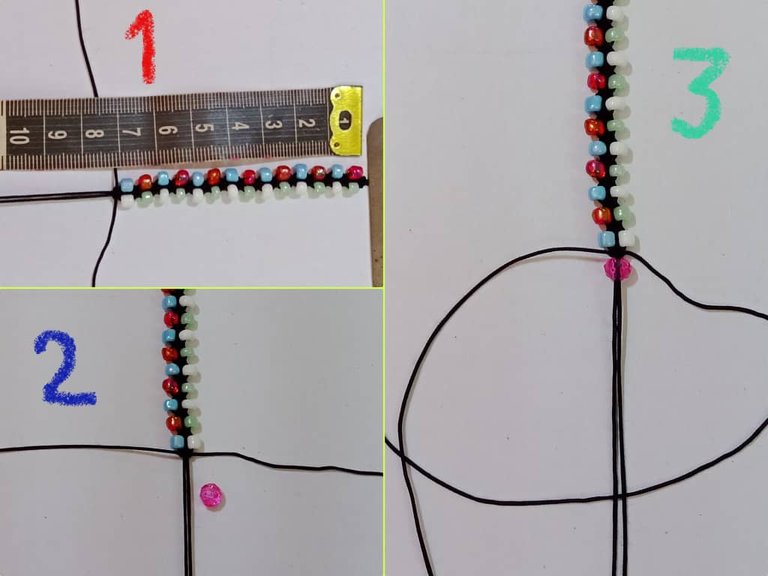
I then tied a complete flat knot and continued with the same procedure until the weaving was complete.
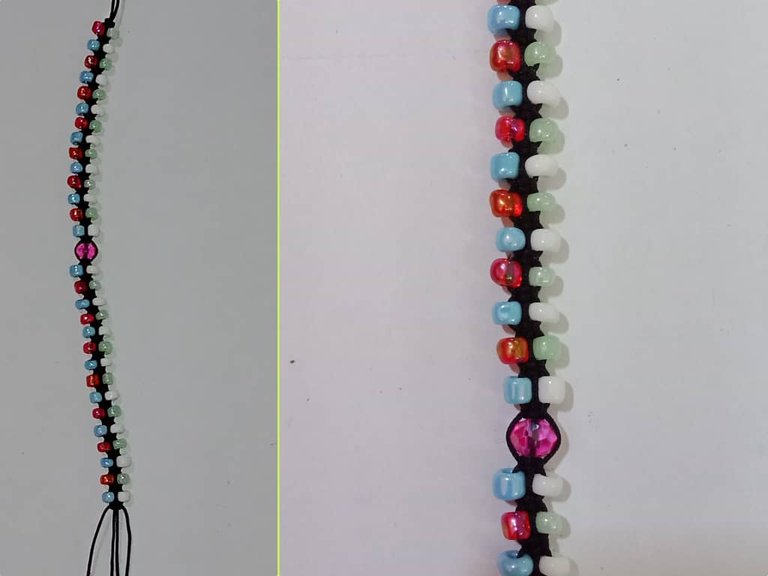
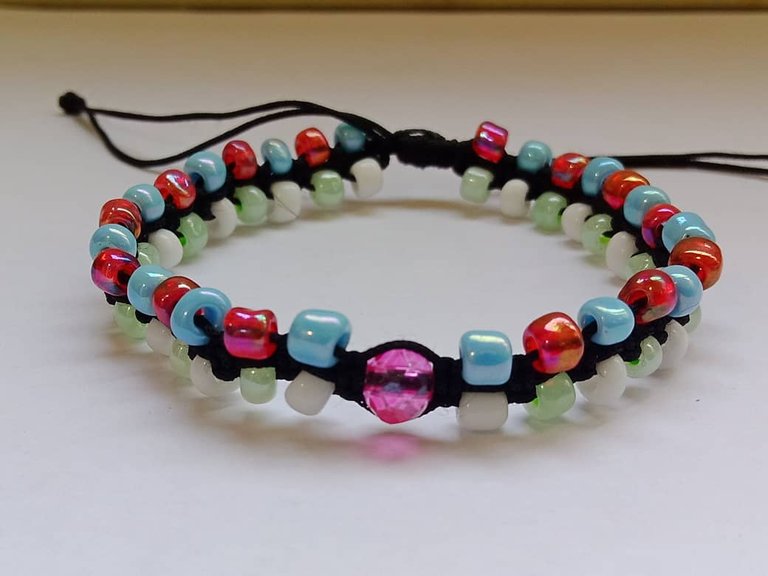
Después corté los hilos sobrante, realicé un nudo franciscano para el trancadero de la pulsera y con un encendedor sellé Y LISTO!! Así quedó esta preciosa pulsera llena de color y amor
Translated with https://www.deepl.com/translator
                  All images are my own, dividers courtesy of @kattycrochet.


             Todas las imágenes son de mi autoría, divisores cortesía de @kattycrochet.
Posted Using InLeo Alpha
Saludos amigo, te quedó hermoso el accesorio, como para un bello regalo, gracias por compartir tu tutorial.
Bendiciones amigo!! Muchas gracias por la visita y comentario
Es juvenil, delicada y también muy llamativa.
Las mostacillas así de grandes también se conocen como chaquiras. Son preciosas, a mí en lo personal me gustan mucho porque son muy versátiles.
Buen trabajo, amigo.
Saludos y muchas bendiciones
Bendiciones amiga!! Muchas gracias por vuestra palabra. Las mostacillas son muy versátiles
Muy linda pulsera. Saludos 🙏
Muchas gracias por la visita y comentario