Pulsera Macramé con diseño de Cruz

El arte es como la vida, mientras más lo conoces y admiras más te enamoras de él. Sigamos construyendo para una vida llena de Bella arte.
Virgilio07
Bendiciones abundantes y eternas para todos los miembros de esta fabulosa comunidad llena de belleza y arte plasmado en cada publicación. En éste inicio de semana ruego que tengamos mucha prosperidad y salud para ir en busca de todos los sueños que tenemos en el corazón.
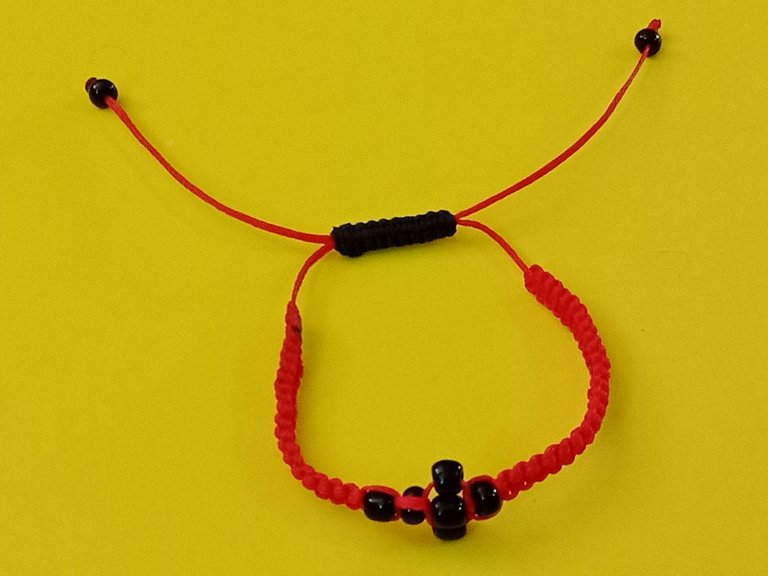
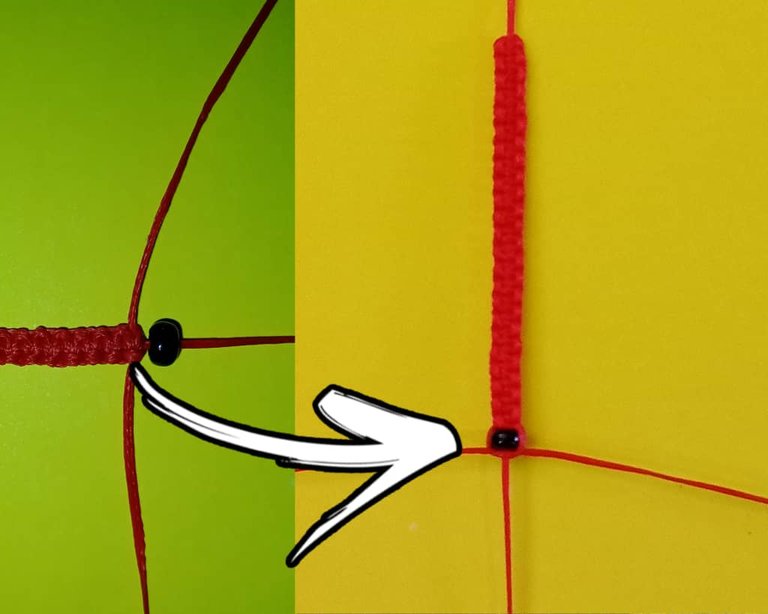
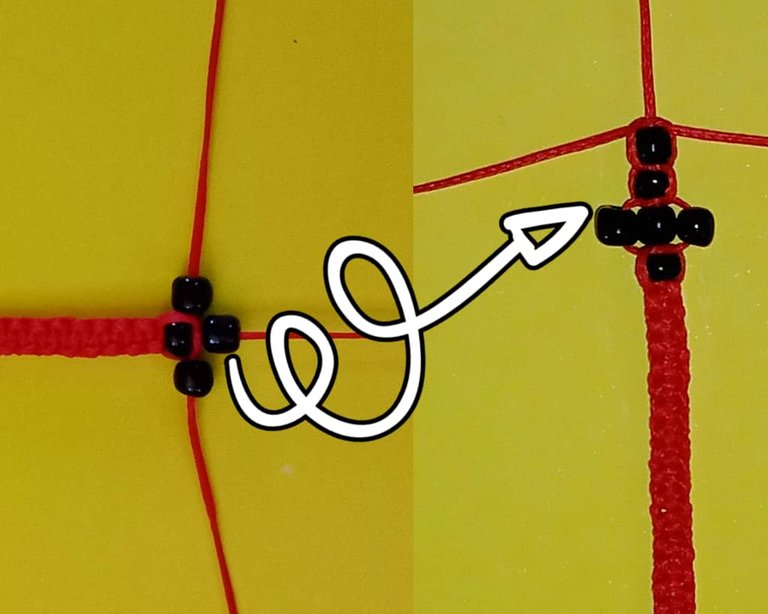
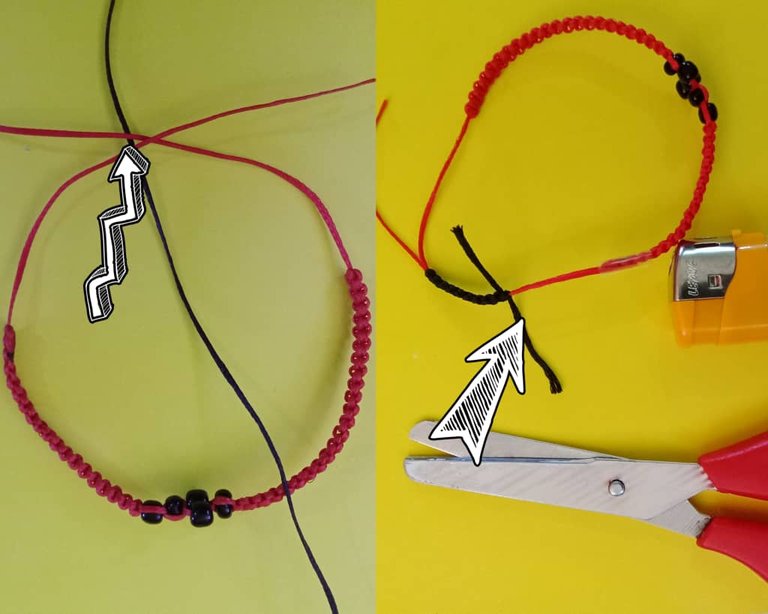
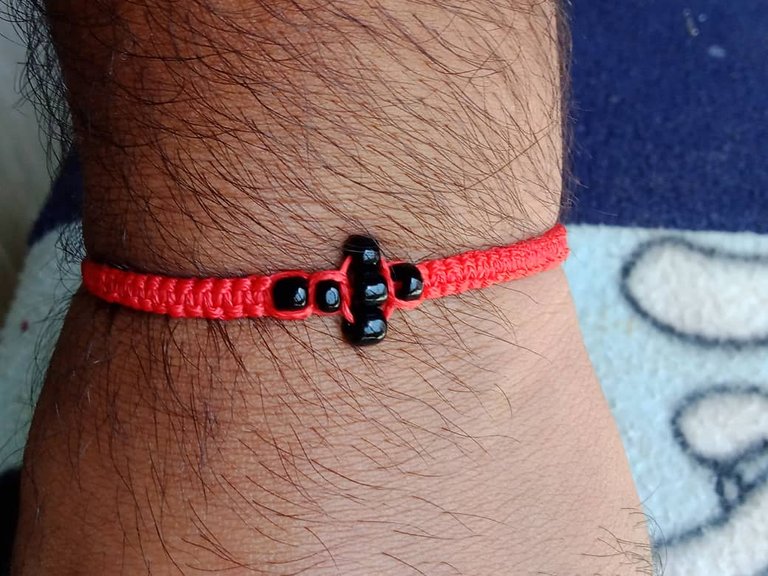
Hoy les comparto una hermosa pulsera macramé con tejido plano y con una cruz que engalana que hace de ésta una joya muy sencilla y llamativa. Es de mencionar, que esta pulsera es muy sencilla de elaborar y en tan sólo pocos minutos.
Sin más tiempo que perder les invito a acompañarme en esta fascinante creación y poner manos al hilo.
Art is like life, the more you know and admire it, the more you fall in love with it. Let's keep building for a life full of beautiful art.
Virgil07
Abundant and eternal blessings to all the members of this fabulous community full of beauty and art captured in each publication. At the beginning of this week I pray that we have much prosperity and health to go in search of all the dreams we have in our hearts.
Today I share with you a beautiful macramé bracelet with flat weave and with a cross that embellishes that makes this a very simple and striking jewel. It is worth mentioning that this bracelet is very easy to make in just a few minutes.
Without more time to lose I invite you to join me in this fascinating creation and put your hands to the thread.

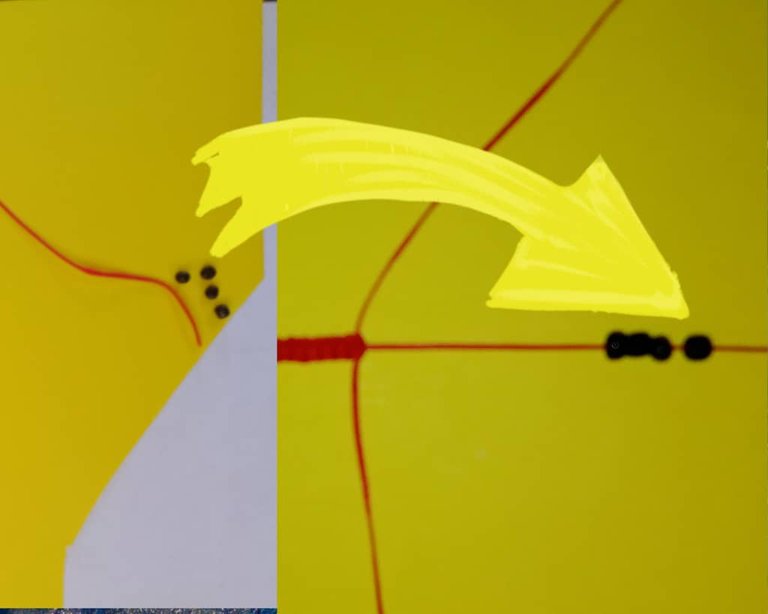
Los materiales que utilicé para realizar esta hermosa pulsera con cruz, a saber:
*Hilo chino
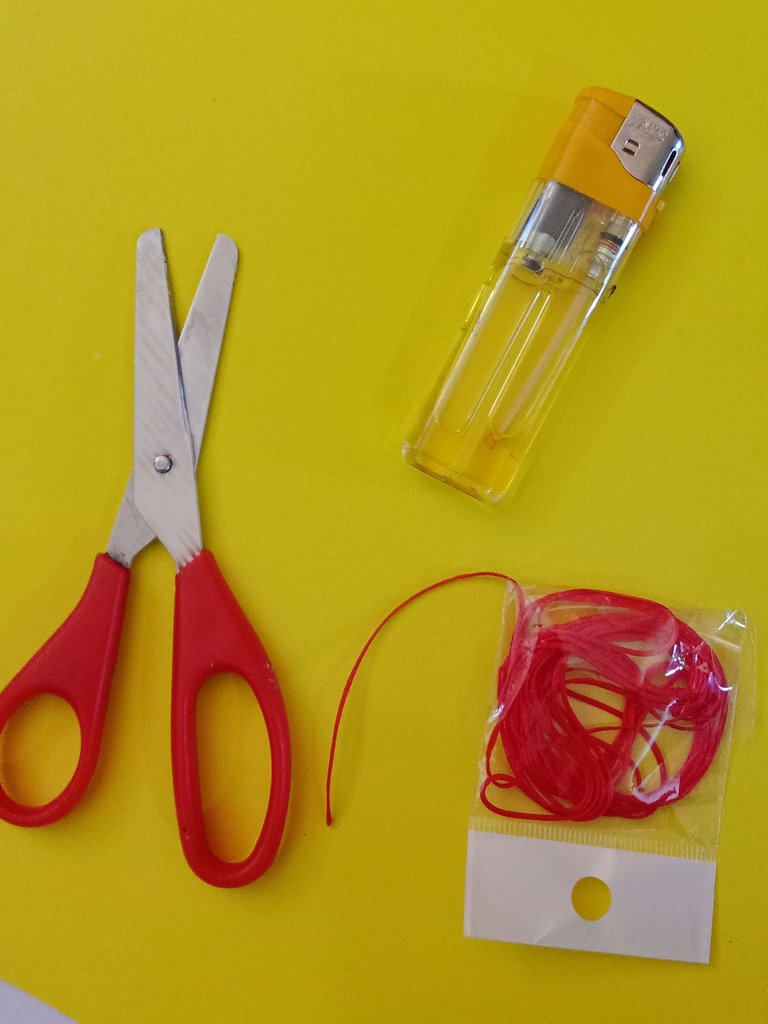
- Tijera
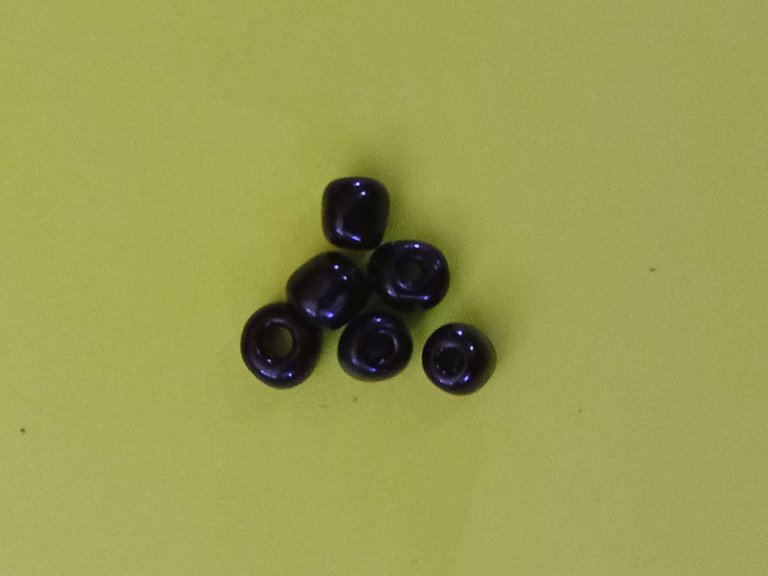
- Cuentas
- Encendedor
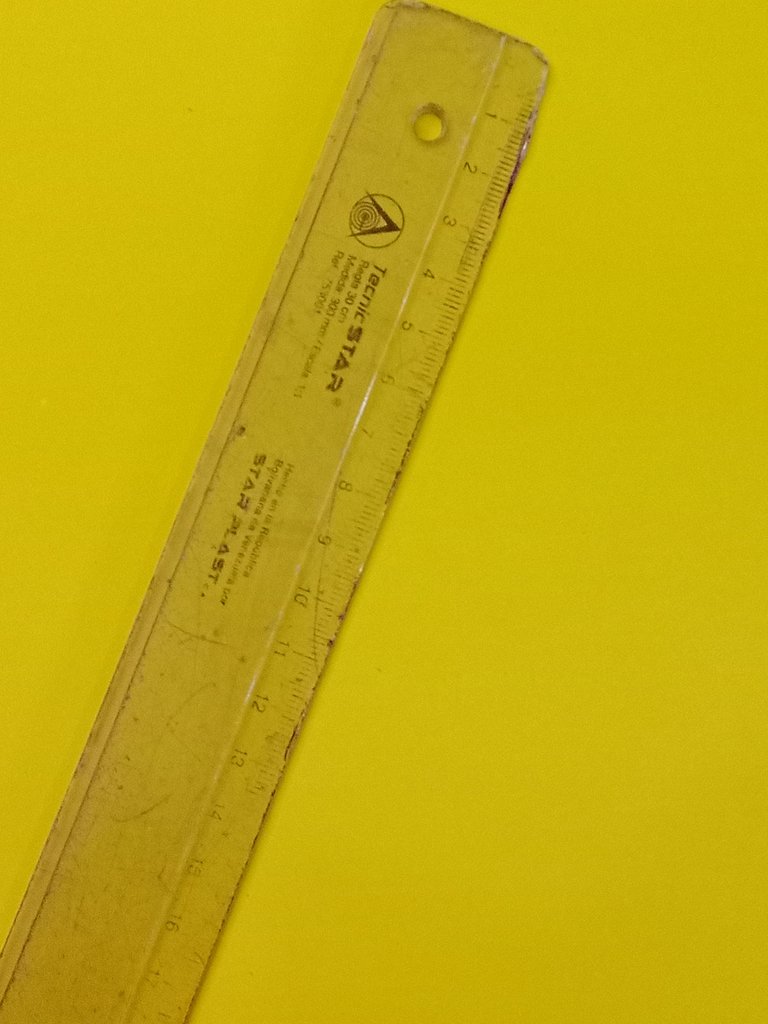
- Regla
The materials I used to make this beautiful bracelet with cross, namely:
*Chinese thread
- Scissors
- Beads
- Lighter
- Ruler
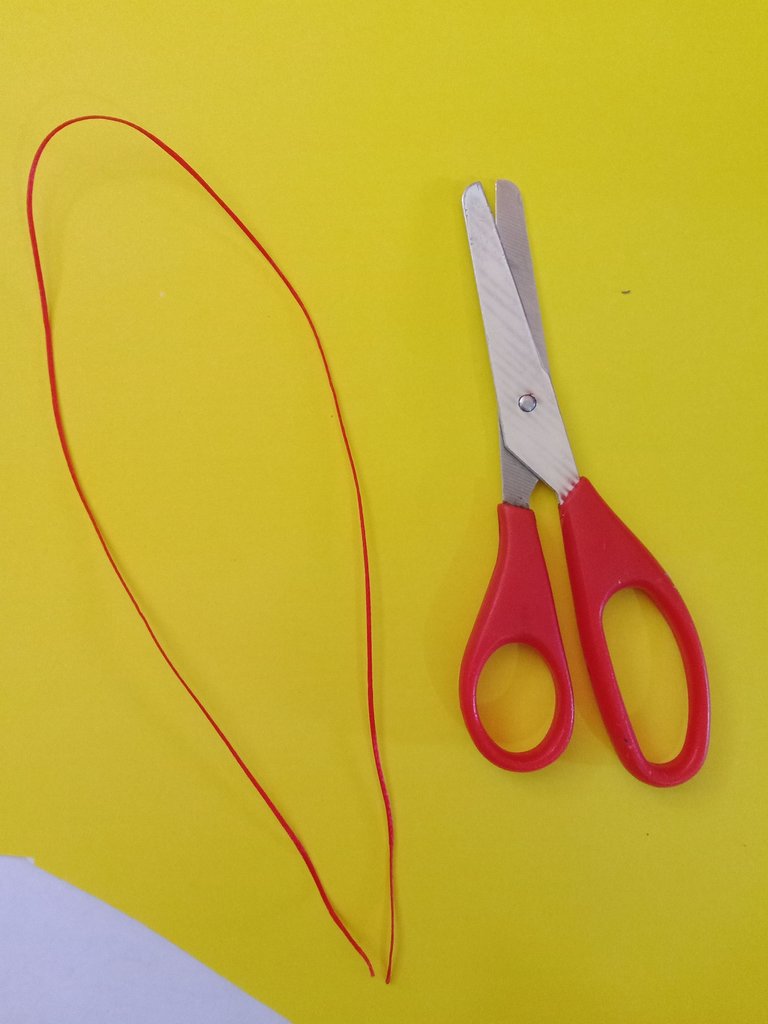
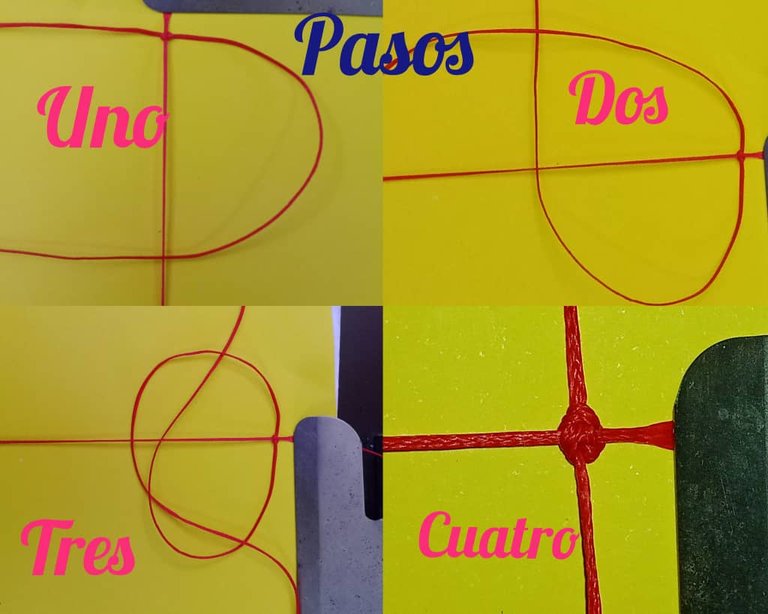
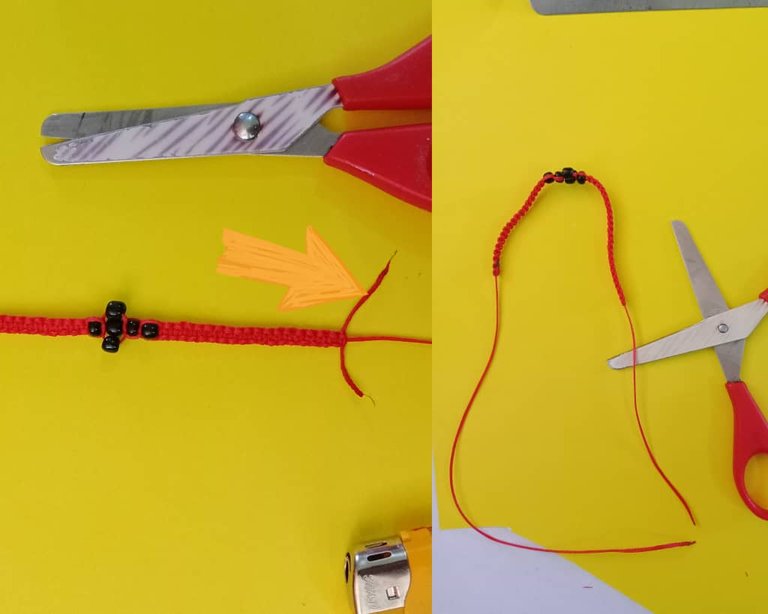
Para comenzar esta hermosa joya iniciamos cortando una hebra de hilo chino de 40cm el cuál utilizaremos como base para nuestra pulsera
To begin this beautiful jewelry we start by cutting a 40cm strand of Chinese thread which we will use as a base for our bracelet.
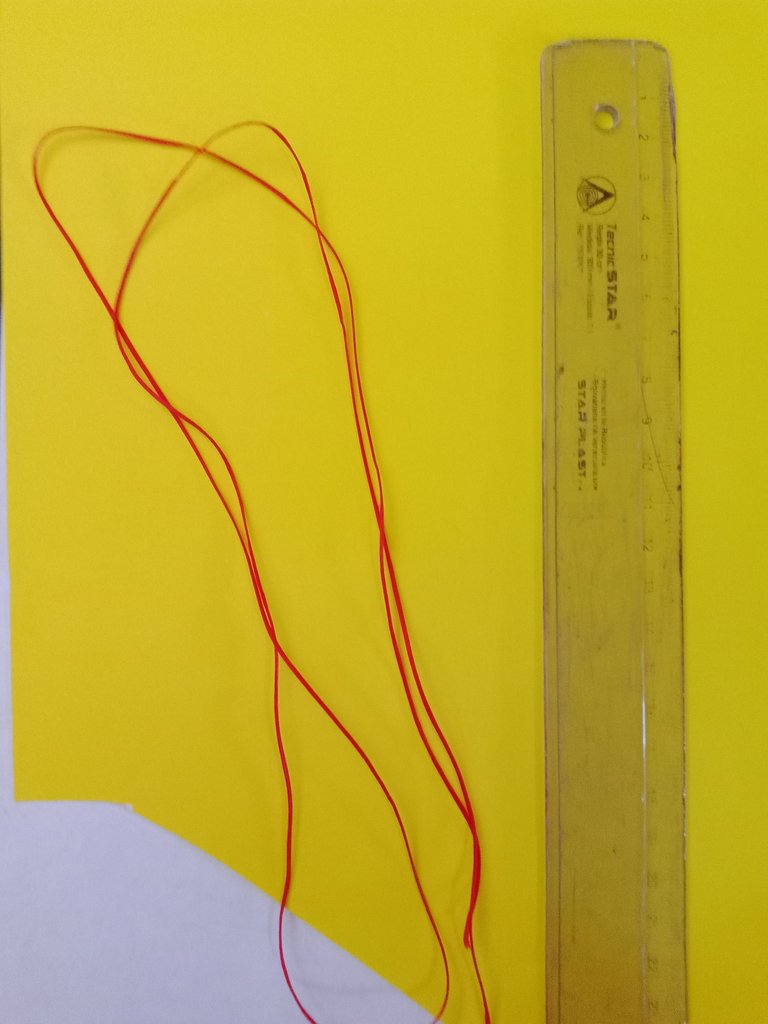
Luego corté una hebra de hilo chino de 100cm que utilizaremos para realizar el tejido plano
Then I cut a 100cm strand of Chinese thread that we will use to make the flat weave.


Translated with https://www.deepl.com/translator
                  All images are my own, dividers courtesy of @kattycrochet.


             Todas las imágenes son de mi autoría, divisores cortesía de @kattycrochet.
Te quedó fantástica. Me gusta la forma tan gráfica que explicas tus publicaciones. Has hecho un gran trabajo.
Genial idea de brazalete con cruz tejido en macramé genial para caballeros
Gracias por pasar y comentar . Es ideal y muy sencilla de elaborar