🎀🦋How to Make a white butterfly hair clip 🦋🎀

Hello guys,
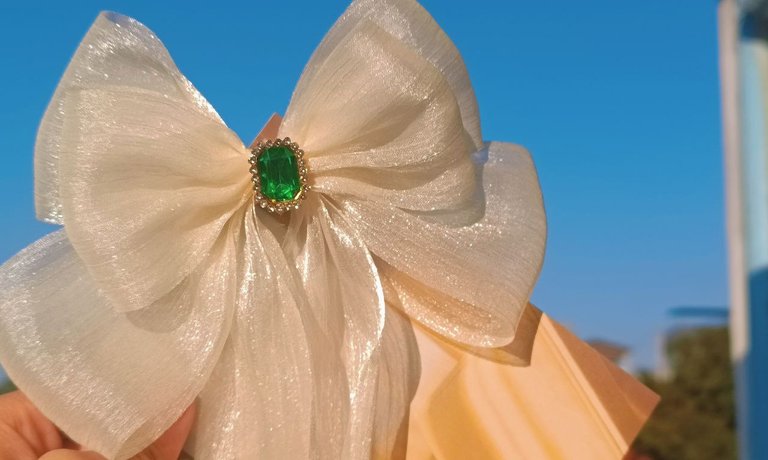
Welcome back to my new blog. How is it going guys? Is everything OK? I hope all is well. Tomorrow I will try to share a crochet baby mushroom keychain. Today I will share how to make a hair clip. This hair clip is a custom order that my friend ordered from me. She told me she wanted it to be white and green and the ribbon big because she was a school teacher. The reason she chose white and green is because our country's school uniform is white and green.


For the hair clip she ordered, I mainly used white ribbon, and that ribbon has bling bling. For the green, I used a green jade in the middle of the ribbon. The ribbon I used was thin and I felt it was beautiful like a butterfly's wing. So I named this ribbon as white butterfly hair clip. What do you think? I will now tell you the steps and materials I used to make this hair clip.
🦋Materials-🦋
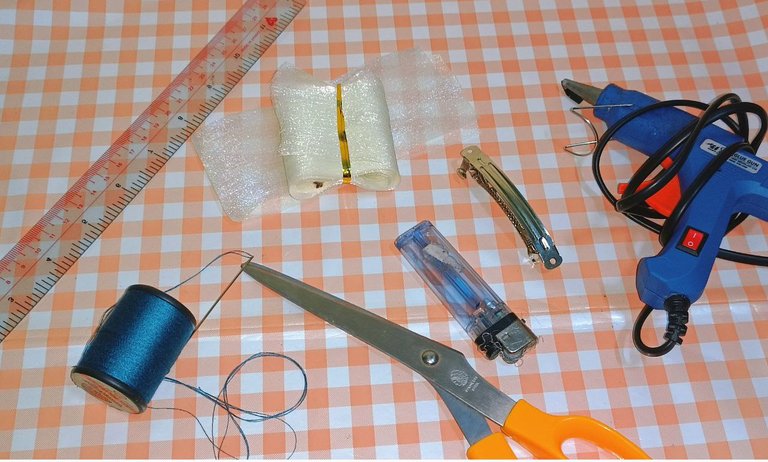
- ribbon
- green jade
- ruler
- scissors
- hair clip
- glue gun
- needle and thread
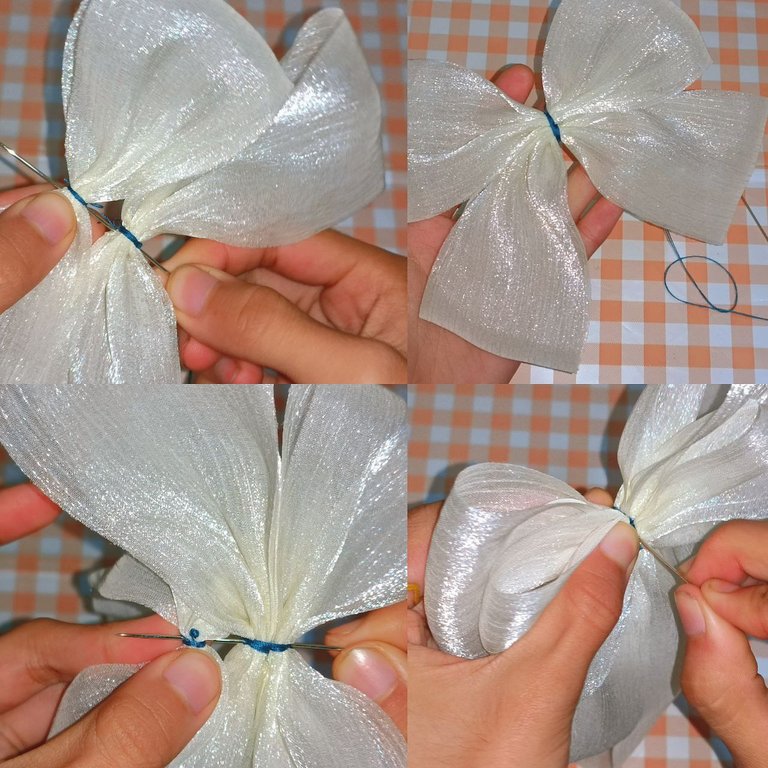
🦋Step-1🦋


In step-1, I cut the white ribbon into four pieces. Those 4 parts are different in size. The dimensions I cut are shown in the picture above.
🦋Step-2🦋

You can see in the picture that the edges of the ribbon are not neat. So I touched the edge of the ribbon with a little fire. I folded the ribbons from the middle and touched them again with a little light. What I do is to make the middle point appear.
🦋Step-3🦋

In step-3 I put the ribbon back to its original shape and put the 2 ends on the middle point. Hold it with a hair clip so that it doesn't move, and sew it with a needle at the middle point. Then I pulled the thread and made it into a cute ribbon. The remaining ribbons were also made in the same way.
🦋Step-4🦋
First, I sewed together 2 12 inch ribbon and 14 inch ribbon. Then I stitched the 16 inch ribbon together at the bottom of the ribbon. The 11 inch ribbon is stitched together above.
🦋Step-5🦋
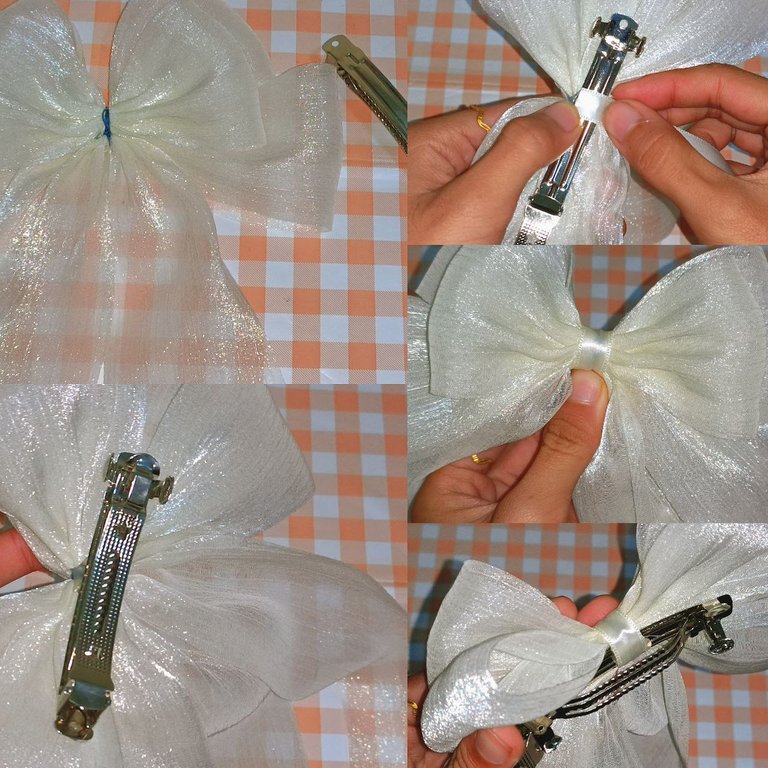
I attached the ribbon made in step-4 with a hair clip. Then I wrapped a small ribbon in the middle of the ribbon.


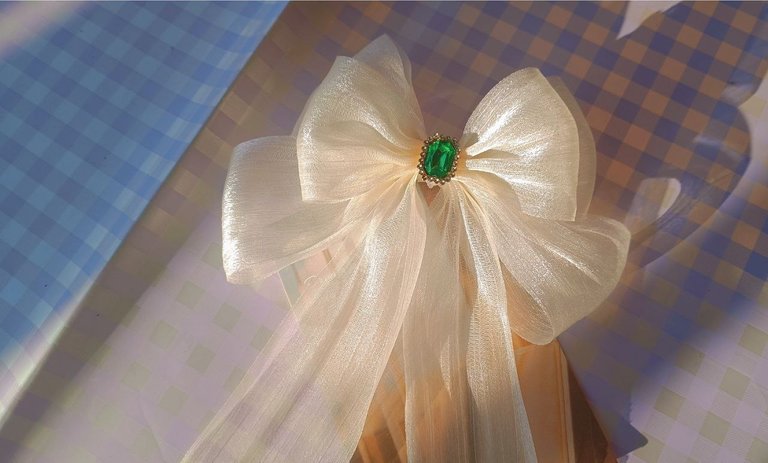

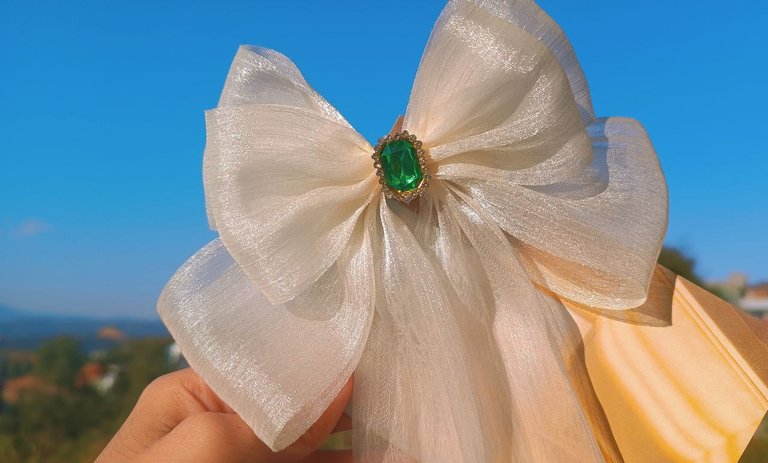
In the last step, the green jade is attached to the middle of the ribbon. Now I have a very cute ribbon. If you are interested, you can follow easily. Thank you very much for reading my post with interest till the end. See you tomorrow in a new post. Bye Bye.
@winelay 🍇
This post has been manually curated by @bhattg from Indiaunited community. Join us on our Discord Server.
Do you know that you can earn a passive income by delegating to @indiaunited. We share more than 100 % of the curation rewards with the delegators in the form of IUC tokens. HP delegators and IUC token holders also get upto 20% additional vote weight.
Here are some handy links for delegations: 100HP, 250HP, 500HP, 1000HP.
100% of the rewards from this comment goes to the curator for their manual curation efforts. Please encourage the curator @bhattg by upvoting this comment and support the community by voting the posts made by @indiaunited.
Yay! 🤗
Your content has been boosted with Ecency Points, by @winelay.
Use Ecency daily to boost your growth on platform!
Hermoso, el color me encanta 😍
Que hermoso y delicado.. digno de una princesa, bendiciones 🤗
Wow! Amazingly done @winelay. Such a creative one. It's good that you have a skill like this. Thanks for sharing this one. God bless
Your ribbon is looking really amazing, your explanations are clear and your steps are very easy to understand. I'm going to try it out.
Thanks for sharing