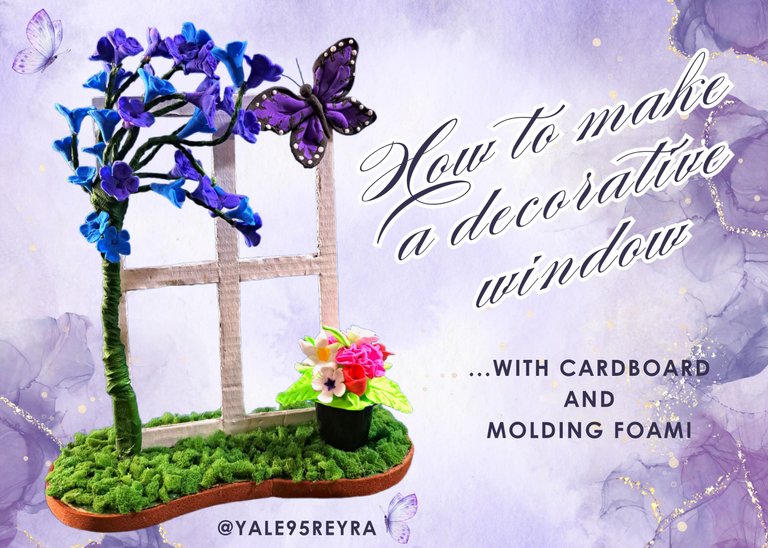
[EN-ES] How to make a decorative window with cardboard and molding foami / Cómo hacer una ventana decorativa con cartón y foami moldeable.
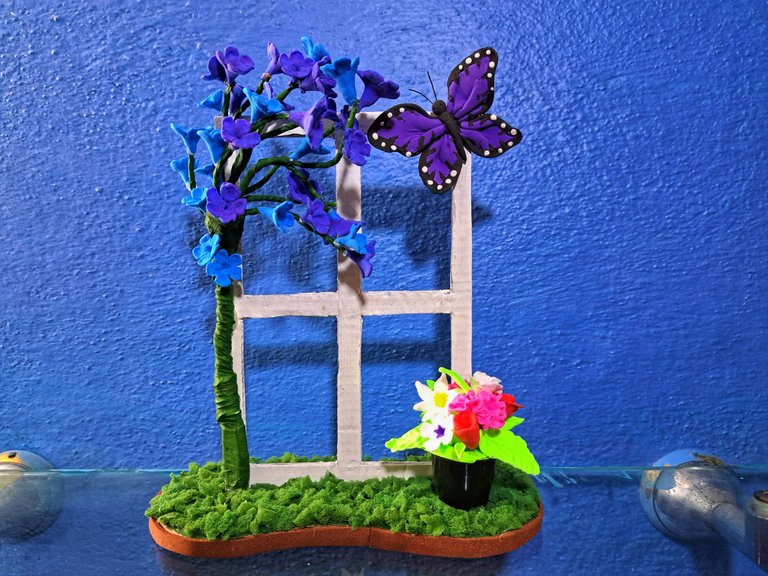
They say that the eyes are the windows to the soul, but have you ever thought about what the window that would allow us to see our soul would really look like? I have it clear, and it would be a simple window, but at the same time very beautiful adorned only with what is necessary because I consider myself a fairly simple person. The window of my soul would be surrounded by flowering trees and underneath there would be flower pots, as I am a true lover of plants and flowers.
That said, today I bring you a tutorial where I will show you step by step how to make a decorative window which is a small representation of what would be for me, my soul window. I hope you like it and without further ado, let's get started.
Dicen que los ojos son las ventanas del alma, pero alguna vez han pensado como sería realmente la ventana que permitiría ver nuestra alma. Yo la tengo clara, y sería una ventana sencilla, pero a la vez muy bella adornada solo con lo necesario ya que me considero una persona bastante simple. La ventana de mi alma estaría rodeada de árboles florales y debajo habría macetas, pues soy fiel amante de las plantas y las flores.
Dicho esto, el día de hoy les traigo un tutorial donde les mostraré paso a paso cómo hacer una ventana decorativa la cual es una pequeña representación de lo que sería para mí, mi ventana del alma. Espero que les guste y sin más preámbulos comencemos.
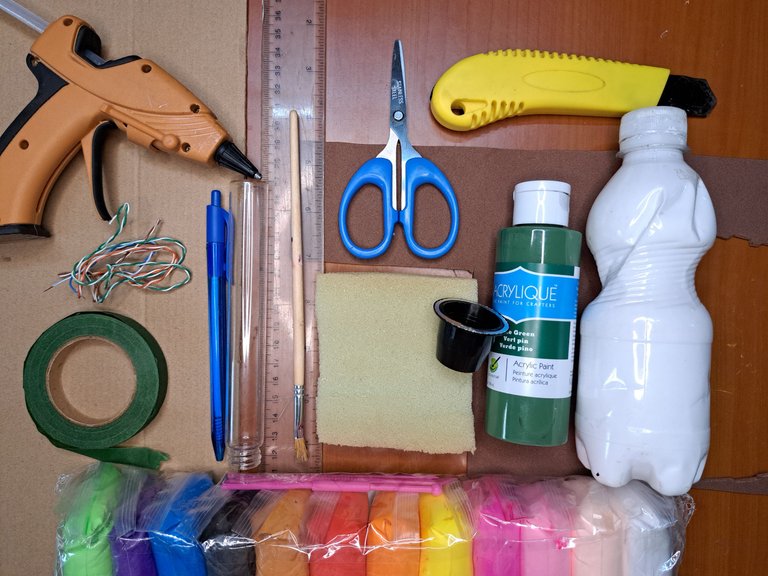
Materials // Materiales
- Cardboard / Cartón
- Pencil / Lapicero
- Cutter / Cúter
- Ruler / Regla
- Wire / Alambre
- Silicone / Silicona
- Floral tape / Tape floral
- Sponge / Esponja
- Paint / Pintura
- Brush / Pincel
- Scissors / Tijera
- Carmelite Foami / Foami carmelita
- Moldable Foami / Foami moldeable
- Roller / Rodillo
- Straw / Estecas
- Empty coffee capsule container / Envase vacío de cápsula de café
- Paper / Papel
Step by Step // Paso a paso
 |
 |
 |
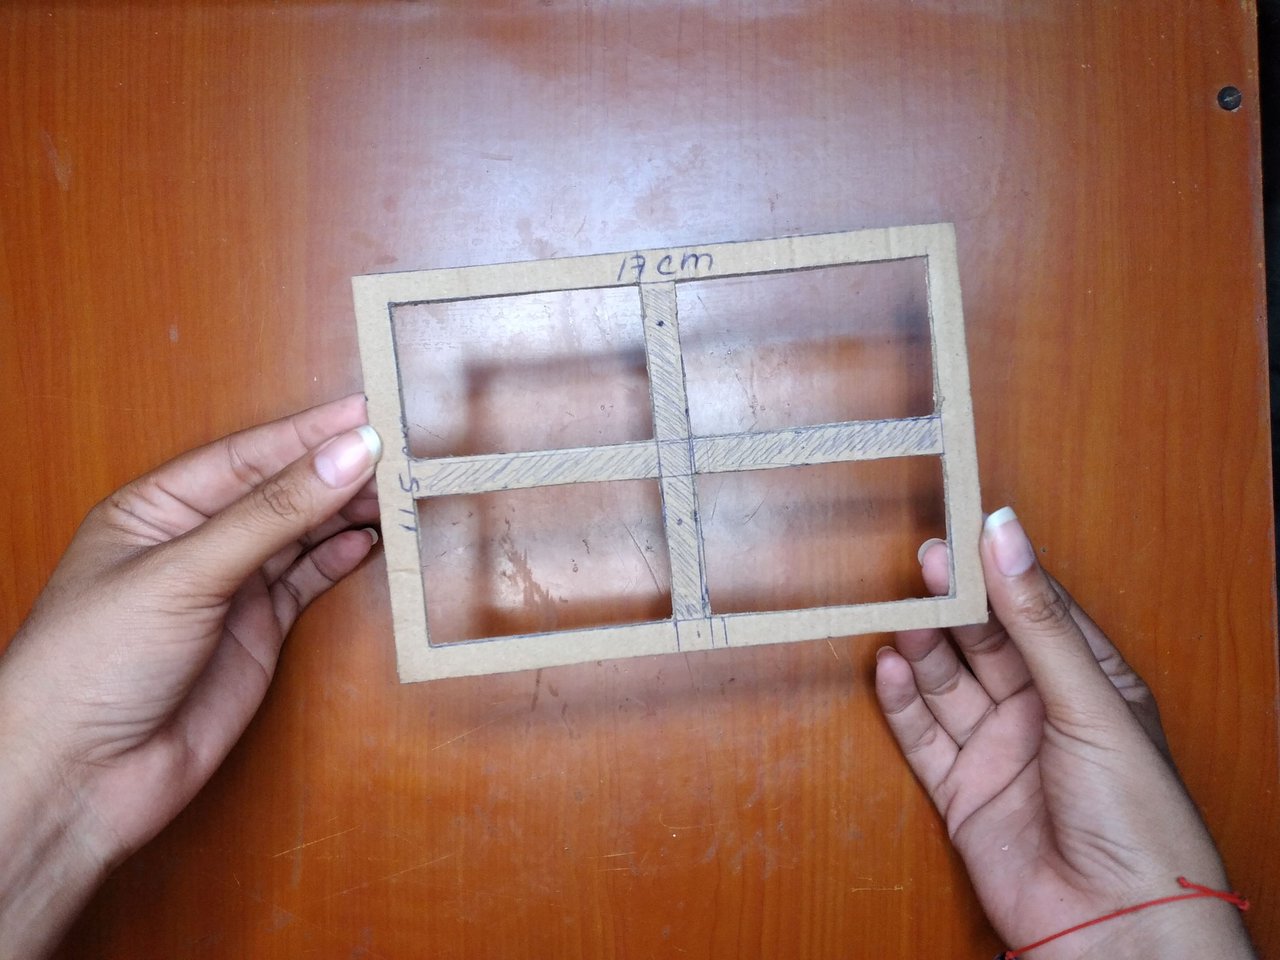 |
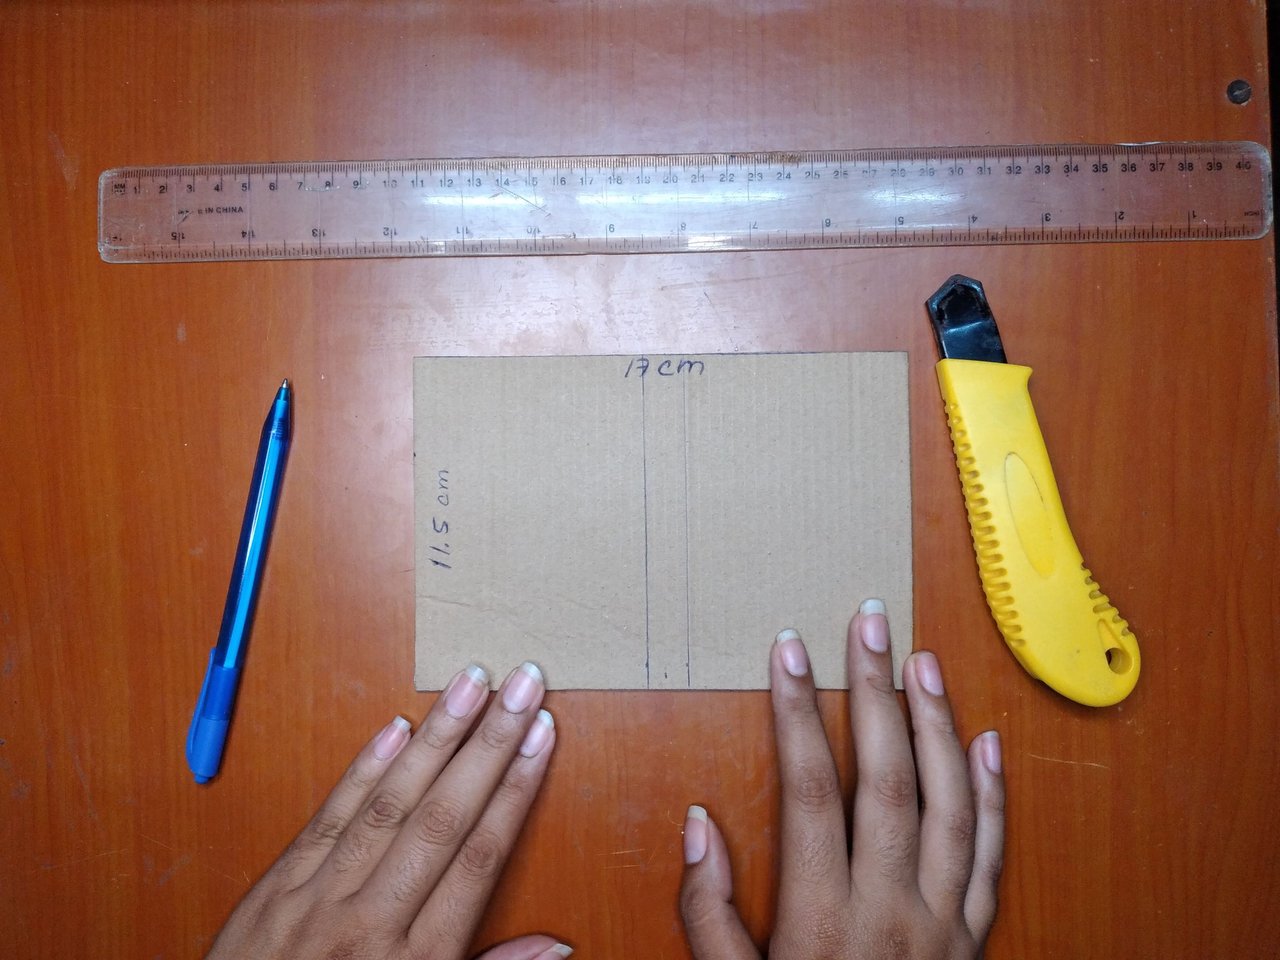
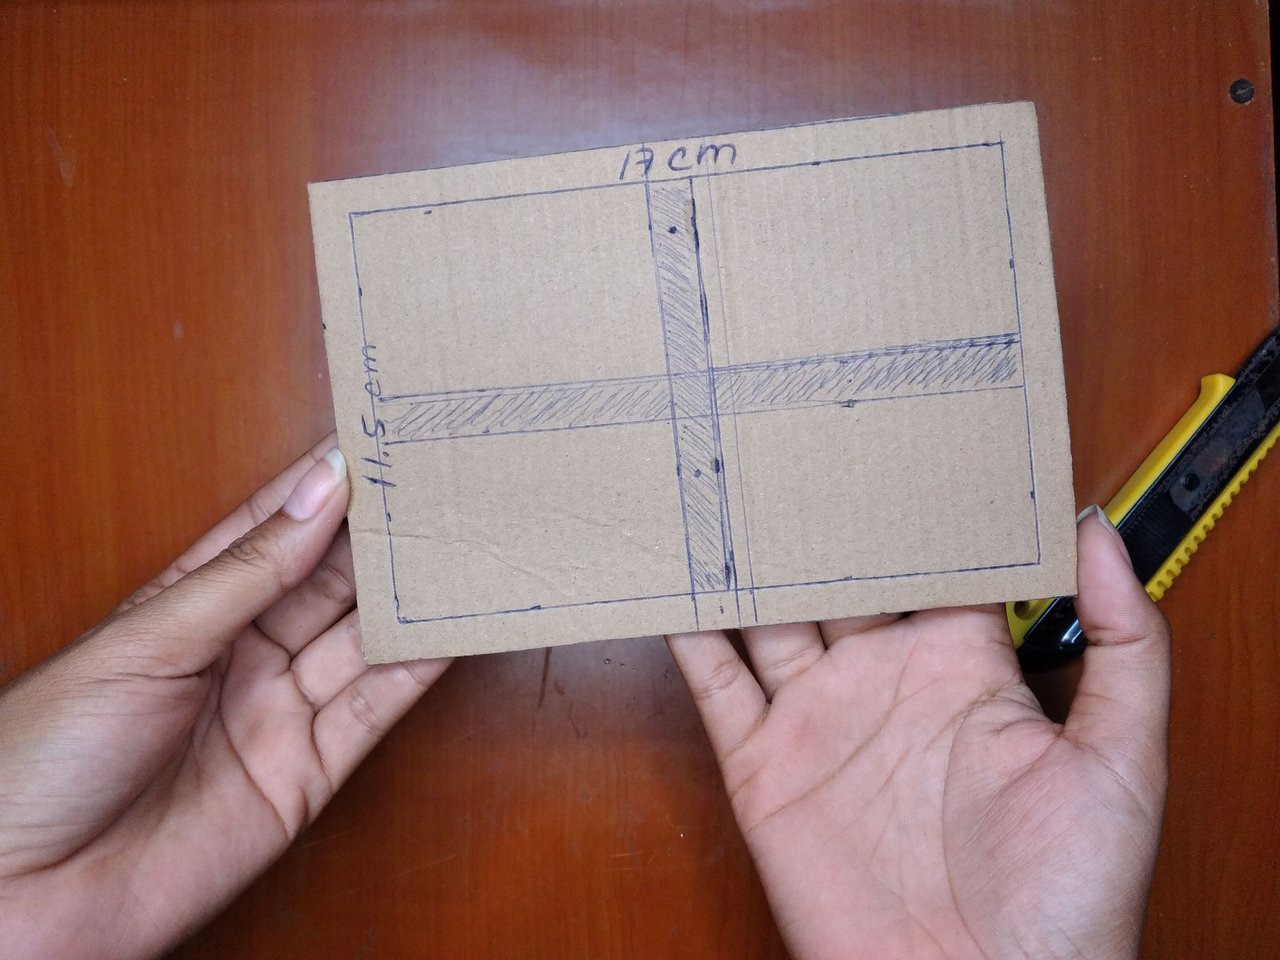
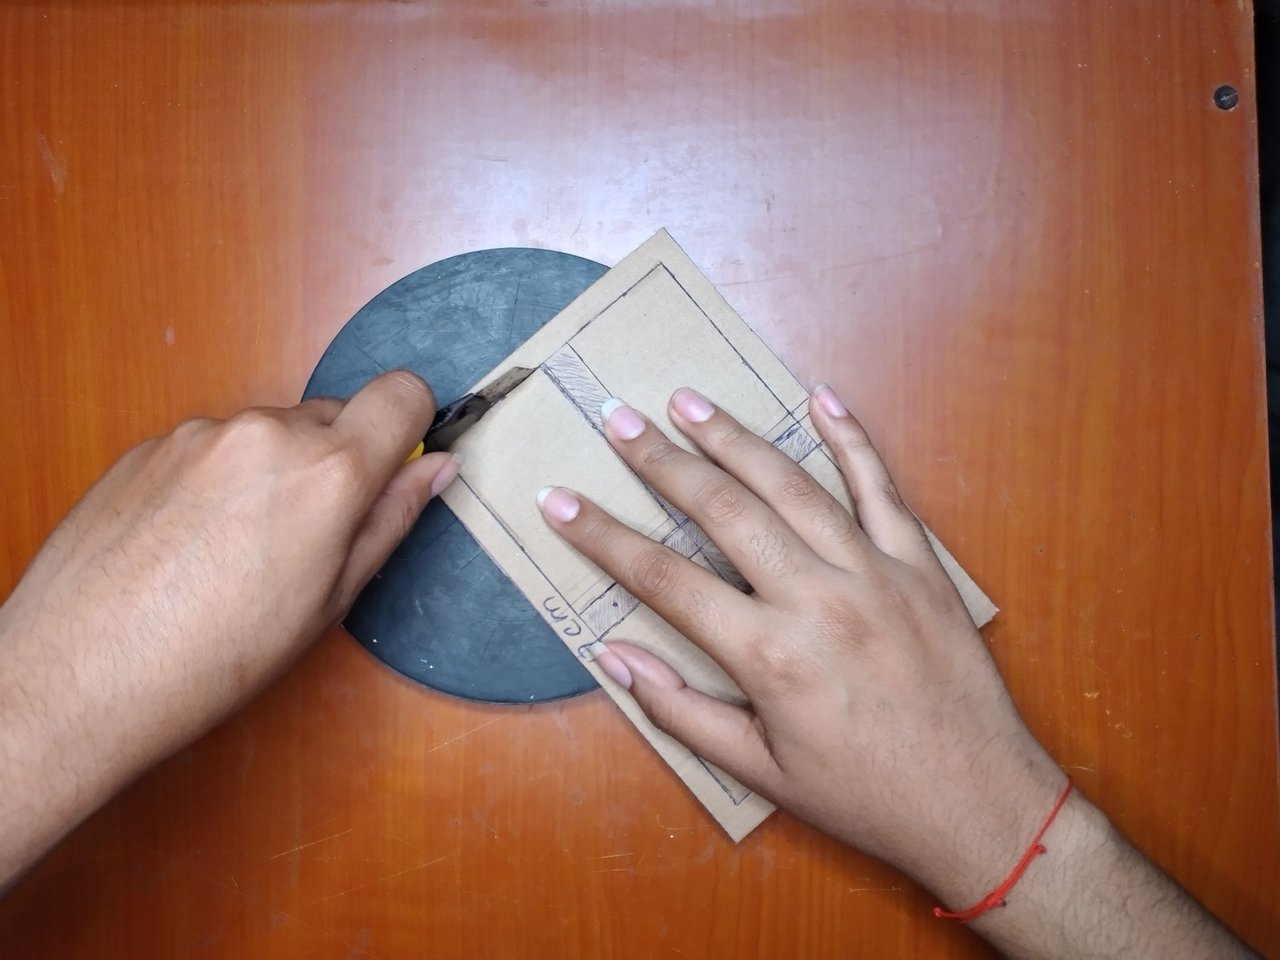
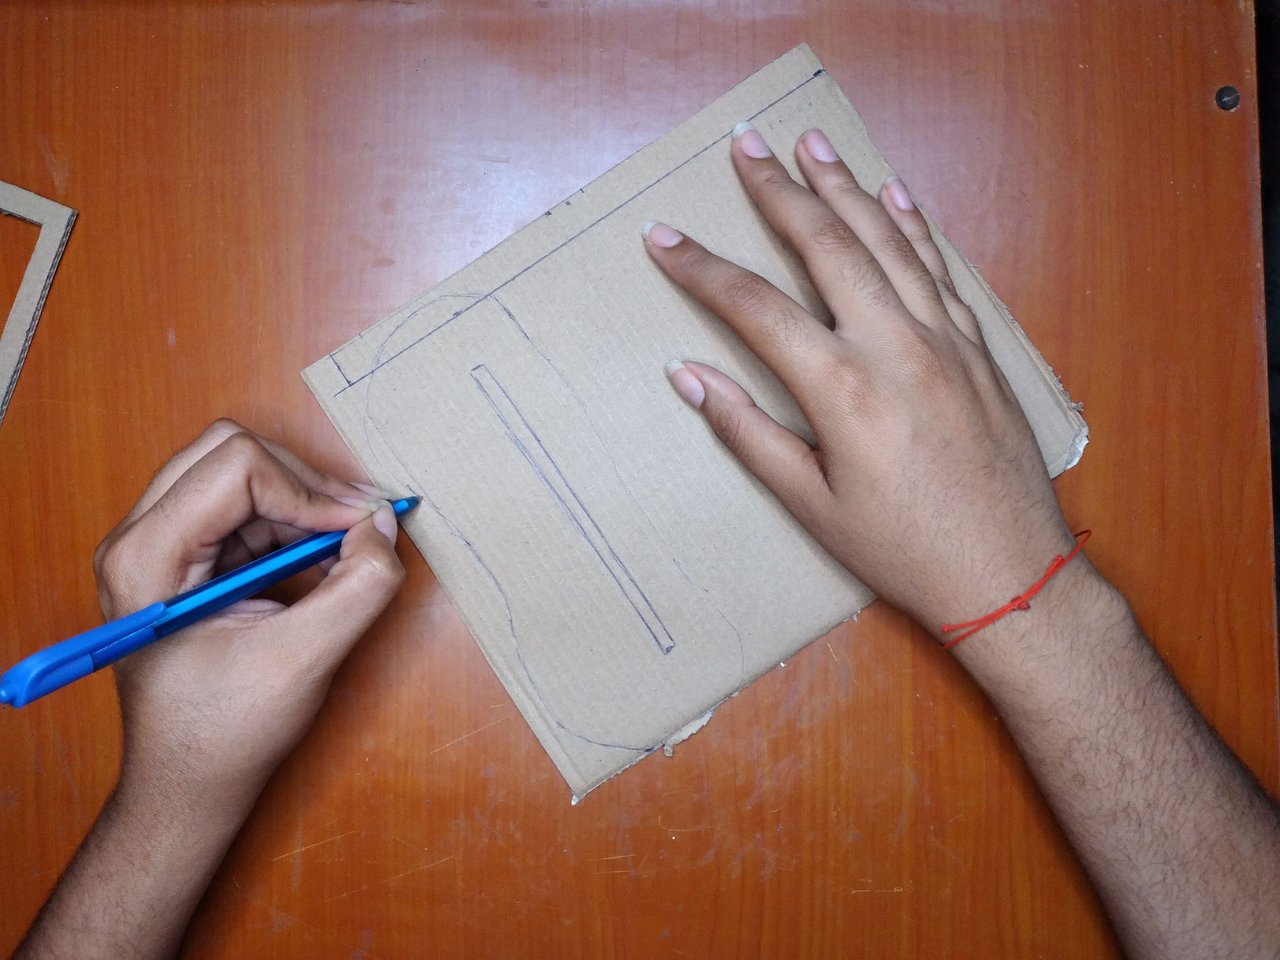
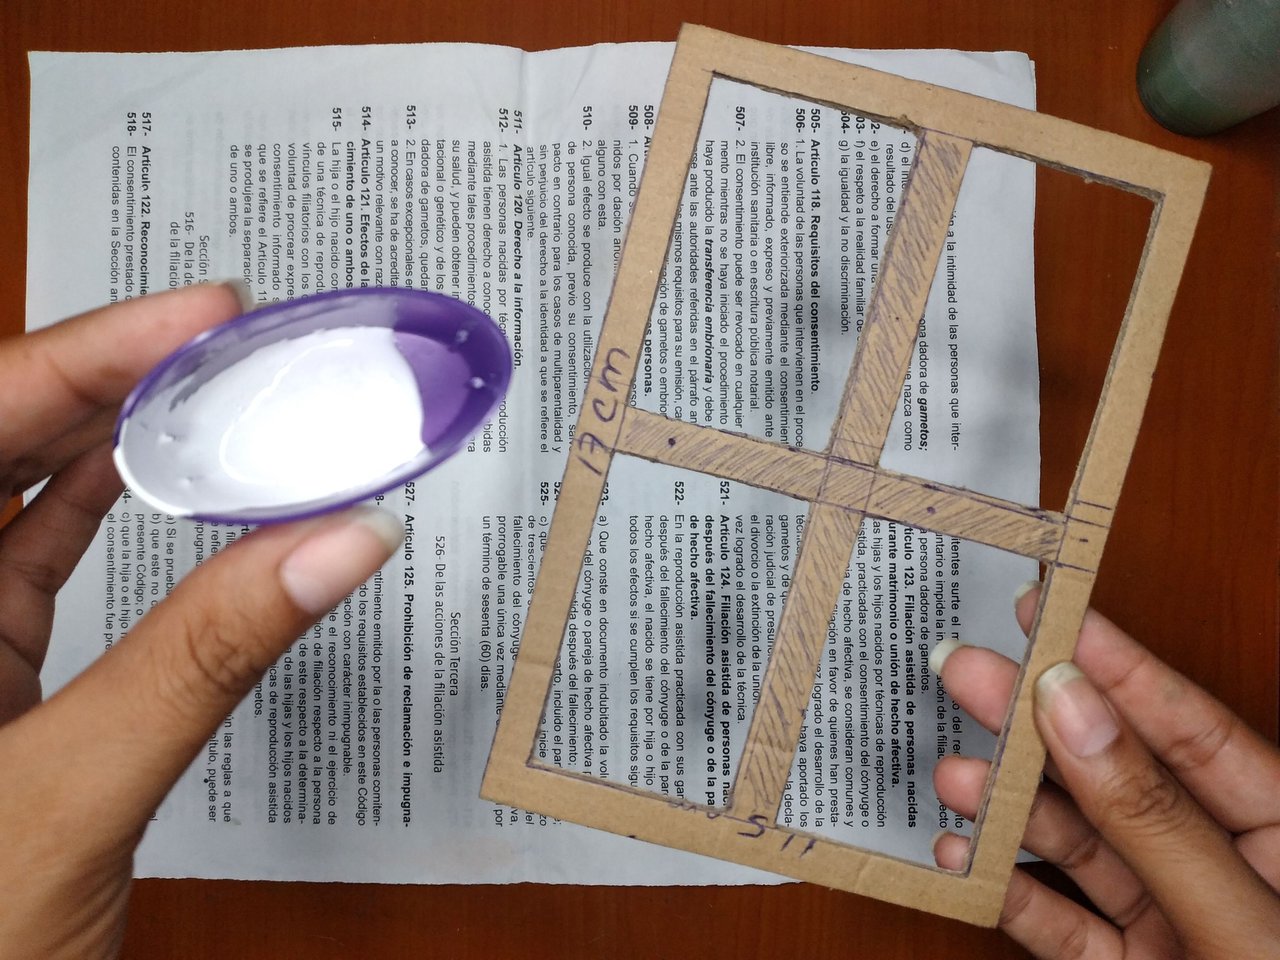
To begin, take a square of recycled cardboard of 17 x 11.5 cm, this is the size I used, you can always do it to the size you prefer. Then along the entire edge mark a cm distance, as well as the cross in the center. This silhouette will be the window frame. With a cutter cut, very carefully, the interior squares.
Para comenzar, tomar un cuadro de cartón reciclado de 17 x 11.5 cm, esta es la medida que utilicé, siempre pueden hacerlo a la medida que prefieran. Luego por todo el borde marcar un cm de distancia, al igual que la cruz del centro. Esta silueta será el marco de la ventana. Con un cúter cortar, con mucho cuidado, los cuadros interiores.
 |
 |
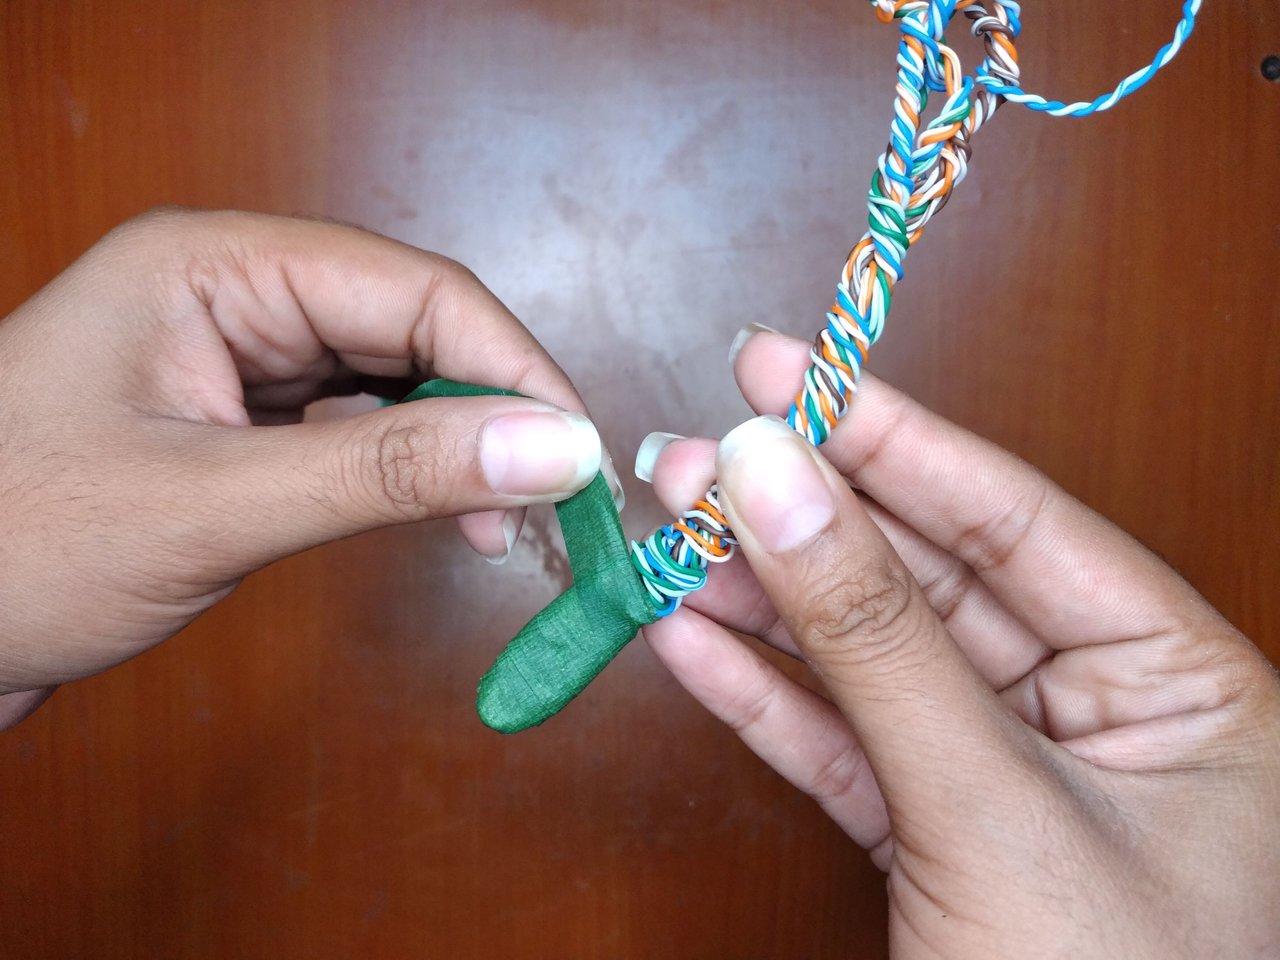 |
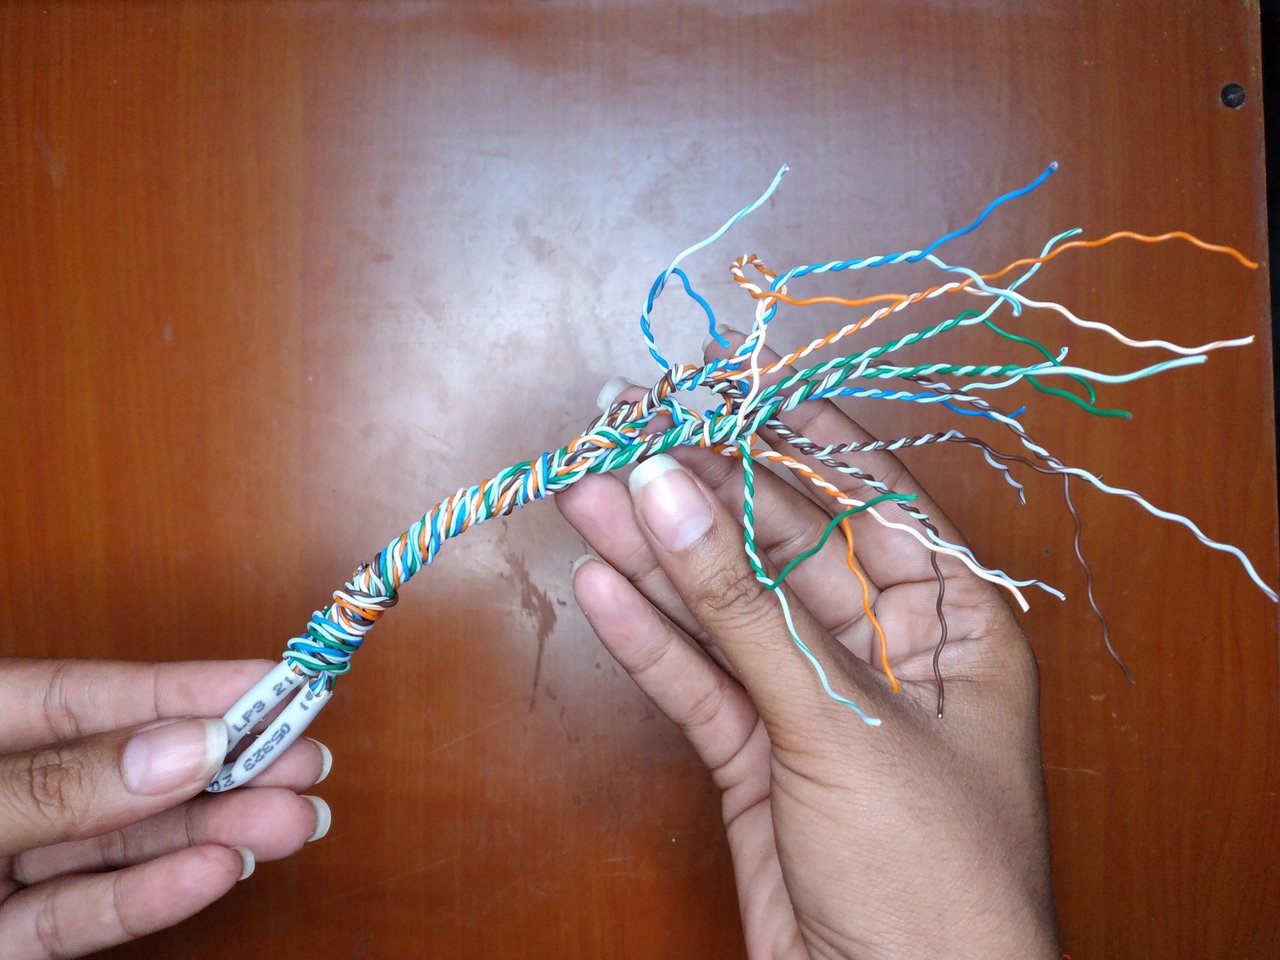
I took a net cable and with the cutter I cut the plastic coating in order to use the wires inside. These wires can be twisted into any shape we want, so I made the structure of a tree with its branches. Then I covered the entire surface with floral tape.
Tomé un cable de red y con el cúter corté el recubrimiento plástico con el fin de utilizar los alambres que tiene dentro. Estos al torcerlos podemos darle la forma que queramos , por lo tanto, hice la estructura de un árbol con sus ramas. Luego cubrí toda la superficie con tape floral.
 |
 |
 |
 |
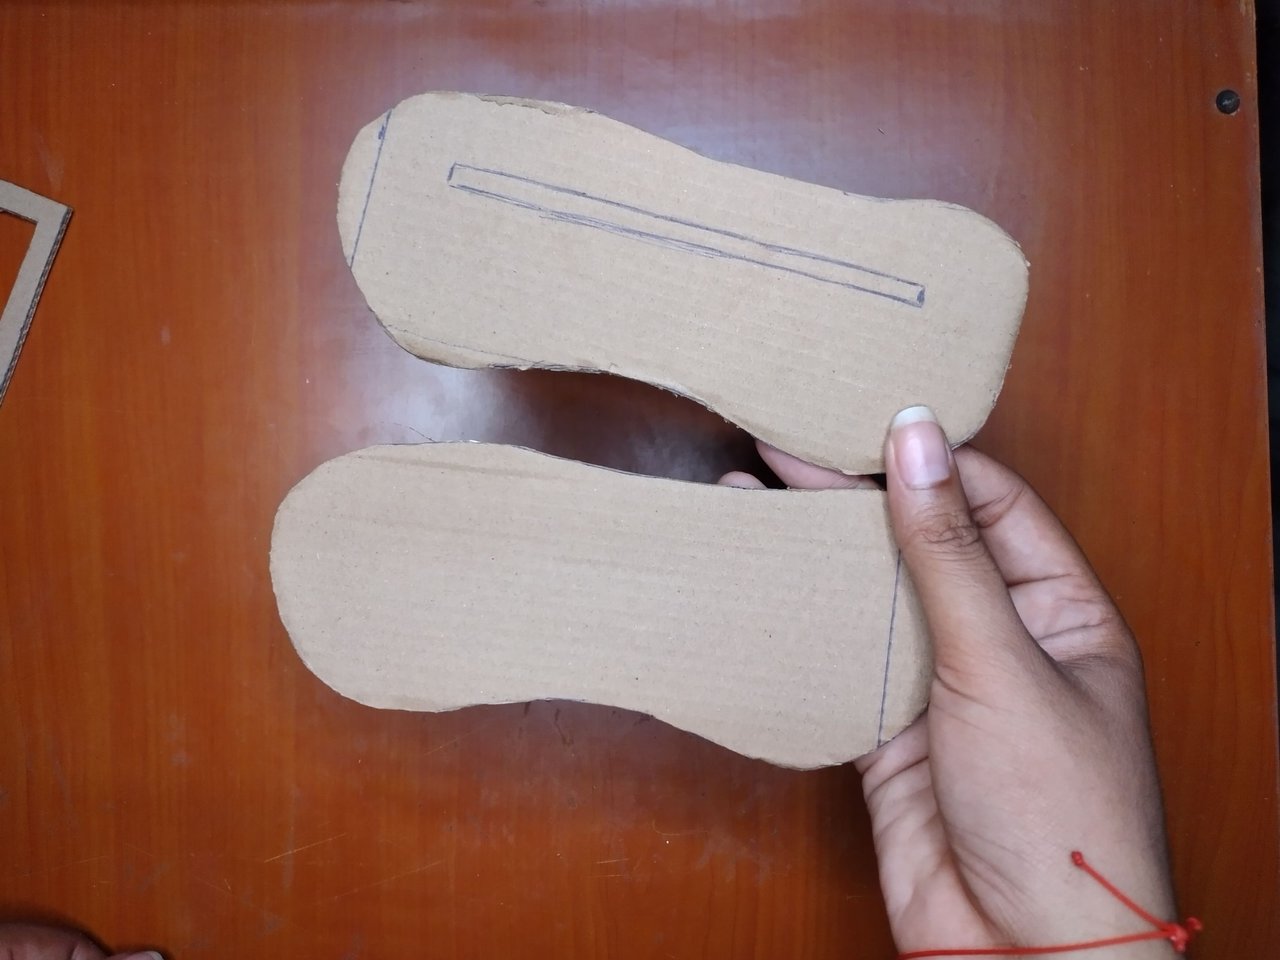
With another piece of cardboard, I drew an irregular silhouette for the base of the window, making a mark where the window frame should be glued. Then I cut it out and made an identical one to glue to it later to give it more height and hardness.
Con otra pieza de cartón, dibujé una silueta irregular para la base de la ventana, haciendo una marca donde corresponde pegar el marco de la ventana. Luego la recorté y elaboré una idéntica para pegarla posteriormente a esta para darle mayor altura y dureza.
 |
 |
 |
 |
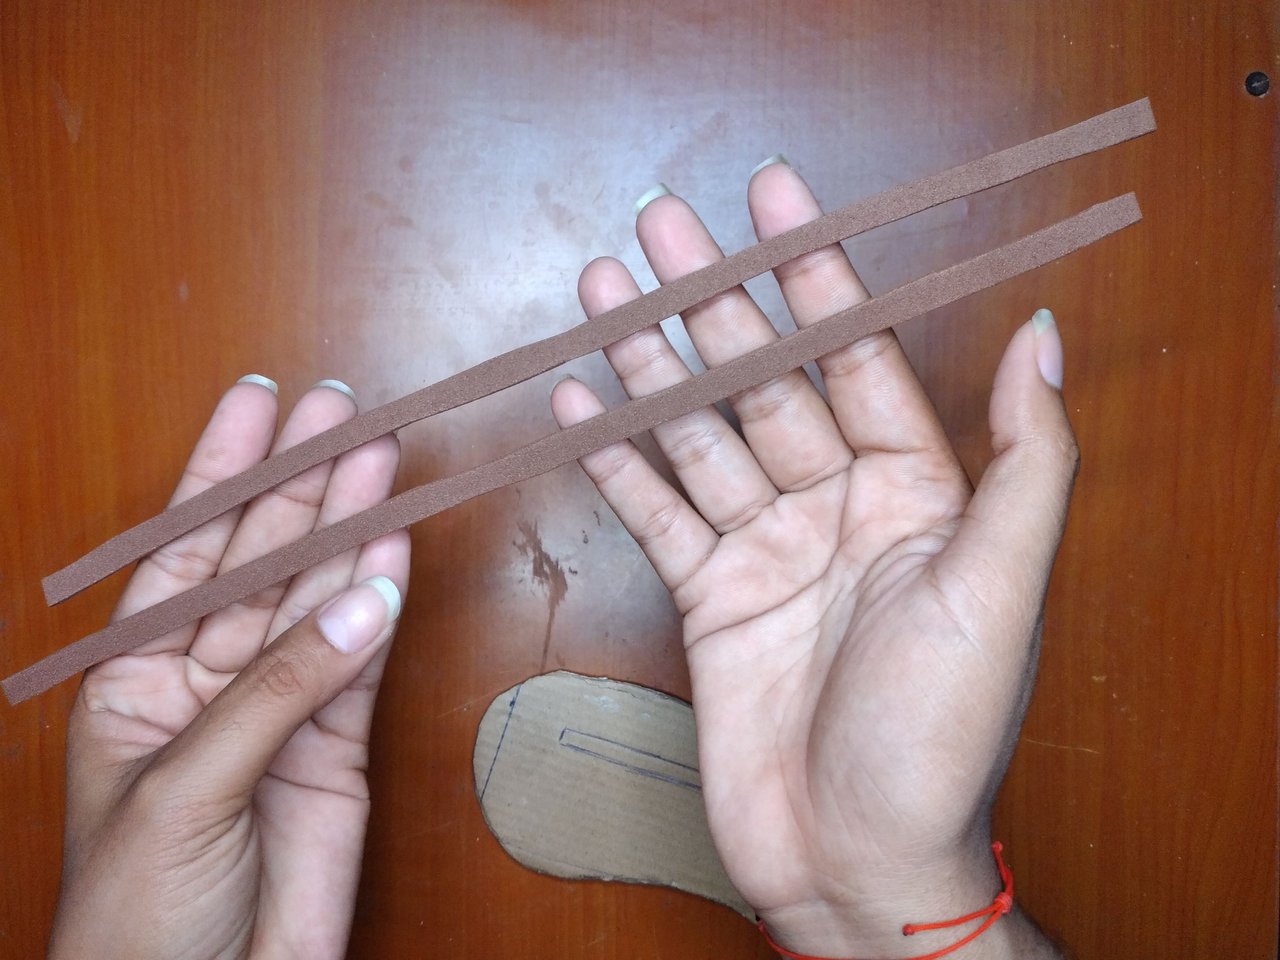
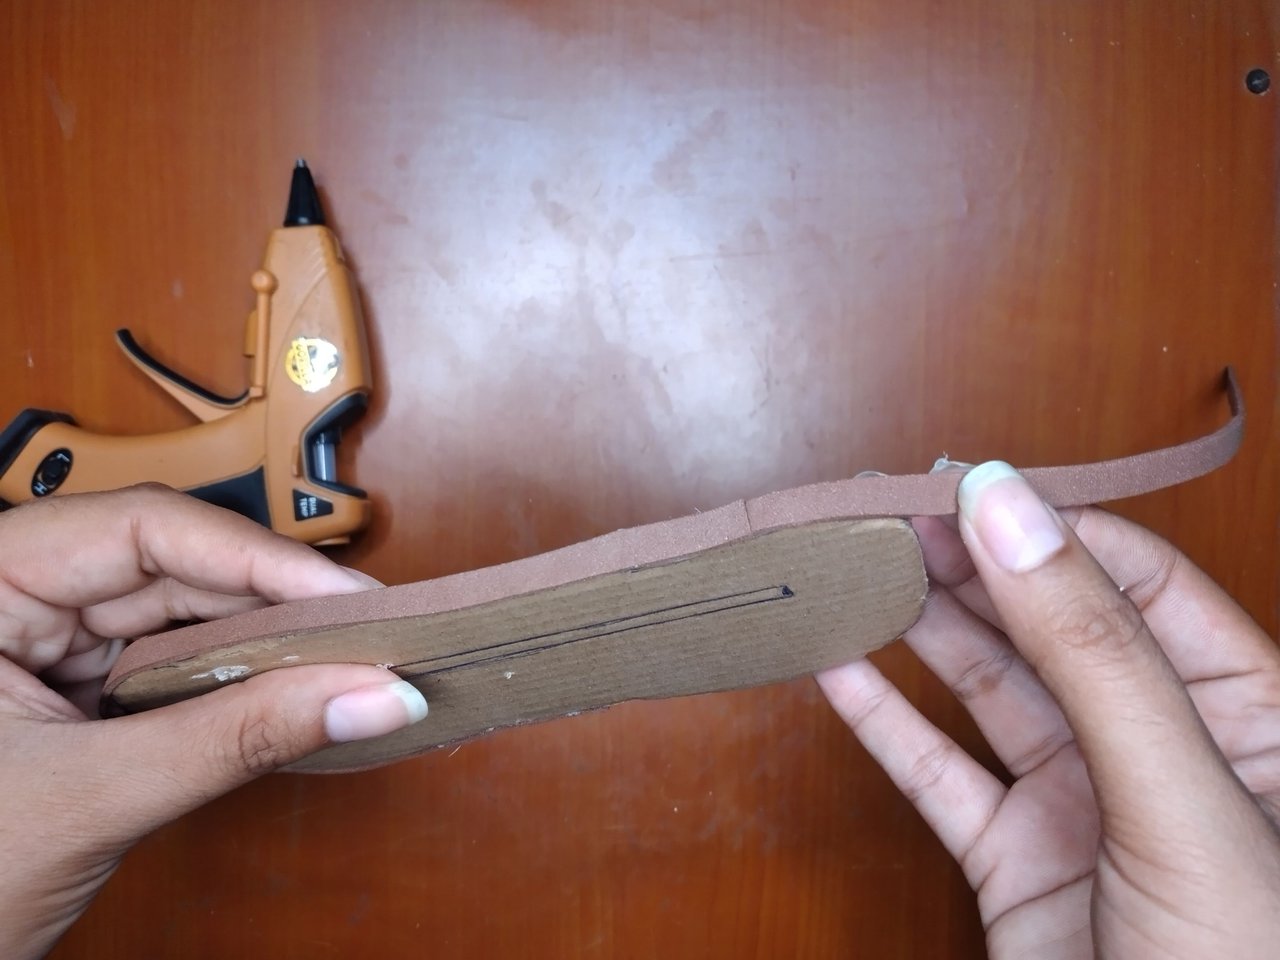
With a fold of carmelite foami, make two custom-made strips to cover the entire edge of the base, thus covering the imperfections of the cardboard. It can be made with paper and then painted.
Con un pliegue de foami carmelita hacer dos listones a medida para cubrir todo el borde de la base, de esta forma tapar las imperfecciones del cartón picado. Se puede hacer con papel y luego pintarlo.
 |
 |
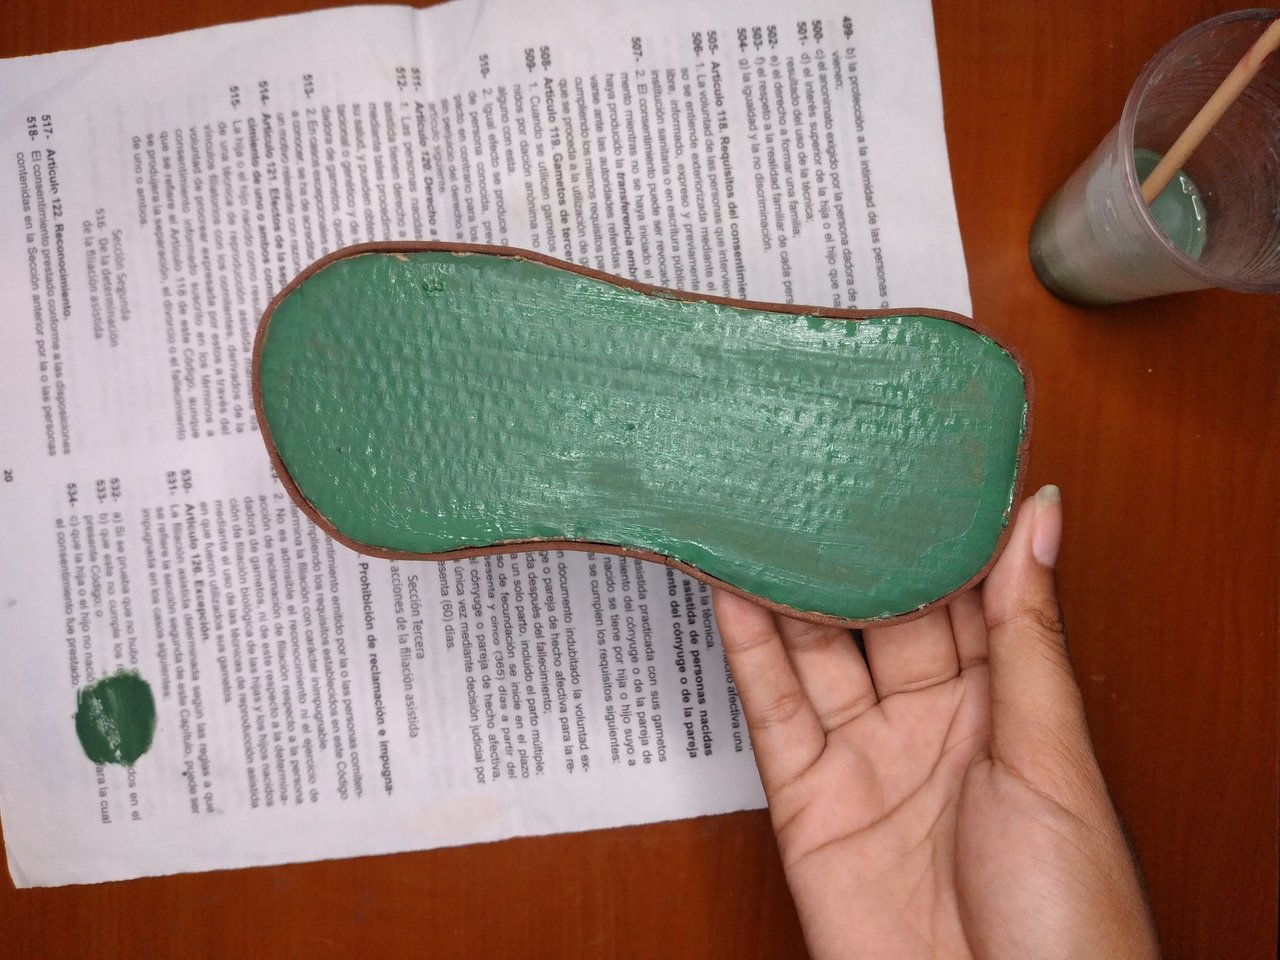 |
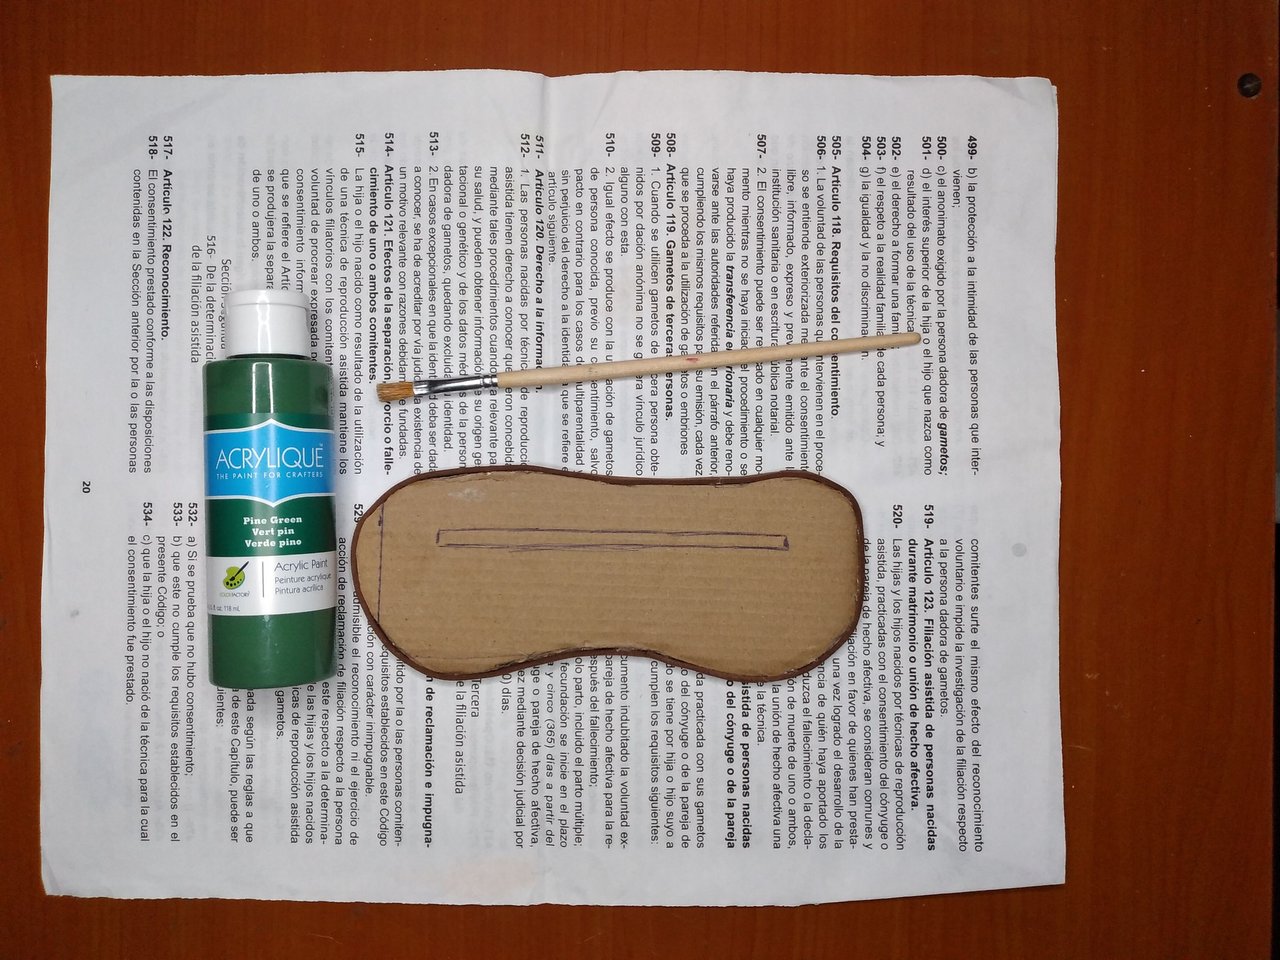
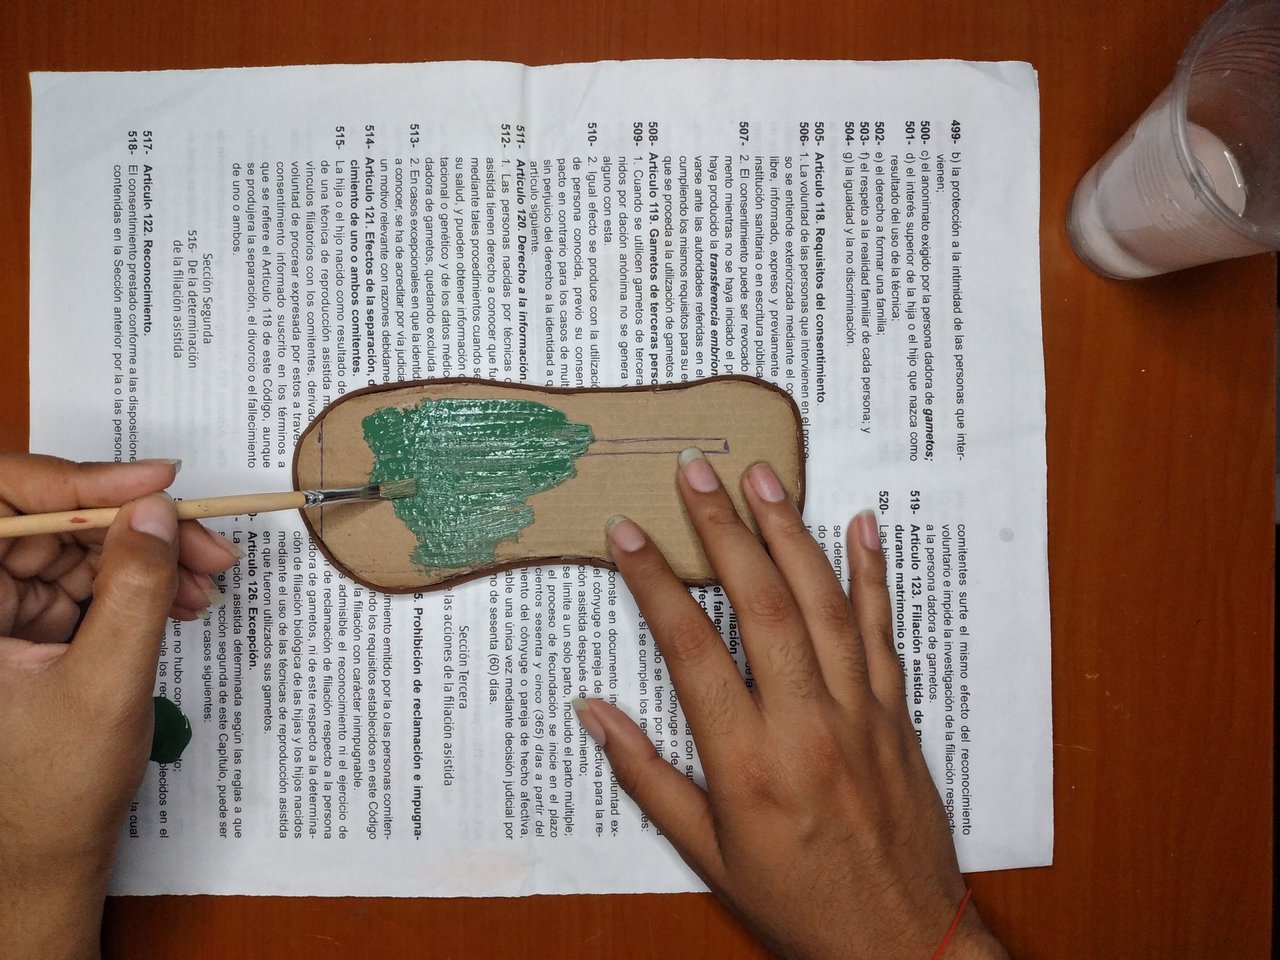
With green paint, paint the base, let it dry and then redraw the box where the window goes to have a reference.
Con pintura verde pintar la base, dejar secar y luego volver a dibujar el cuadro donde va la ventana para tener una referencia.
 |
 |
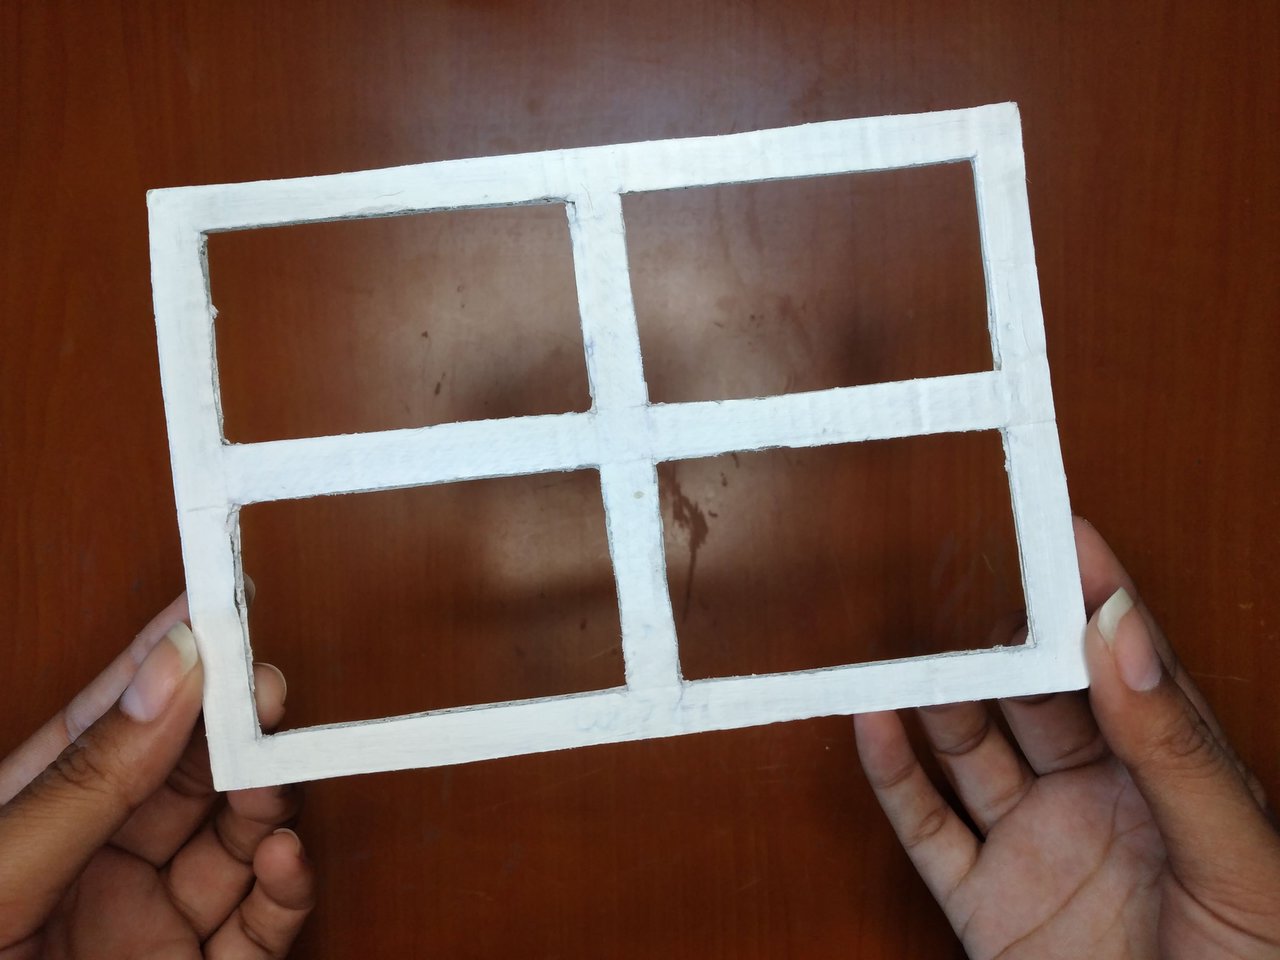 |
Paint the window frame, I preferred white, it looks cleaner and more elegant.
Pintar el marco de la ventana, preferí de color blanco, este se ve más limpio y elegante.
 |
 |
 |
 |
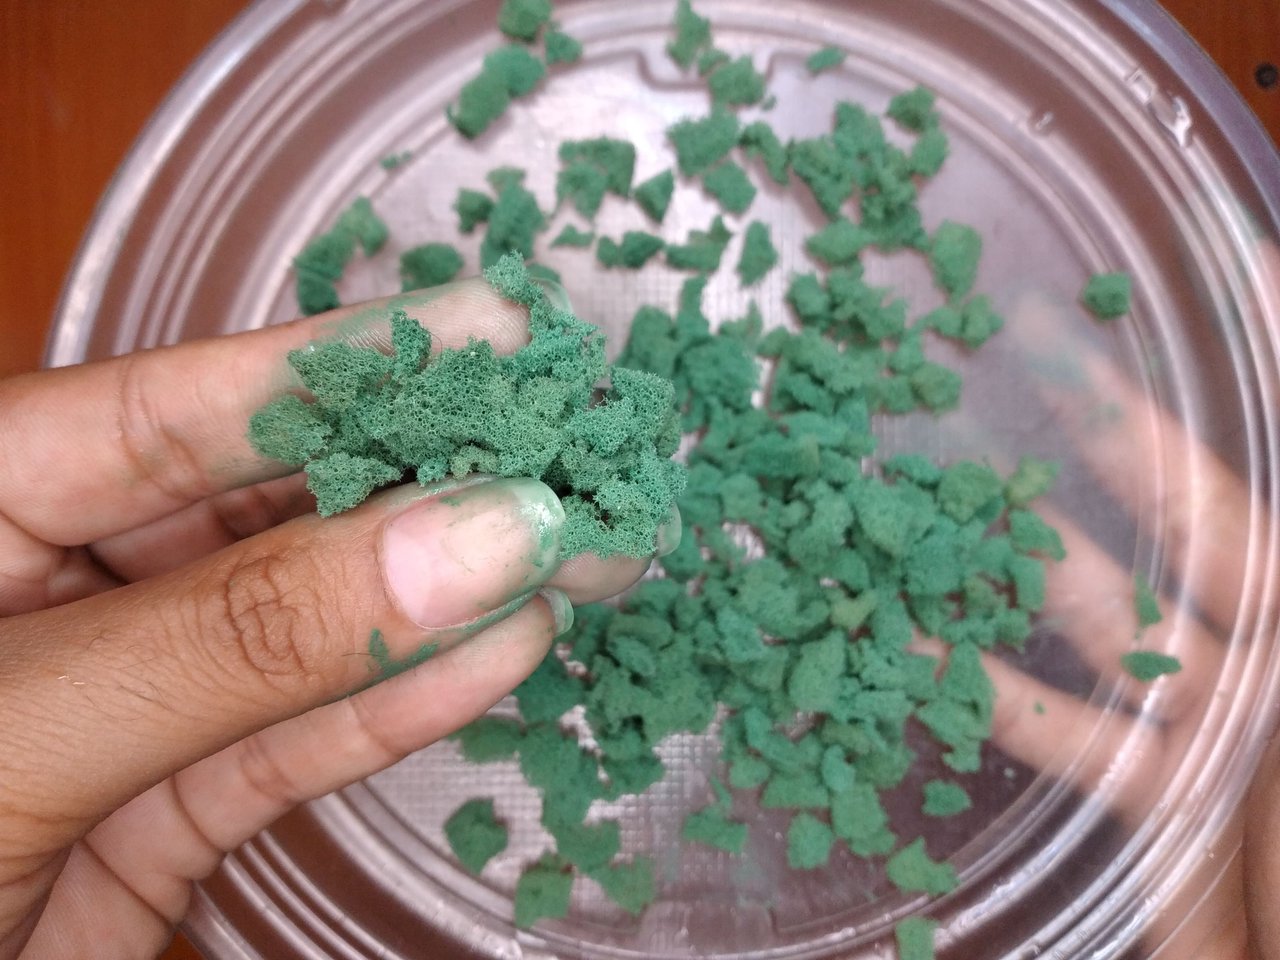 |
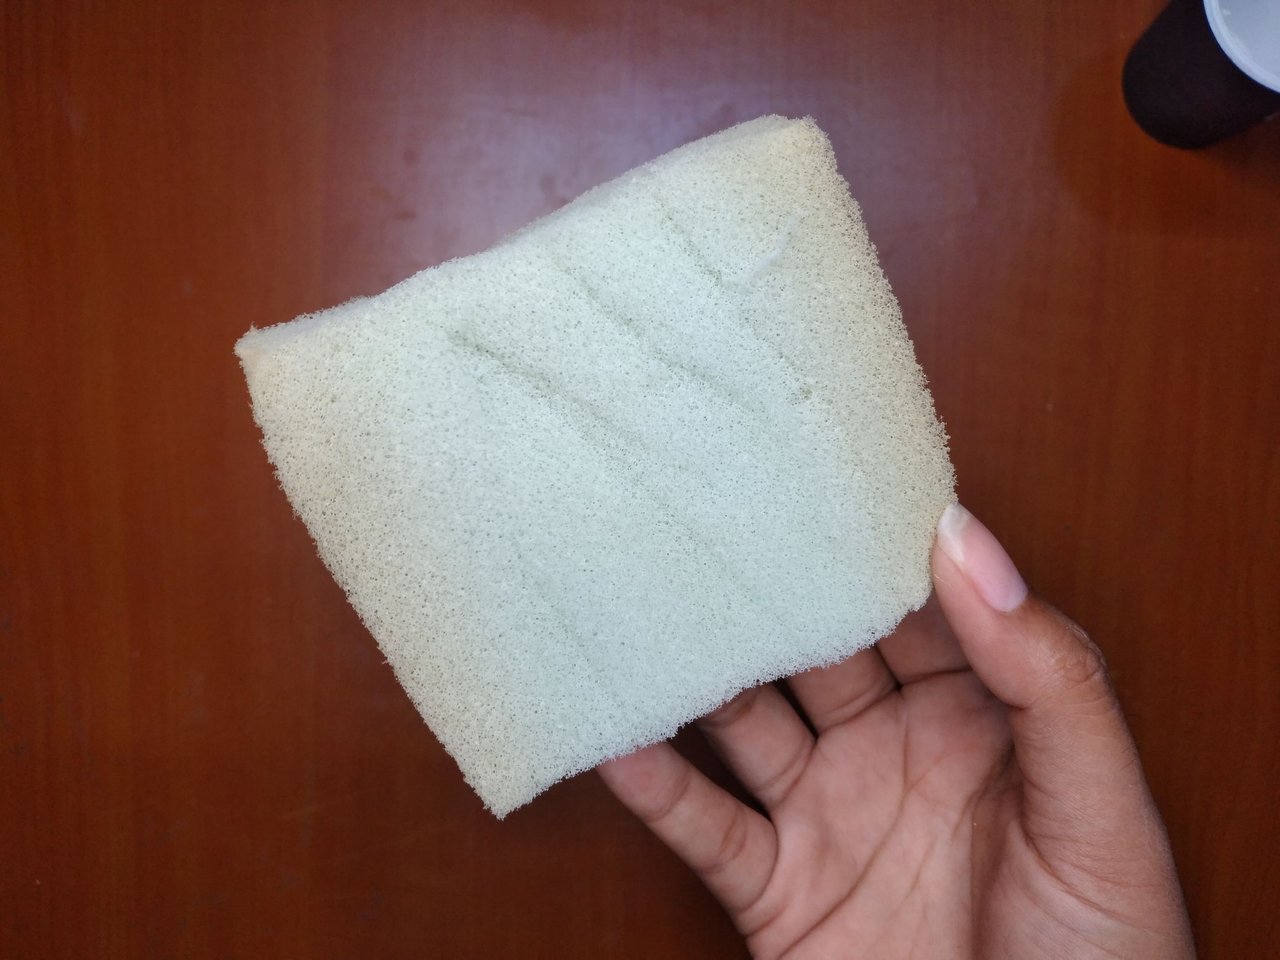
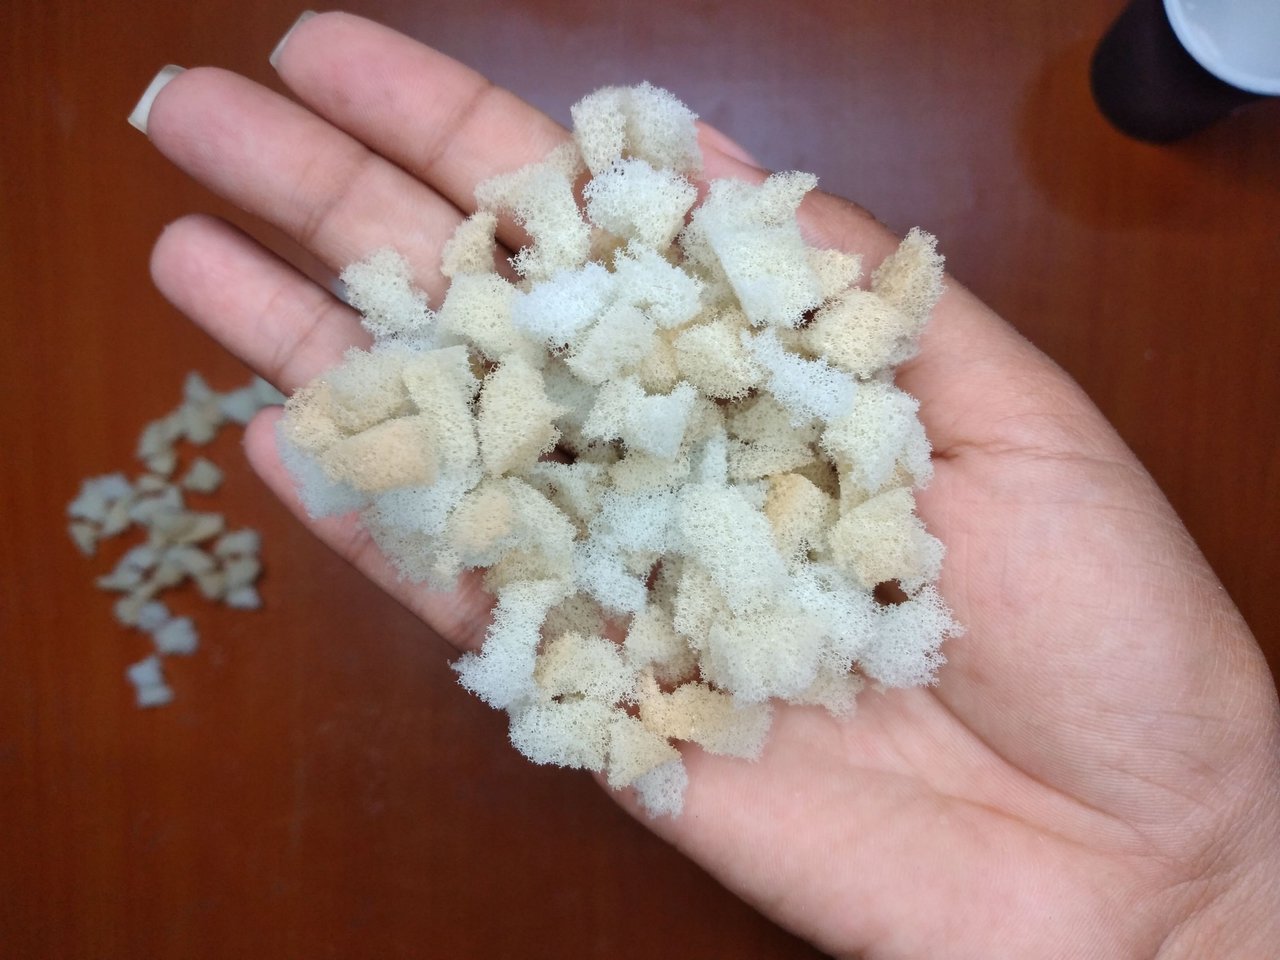
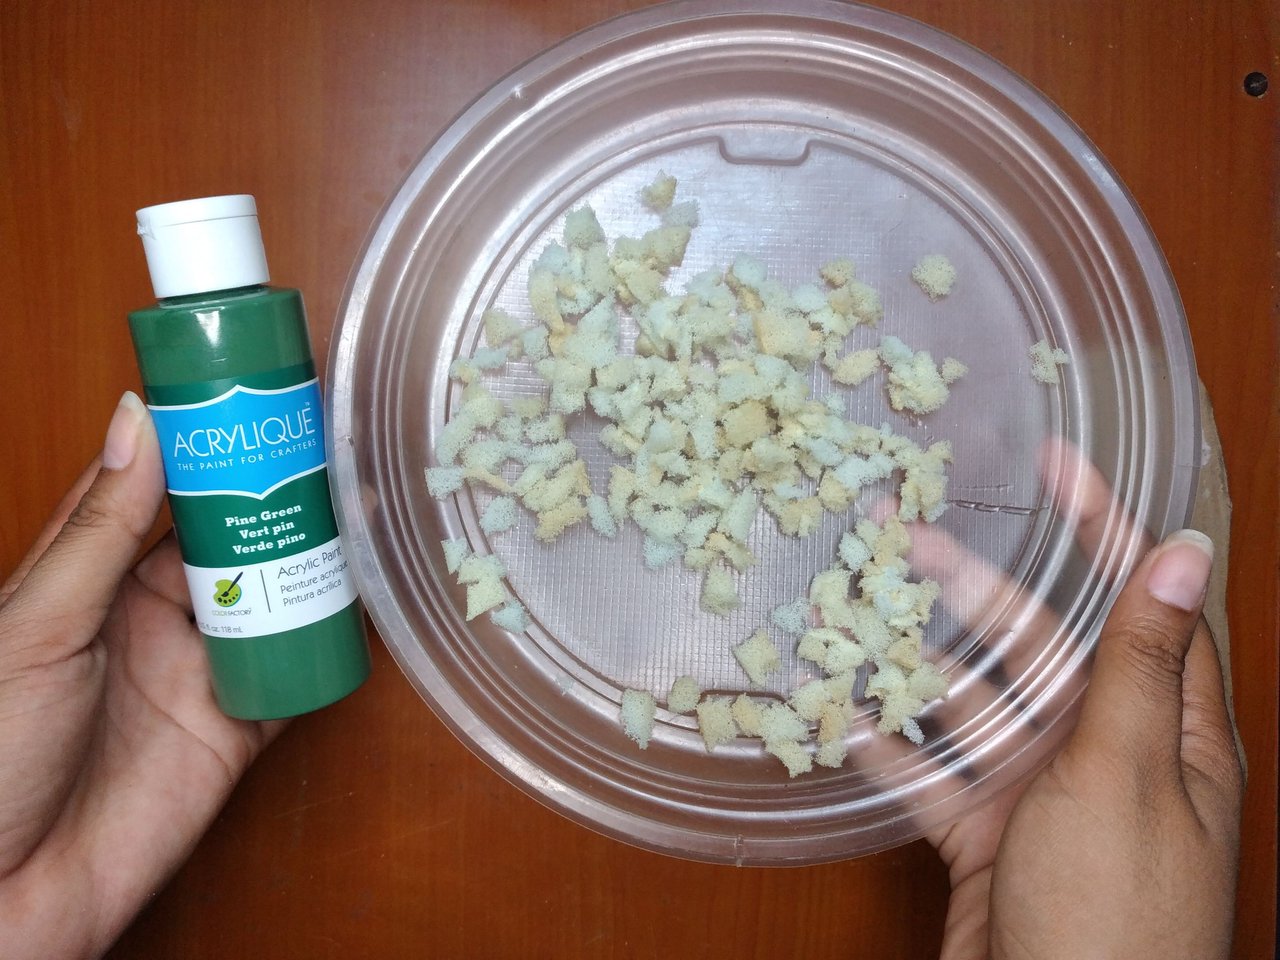
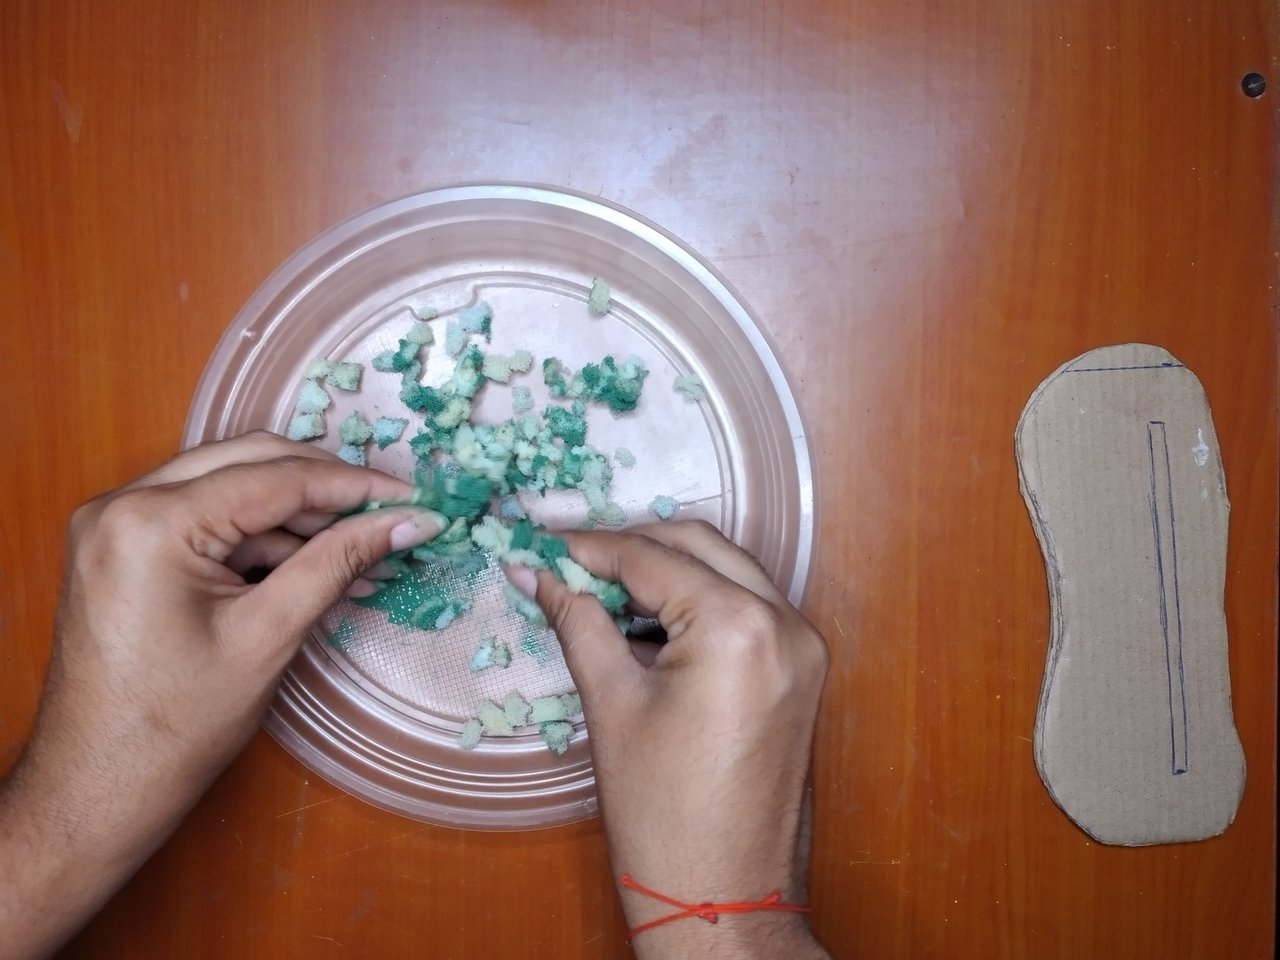
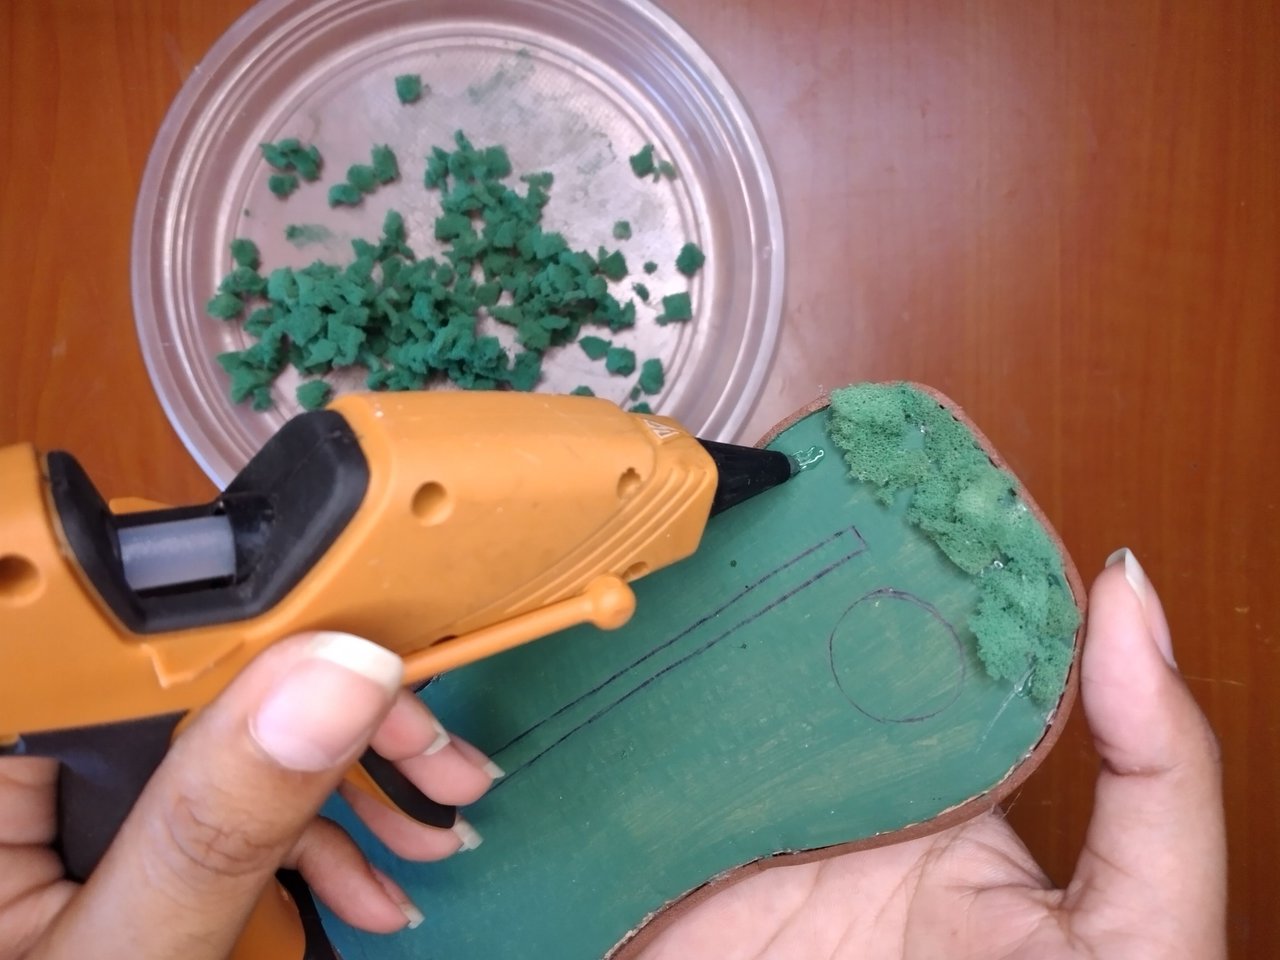
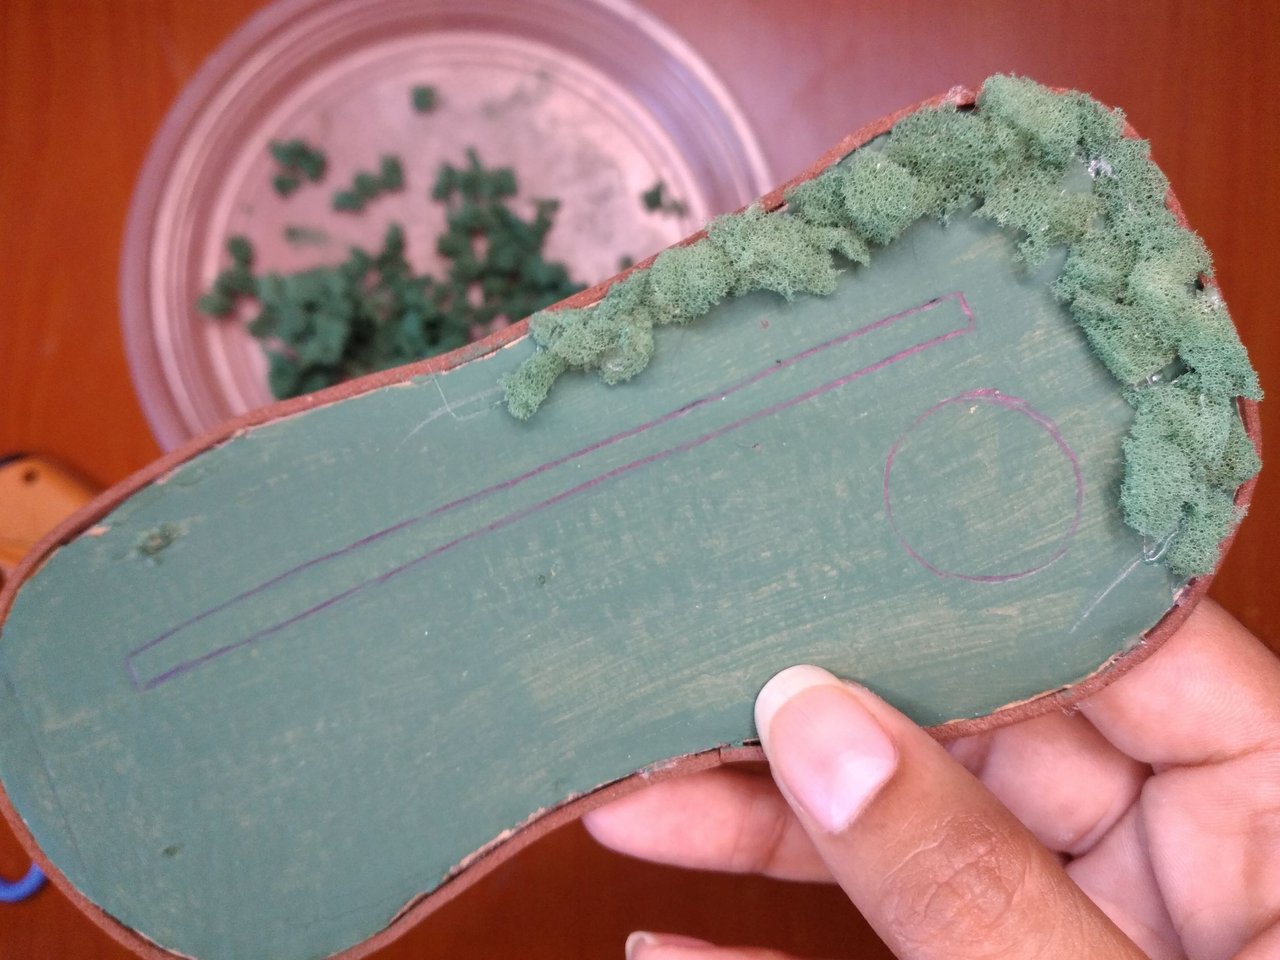
To make the grass, we will use a sponge. This is chopped into very small pieces, we place them in a container to which we add a few drops of green paint and with our fingers we spread the paint all over the sponge. Then let it dry.
Para elaborar el césped, utilizaremos una esponja. Esta se pica en pedacitos muy pequeños, los colocamos en un recipiente al cual añadimos unas gotas de pintura verde y con los dedos esparcimos la pintura en toda la esponja. Luego dejar secar.
 |
 |
 |
 |
 |
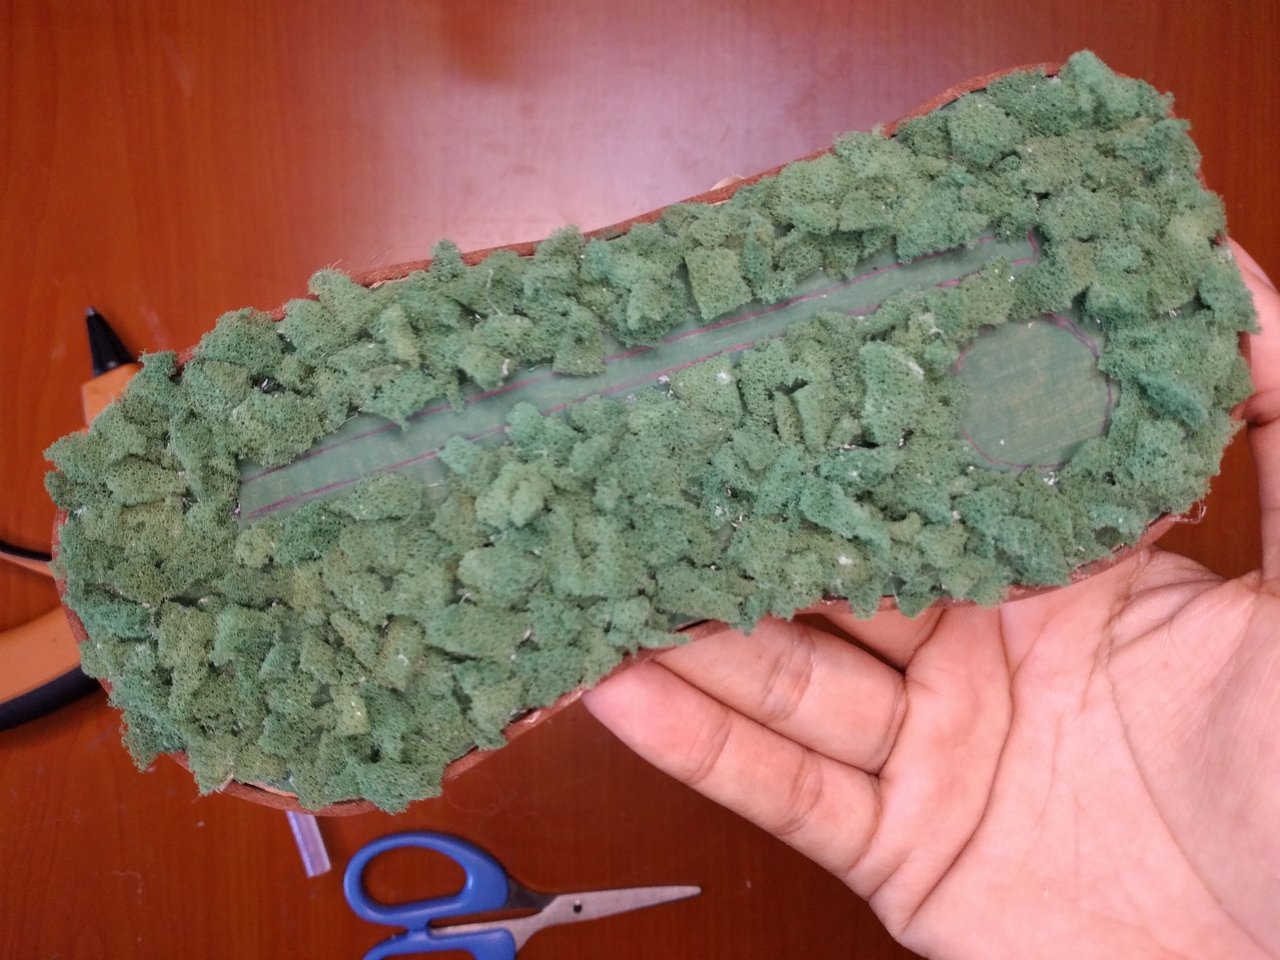
With silicone or other glue, spread a little at a time on the base and glue the pieces of sponge, leaving the space where the window and the plant will be placed. When finished, place the window in its place. As you can see, it is already taking shape.
Con silicona u otro pegamento se va esparciendo de a poco en la base y pegando los trocitos de esponja, dejando el espacio donde se colocará la ventana y la planta. Al terminar ubicar la ventana en su lugar. Como ven, ya va tomando forma.
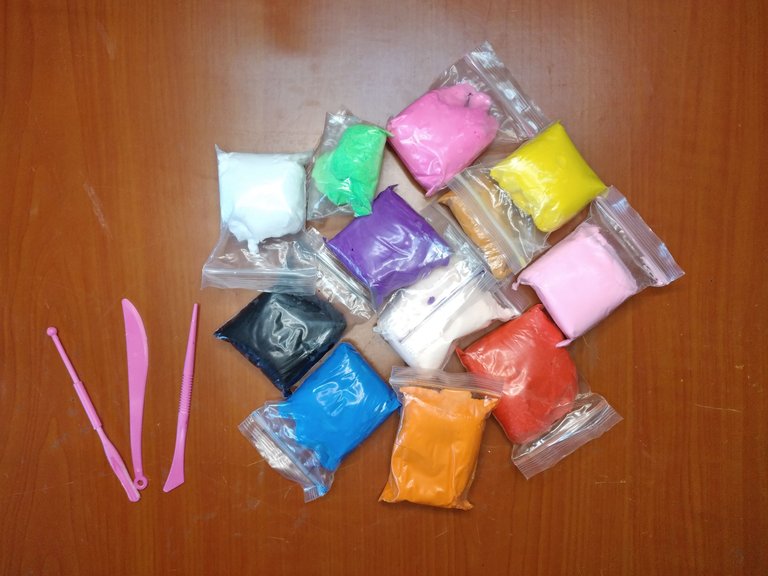
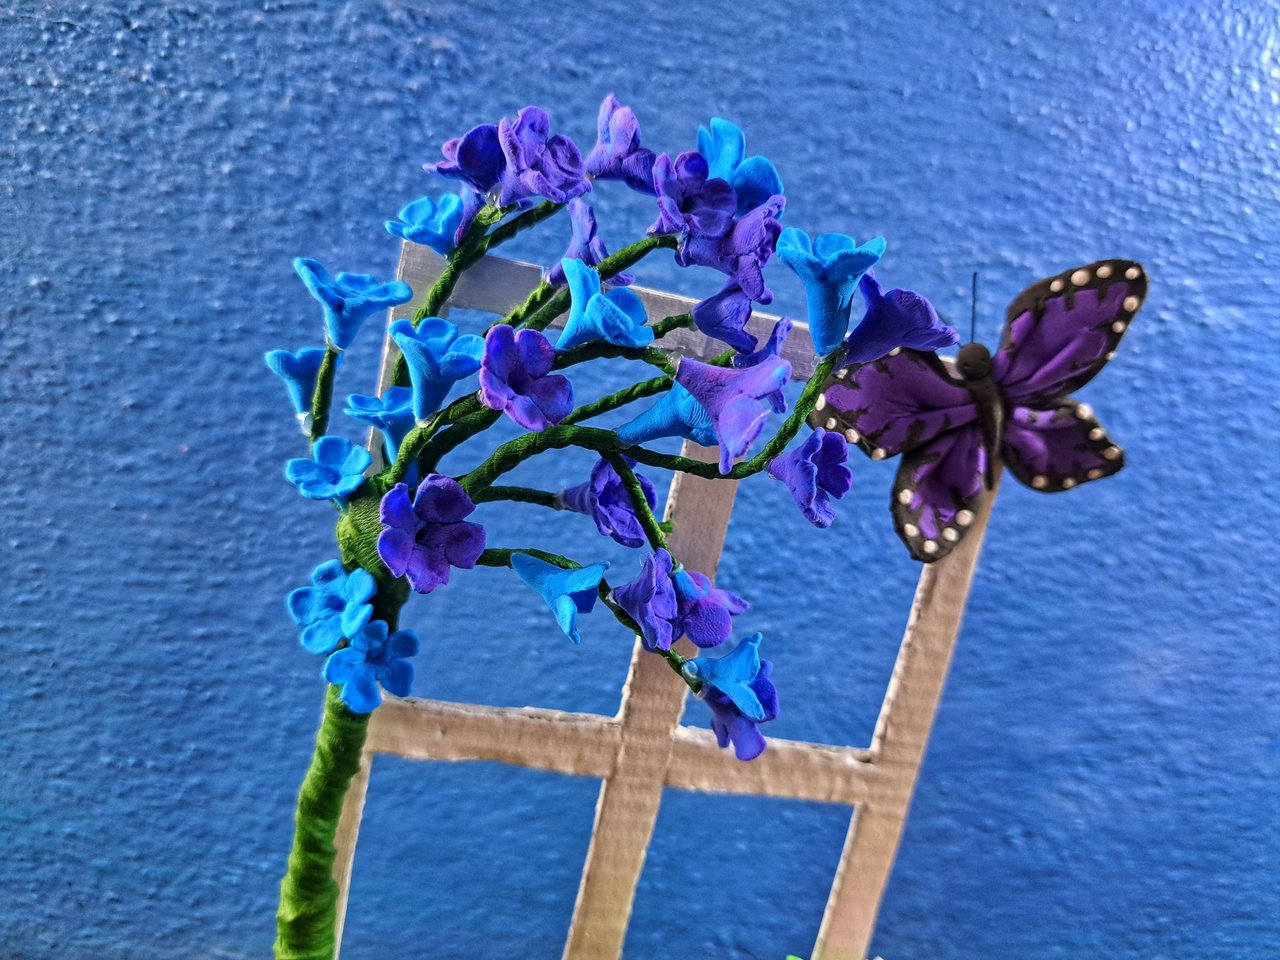
I made the decorations with moldable foami of various colors.
Las decoraciones las elaboré con foami moldeable de varios colores.
 |
 |
 |
 |
 |
 |
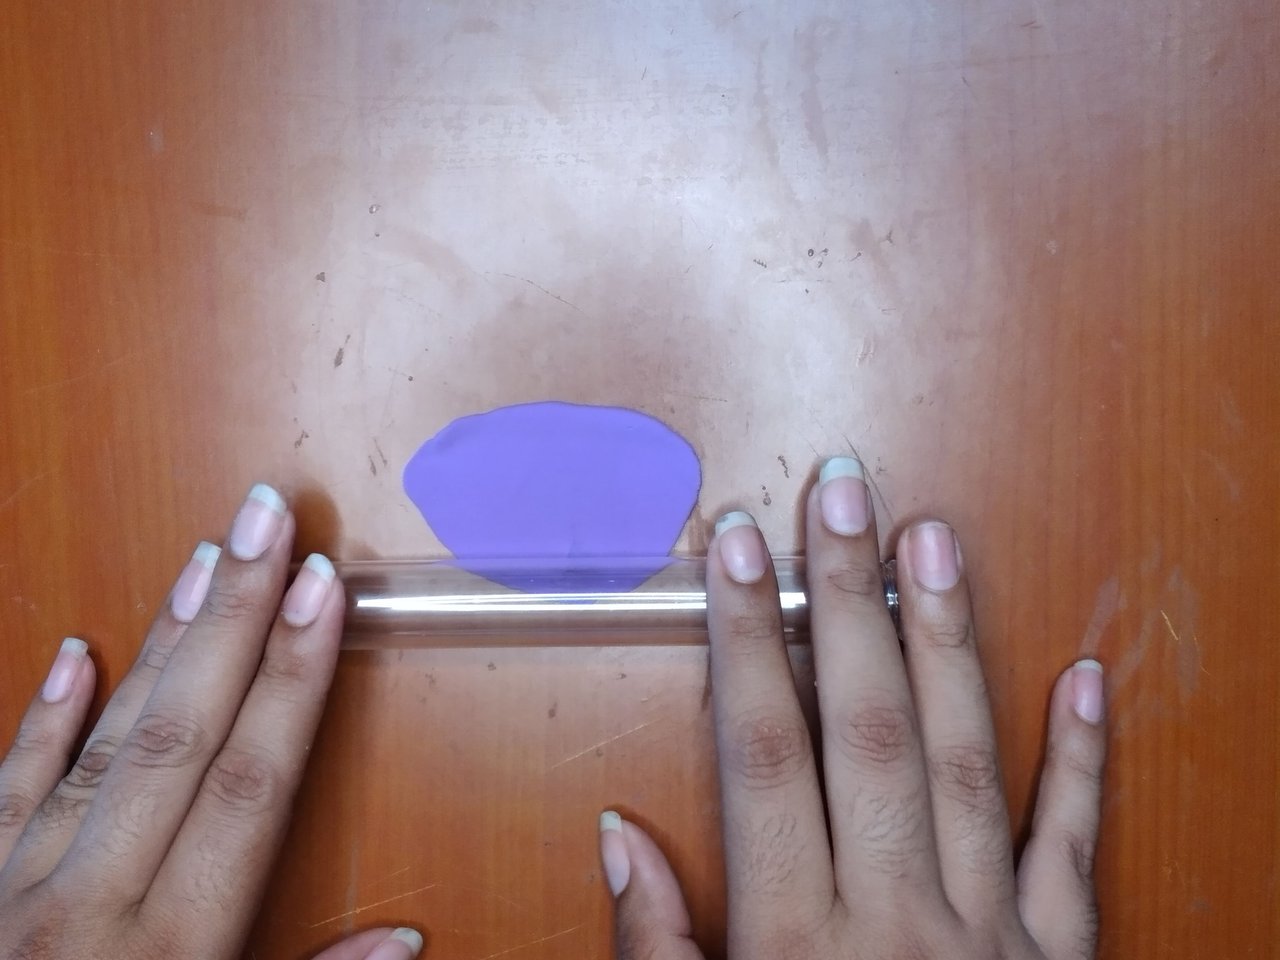
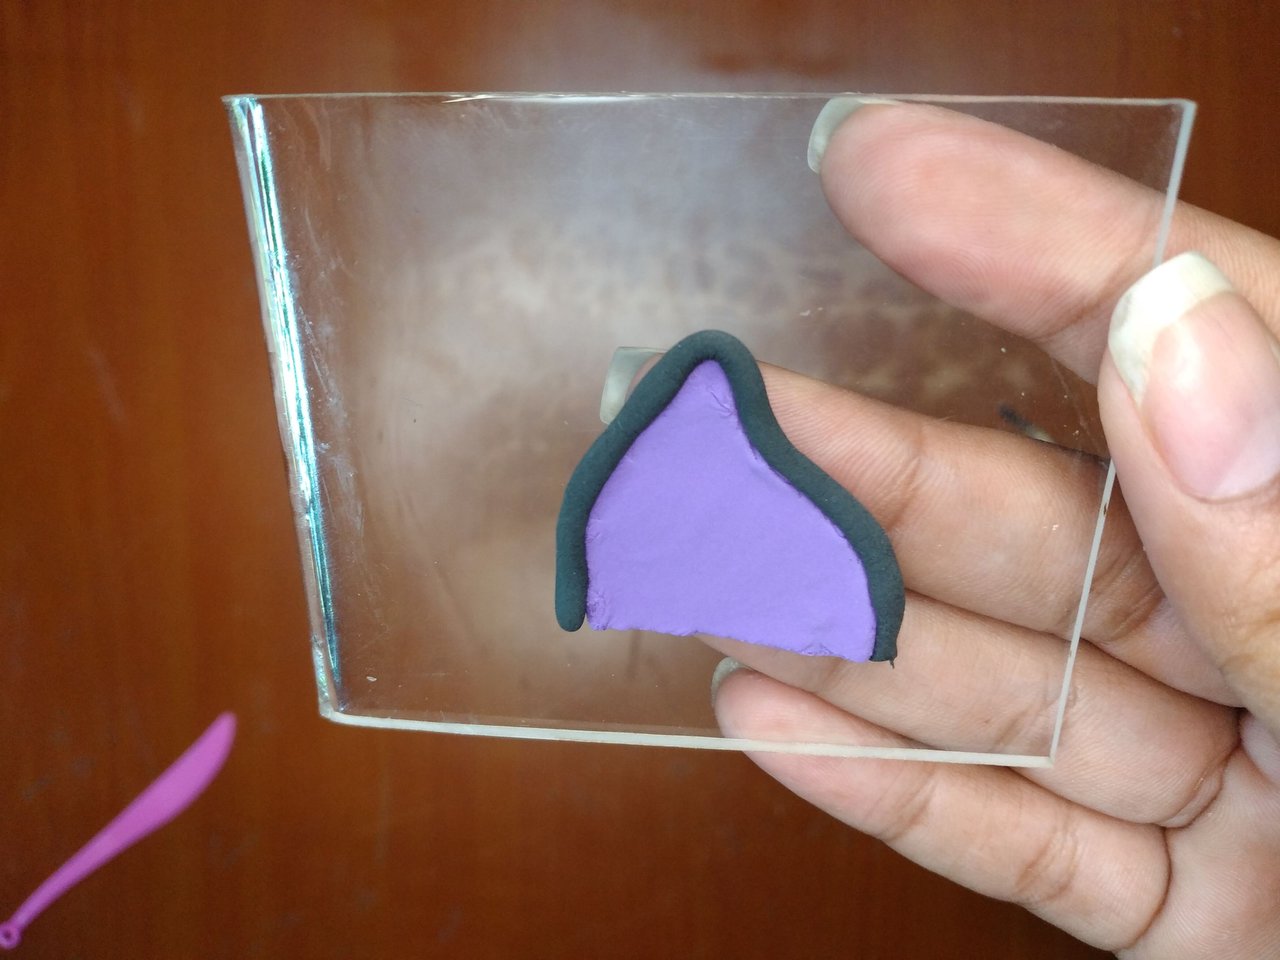
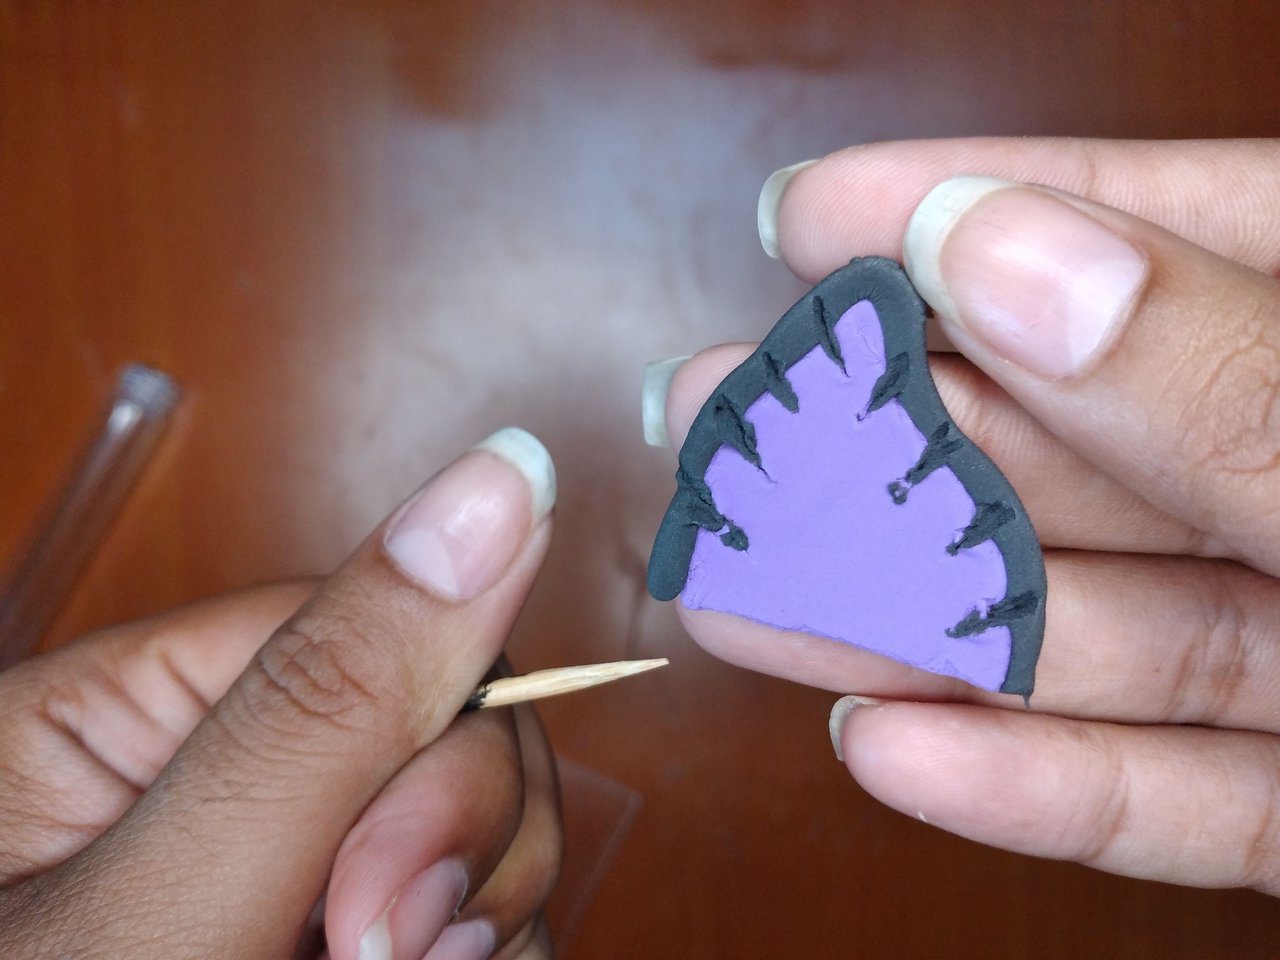
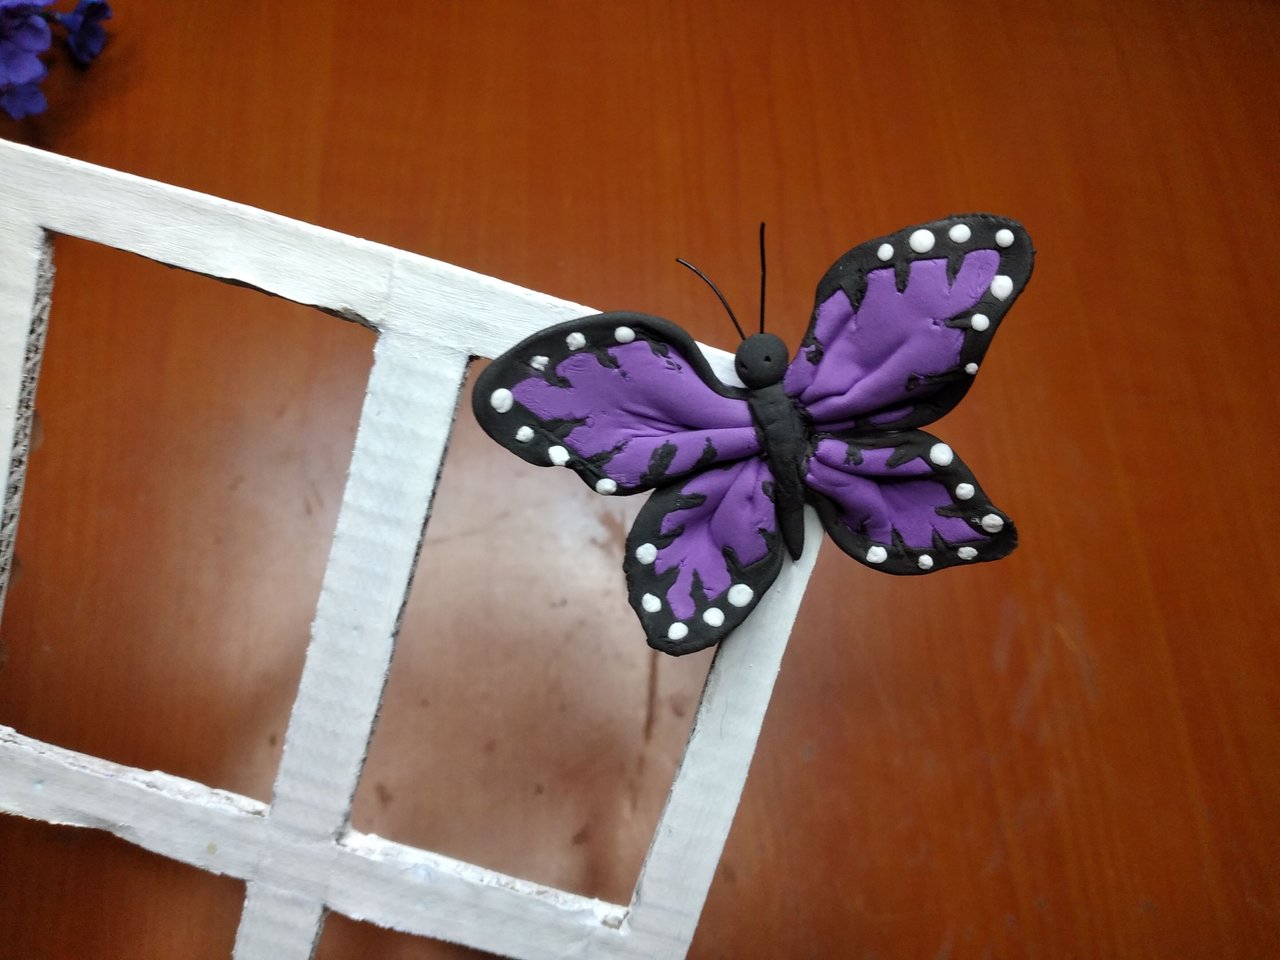
To make the butterfly I used purple moldable foami, I love this color. I took a small portion and flattened it with the rolling pin, then I cut it as shown in the pictures. With black foami I made a long strip and covered the entire edge. Afterwards, I flattened it so that the two colors joined well. With a skewer I dragged from the black part to the inside to form some lines on the wings and with white I glued some tiny circles on the tip. At the end I flattened it again to make it uniform.
Para elaborar la mariposa utilicé foami moldeable de color violeta, me encanta este color. Tomé una pequeña porción y la aplané con el rodillo, luego la corté de la forma que les muestro en las imágenes. Con foami de color negro hice una tira larga y cubrí todo el borde. Posteriormente, aplané para que se unieran bien los dos colores. Con un pincho arrastré desde la parte negra hasta dentro para formar como unas líneas en las alas y con blanco pegar unos diminutos círculos en la punta. al finalizar volver a aplanar para que quede todo uniforme.
 |
 |
 |
 |
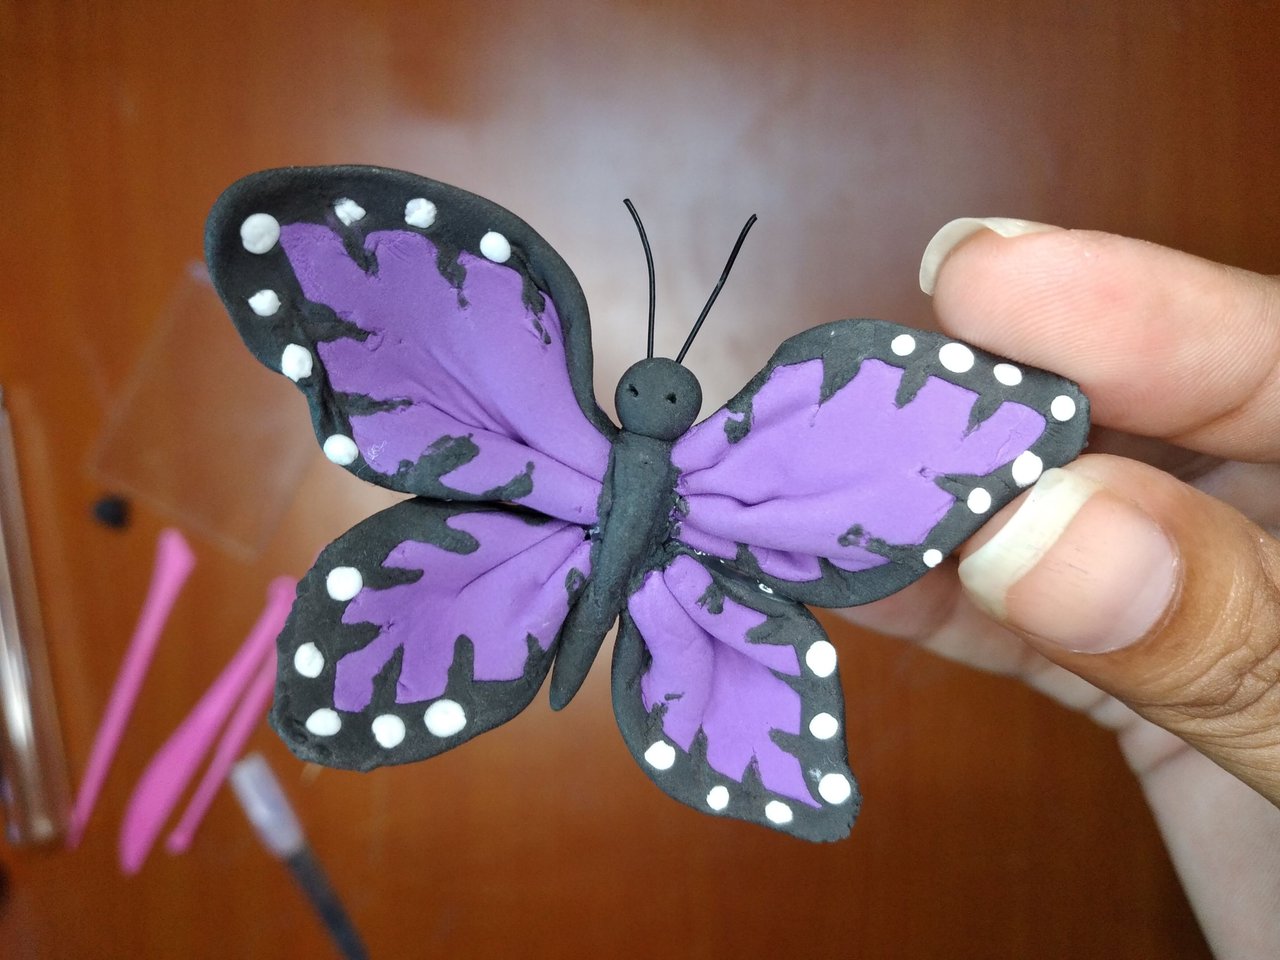 |
Fold in this way that I show you, so if they look like butterfly wings, do the same procedure for the rest of the wings, the bottom two are made of a smaller size. When they are all ready, make the body and head of the butterfly and glue. The antennae are two hairs from a hairbrush.
Doblar de esta forma que les muestro, así si parecen alas de mariposa, este mismo procedimiento hacerlo para el resto de las alas, las dos de abajo se hacen de un menor tamaño. Cuando ya estén todas listas hacer el cuerpo y la cabeza de la mariposa y pegar. Las antenas son dos pelos de un cepillo para el cabello.
 |
 |
 |
 |
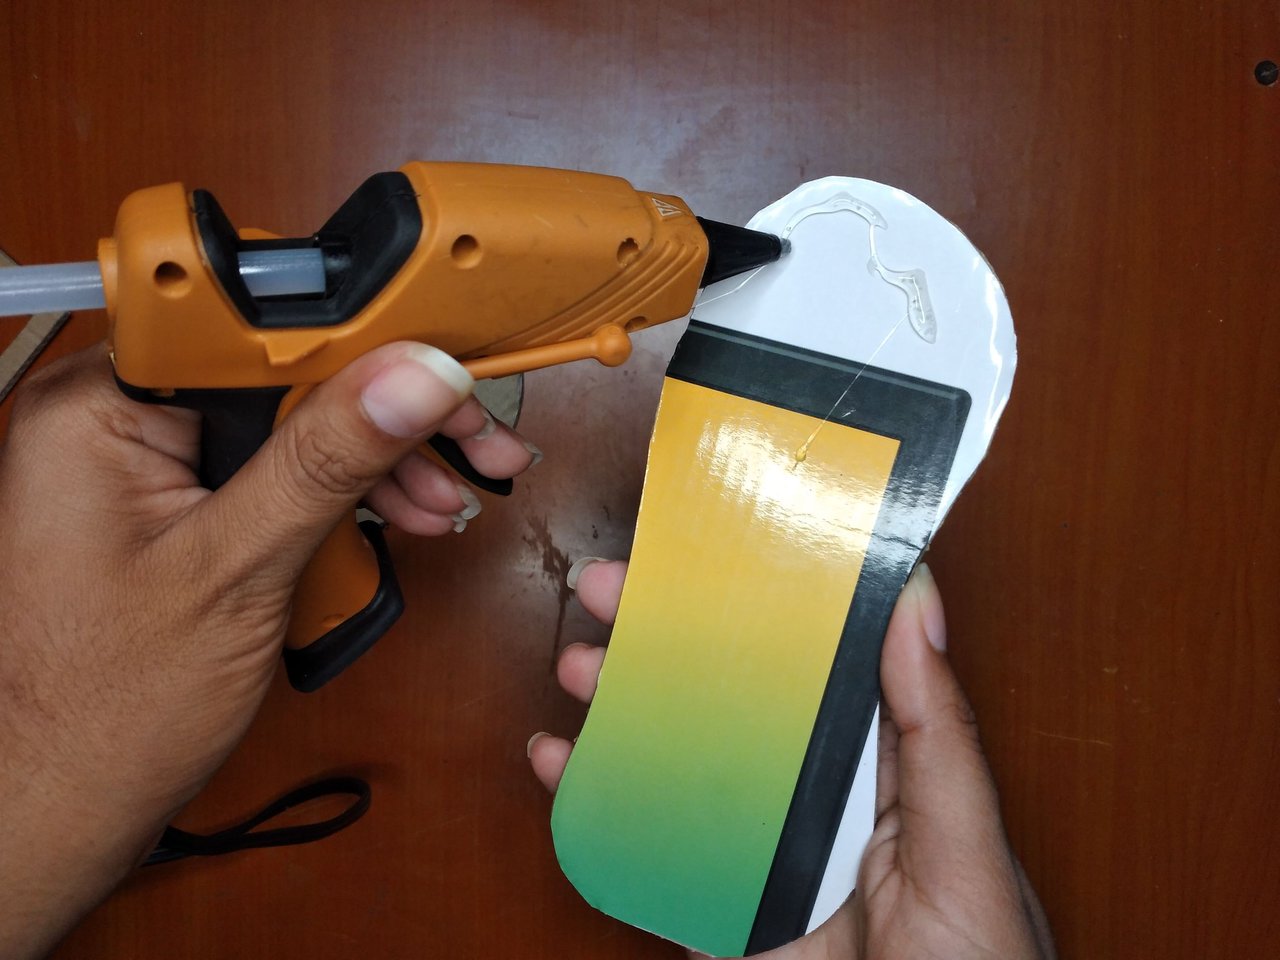
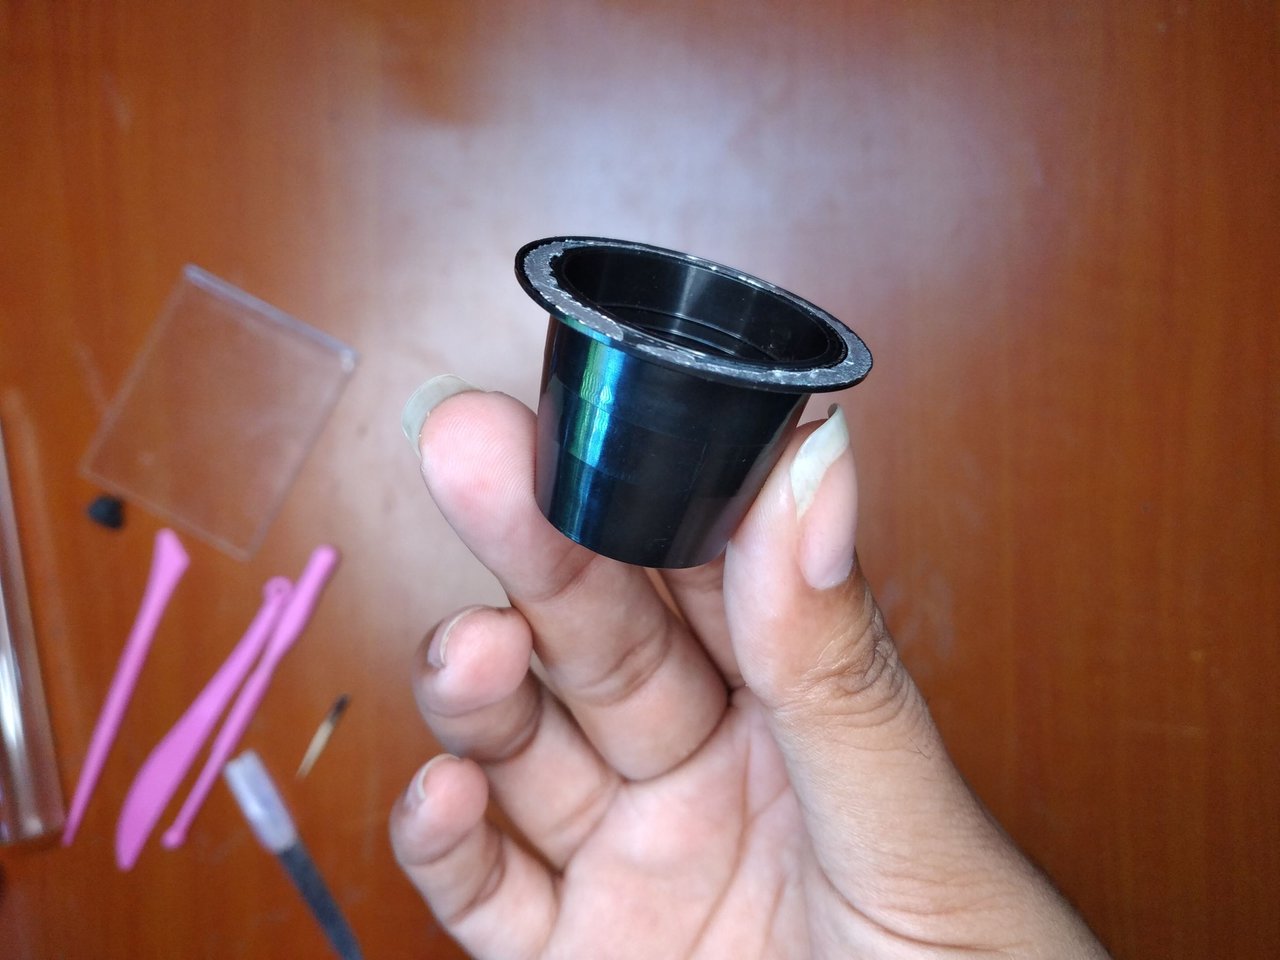
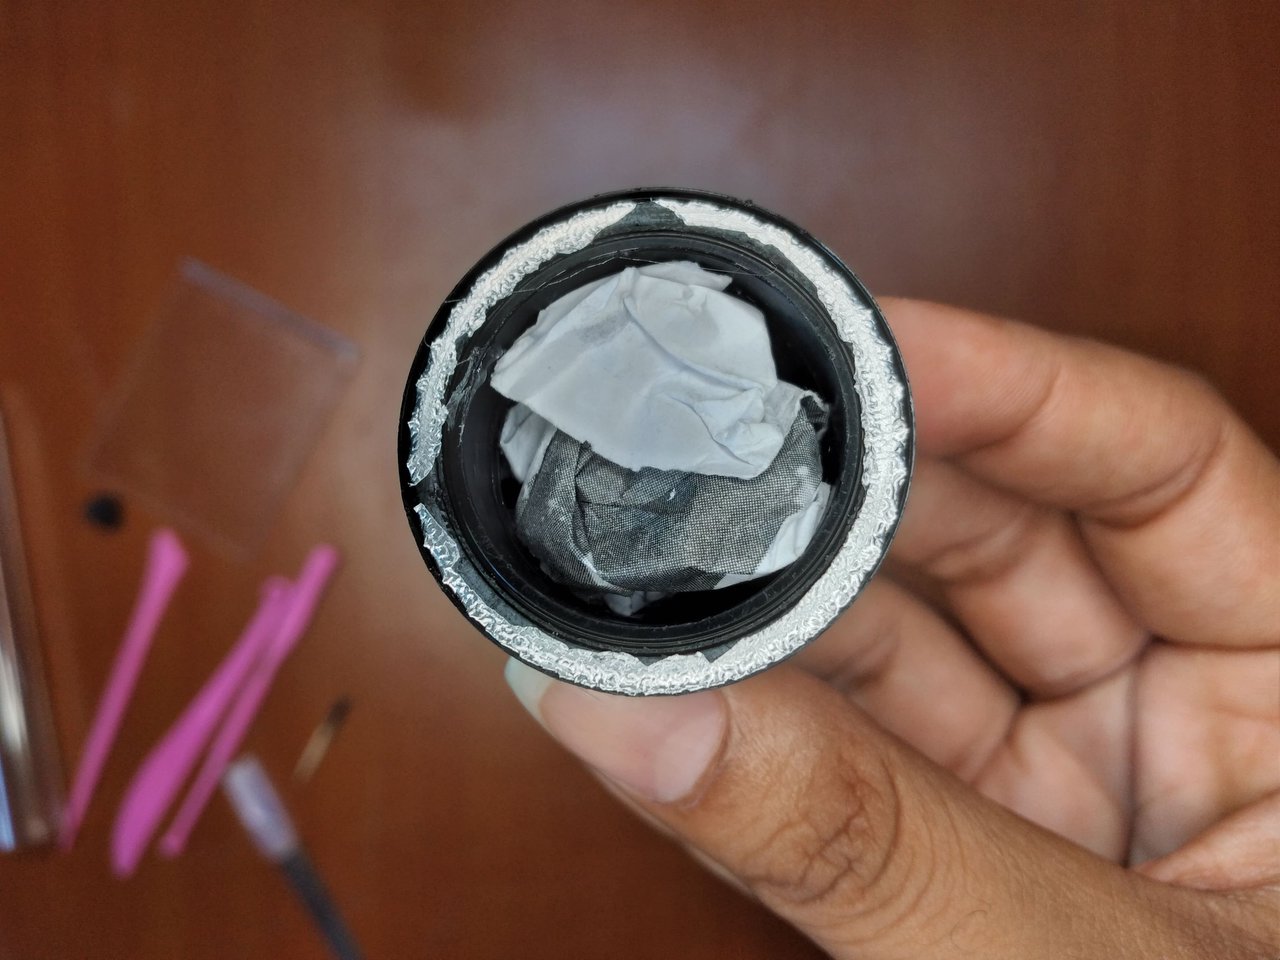
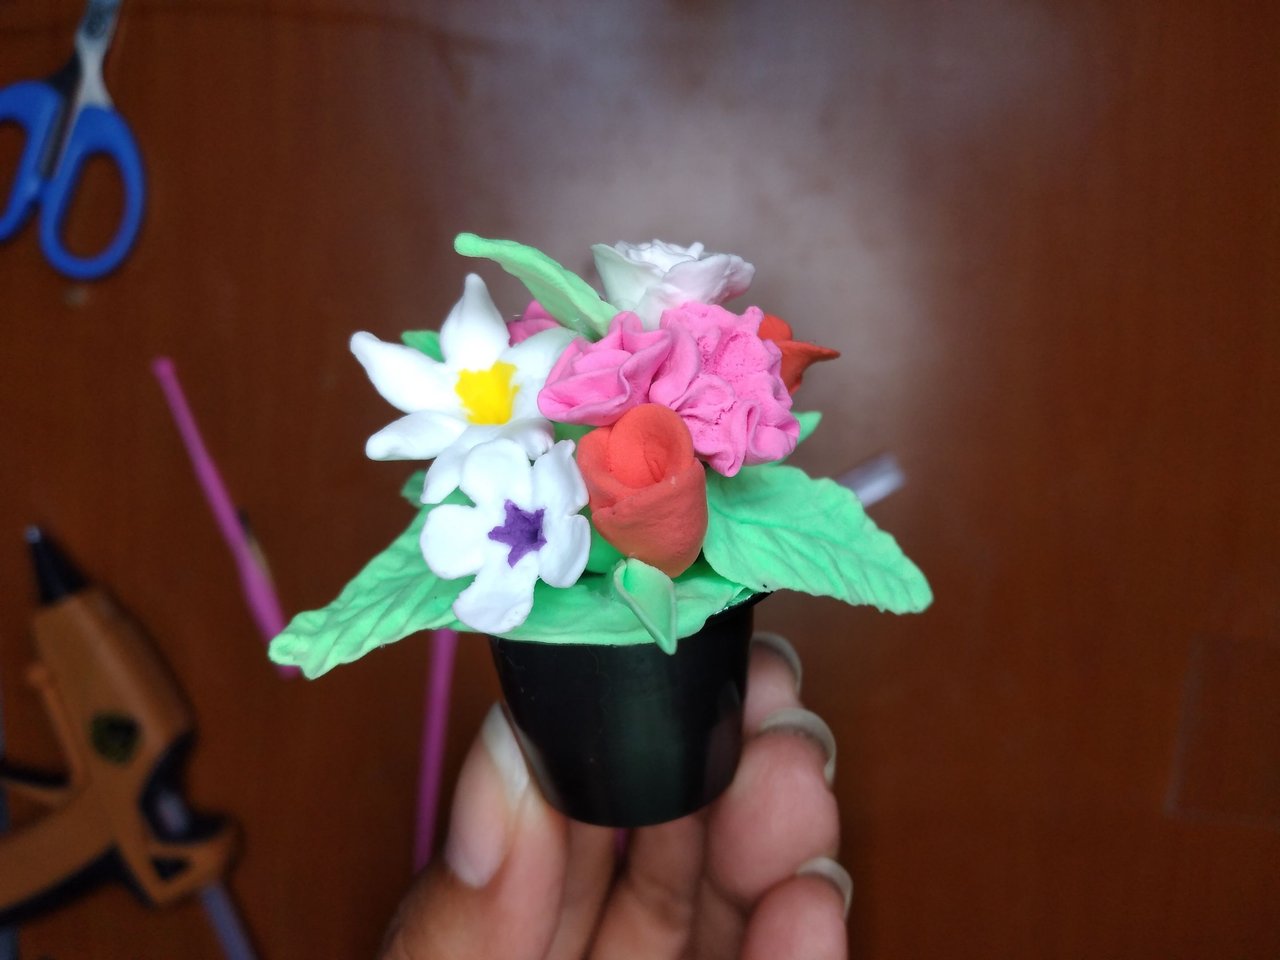
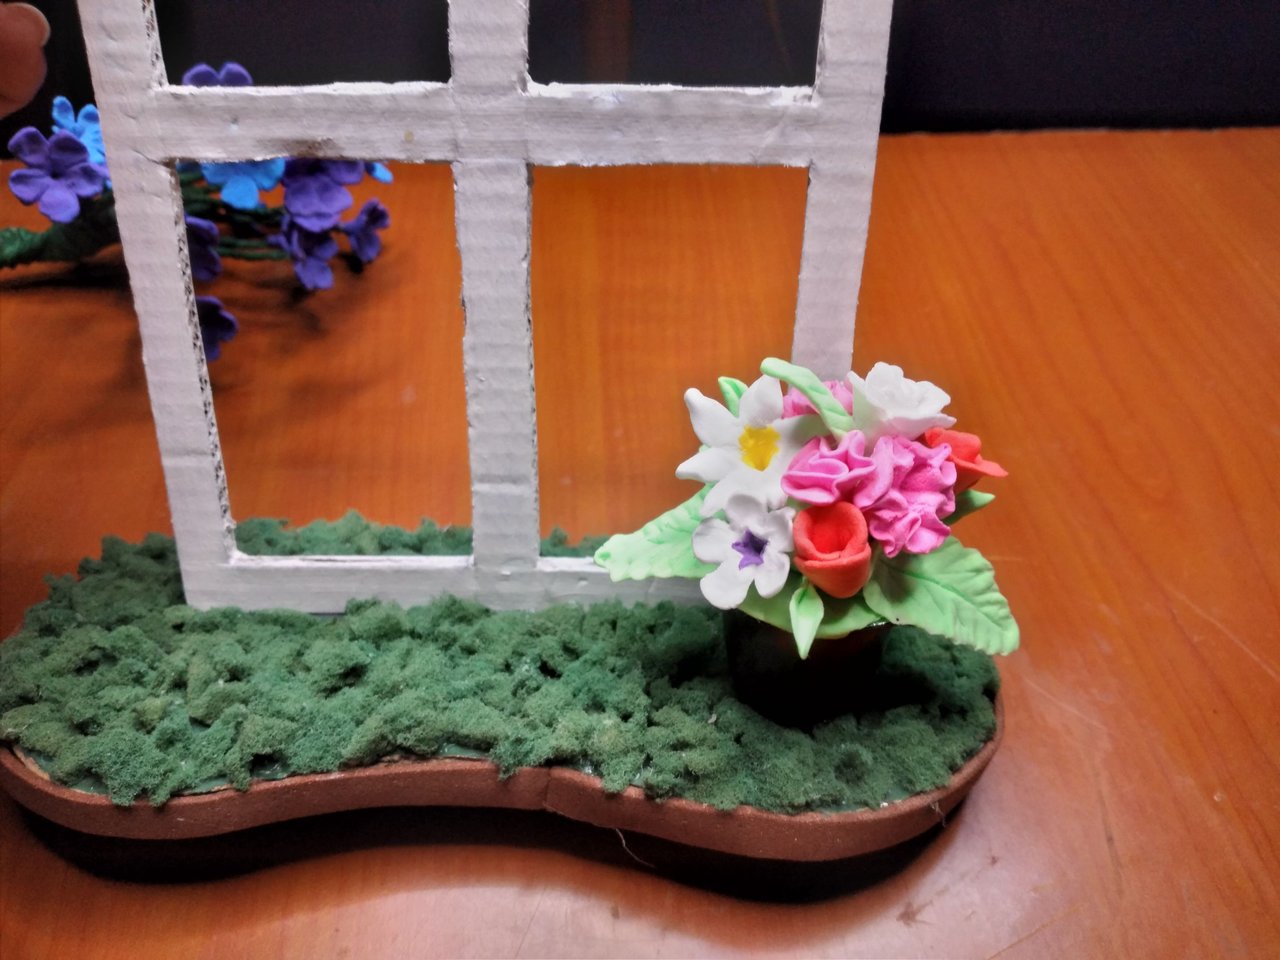
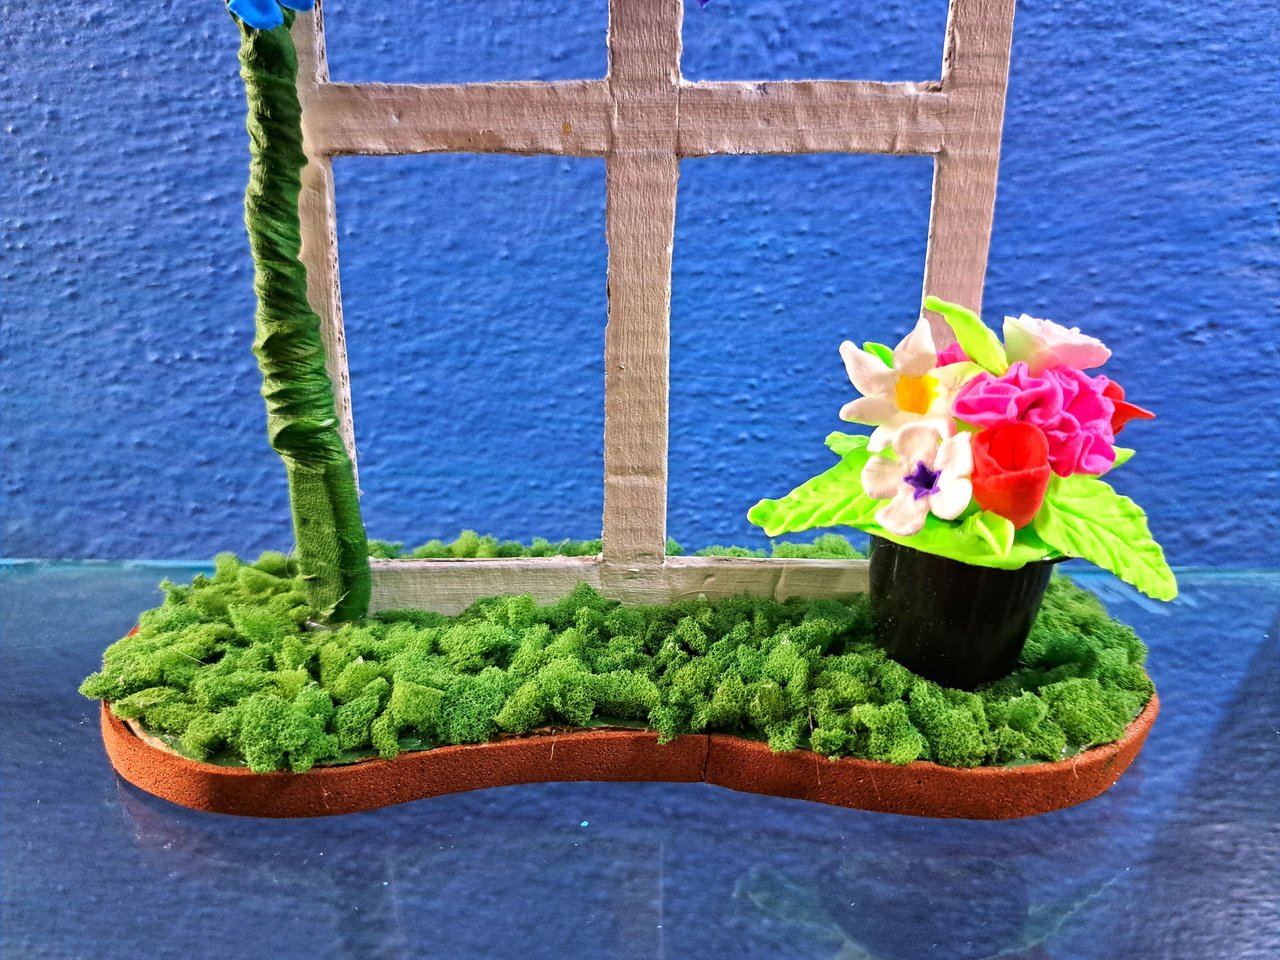
For the plant I used a coffee container, I liked it because it has the shape of a miniature flowerpot, I filled it with paper and covered it with green foami.
Para la planta utilicé un envase de café, me gustó porque tiene la forma de una maceta en miniatura, la rellené con papel y la cubrí con foami verde.
 |
 |
 |
 |
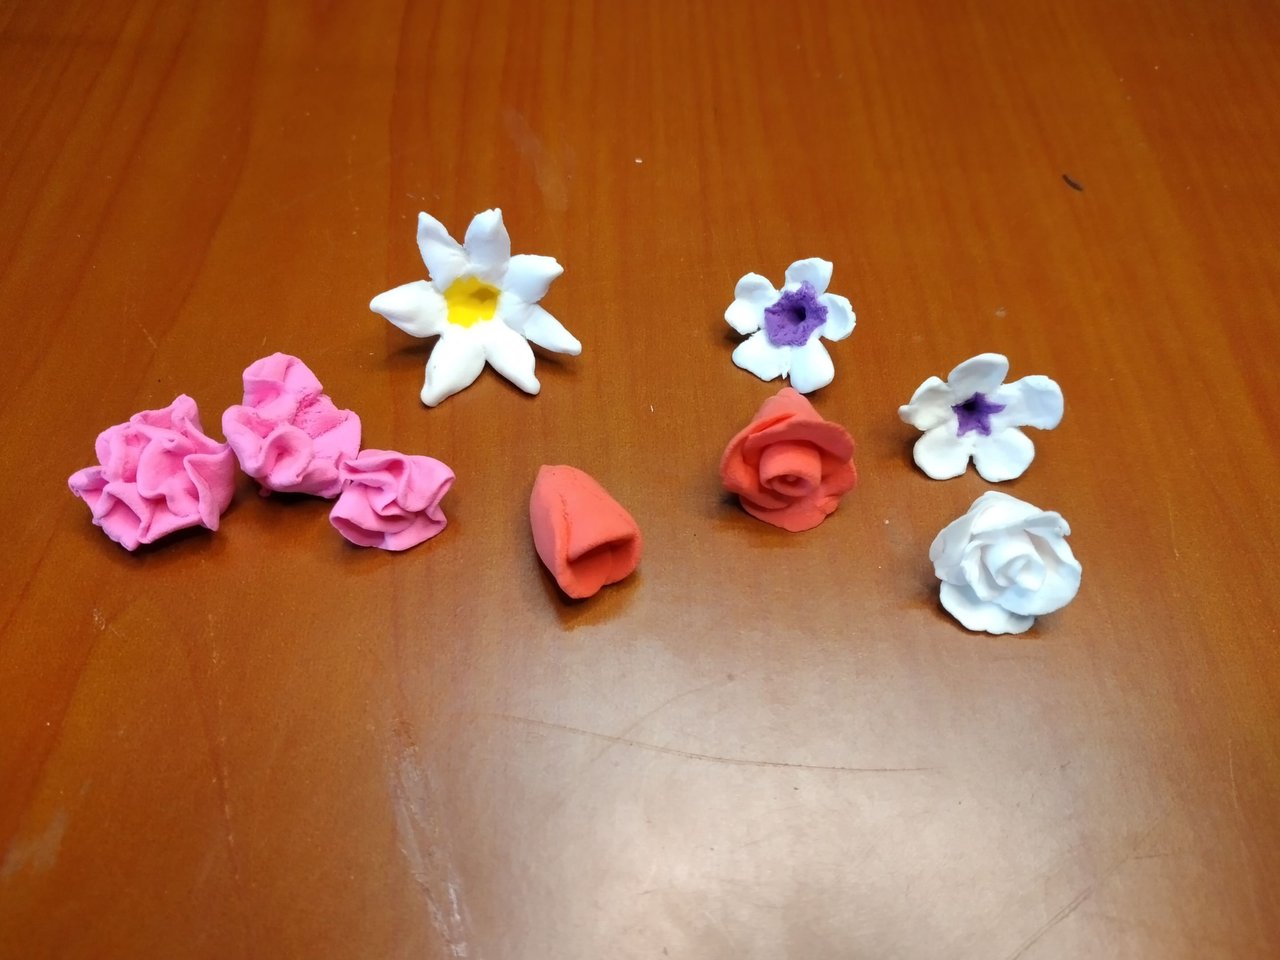 |
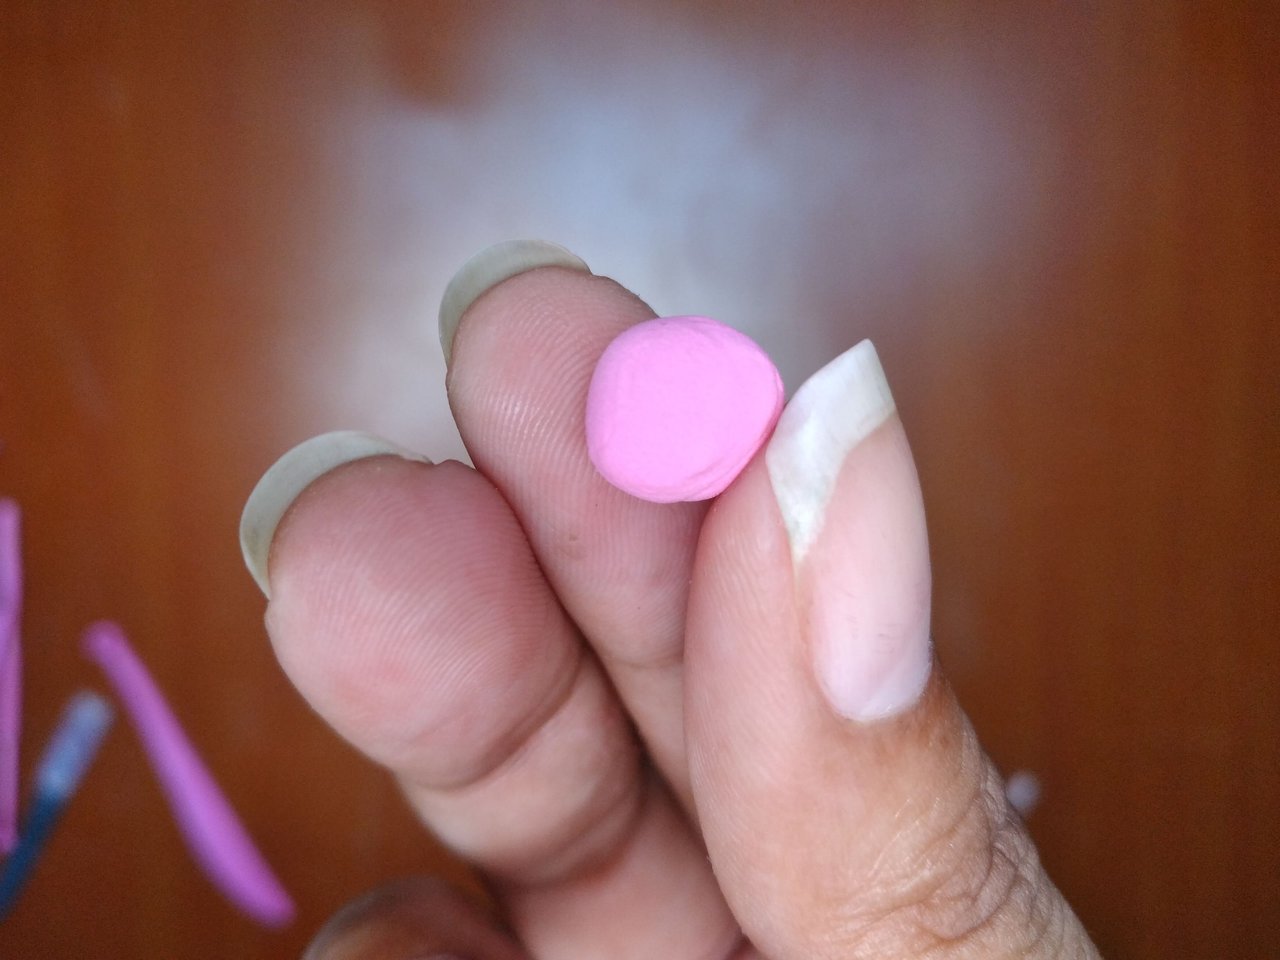
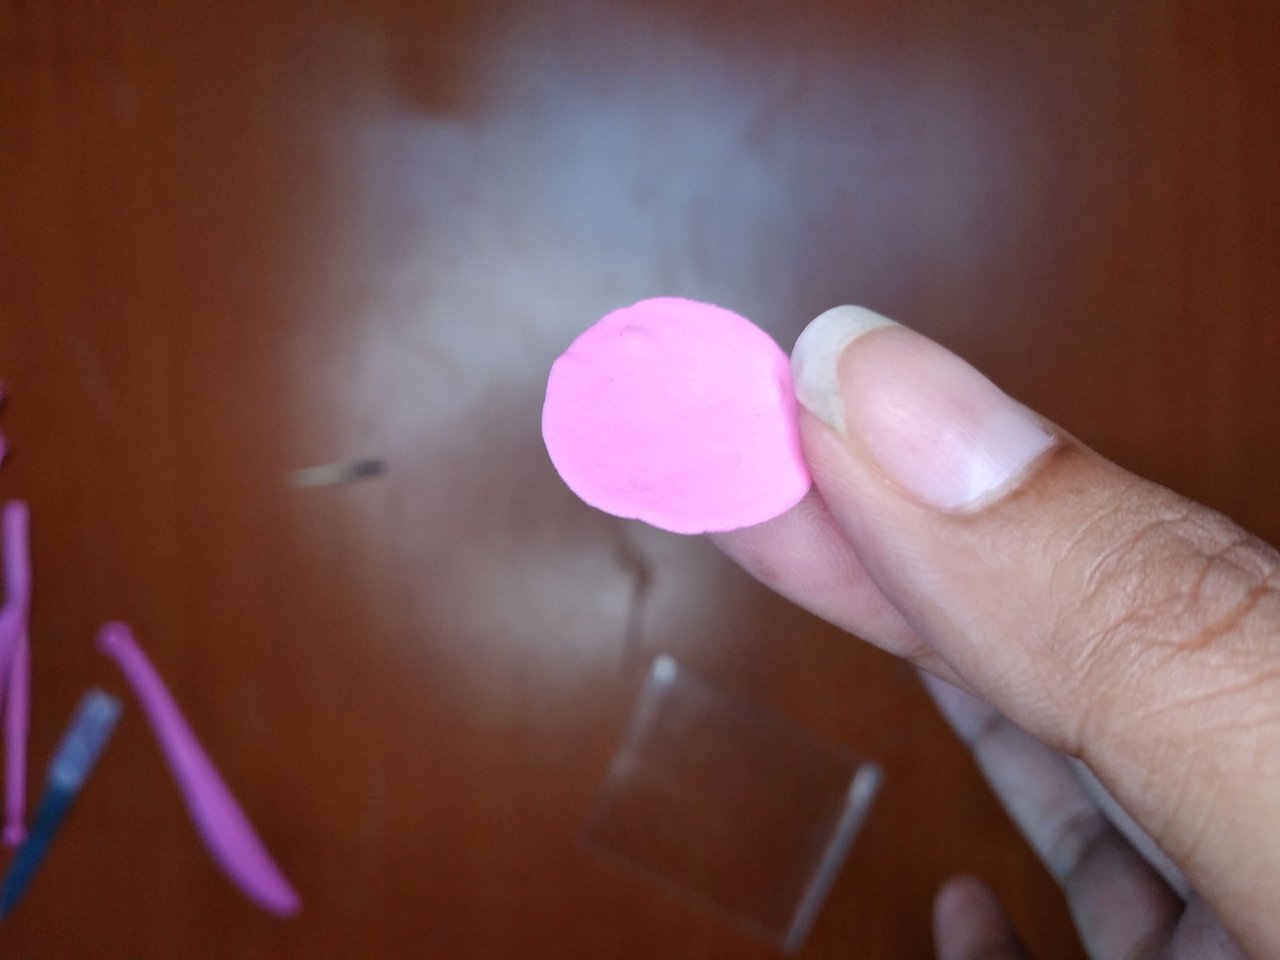
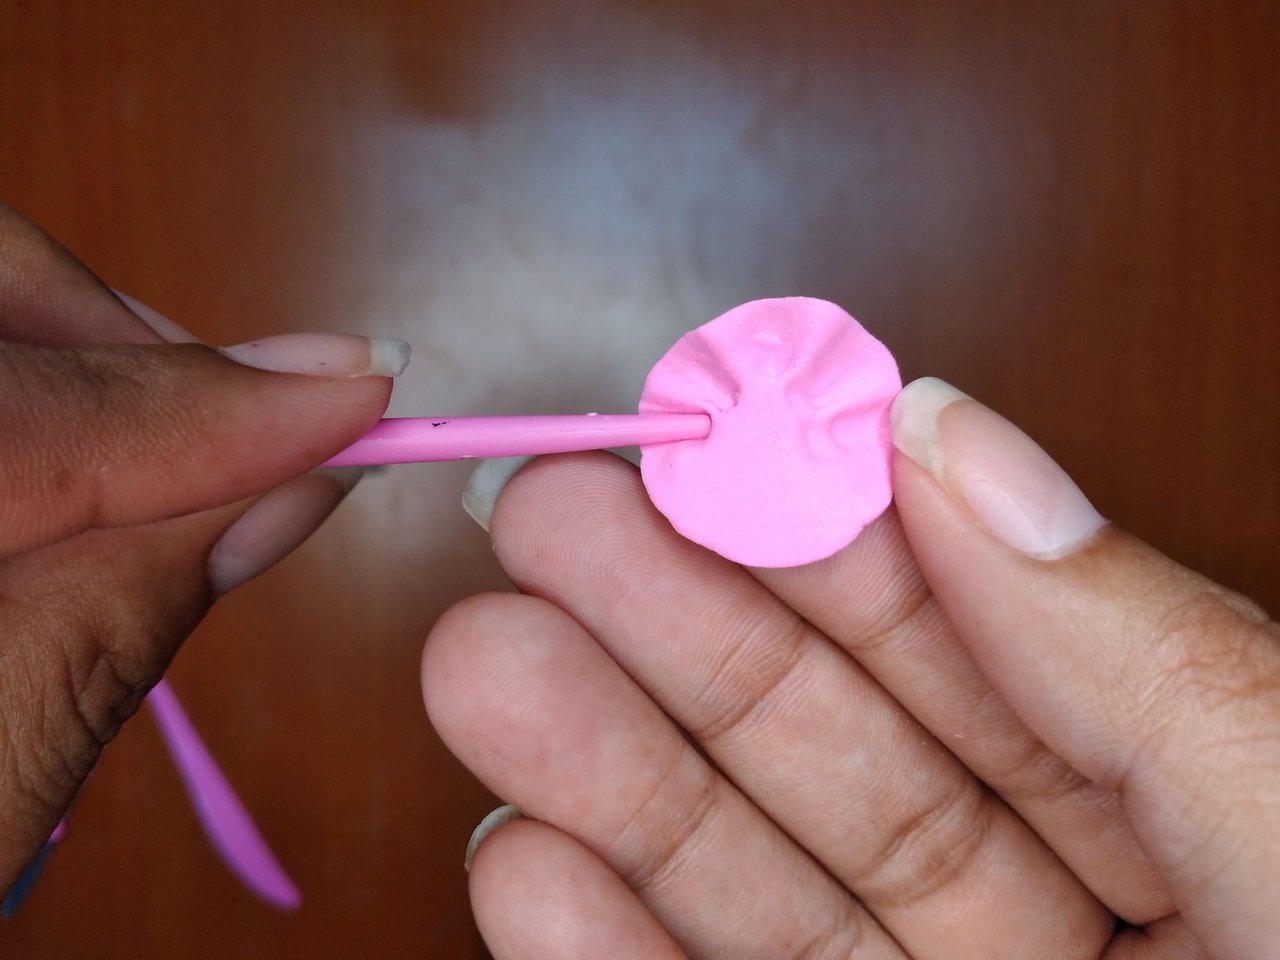
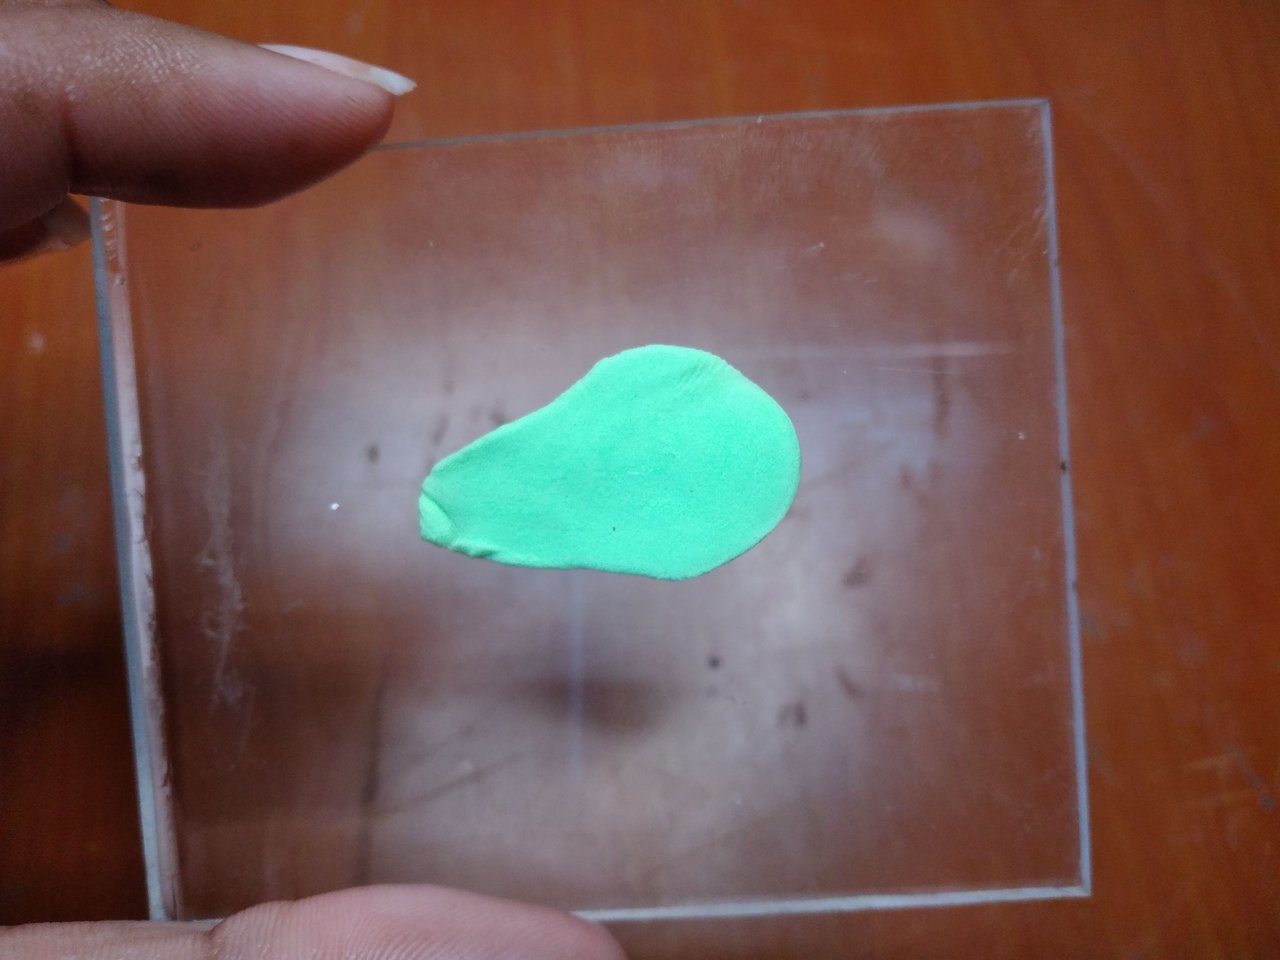
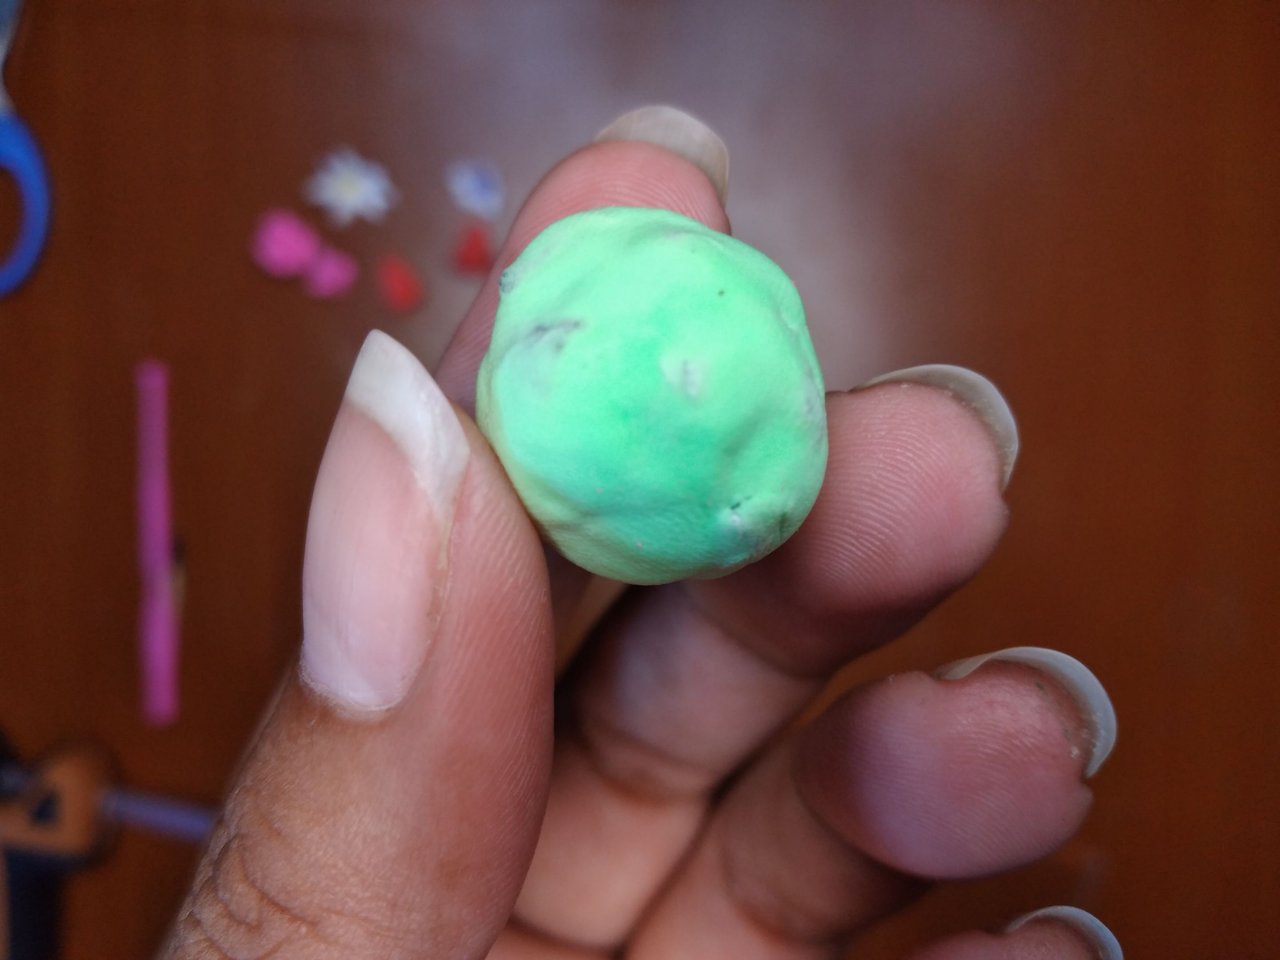
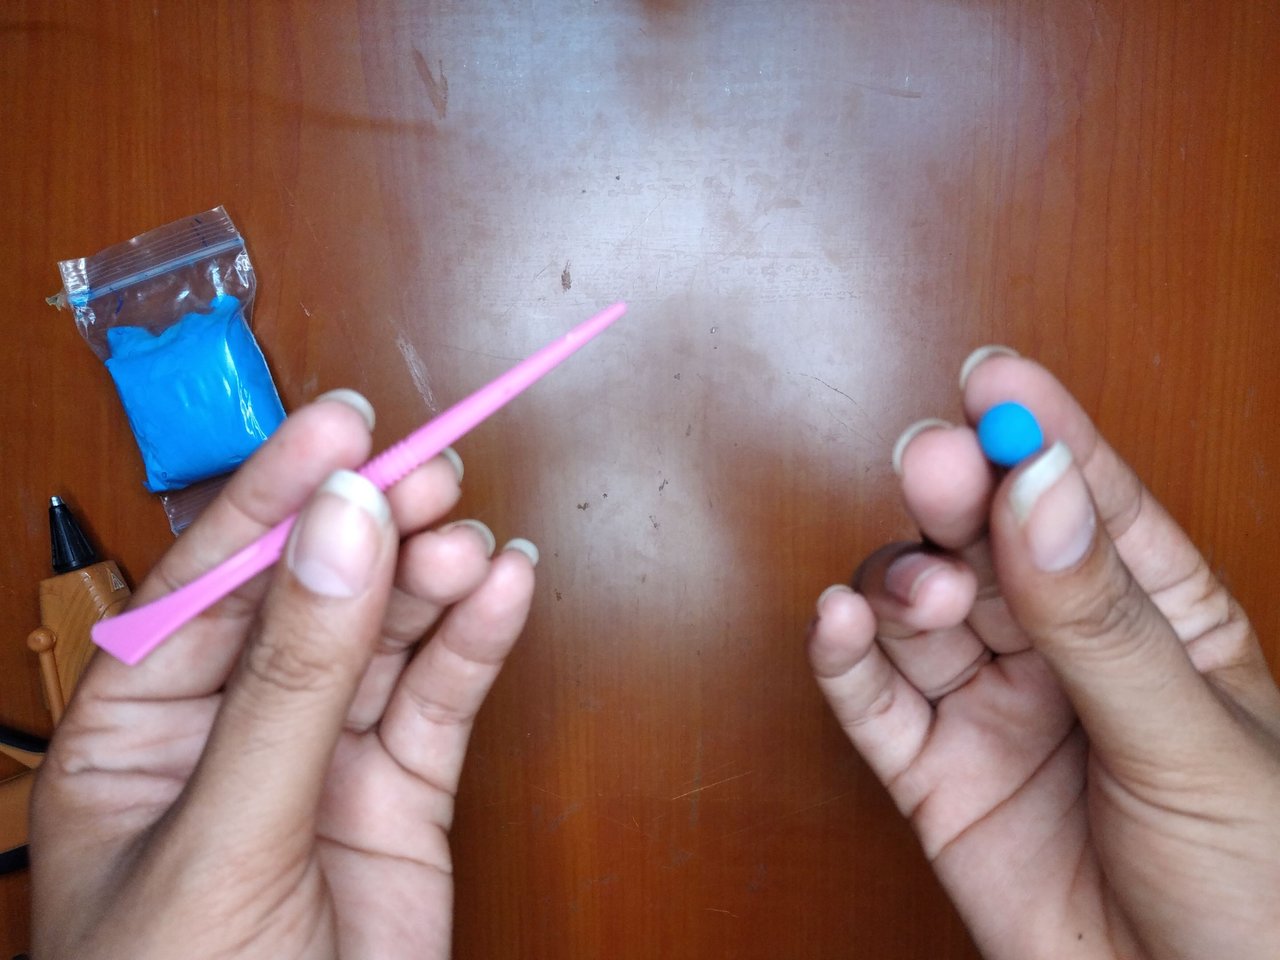
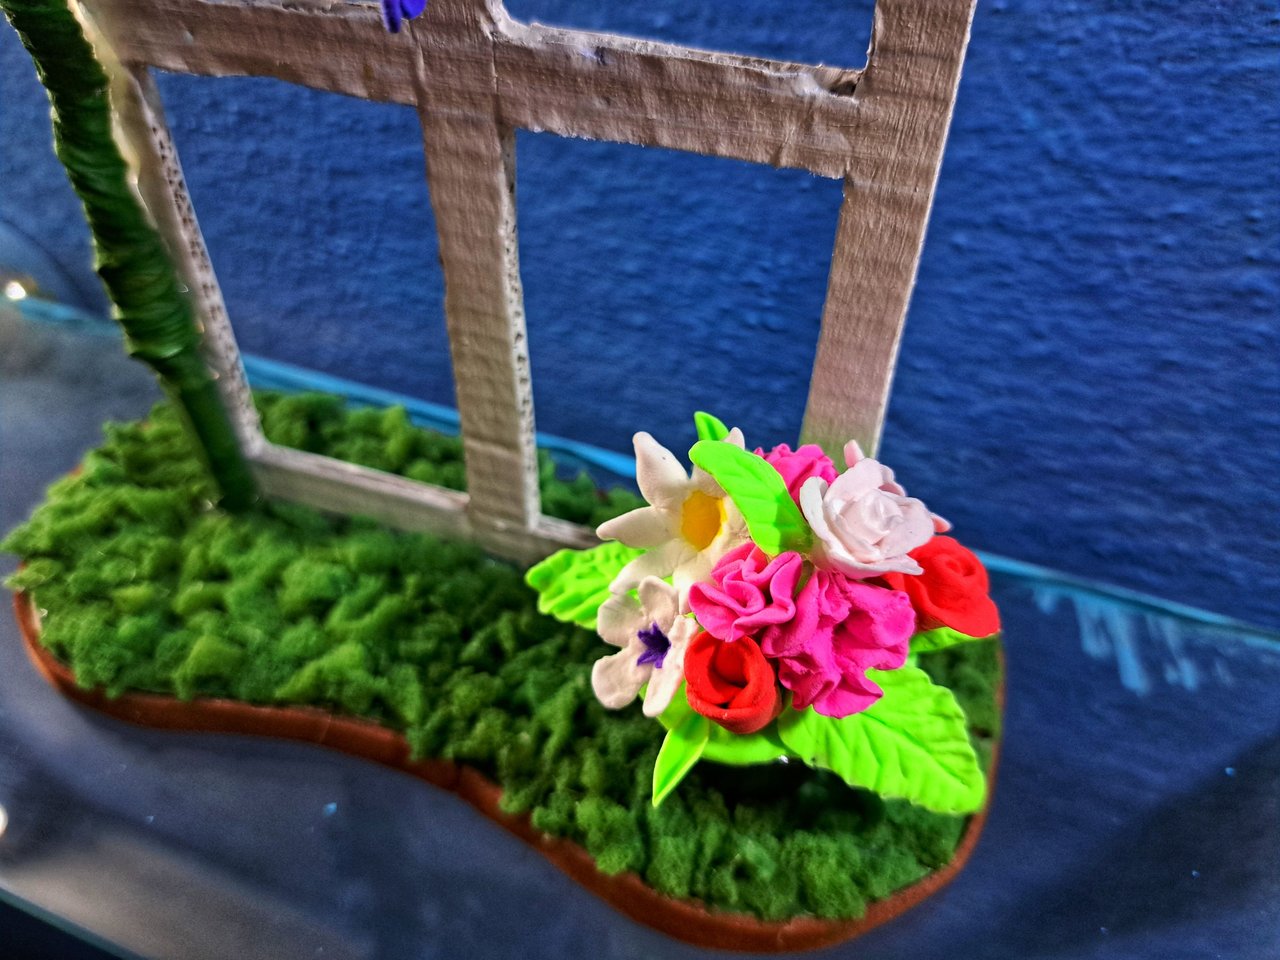
To make the flowers, I tried to make like carnations, for this I started with a little ball, which I flattened and with a fine-tipped stake I waved the entire edge, then I closed it and it was like this. Then I made other types of flowers, I am not going to explain them because I have already shown the procedure in previous posts and it would be too long.
Para hacer las flores, intenté hacer como unos claveles, para ello comencé por una bolita, la cual aplané y con una esteca de punta fina le fui ondulando todo el borde, luego la cerré y quedó de esta forma. Después hice otros tipos de flores, no les voy a explicar porque estas ya he mostrado el procedimiento en post anteriores y se me haría muy extenso.
 |
 |
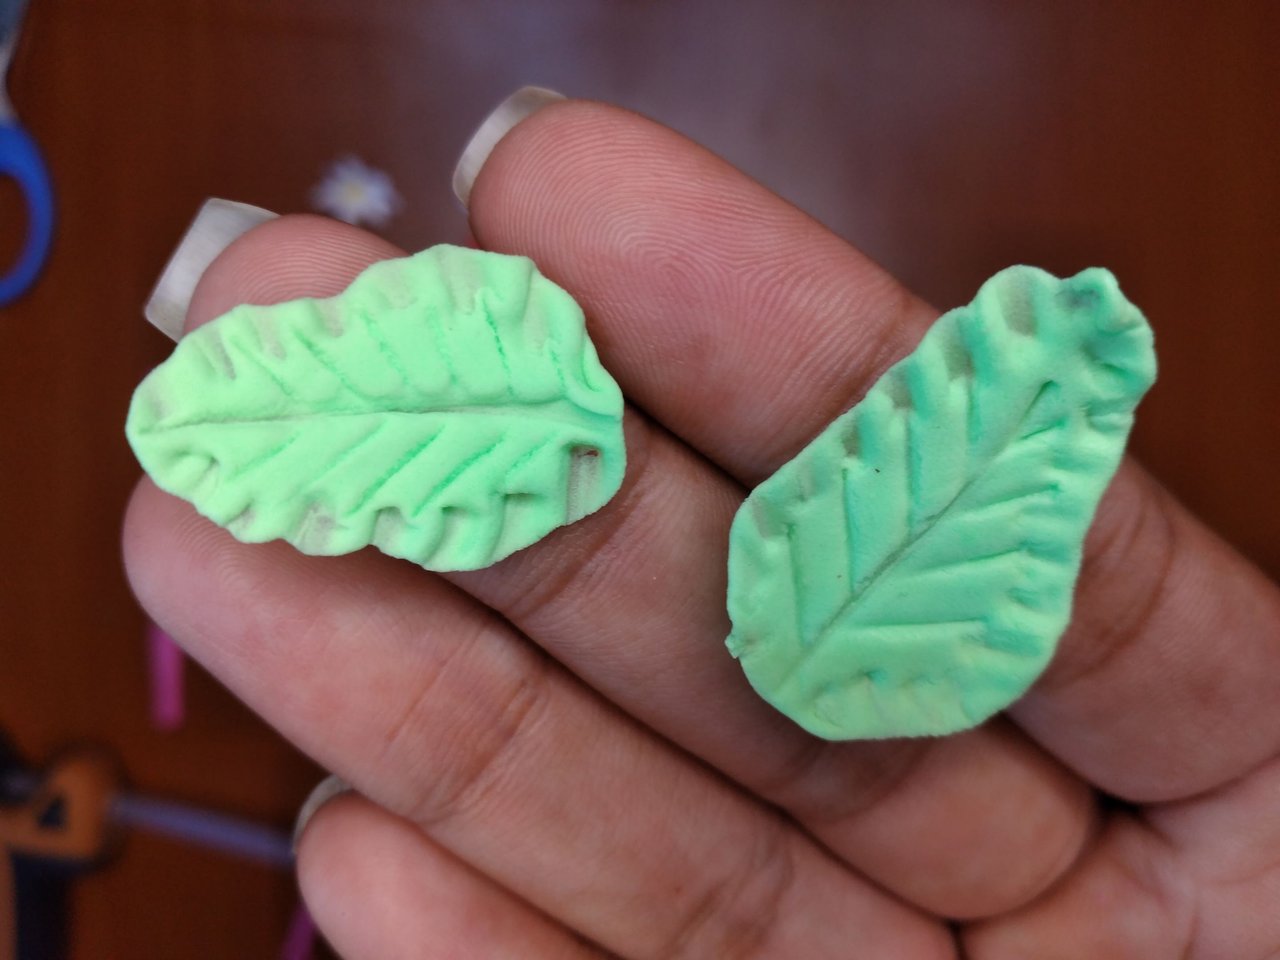 |
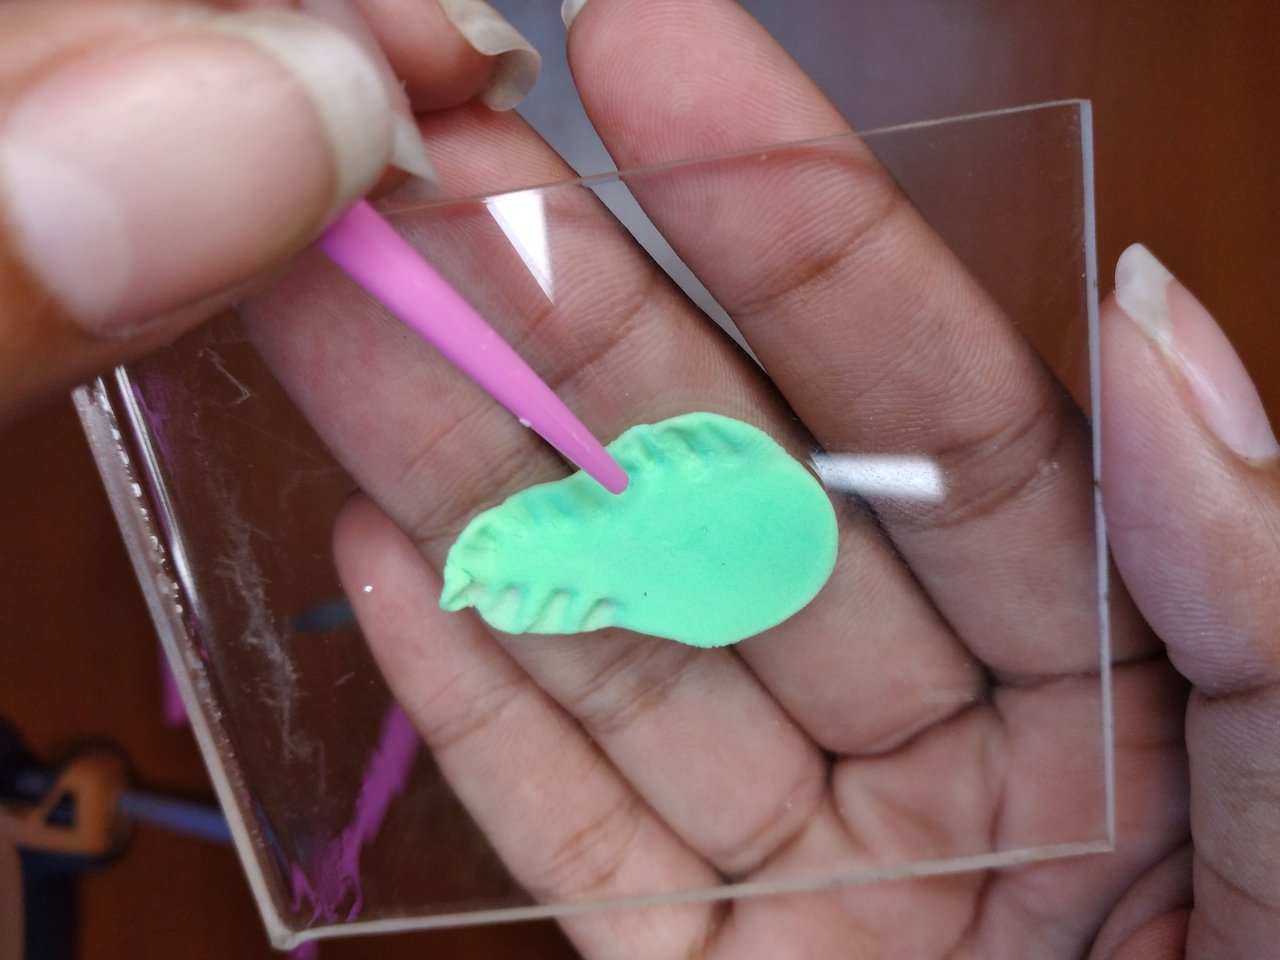
Las hojas son muy fáciles, se hace la forma como de una gota de agua y se le va aplastando todo el borde, finalmente se le hacen líneas diagonales en el interior.
 |
 |
 |
 |
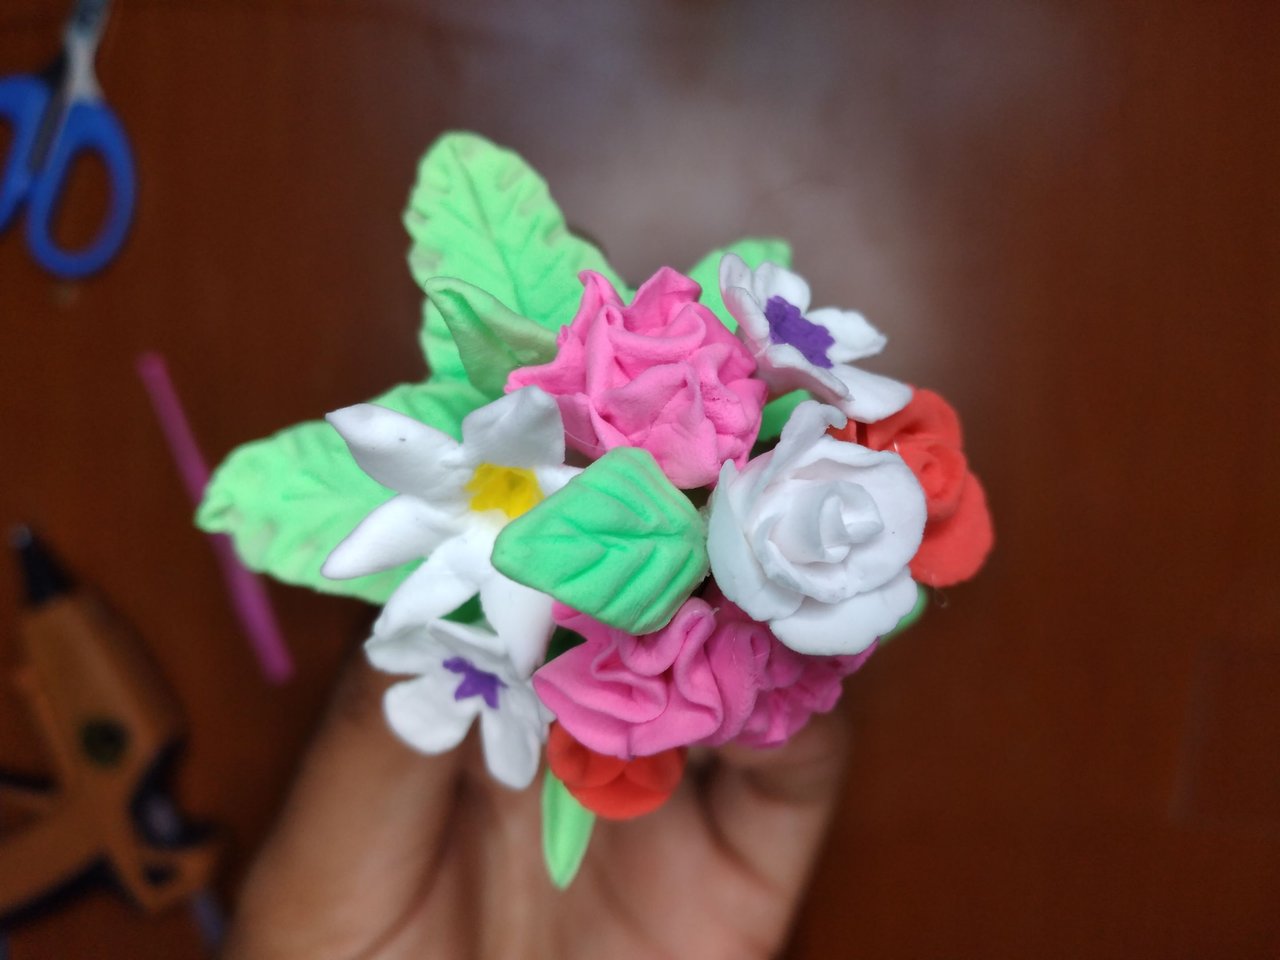 |
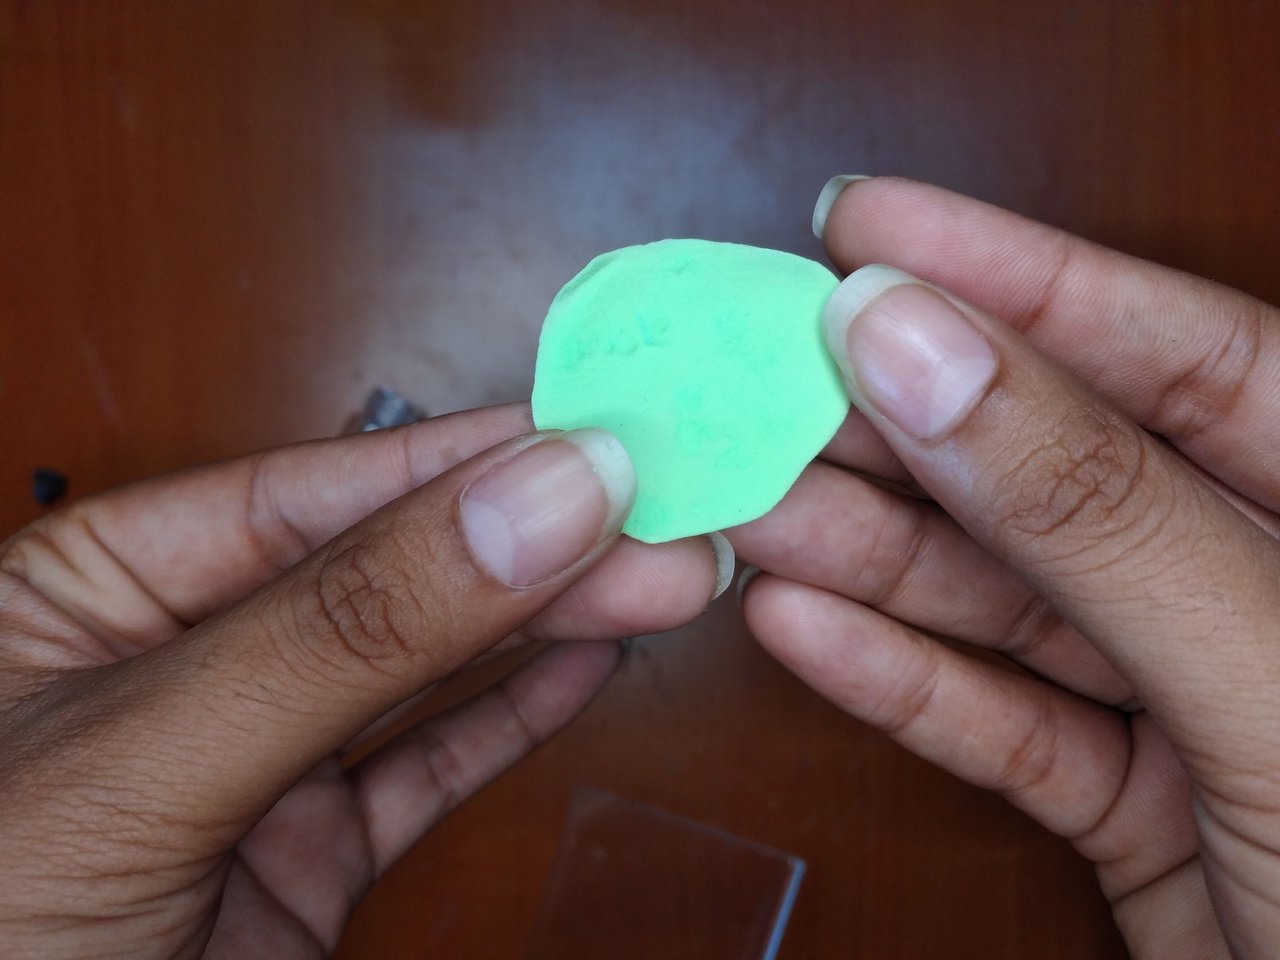
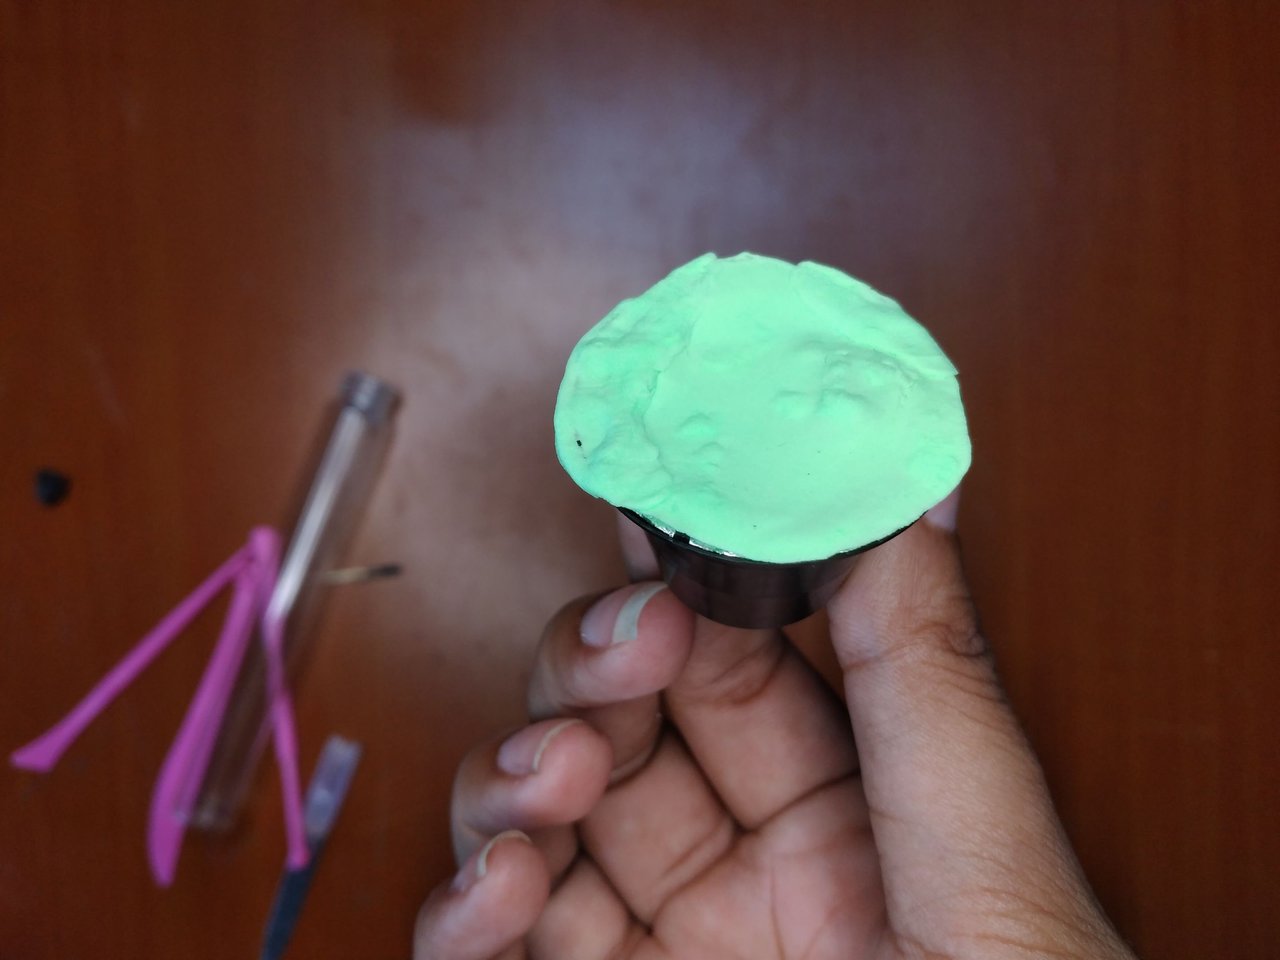
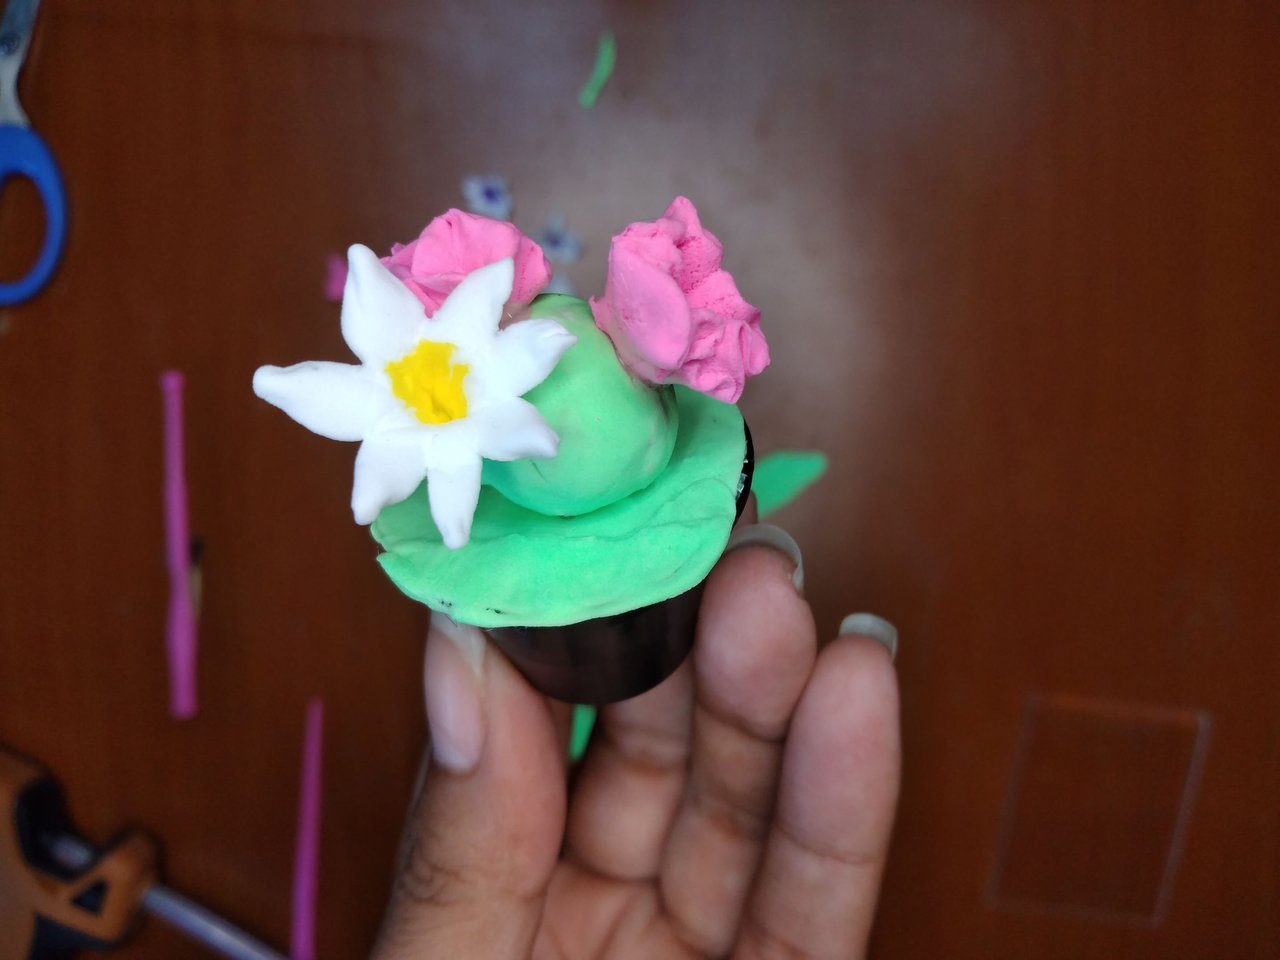
To assemble the whole pot, I made a little ball of paper and lined it with moldable foami. I glued it on top of the pot and there I glued all the flowers and leaves that we made in the way we like.
Para montar ya todo el macetero, elaboré una bolita de papel y la forré con foami moldeable. Esta la pegué encima de la maceta y allí pegar todas las flores y hojas que hicimos de la forma que más nos guste.
 |
 |
 |
 |
 |
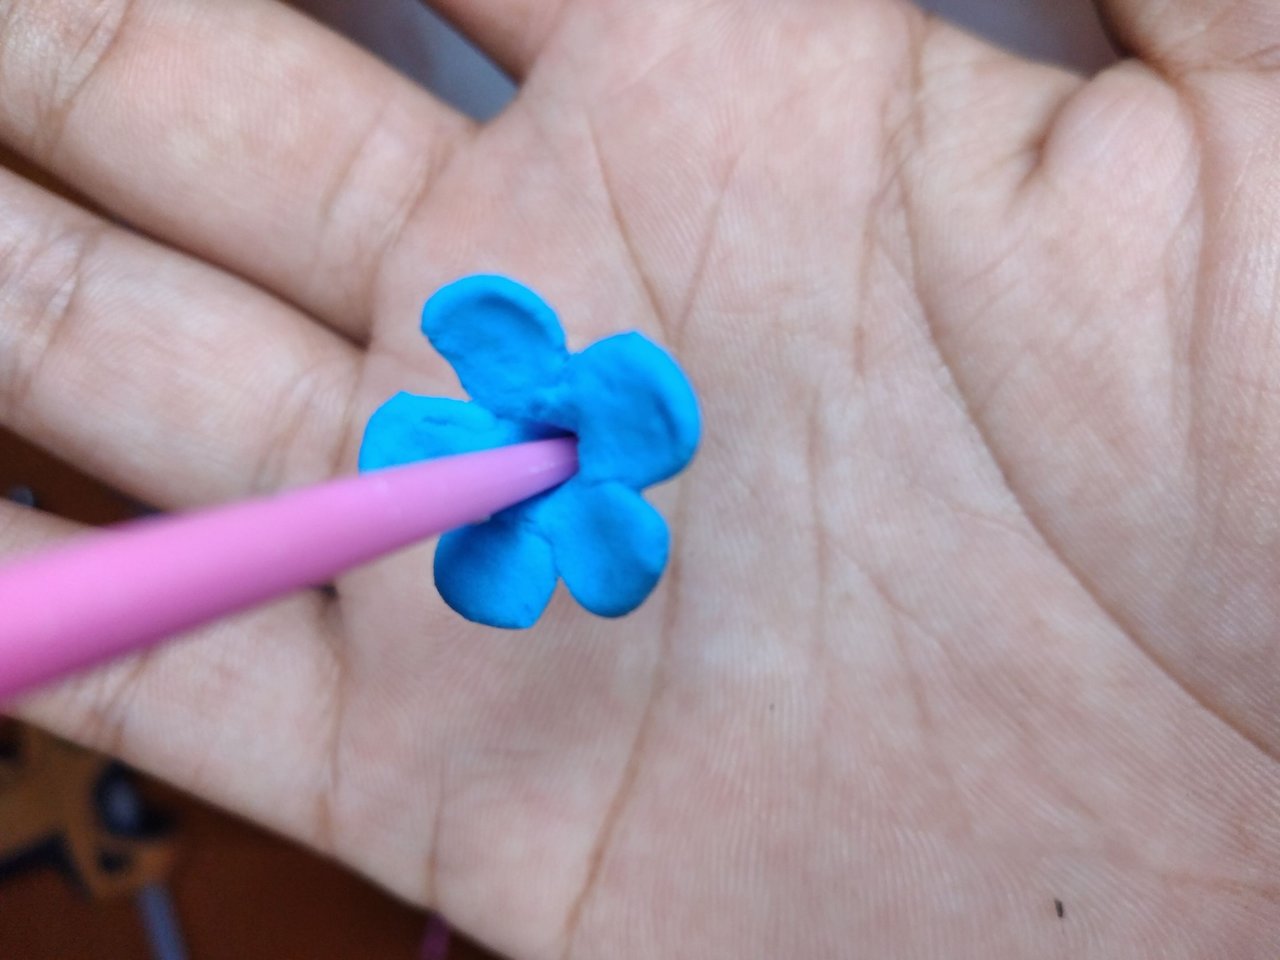 |
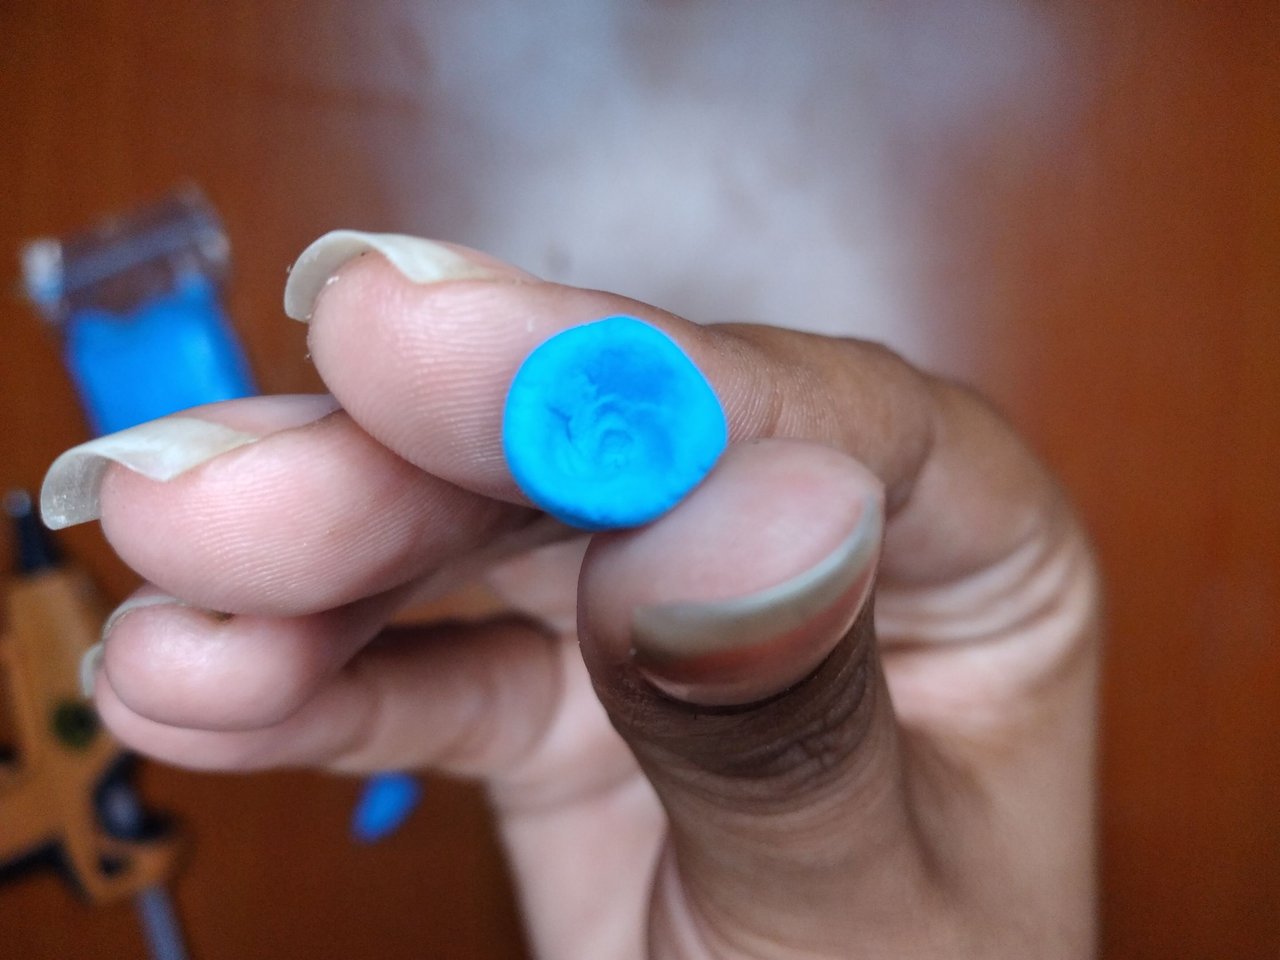
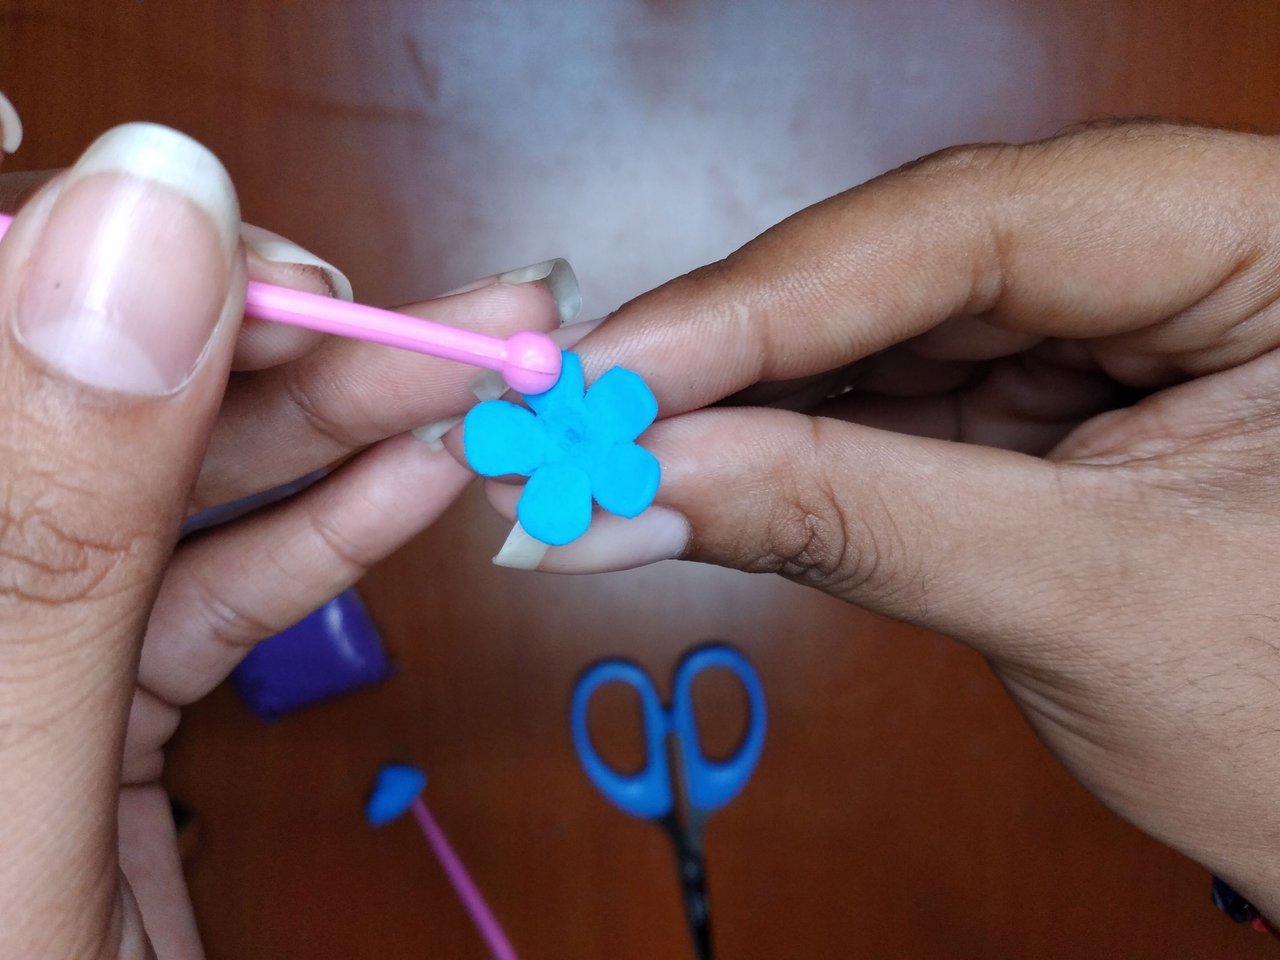
Now, the flowers of the tree, I wanted to make like little bells, for this I made a little ball, I put a fine-tipped stake in it and I went levering outwards until I got a bigger hole. With a scissors cut into 5 parts, these would be the petals, with a ball-tipped stake I pressed until I gave it a round shape. Finally, make a hole in the center.
Ahora, las flores del árbol, quise hacer como unas campanitas, para ello hice una bolita, le encajé una esteca de punta fina y fui palanqueando hacia afuera hasta obtener un agujero más grande. Con una tijera cortar en 5 partes, estos serían los pétalos, con una esteca de punta bola fui presionando hasta darle la forma redonda. Finalmente, hacer un agujero en el centro.
 |
 |
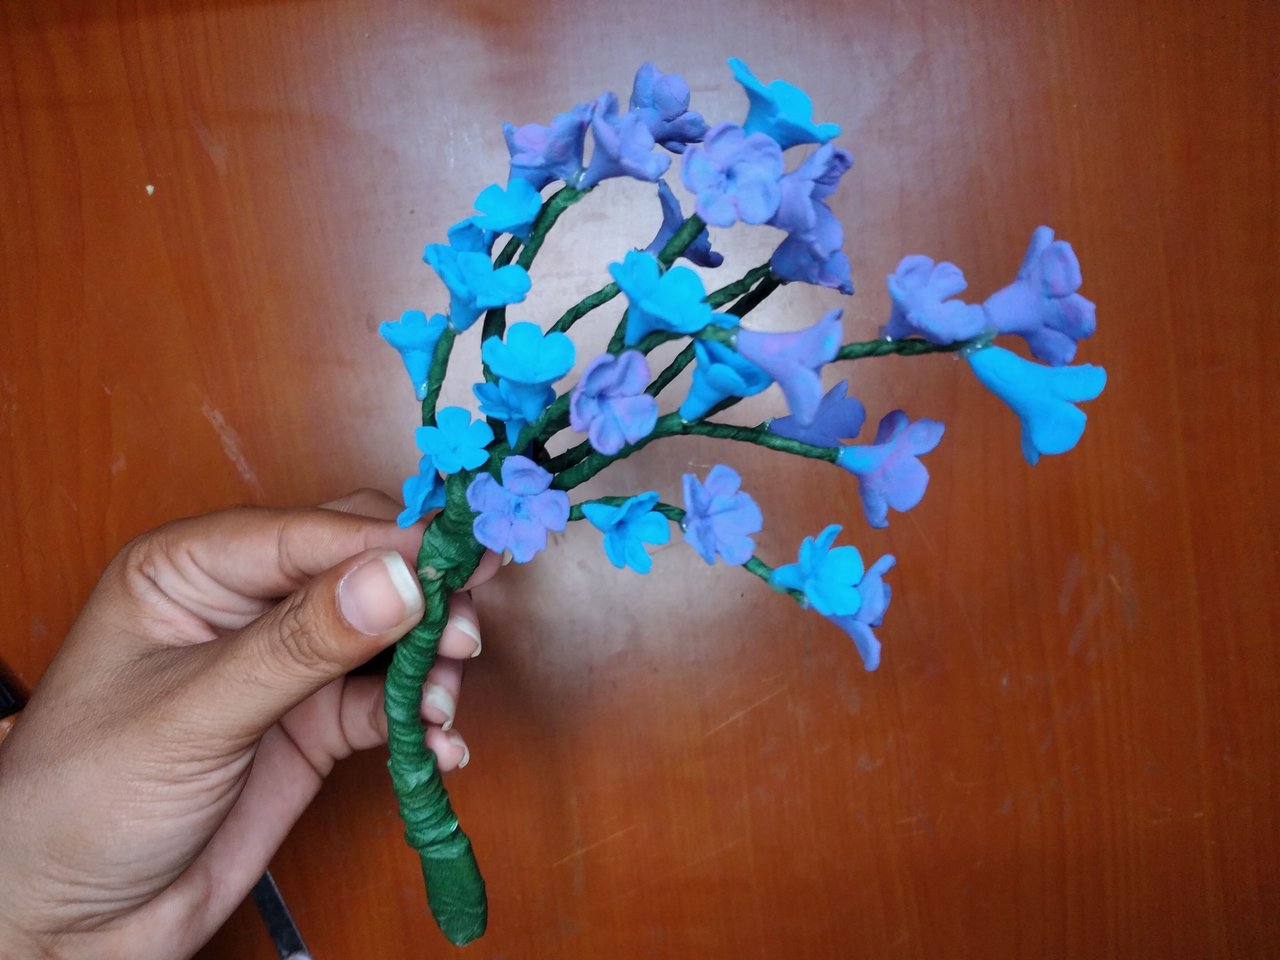 |
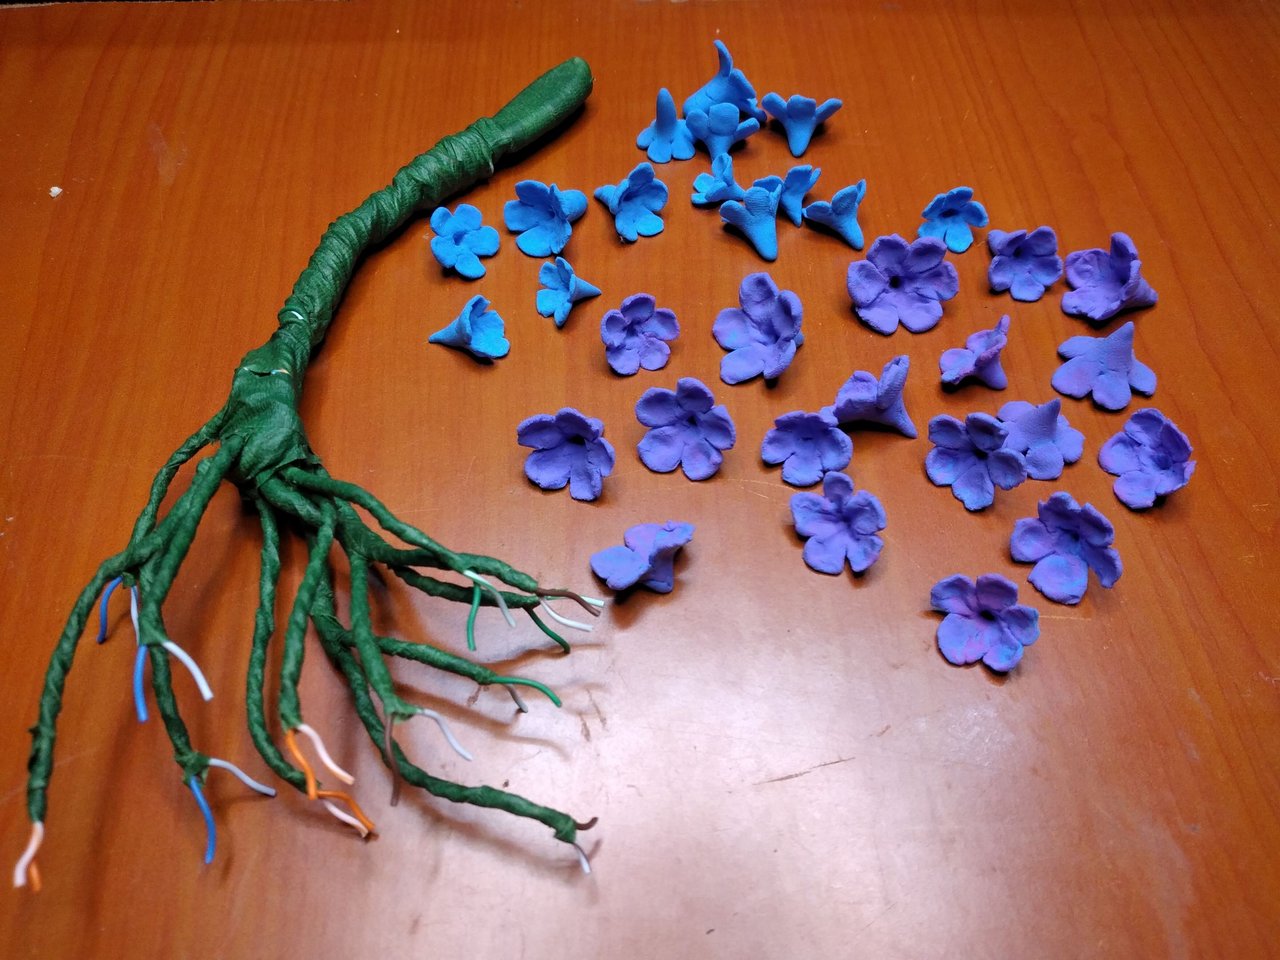
With all the flowers ready, glue them on all the branches of the tree starting at the tips and the rest of the flowers fill in the empty spaces.
Con todas las flores listas pegar en todas las ramas del árbol comenzando en las puntas y las demás ir rellenando los espacios vacíos.
 |
 |
 |
 |
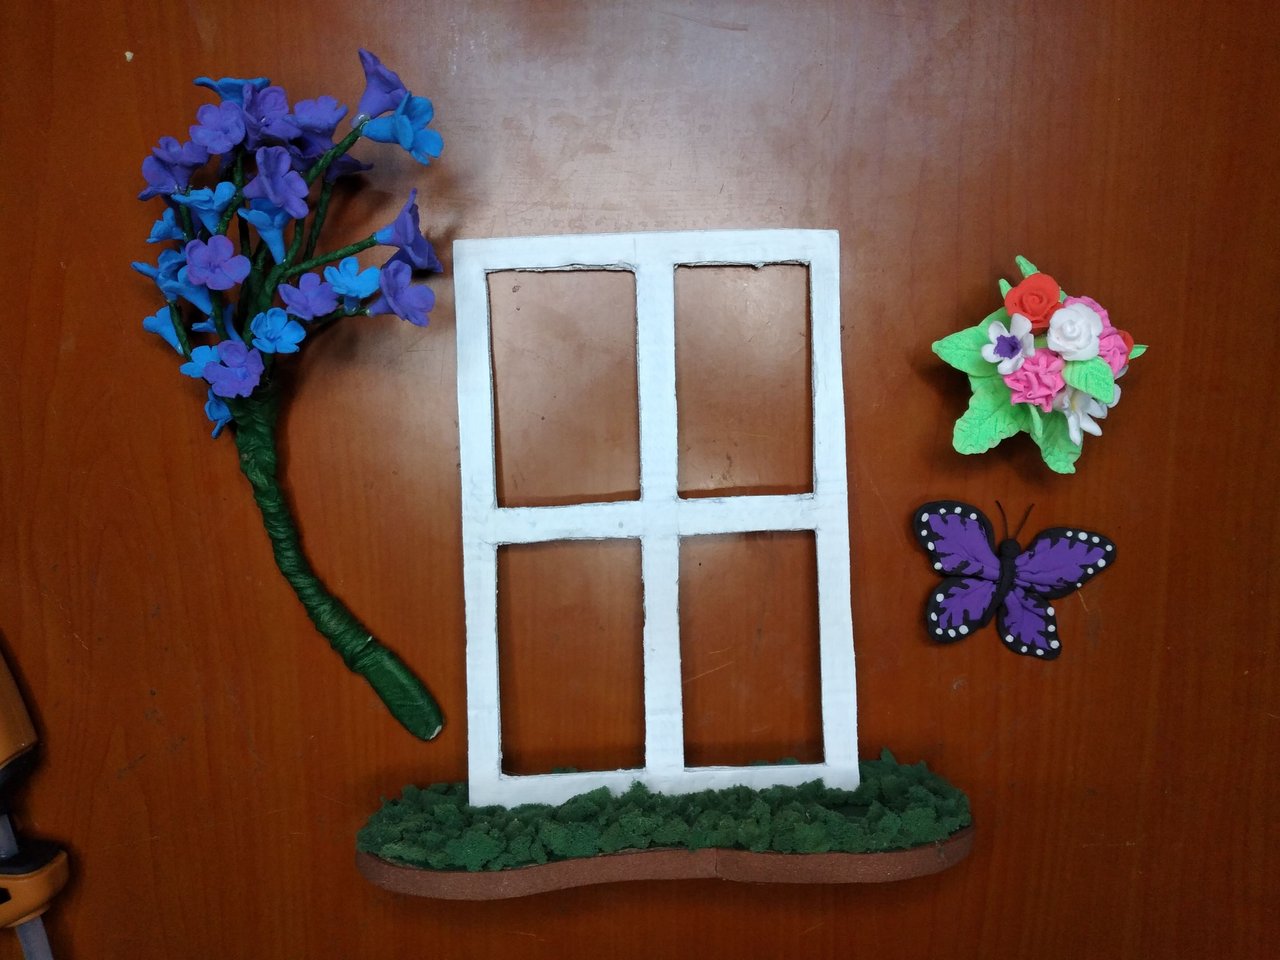
To finish and with all the elements finished, glue with silicone each component in its place, the tree, the butterfly and the plant.
Para culminar y con todos los elementos terminados, pegar con silicona cada componente en su lugar, el árbol, la mariposa y la planta.
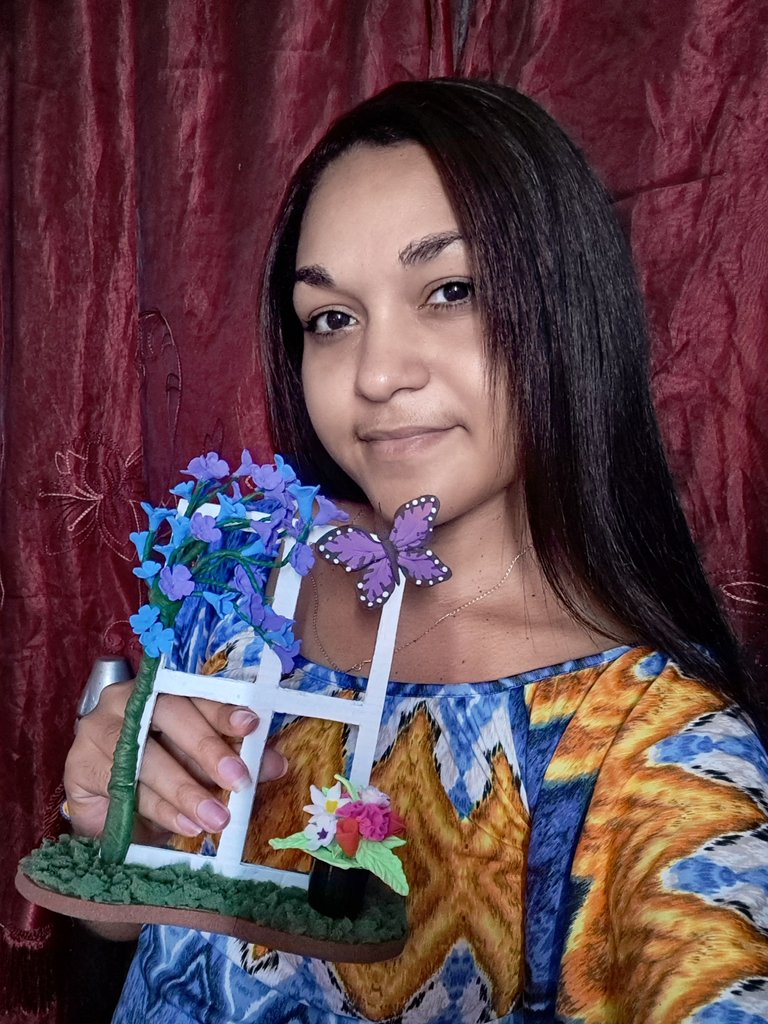
Final result // Resultado final
 |
 |
 |
 |
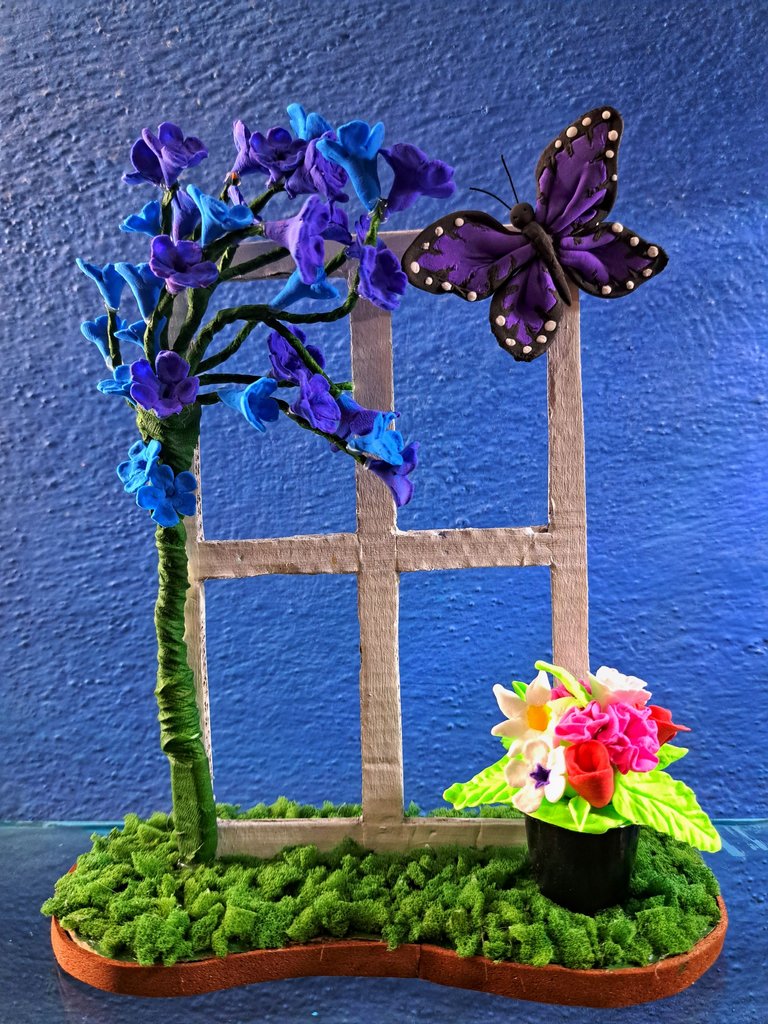
And now my miniature window is ready!, what did you think, I hope you liked it, I loved it, and even more that I used some of my favorite colors, like purple. Leave me your opinion in the comments, I read them. Greetings to all ❤️.
¡Y ya está lista mi ventana en miniatura!, que les pareció, espero les haya gustado, yo la adoré, y más que utilicé varios de mis colores de favoritos, como el violeta. Déjenme en los comentarios su opinión, los leo. Un saludo para todos ❤️.
Cover made in Canva
English is not my native language, translated by DeepL
Un trabajo definitivamente precioso, delicado, y muy prolijo. Me encanto...
!DIY
Muchas gracias 🥰
You can query your personal balance by
!DIYSTATSThanks 🤗
Nice work, very creative and well executed, lots of eye catching details. Thanks for sharing your step by step. Best wishes...
Thank you very much, I'm glad you liked it, it was a long process because it has several elements but I loved the result, best regards 🥰.
¡Felicidades! Esta publicación obtuvo upvote y fue compartido por @la-colmena, un proyecto de Curación Manual para la comunidad hispana de Hive que cuenta con el respaldo de @curie.
Si te gusta el trabajo que hacemos, te invitamos a darle tu voto a este comentario y a votar como testigo por La Colmena.
Si quieres saber más sobre nuestro proyecto, te invitamos a acompañarnos en nuestro servidor de Discord.
Muchas gracias por el apoyo 🤗
Me gusto mucho el significado que le diste a tu trabajo, la ventana de tu alma ❤️ pienso que has hecho una representacion muy acertada y colorida. Me encanto como te quedo, los colores que elegiste son bellisimos 😍
Muchas gracias, que bueno que te haya gustado. Hay veces que cuando voy a hacer una manualidad voy crandole una historia a medida que confecciono las piezas, pero otras veces tengo claro lo que voy a hacer y eso ayuda mucho en el proceso creativo.
Se ve demasiado hermoso, hiciste un gran trabajo 🩵.
!DIY
Muchas gracias, llevó un tiempo hacerlo pero me encantó el resultado 🤗
You can query your personal balance by
!DIYSTATSThank you very much 🤗
This is gorgeous!!
Thank you 😍
Buenas tardes Yaliemny. Que hermoso que quedó tu trabajo, me gustó la referencia de la ventana al alma. Esta se ve muy linda y con todos sus detalles coloridos, un proyecto muy alegre. Te felicito ❤️
Muchas gracias, me alegra mucho saber que te gustó, lo hice con mucho cariño, me gusta usar colores vivos que resalten y el violeta , mi favorito, saludos 🤗
Congratulations, your post has been upvoted by @dsc-r2cornell, which is the curating account for @R2cornell's Discord Community.
Enhorabuena, su "post" ha sido "up-voted" por @dsc-r2cornell, que es la "cuenta curating" de la Comunidad de la Discordia de @R2cornell.
Thank you very much for the support 🤗
https://twitter.com/hivediy47901/status/1774298209415819560
Thank you for the support 🥰
Congratulations @yale95reyra! You have completed the following achievement on the Hive blockchain And have been rewarded with New badge(s)
Your next target is to reach 3000 upvotes.
You can view your badges on your board and compare yourself to others in the Ranking
If you no longer want to receive notifications, reply to this comment with the word
STOPCheck out our last posts:
Congratulations @yale95reyra! You received a personal badge!
Wait until the end of Power Up Day to find out the size of your Power-Bee.
May the Hive Power be with you!
You can view your badges on your board and compare yourself to others in the Ranking
Check out our last posts:
Congratulations @yale95reyra! You received a personal badge!
Participate in the next Power Up Day and try to power-up more HIVE to get a bigger Power-Bee.
May the Hive Power be with you!
You can view your badges on your board and compare yourself to others in the Ranking
Check out our last posts: