[EN-ES] Recycled cardboard basket for Halloween / Cesta tejida de cartón reciclado para el día de Halloween
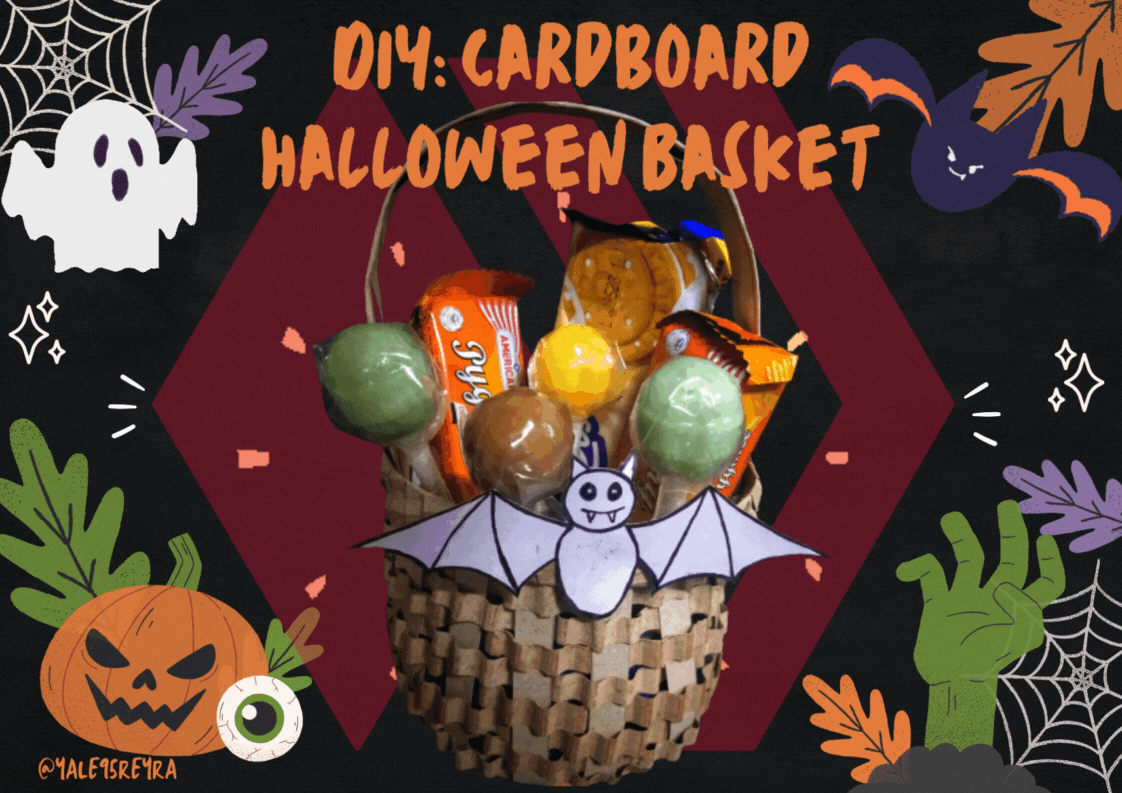
We are in the most haunted season of the year, Halloween and as usual everyone is preparing for that day, October 31. I realized that for my two year old nephew it will be his first celebration and I wanted to surprise him with something made by me to accompany him during that night. Therefore, I decided to make a cardboard basket for him to keep his sweets and treats in, besides being a sustainable alternative that won't lose its charm.
I can already imagine him, with a costume, which we still don't know what we are going to dress him up as because we can't agree, holding the basket in his little hands. This recycled cardboard basket will not only be a tool to collect candy, but also a way to teach my nephew about the importance of reusing and recycling.
Next, I will show you how I created this woven cardboard basket.
Estamos en la temporada mas embrujada del año, Halloween y como es costumbre todos se preparan para ese día, el 31 de octubre. Ya faltando poco me di cuenta que para mi sobrino de dos años será su primera celebración y quería sorprenderlo con algo hecho por mí que lo acompañe durante esa noche. Por lo tanto, decidí hacer una cesta de cartón para que allí guarde sus dulces y golosinas, además de ser una alternativa sostenible y que no pierda su encanto.
Ya lo imagino, con un disfraz, que todavía no sabemos de que lo vamos a disfrazar porque no nos ponemos de acuerdo, sosteniendo la cesta en sus manitos. Esta cestica con cartón reciclado, no solo será una herramienta para recolectar dulces, sino que también será una forma de enseñarle a mi sobrino sobre la importancia que tiene la reutilización y el reciclaje.
A continuación, te mostraré como creé esta cesta tejida con cartón.
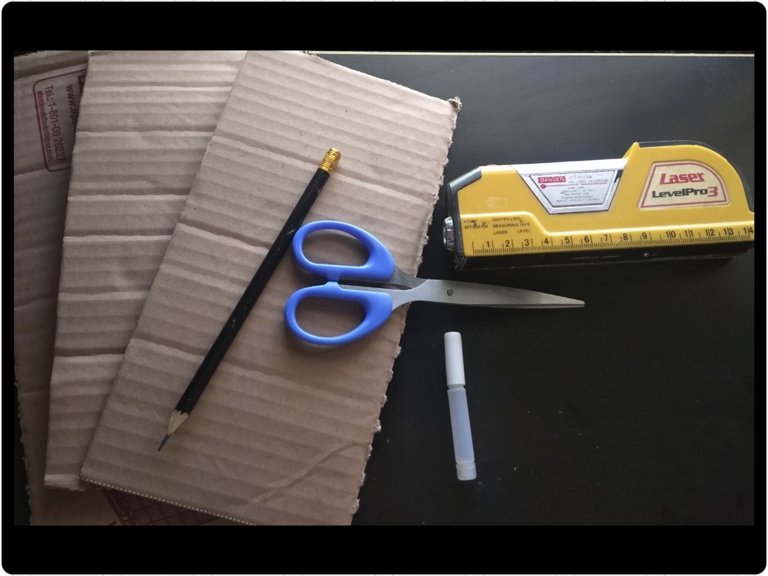
Materials needed / Materiales necesarios
- Recycled cardboard - Cartón reciclado
- Scissors - Tijeras
- Ruler - Regla
- Pencil - Lápiz
- Glue - Pegamento
Prepared by / Elaboración
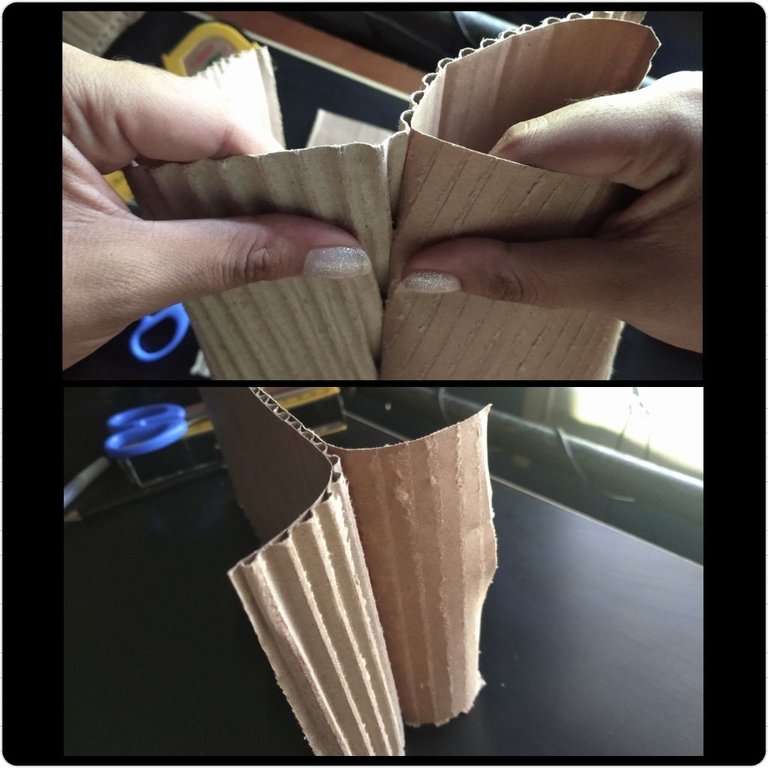
First, take the cardboard and separate each of its folds, being careful not to break them.
Primeramente, tomar el cartón e ir separando cada uno de sus pliegues, con cuidado para que no se rompan.

Mark with a compass, if you have one, two circles of the same size, I used a lid of a container to mark the shape because I did not have a compass. Once the two circles are marked, cut them out.
Marcar con un compás, si tienes, dos círculos del mismo tamaño, yo utilicé una tapa de un recipiente para marcar la forma porque no tenía compás. Ya marcados los dos círculos, se recortan.
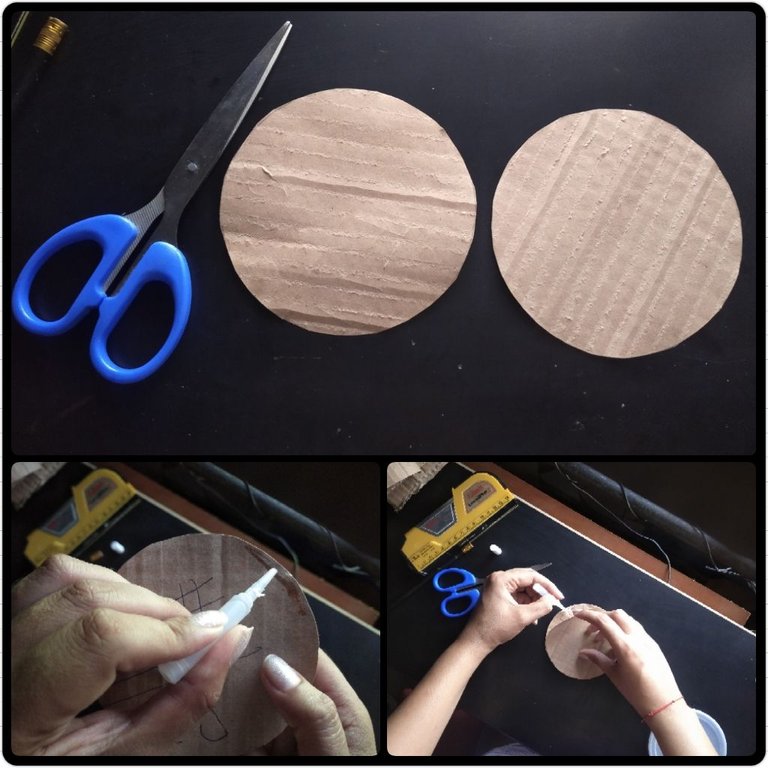
Take the two circles and glue them one on top of the other, with the objective of strengthening them because this will be the base.
Tomar los dos círculos y pegarlos uno encima de otro, con el objetivo de fortalecerlos porque esta será la base.
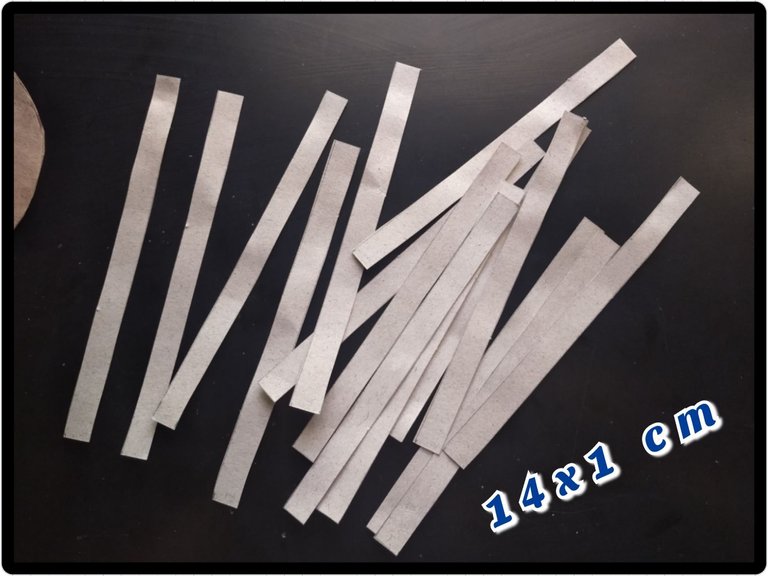
Picar 15 tirillas de cartón de 14x 1 cm de largo.
Picar 15 tirillas de cartón de 14x 1 cm de largo.
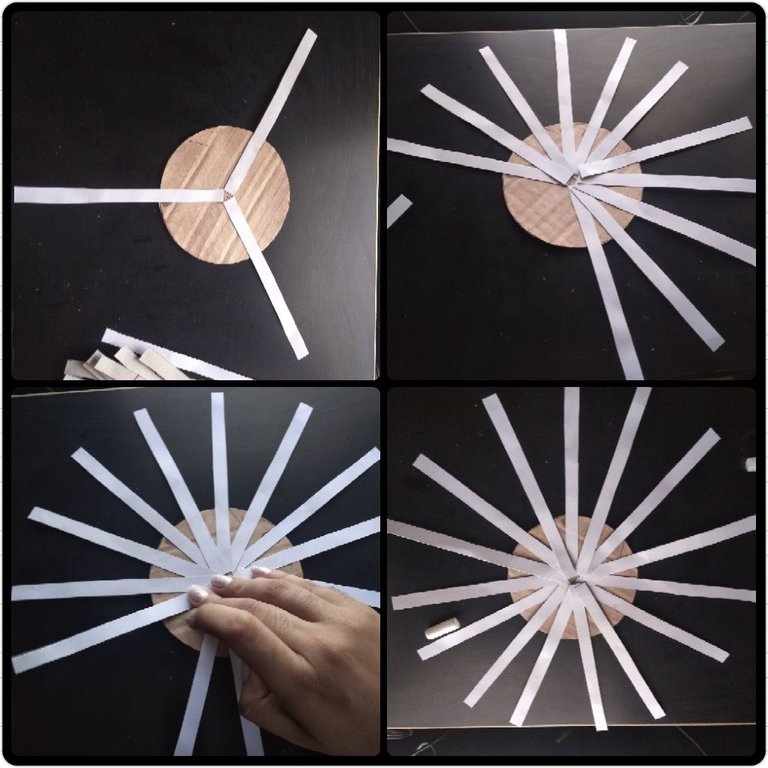
Place the strips in this way and glue them little by little from the center.
Colocar las tirillas de esta forma e ir pegándolas poco a poco desde el centro.
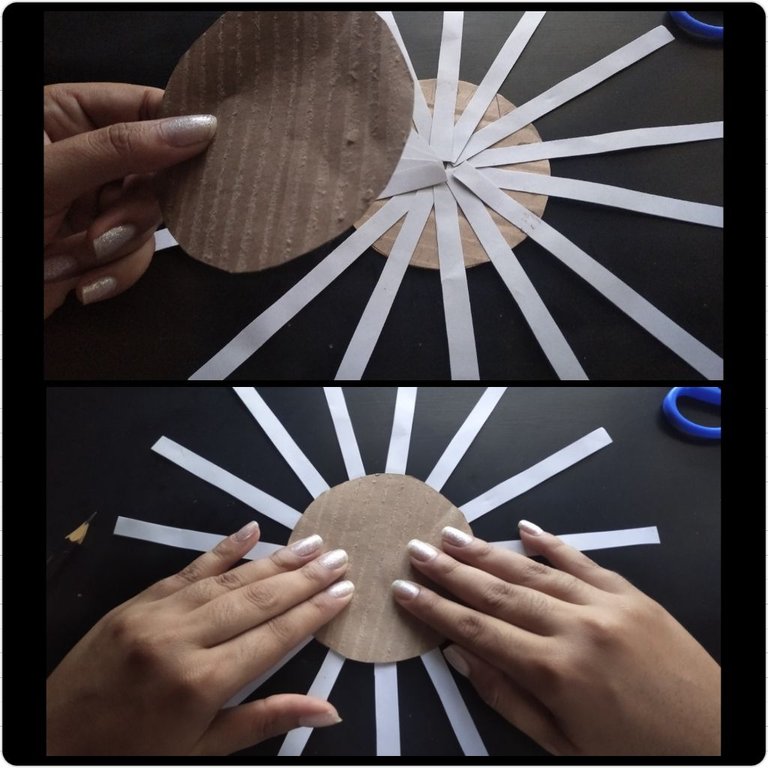
When all the strips are glued together, cut out another circle of the same size to place it on top, this will strengthen it and make it look much better.
Cuando ya estén todas las tirillas pegadas recortar otro circulo de la misma medida para colocarlo encima, esto hará que se fortalezca y se vea mucho mejor.
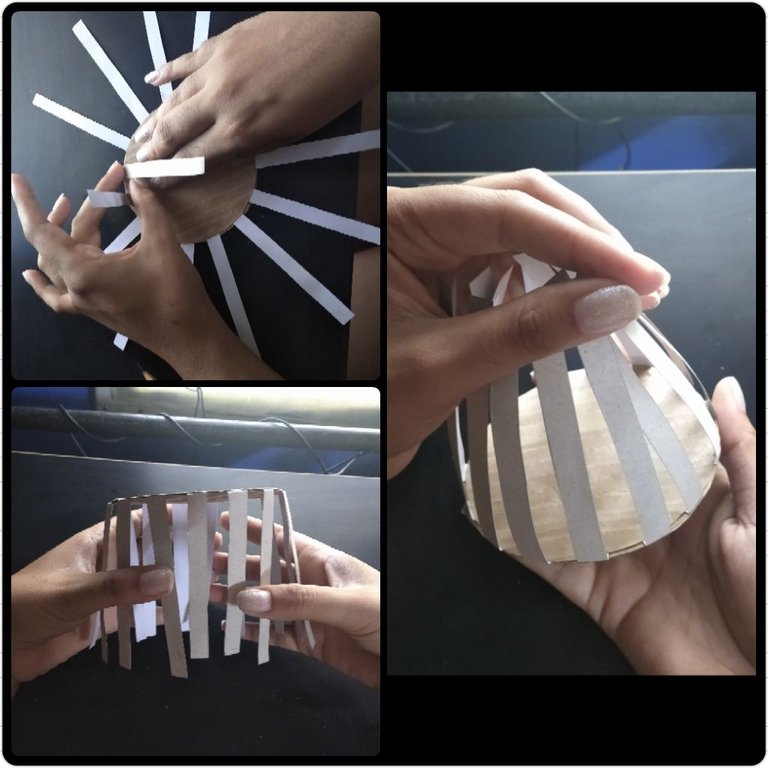
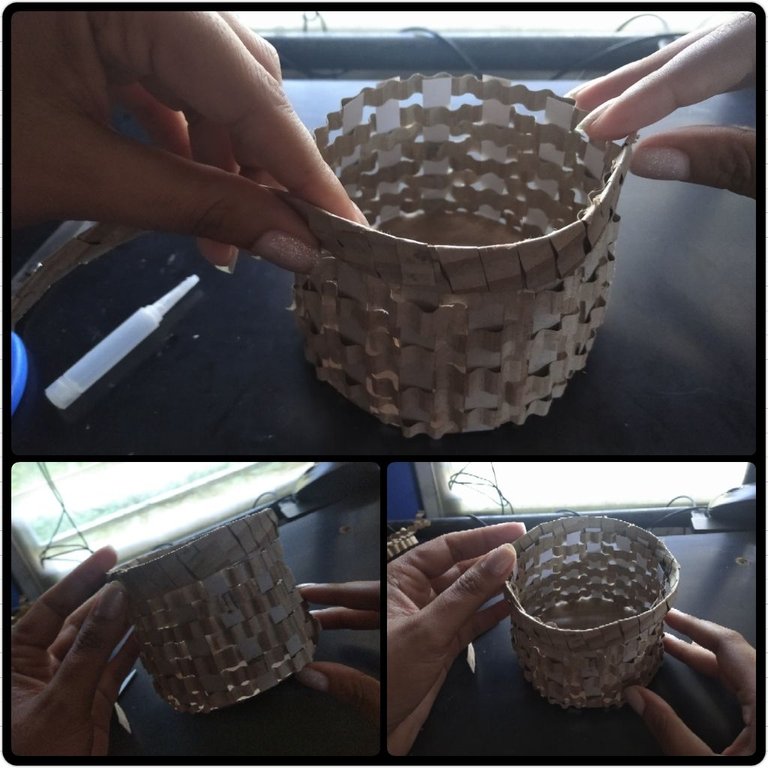
Fold each strip upwards very carefully, so that it looks like this.
Doblar cada tirilla hacia arriba con mucho cuidado, para que quede de esta forma.
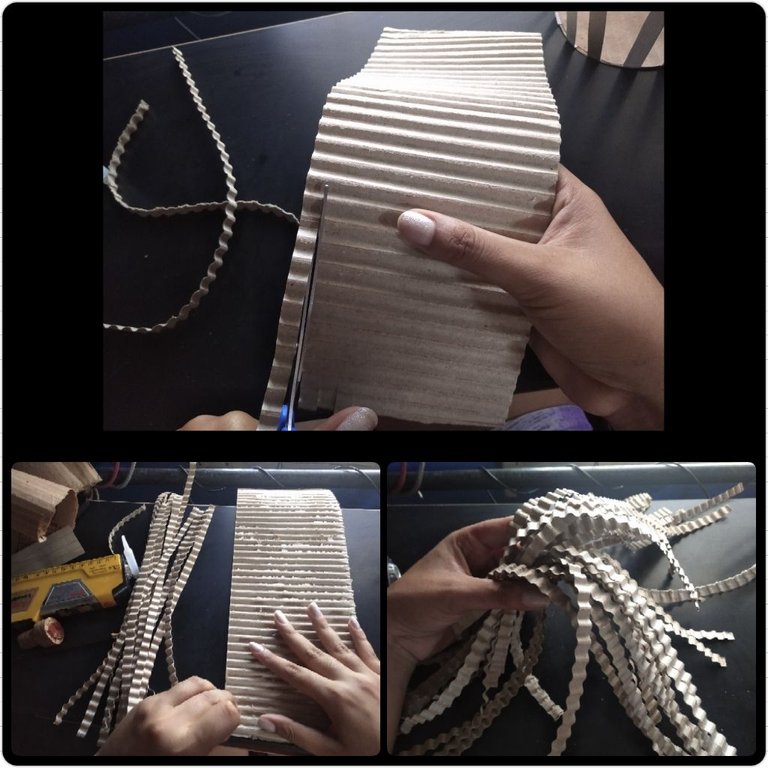
Cut strips of about half a centimeter as long as possible, I used the cardboard that goes in the inner layer which is the softest and can be folded easily because this is what we are going to weave with.
Recortar tiras de medio centímetro aproximadamente lo más largas posibles, yo utilicé el cartón que va en la capa interior que es el más blando y se puede doblar con facilidad porque con esto es que vamos a tejer.
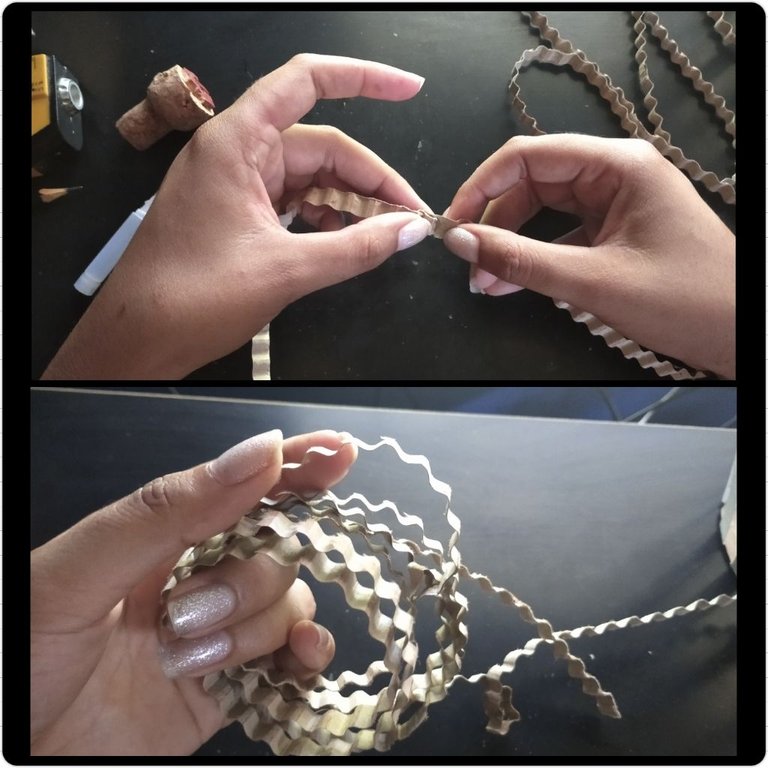
Join the strips at the ends so that a single long strip remains to line the entire basket.
Unir las tirillas por la punta de tal forma que quede una sola tirilla muy larga para forrar la cesta completa.
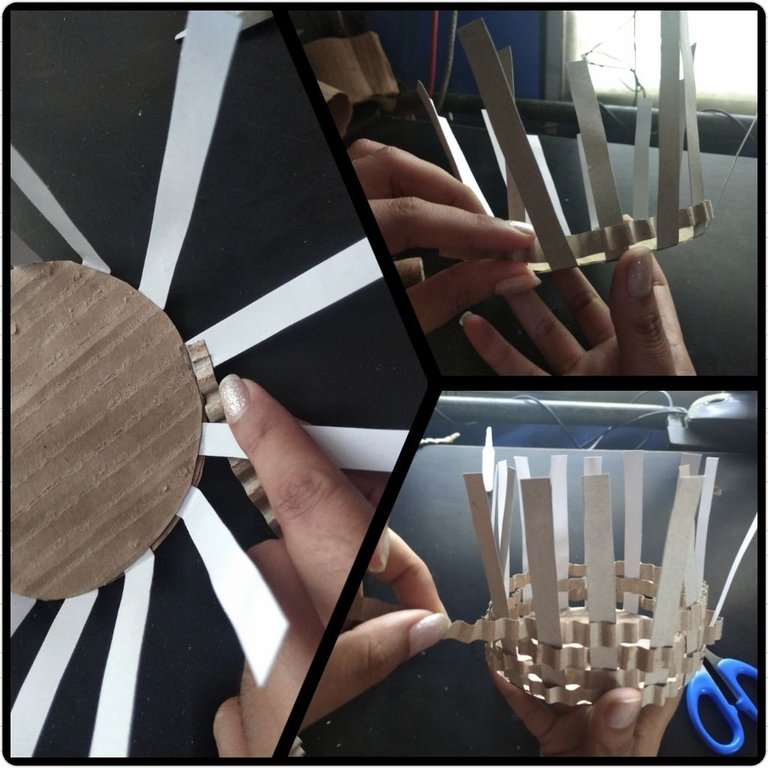

Glue the end of the strip inside and start weaving with the classic basket weave pattern, alternating between passing the strip under and over the strips we glued previously.
Pegar la punta de la tirilla por dentro y comenzar a tejer con el patrón clásico de tejido de cesta, alternando entre pasar la tira por debajo y por encima de las tirillas que pegamos anteriormente.

When it is completely woven to the desired height, glue the strip on the inside and chop the excess.
Cuando ya esté completamente tejido con la altura deseada pegar la tirilla por dentro y picar los sobrantes.
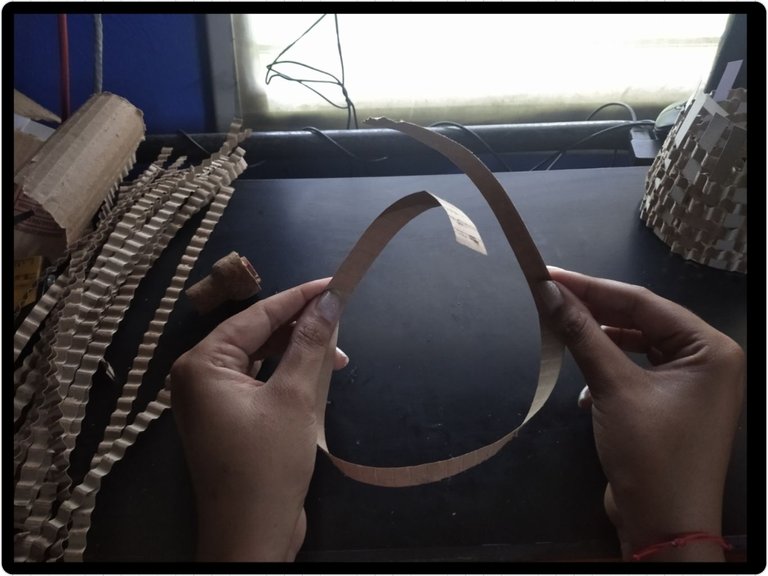

To make the upper edge I took a piece of cardboard with the measure of the surface and lined it with the strips that I had left over.
Para hacer el filo superior tomé un pedazo de cartón con la medida de la superficie y lo forré con las tirillas que me habían sobrado.
Then glue over the entire surface.
Luego pegar por toda la superficie.
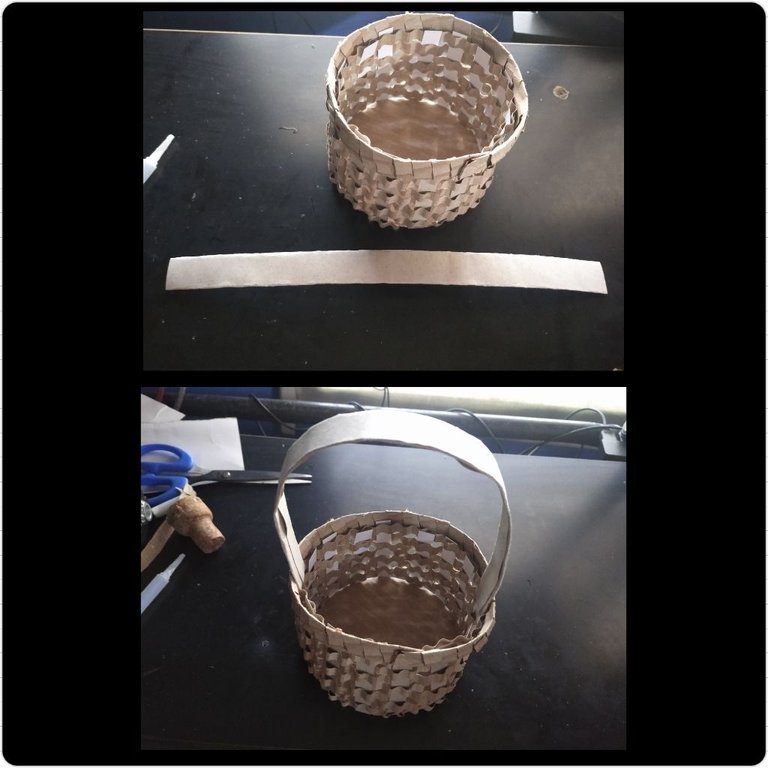
To make the handle, I cut a piece of cardboard and folded it twice to strengthen it and glued them on opposite sides. Make sure they are well glued so it won't come off when filled with candy.
Para hacer el asa, piqué un pedazo de cartón y lo doble dos veces para fortalecerlo y las pegué en los lados opuestos. Asegúrate de que están bien pegadas para que no se desprenda cuando esté llena de dulces.
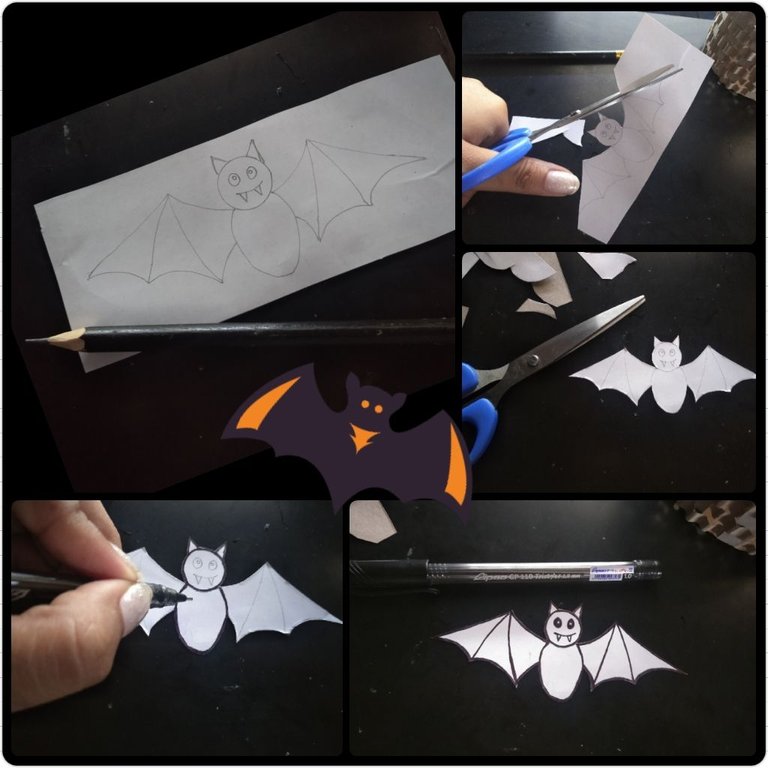
To decorate it I painted a bat, cut it out and glued it, I'm not very good at painting, but you can decorate it as you like.
Para decorarla pinté un murciélago, lo recorté y lo pegué, no soy muy buena pintando, pero puedes decorarla como gustes.
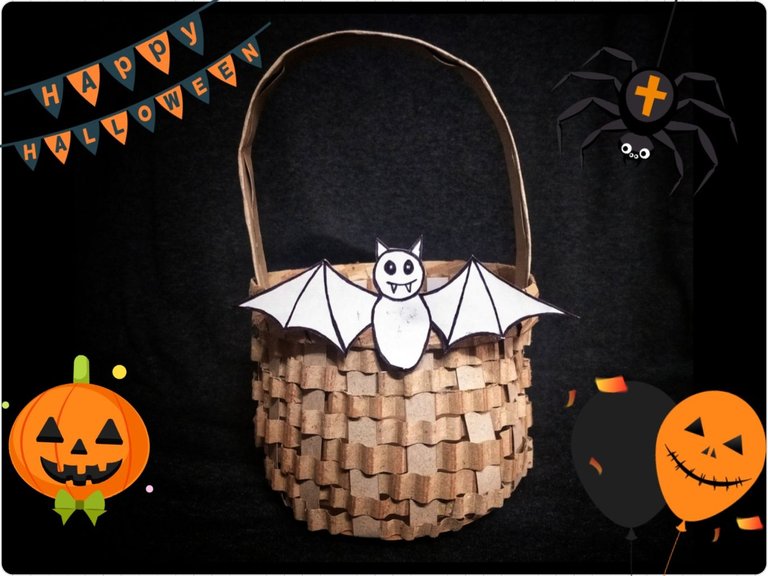
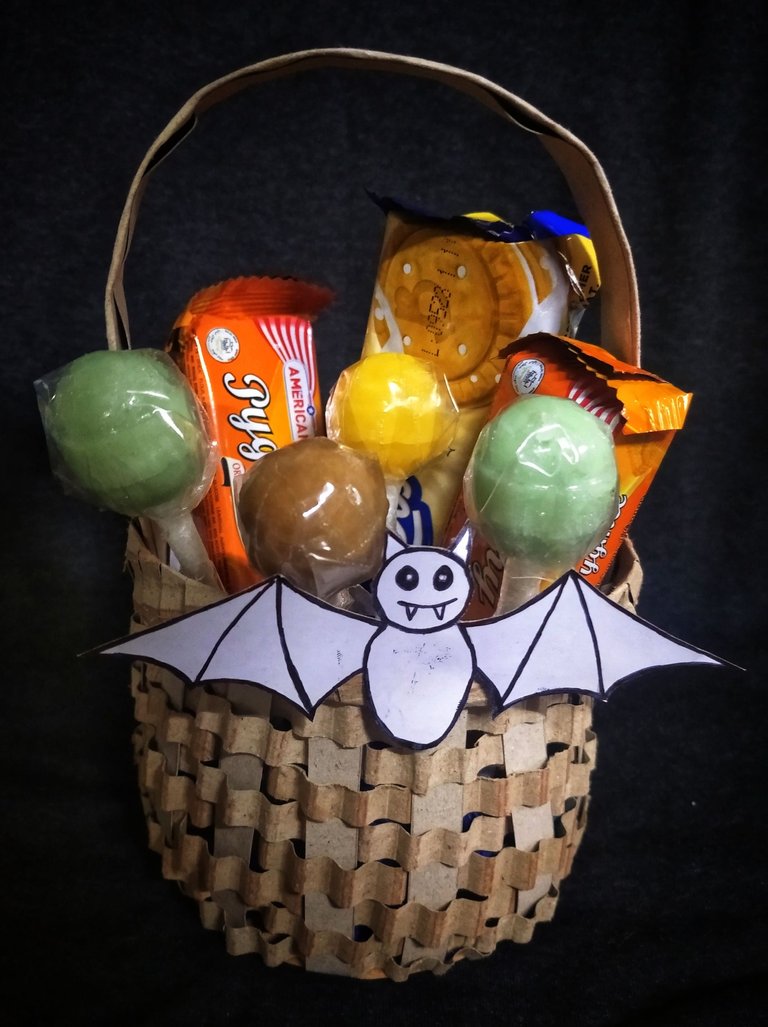
And there you have it! A basket made from recycled cardboard, ready to be filled with candy. I have it stored here waiting for the day. I hope you liked it and I hope it surprises my nephew.
Always remember that recycling and reusing materials is a great way to take care of our environment while enjoying fun activities like this one. Happy Halloween to all.
¡y ahí la tienen! Una cesta hecha de cartón reciclado, ya está lista para llenarla de dulces. La tengo aquí guardadita esperando el día. Espero les haya gustado y ansío que sorprenda a mi sobrino.
Siempre recuerda que reciclar y reutilizar los materiales es una excelente forma de cuidar nuestro medio ambiente mientras disfrutamos de actividades tan divertidas como esta. Feliz Halloween a todos.
Cover made in Canva
English is not my native language, translated by DeepL
Que linda cestita de cartón, de seguro tu sobrino apreciará mucho el detalle. Espero tenga una linda noche :)
Gracias, linda noche para usted también, ojalá le guste 🙏
aha that looks interesting you are so creative thanks for sharing the steps. keep sharing great content.
Thank you for the support ☺️
Me encanta! Está súper original!
Gracias, que bueno que te gustó ☺️
Congratulations @yale95reyra! You received a personal badge!
Wait until the end of Power Up Day to find out the size of your Power-Bee.
May the Hive Power be with you!
You can view your badges on your board and compare yourself to others in the Ranking
Check out our last posts:
Congratulations @yale95reyra! You received a personal badge!
Participate in the next Power Up Day and try to power-up more HIVE to get a bigger Power-Bee.
May the Hive Power be with you!
You can view your badges on your board and compare yourself to others in the Ranking
Check out our last posts:
Preciosa, hasta yo quiero una para mi primita 😁