💦Beautiful Wired Bracelet Inspired by Ocean Healer🐚Bonito Brazalete en Alambrismo Inspirado en Ocean Healer💦
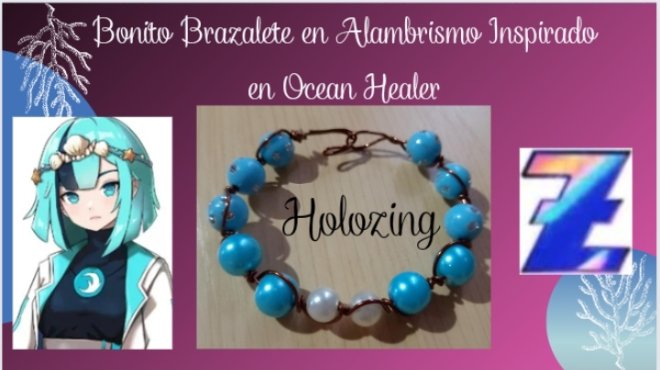

Hello my dear friends of this beautiful Holozing community a pleasure to greet you all, I hope you are very well, again with you showing how we can make a bracelet inspired by the healer of the ocean.
I want to tell you that it is very easy to make I hope you can join it at home, do not use many materials, and I love it because the color blue enters my list of favorite colors.
Material used in the making of our Healer Oceani inspired bracelet:

✔️Dos white pearls
✔️Cuatro turquoise blue pearls
✔️Seis large blue stones with ✔️cristales
✔️Pinza cutting
✔️Pinza multiple
✔️Alambre 16 gauge copper
Now we begin the step by step elaboration of how to make our bracelet.

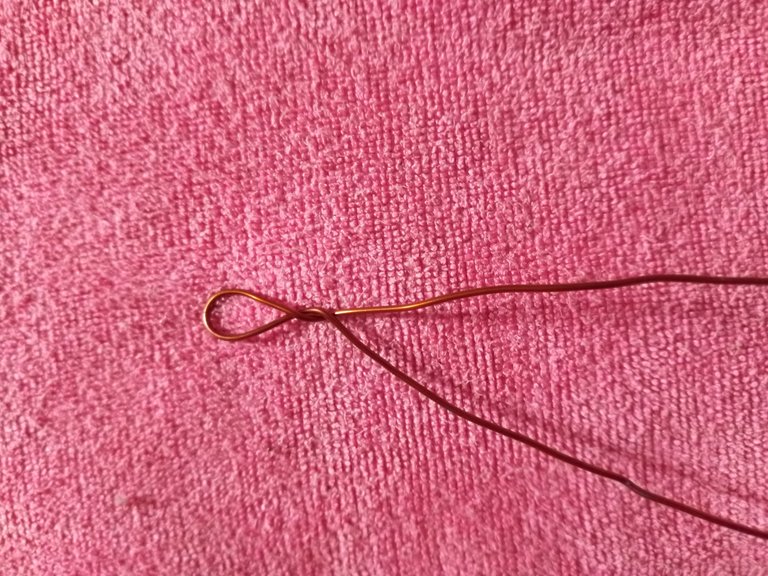
Step 1
The first thing we are going to do is to select the copper wire I am using it because my costume jewelry wire is finished and I have always liked to work with recycled material and sometimes reuse things that we think are useless. Here you have a result of how to use it.

The first thing we are going to do is measure it and double it like this.
Step 2
Now what we are going to do is make a little twist so that it is double and the ring part of the bracelet is left.
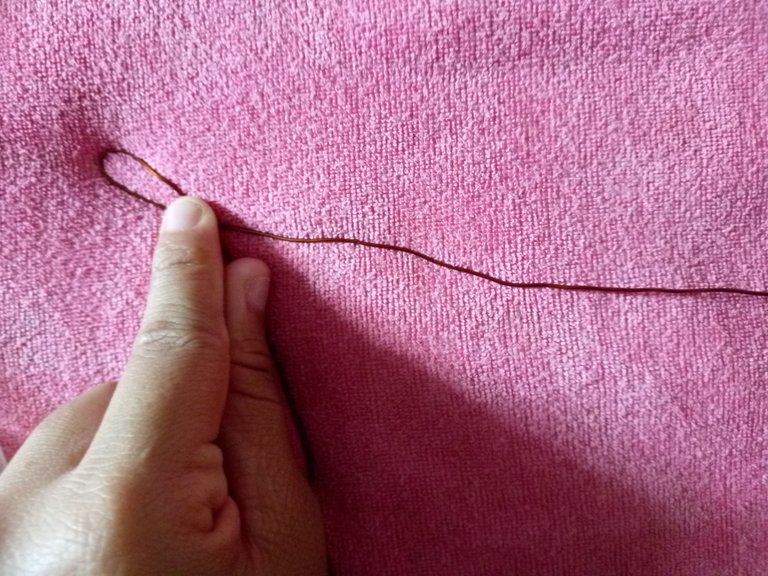
Step 3
Then we are just going to put it straight and the one on the left side has to be vertical and the other wire will be for the right side, so we can start weaving our bracelet.
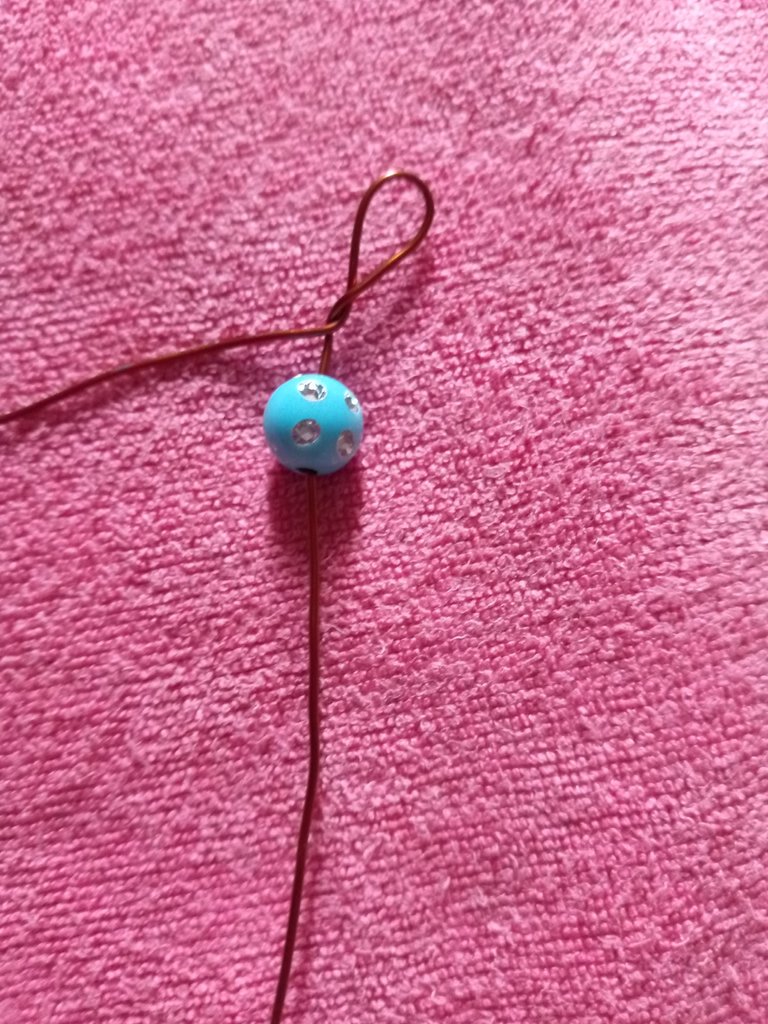
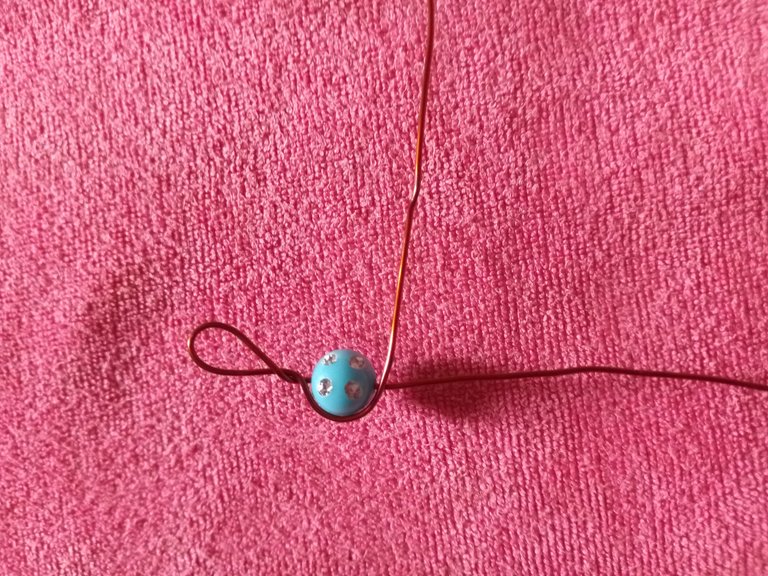
Then we will begin to introduce the large stones with crystals, so that way, it has to be left.
Step 4
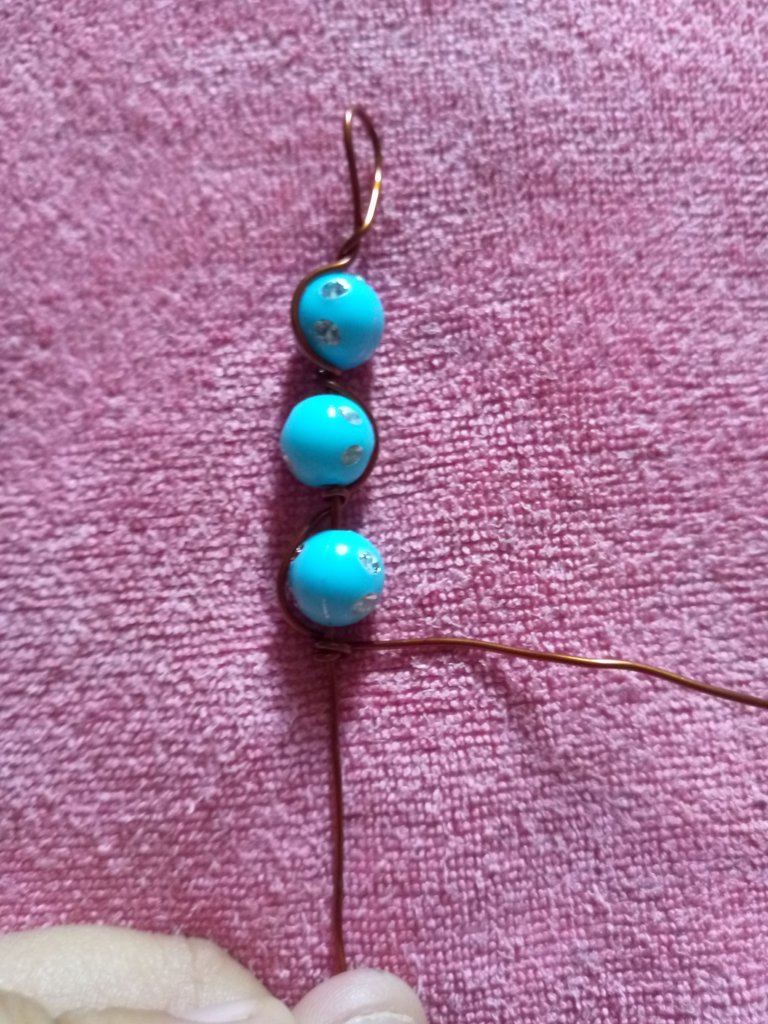
Next of these we are going to introduce and we are going to make the weave of both sides when we do it of the right part, to the other side it has to be of the left part and so on so that it is in the same context our bracelet, the same of the first stones of these they are going to make three.
Step 5
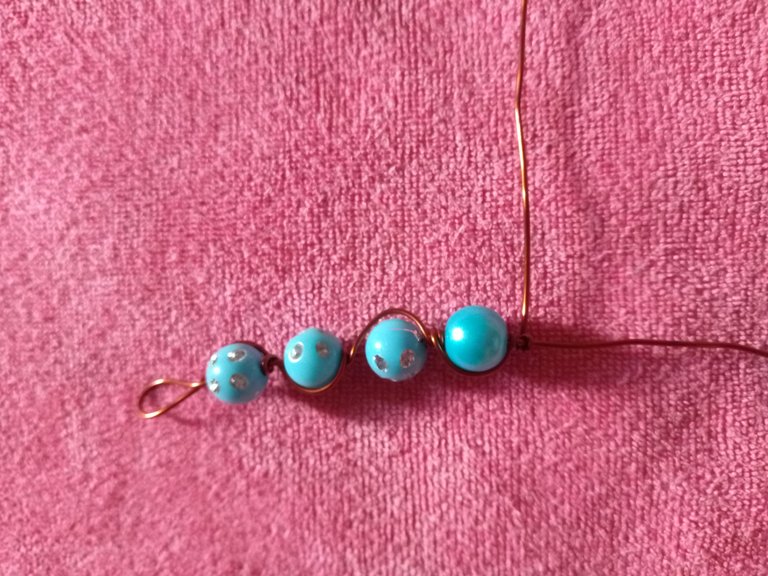
Now from the large turquoise blue beads of these stones we are only going to use two like this, this weaving technique is very easy it's all in the twist and how tight it is.
Step 6
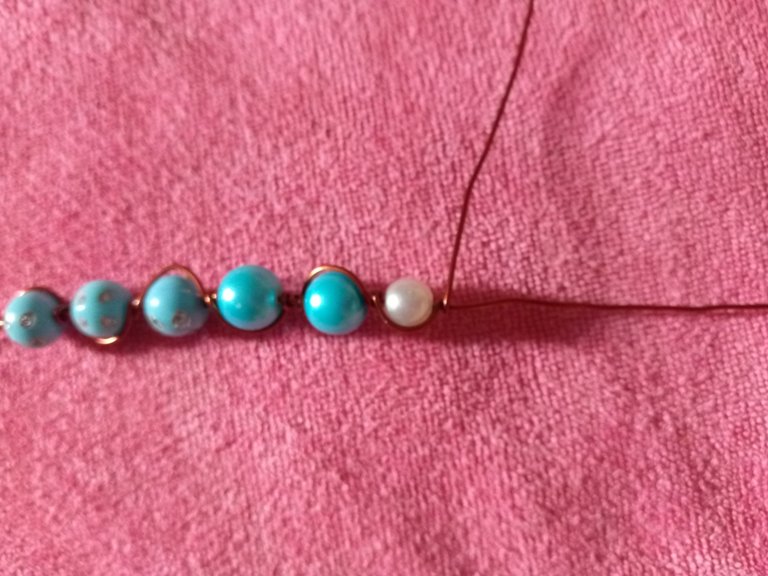
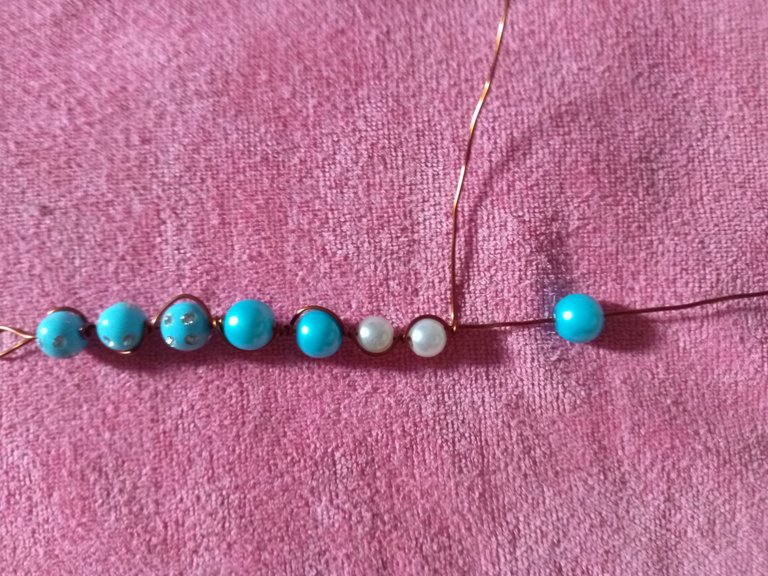
After the blue beads we are going to go with the white beads and in this one it changes since they are a little small but using the same technique and putting the two beads of the same color.
Step 7
Now we only have to do the same procedure with some turquoise blue pearls and with the big pearls with crystals.
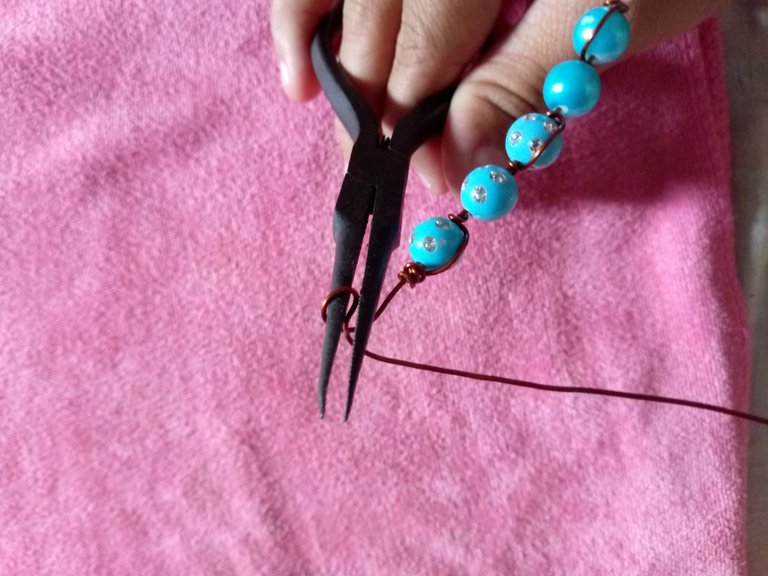
Step 8
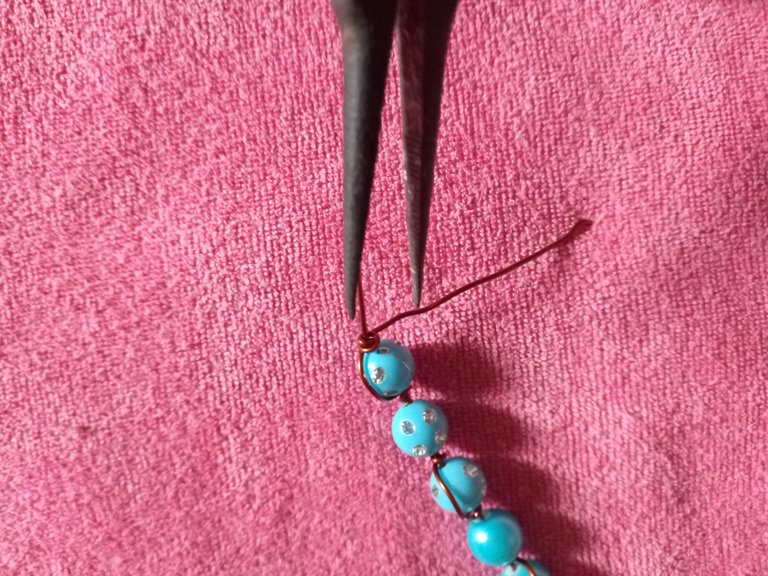
Now we only have to make the closure with the clamp we take care of making several turns and finally we only have to make the cut of one of the wires.
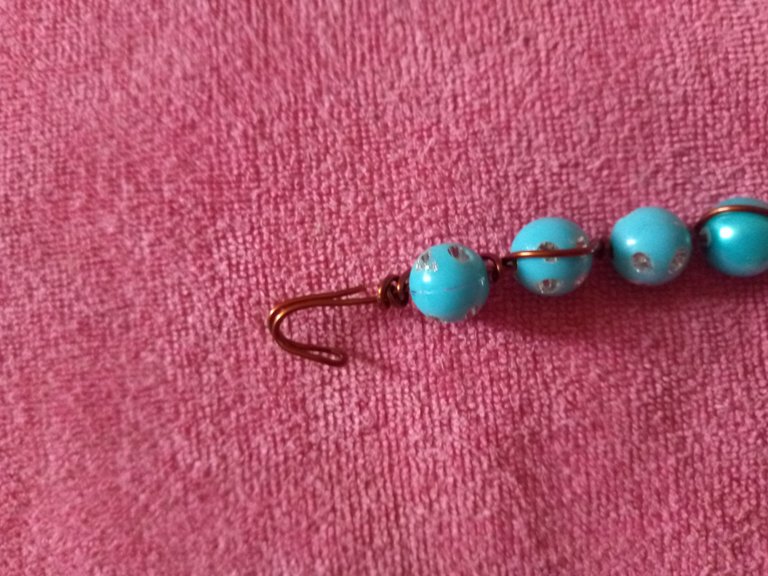
Then we are just going to make a little hook in a way that can close the bracelet.
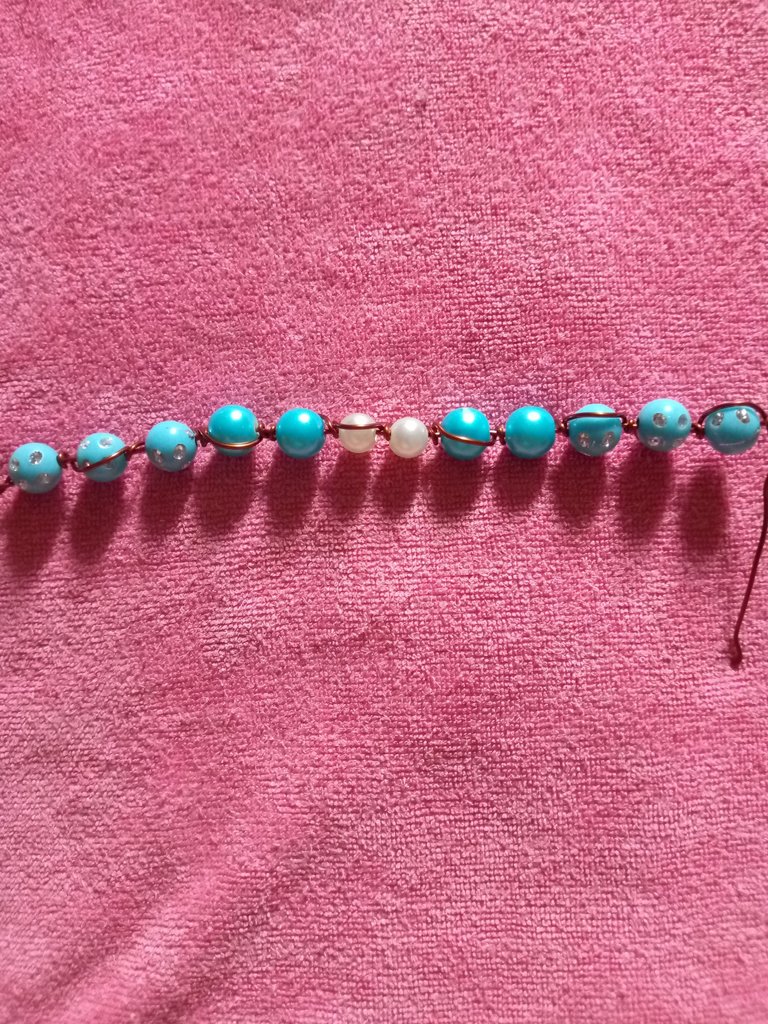
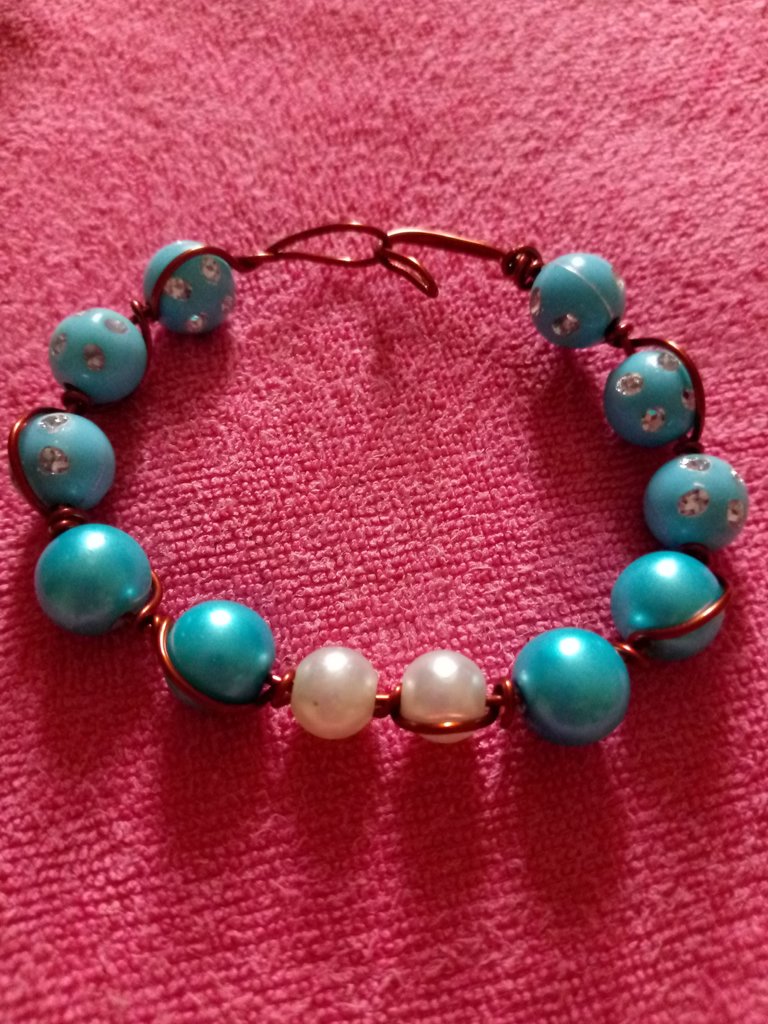
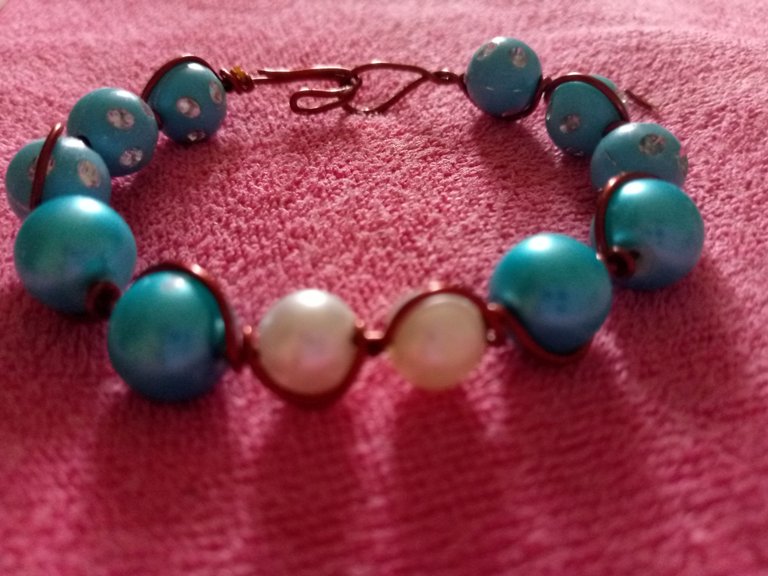
This is the way our pretty bracelet turned out, I hope you like it.
Good friends I send showers of blessings and success to all of you.
THE SMALL AND SIMPLE DETAILS ARE THE MOST APPRECIATED ALWAYS GRATEFUL TO MY DEAR READERS THANK YOU FOR STOPPING BY!🫂👏🏻💖


Hola mis querido amigos de esta bella comunidad de Holozing un gusto saludarlos a todos, Espero que se encuentre muy bien, nuevamente con ustedes mostrando como podemos realizar un brazalete inspirado en la sanadora del océano.
Quiero decirle que es muy fácil de realizar Espero que puedan unirse hacerlo en casa, no utilice muchos materiales, y me encanta porque el color azul entra en mi lista de los colores favoritos.
Material utilizado en la elaboración de nuestro brazalete inspirado en Healer Oceani:
✔️Dos perlas blancas
✔️Cuatro perlas azul turquesa
✔️Seis piedras grandes azules con ✔️cristales
✔️Pinza de cortar
✔️Pinza multiple
✔️Alambre de Cobre calibre 16
Ahora comenzamos la elaboración del paso a paso de como hacer nuestro brazalete.
Paso 1
Lo primero que vamos a hacer es seleccionar el alambre de cobre lo estoy utilizando porque mi alambre de bisutería pues se me terminó y siempre me ha gustado trabajar con mucho material reciclado a veces reutilizar las cosas que pensamos que no sirven Pues aquí tienen un resultado de como utilizarlo.
Lo primero que vamos a hacer es medirlo y ponerlo doble de esta manera.
Paso 2
Ahora lo que vamos a hacer es realizar un pequeño giro de manera que queda doble y quede la parte del aro del brazalete.
Paso 3
Luego solo vamos a ponerlo recto y el del lado izquierdo tienes que quedar vertical y el otro alambre va a quedar para la parte derecha, y así poder empezar a tejer nuestro brazalete.
Luego vamos a empezar a introducir las piedras grandes con cristales, así de forma, tiene que ir quedando.
Paso 4
Seguidamente de estás vamos a introducir y vamos a realizar el tejido de ambos lados cuando lo hacemos de la parte derecha, al tro lado tiene que ser de la parte izquierda y así sucesivamente para que quede en el mismo contexto nuestro brazalete, igual de las primeras piedras de estás van a hacer tres..
Paso 5
Ahora de la perlas azul turquesa grande de estás piedras vamos solo a utilizar dos así de esta forma, está técnica de tejido es muy fácil todo está en el giro y en lo apretado que quede.
Paso 6
Después de las perlas azules vamos a ir con las perlas blancas y en esta cambia ya que son un poco pequeñas pero utilizando la misma técnica y poniendo la dos perlas del mismo color.
Paso 7
Ahora solo nos queda realizar el mismo procedimiento con unas Perlas azules turquesas y con las Perlas grandes con cristales.
Paso 8
Ahora solo nos queda realizar el cierre con la pinza nos encargamos de realizar varios giros y por último solo nos queda realizar el corte de uno de los alambres.
Luego solo vamos a realizar un ganchito en forma de que pueda cerrar el brazalete.
Así de esta manera quedó nuestro lindo brazalete espero que les guste.
Buenos amigos les mando lluvias de bendiciones y éxitos para todos.
LOS DETALLES PEQUEÑOS Y SENCILLOS SON LOS MÁS APRECIADOS AGRADECIDA SIEMPRE CON MIS QUERIDOS LECTORES GRACIAS POR PASAR!🫂👏🏻💖
Que linda te quedó amiga .. saludos .. que bueno verte de vuelta. ❤️🫂
Muchas gracias amiga, igual para ti, así es nuevamente activa en hive
🫂❤️❤️❤️💪🏻😎
That's very pretty!
Congratulations @yanetzi1! You have completed the following achievement on the Hive blockchain And have been rewarded with New badge(s)
Your next payout target is 2000 HP.
The unit is Hive Power equivalent because post and comment rewards can be split into HP and HBD
You can view your badges on your board and compare yourself to others in the Ranking
If you no longer want to receive notifications, reply to this comment with the word
STOPCheck out our last posts:
Que lindo te quedó, me gustó el color azul y su combinación con blanco.
Saludos!
Muchas gracias amiga, si a mí me gustó mucho la combinación de color.
¡Felicitaciones!
Estás participando para optar a la mención especial que se efectuará el domingo 7 de abril del 2024 a las 8:00 pm (hora de Venezuela), gracias a la cual el autor del artículo seleccionado recibirá la cantidad de 1 HIVE transferida a su cuenta.
¡También has recibido 1 ENTROKEN! El token del PROYECTO ENTROPÍA impulsado por la plataforma Steem-Engine.
1. Invierte en el PROYECTO ENTROPÍA y recibe ganancias semanalmente. Entra aquí para más información.
2. Contáctanos en Discord: https://discord.gg/hkCjFeb
3. Suscríbete a nuestra COMUNIDAD y apoya al trail de @Entropia y así podrás ganar recompensas de curación de forma automática. Entra aquí para más información sobre nuestro trail.
4. Visita nuestro canal de Youtube.
Atentamente
El equipo de curación del PROYECTO ENTROPÍA