Hermosas Argollas y Pulsera en Alambre 💎Beautiful wire bracelets and earrings 💎
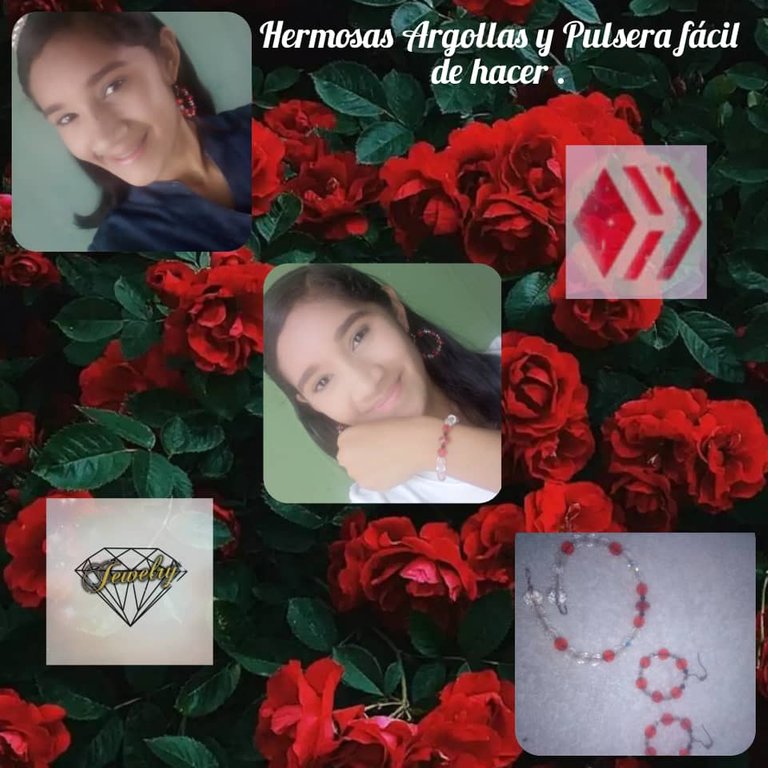
Hoy quiero mostrarles unas Argollas y pulsera utilizando la técnica de alambrismo para crearlos. La elaboración de los mismo son muy fáciles de hacer y no requieren mucho tiempo. Basta con tener un poco de alambre de cobre y unas piedras para poder realizarlo.
Materiales Utilizados:
- Alambre de cobre
- piqueta de cortar
- Piedras Rojas
- piedras transparentes
A continuación comparto con todos ustedes el paso a paso:
Procedimiento:
Paso 1
Primero que todo se selecciona el alambre y de una piedra roja a la que sigue se le pone dos transparentes contando mínimo seis piedras Rojas .
Paso 2
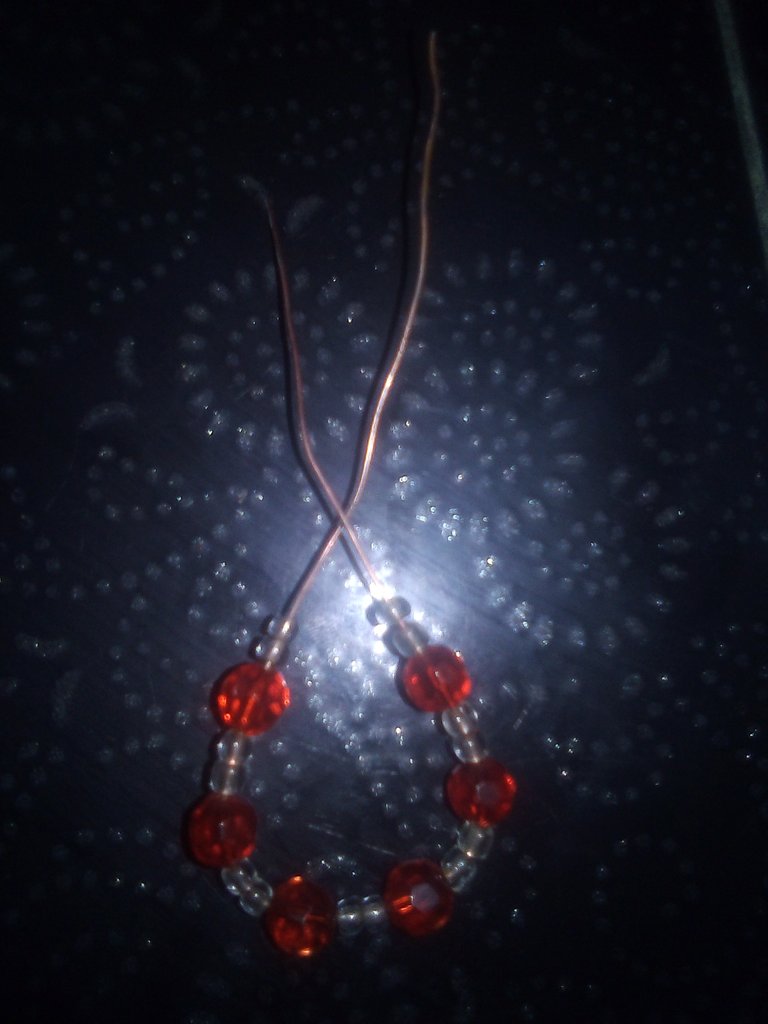
Luego de haberlo terminado se hace un cruze estilo x y cuando ya esté listo se va girando poco a poco para ir amarrando de esta forma
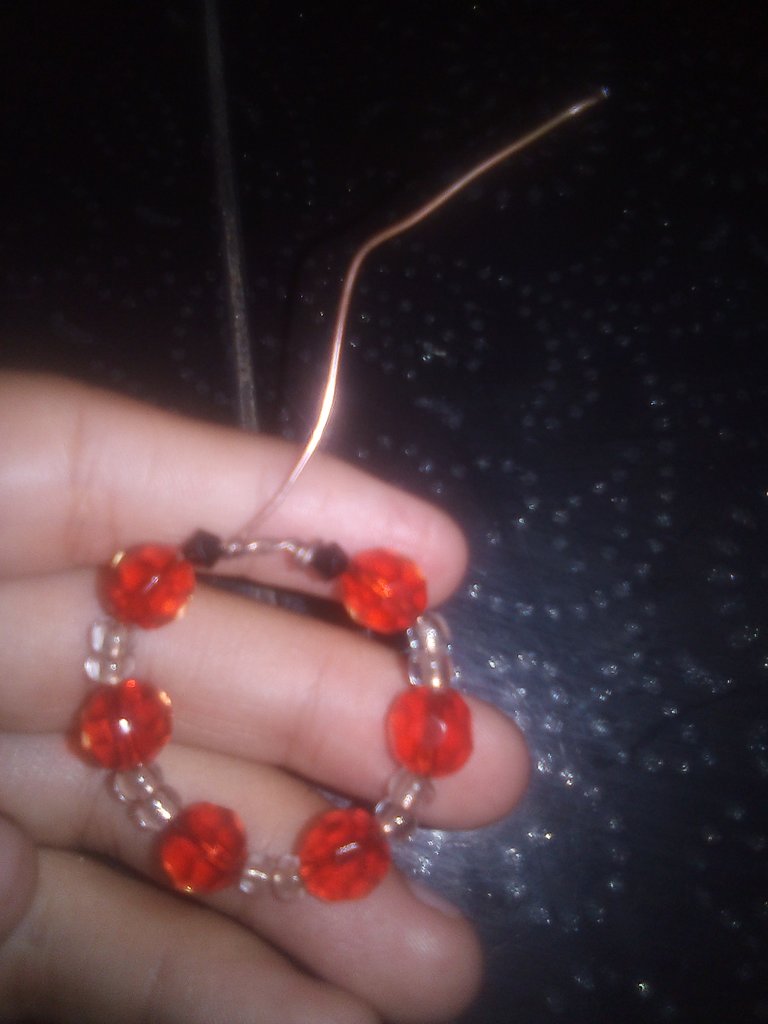
Paso 3
Una vez ya realizado con mucha delicadeza con la piqueta cortar el alambre que sobra es decir que se hace un nudo dejando cavidad para poder enganchar el gancho de las argollas 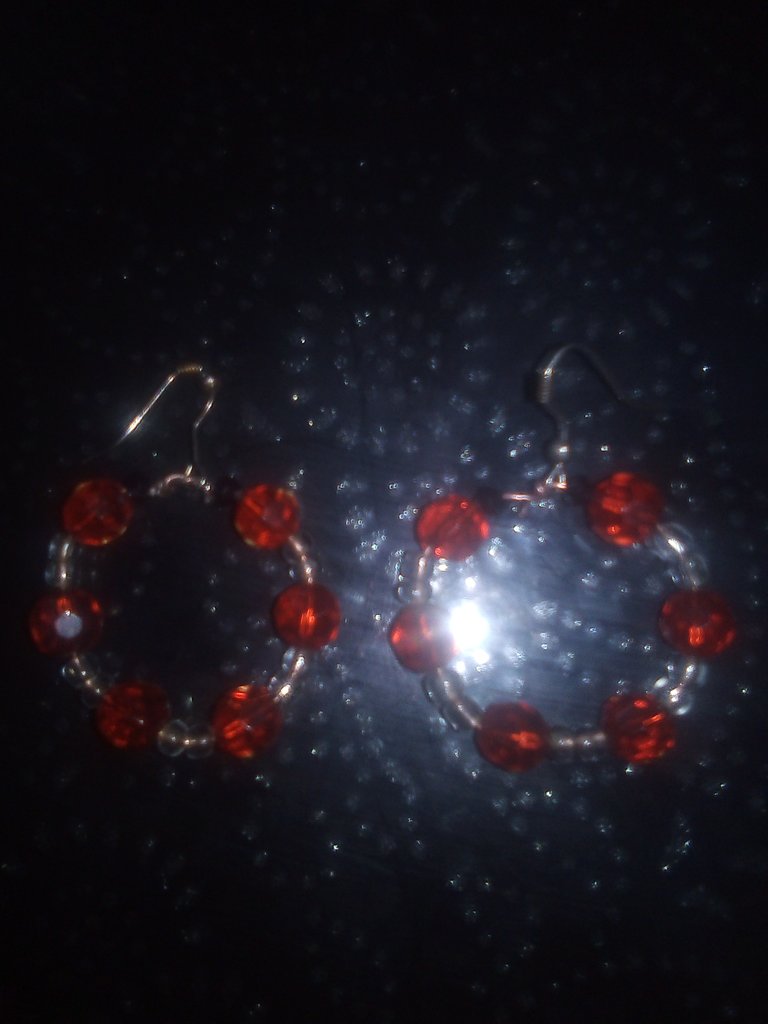
Ahora les voy a estar explicando el paso a paso de la pulsera .
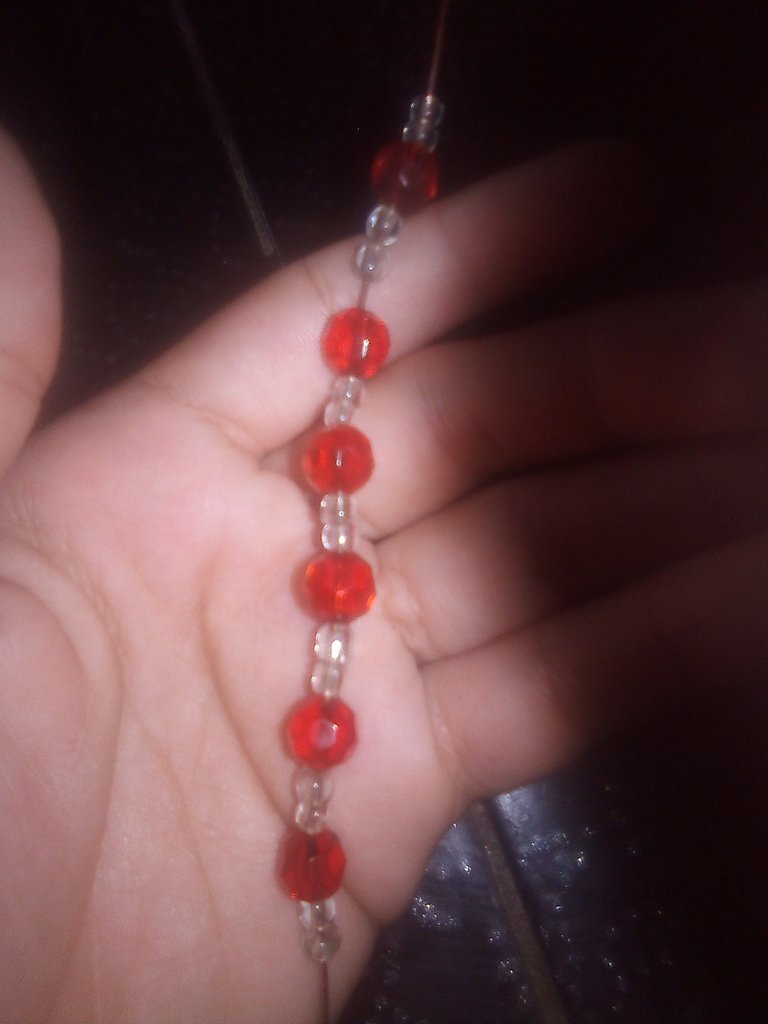
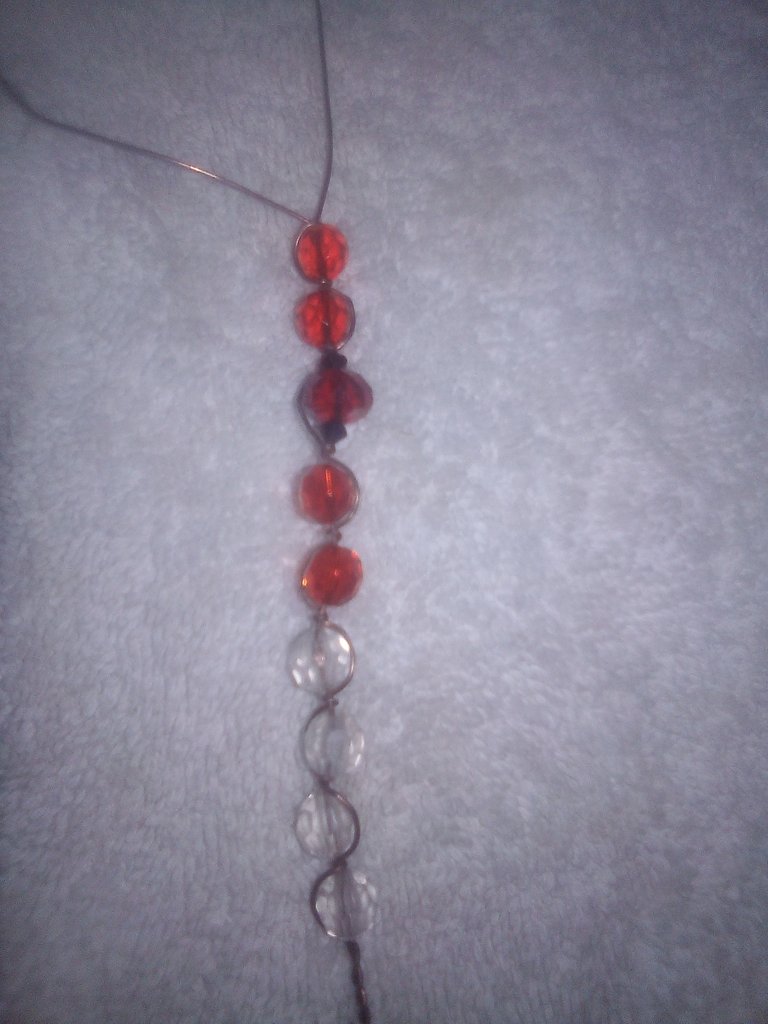
Paso 4
Lo que vamos hacer es primero tomar el alambre e ir metiendo las piedras de esta manera .
Primero se cuentan tres piedras transparentes y después se mete una roja este procedimiento lo vamos hacer tres veces .
Una vez ya hecho los procedimientos primeros se le pone una piedra roja y un diamante se pone una pequeña piedra negra y quedará de esta forma

Paso 5
Una vez ya terminada las dos partes al final se le agrega una piedra transparente grande
Paso 6
Ahora viene la parte de los trancados lo primero es con un lado hacer un giro con un nudo de tres veces y al final cortar lo que quede de alambre eso permite que el otro alambre quede solo para así poder hacer el círculo cuyo agujero es donde va encajado el broche
La otra parte es que con la piqueta se va cortando y se deja un 1cm de largo para que quede de una manera ancha y así pueda servir más fácil de entrada , a la último se le da un giro en forma de U .


De esta manera se ha terminado con el procedimiento de la realización de los zarcillos. En realidada son pasos muy cortos y fáciles de hacer. Solo quedaría realizar el otro par siguiendo los mismo paso que se han explicado anteriormente.
Espero les guste la propuesta que les he traído en esta oportunidad.
Espero sus comentarios y opiniones acerca de estas argollas y pulsera en piedras rojas . Me despido de ustedes agradeciendo su receptividad y esta bonita relación que se ha iniciado en Hive.
Muchas Gracias queridos amigos de Hive!
Mucho éxito en Todo!
Las imagenes son de mi autoria y fueron Tomadas a traves de un Telefono ZTE BLADE.
Traductor utilizado: Deepl
La edicion de las fotos la realicé mediante la aplicaciones Editor de Fotos Polish y los separadores se editaron en canva.
Today I want to show you some earrings and bracelet using the wire wrap technique to create them. The elaboration of the same are very easy to make and do not require a lot of time. It is enough to have some copper wire and some stones to make them.
Materials used:
- Copper wire
- cutting pickaxe
- Red stones
- transparent stones
Below I share with all of you the step by step:
Procedure:
Step 1
First of all, select the wire and from one red stone to the next one, place two transparent ones, counting at least six red stones.
Step 2 !
After you have finished, make an x style cross and when it is ready, turn it little by little to tie it in this way.
**Step 3
Once it is done very delicately with the pickaxe cut the wire that is left over, that is to say that a knot is made leaving a cavity to be able to hook the hook of the rings
Now I will be explaining the step by step of the bracelet.
**Step 4
What we are going to do is first take the wire and put the stones in this way.
First we count three transparent stones and then we put in a red one. This procedure will be done three times.
Once the first procedures are done, put a red stone and a diamond and put a small black stone and it will look like this.
**Step 5
Once the two parts are finished, a large transparent stone is added at the end.
Step 6
Now comes the part of the locking the first thing is with one side to make a turn with a knot three times and at the end cut the remaining wire that allows the other wire is left alone so you can make the circle whose hole is where the brooch is embedded.
The other part is that with the pickaxe is cut and a 1cm long is left so that it is in a wide way and thus can serve easier entry, the last is given a U-shaped twist.
In this way we have finished with the procedure of making the tendrils. They are really very short and easy to do. It would only remain to make the other pair following the same steps explained above.
I hope you like the proposal I have brought you this time.
I look forward to your comments and opinions about these rings and bracelet in red stones. I say goodbye to you thanking you for your receptivity and this nice relationship that has started in Hive.
Thank you very much dear friends of Hive!
Much success in everything!
The images are of my authorship and were taken through a ZTE BLADE Phone.
Translator used: Deepl
The editing of the photos was done using the Polish Photo Editor application and the separators were edited in canva. From
Me gustan mucho...están como para un regalo de día de los enamorados 😍
Estan muy bonitos y faciles de hacer💗
Thank you for sharing this post on HIVE!
Your content got selected by our fellow curator jasonmunapasee & you just received a little thank you upvote from us for your great work! Your post will be featured in one of our recurring compilations which are aiming to offer you a stage to widen your audience within the DIY scene of Hive. Next time make sure to post / cross-post your creation within the DIYHub community on HIVE and you will receive a higher upvote ;) Stay creative & HIVE ON!
Please vote for our hive witness <3
Queda muy lindo el conjunto completo, las argollas te quedaron muy bien realizadas, gran trabajo.
Están hermosos, muy sencillos de hacer y además son delicados 👍
Que lindos te quedaron y están excelentes tanto otra uso personal como para obsequiar. Muchas veces queremos hacer un bonito detalle pero en el momento no contamos con el dinero y con este tipo de accesorios podemos resolverlo!
Además tiene el plus de ser hecho por nosotros de forma especial para nuestro ser querido.
Congratulations @yanetzi1! You have completed the following achievement on the Hive blockchain And have been rewarded with New badge(s)
Your next target is to reach 300 upvotes.
You can view your badges on your board and compare yourself to others in the Ranking
If you no longer want to receive notifications, reply to this comment with the word
STOPCheck out the last post from @hivebuzz:
Support the HiveBuzz project. Vote for our proposal!