💠Hermoso y Elegante Brazalete en Cristales y Swarovskis💎Beautiful and Elegant Bracelet in Crystals and Swarovskis💠


Hola queridos amigos de esta comunidad un cordial saludo para todas Espero que estén muy bien les deseo días llenos de prosperidad amor y abundancia el día de hoy les estaré nuevamente presentando Un diseño elaborado por mí una linda hermosa y delicada pulsera hecha de cristales y Swarovski con Perlas pequeñas y con un pequeño día de estrella ideal para lucir com un Outfit de color morado negro o blanco espero que les guste muchoBIENVENIDOS A MI BLOG🌻
El dia de hoy les estare diciendo y explicando como realizar nuestro brazalete hecho con amor para todos ustedes.
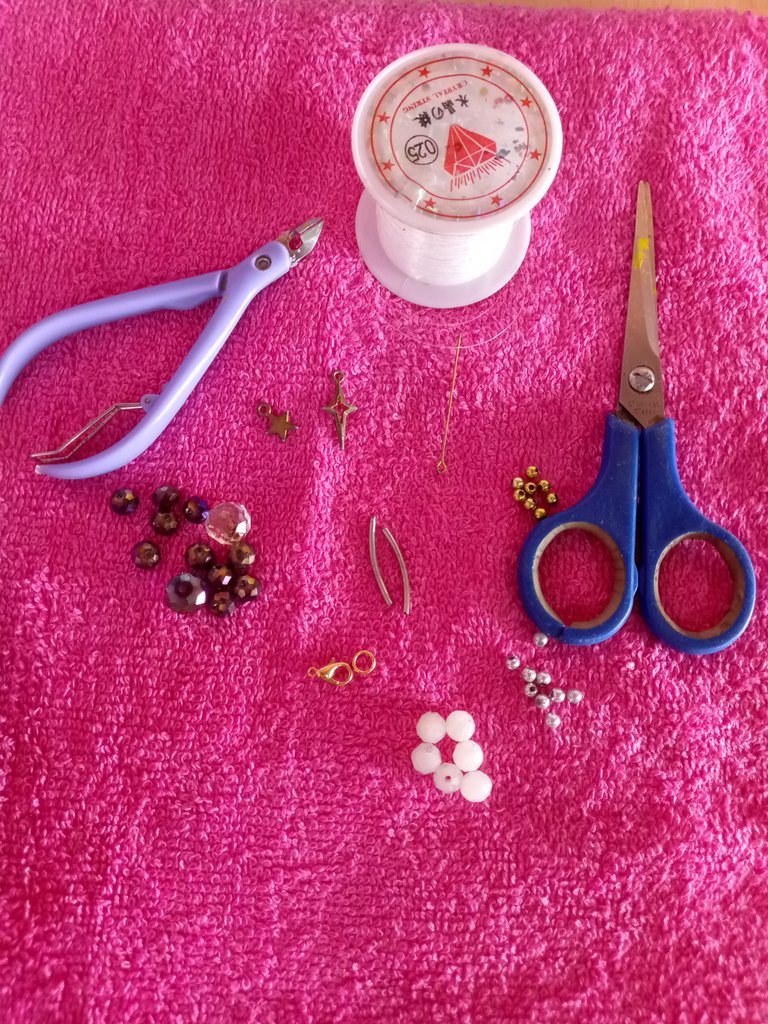
Los materiales utilizados fueron los siguientes:
- Cristales blancos
- Perlas pequeñas plateadas y moradas claras
- Swarovskis morados
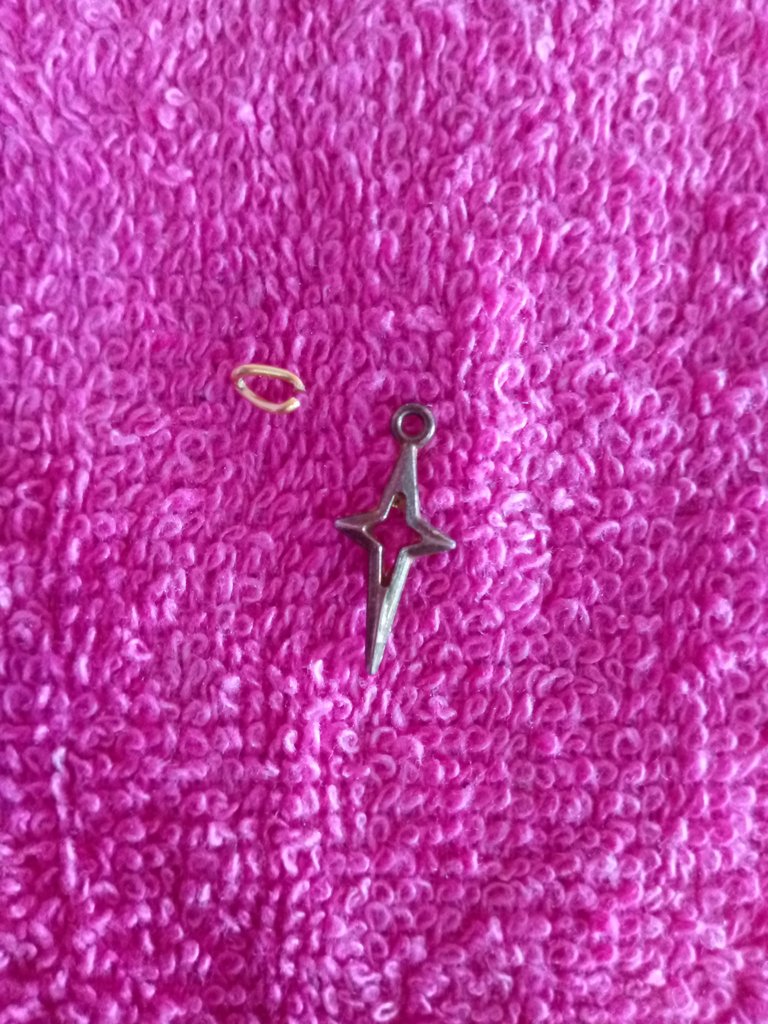
- Dijen de estrella
- tijera
- Nailon Elástico de 0.25
- Aro
- Pinzas
Comencemos a Elaborar!
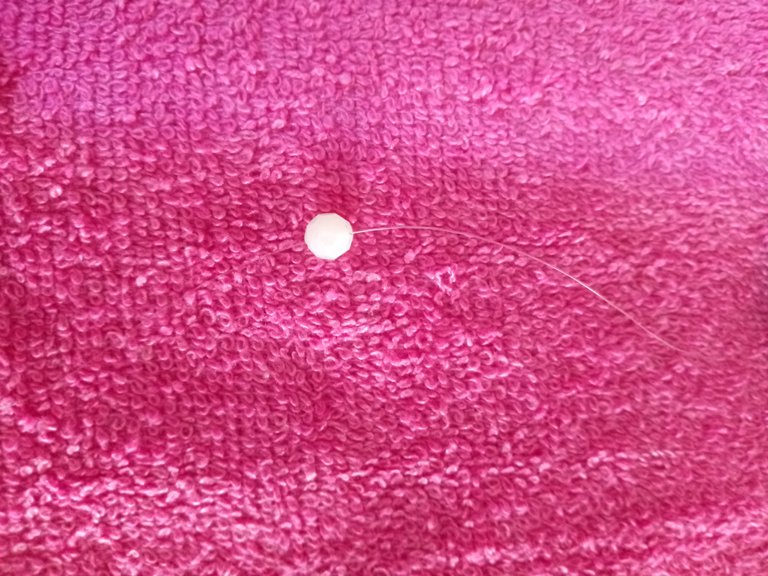
Paso 1
Lo primero que vamos a hacer es seleccionar nuestro hilo y cortarlo con la tijera así de esta manera

Paso 2
Luego solo vamos a ir introduciendo las piedras vamos a comenzar por los cristales blancos asi como este
Paso 3
Seguidamente de la perlita plateada pequeña para ir dandole volumen de esta manera

Paso 4
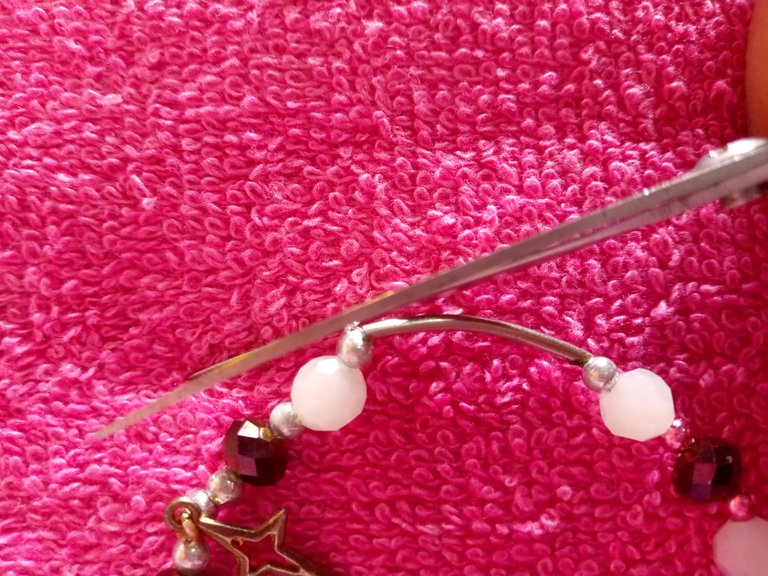
Shora lo que vamos a hacer es tomar el Swarovskis y ponerlo junto con la perlas plateadas y luego vamos a hacer el mismo procedimiento con los cristales blancos

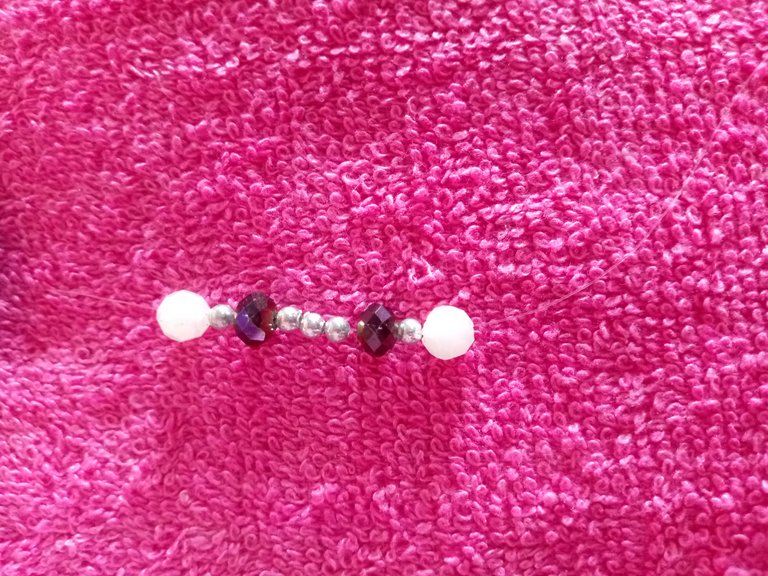
Tenemos que ver que en la parte del medio entre los Swarovskis van a ir tres perlas asi de esta forma y luego se le hace el mismo procedimiento de esta forma.
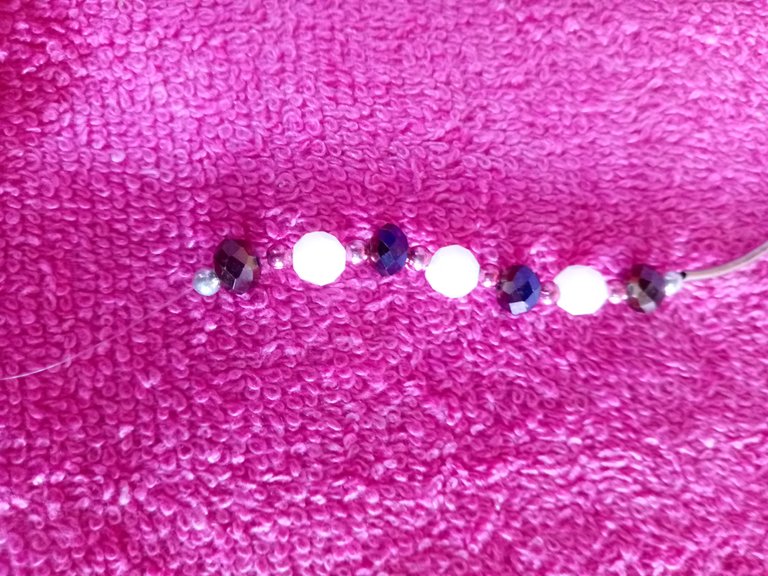
Paso 5
Una vez ya puesto el cristal blanco pondremos otra perla y asi se ira viendo.

Paso 6
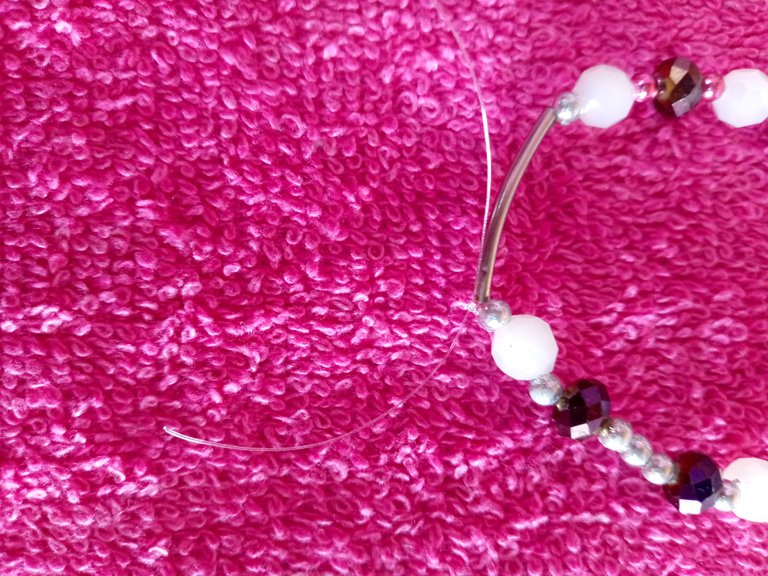
Ahora lo que vamos a hacer es lo siguiente después que ya tengamos nuestro cuerpo de nuestro brazalete solo vamos a poner el separador largo de esta manera.

Paso 7
Ahora vamos a poner solo una perla plateada para separar de las demas que vamos a poner.

Paso 8
Luego vamos a introducir un Swarovskis morado junto con una perla rosada clara asi de esta manera esto lo hago para que tenga algo de separamiento y de color intenso, elegante y llamativo.

Paso 9
Seguidamente de cristales, perlas y Swarovskis quedara asi de esta manera.
Paso 10
Ahora despues nos queda realizar el mismo procedimiento para poder culminar nuestro brazalete, eso si tenemos que tener en cuebta que a la hora de abrir y cerrar siempre seran las mismas piesras y perlas para que quede uniformemente asi de esta manera.

Paso 11
Ahora solo nos queda realizar los nudos de manera normal solo vamos a unir y pasar los naylon por dentro de las perlas y hacer minimo comos tres nudos.
Para que asi quede resistente y no pueda soltarse
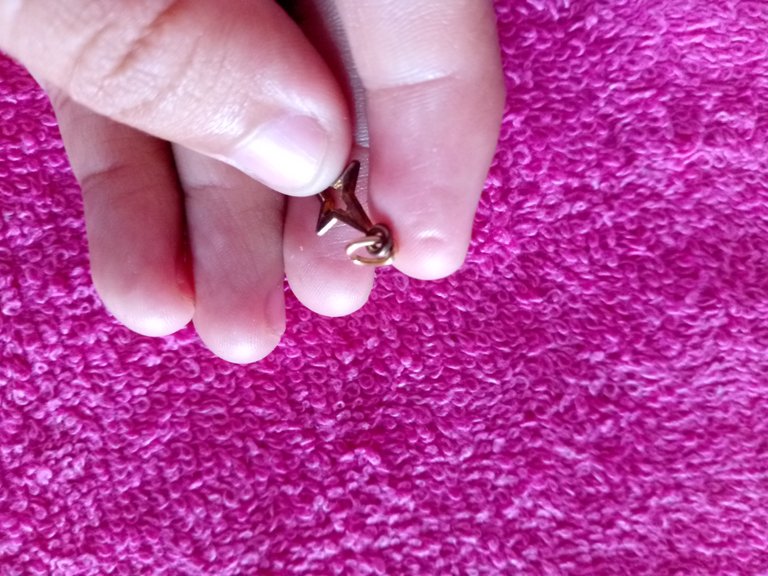
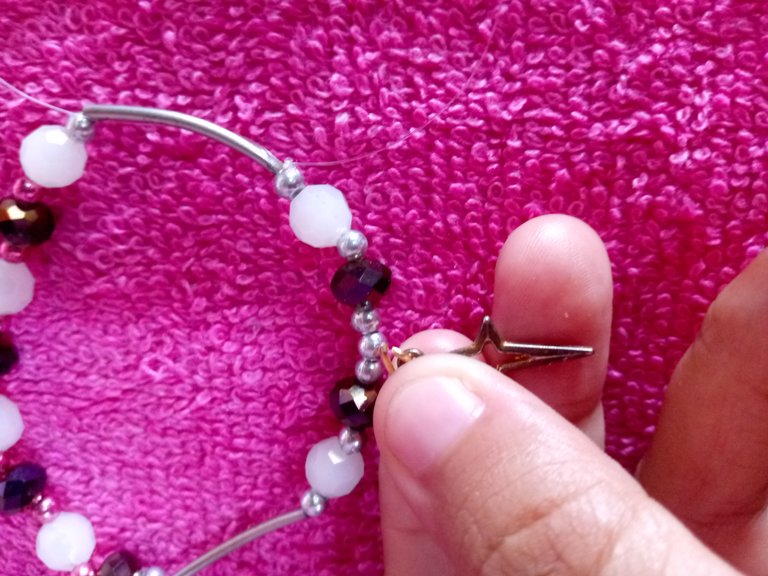
Paso 12
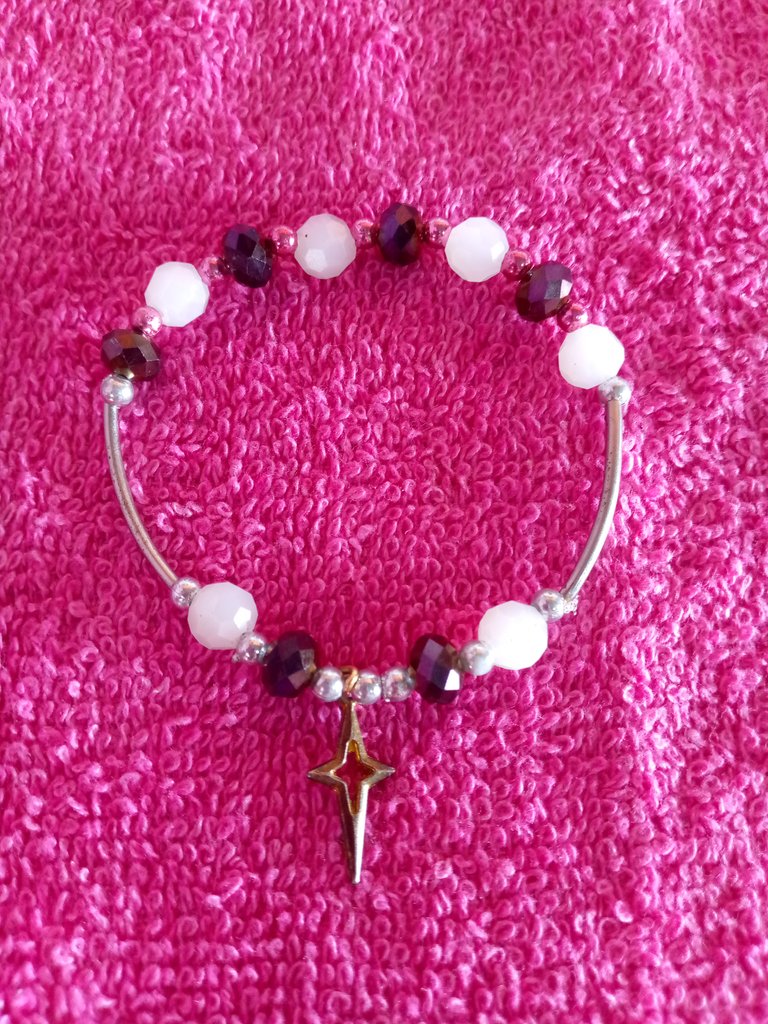
Tomamos ahora un aro y nuestro dijen y los vamos a ir introduciendo para asi poder colocar de ultimo en nuestro brazalete asi de esta forma es utilizando nuestra pinza de bisutería para poder ajustar de esta manera y pueda quedar de manera segura para que asi no se salga.

Y solo recortamos los pedazos de nailon que queden asi y ya hemos terminado nuestro brazalete.
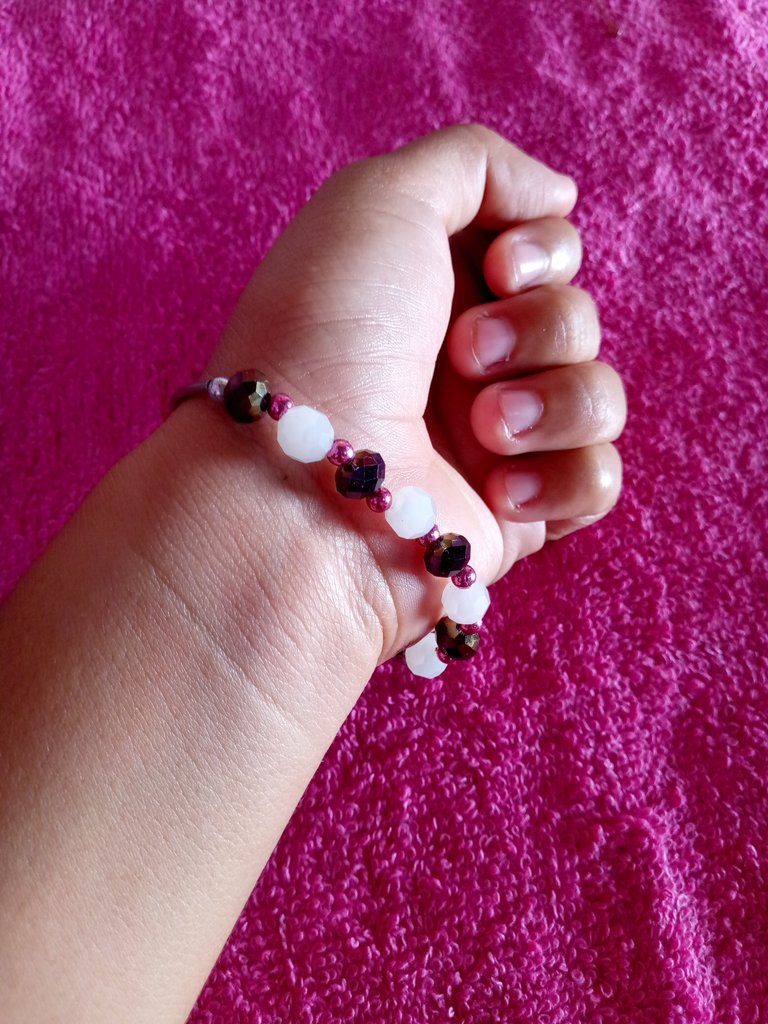
Bueno mis queridos lectores aqui les dejo nuestro resultado de como quedo nuestro brazalete ya listo para lucir y tener elegante accesorio para nuestros Outfit espero que les guste mucho es uno de mis favoritos y bueno que Dios los bendiga siempre saludos para todos.

- Las imágenes son de mi autoria y fueron tomadas por mi teléfono tecno, me pertenecen.
- Traductor utilizado: Deepl Traductor.
- Edicion en Canva.

Versión:

Hello dear friends of this community a warm greeting to all I hope you are very well I wish you days full of prosperity love and abundance today I will be presenting again a design made by me a beautiful and delicate bracelet made of crystals and Swarovski with small pearls and a small star day ideal to wear with a purple black or white Outfit I hope you like it a lot.WELCOME TO MY BLOG🌻
Today I will be telling and explaining how to make our bracelet made with love for all of you.
The materials used were the following:
- White crystals
- Small silver and light purple pearls
- Purple Swarovskis
- Star dijen
- scissors
- Elastic nylon of 0.25
- Hoop
- Tweezers
Let's Start Making!
Step 1
The first thing we are going to do is to select our yarn and cut it with the scissors like this
Step 2
Then we are just going to introduce the stones we are going to start with the white crystals like this
Step 3
Then add the small silver pearlite to give it volume like this
Step 4
Now what we are going to do is to take the Swarovskis and put them together with the silver pearls and then we are going to do the same procedure with the white crystals.
We have to see that in the middle part between the Swarovskis there will be three pearls like this and then we do the same procedure like this.
Step 5
Once the white crystal is placed we will put another pearl and this way it will be seen.
Step 6
Now what we are going to do is the following after we already have our body of our bracelet we are only going to put the long separator in this way.
Step 7
Now we are going to put only one silver pearl to separate it from the others that we are going to put.
Step 8
Then we are going to insert a purple Swarovskis along with a light pink pearl so this way I do it to have some separation and an intense, elegant and striking color.
Step 9
Next of crystals, pearls and Swarovskis it will look like this.
Step 10
Now after that we have to do the same procedure to finish our bracelet, but we have to keep in mind that when opening and closing will always be the same feet and pearls so that it is uniformly like this.
Step 11
Now we only have to tie the knots in the normal way, we are only going to join and pass the naylon inside the beads and make at least three knots.
So that it is resistant and can not come loose.
Step 12
We now take a ring and our pendant and we are going to introduce them so that we can place them last in our bracelet in this way is using our jewelry clamp to be able to adjust in this way and can be securely so that it does not come off.
And we just cut the pieces of nylon that are left like this and we have finished our bracelet.
Well my dear readers here I leave you our result of how our bracelet is ready to look and have elegant accessory for our Outfit I hope you like it very much is one of my favorites and good God bless you always greetings to all.
- The images are of my authorship and were taken by my techno phone, they belong to me.
- Translator used: Deepl trasleter
- Canva edition.
Te ha quedado hermoso amiga .. bendiciones para ti y éxitos 🤗🤗🤗
Muchas gracias amiga saludos
What a beautiful and detailed explanation of creating a crystal and Swarovski bracelet! Your step-by-step guide is so clear and easy to follow, making it seem like a fun and achievable project for anyone. The passion and love you put into making this bracelet truly shine through your words and instructions. Your creativity and talent are inspiring, and I'm sure everyone who reads your post will feel excited to try making their bracelet following your guidance. Keep up the fantastic work, and thank you for sharing your creativity with such a supportive and loving community!
Thank you very much for the beautiful words really fill me with inspiration to continue creating content for creators Thank you very much for your beautiful words that fill my life to continue making accessories that are useful for other people and can be done with ease success and blessings.🌈🌹🙏🏻🫂
Keep spreading positivity and inspiration through your creations! Your work is appreciated by many. Happy Hump Day!
Hola amiga te quedó muy precioso tu brazalete
Muchas gracias bella si a mí me encantó mucho.🫂🌻
Que hermoso quedó
Saludos!!!
Gracias mana🌻🫂🌹🌈
Hermoso trabajo, felicidades 😉 quedó muy linda!
Muchas gracias amiga saludos para ti.
It is so beautiful, elegant, and stylish. Love its design. Well done! Keep up the good work!