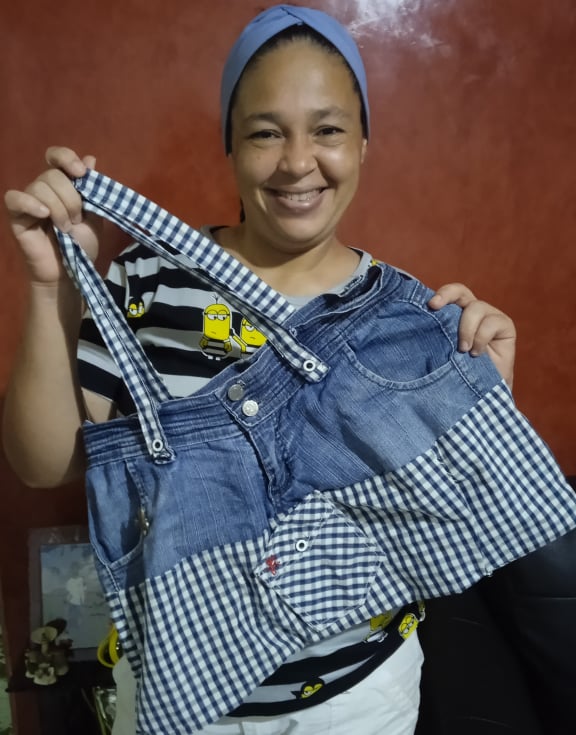
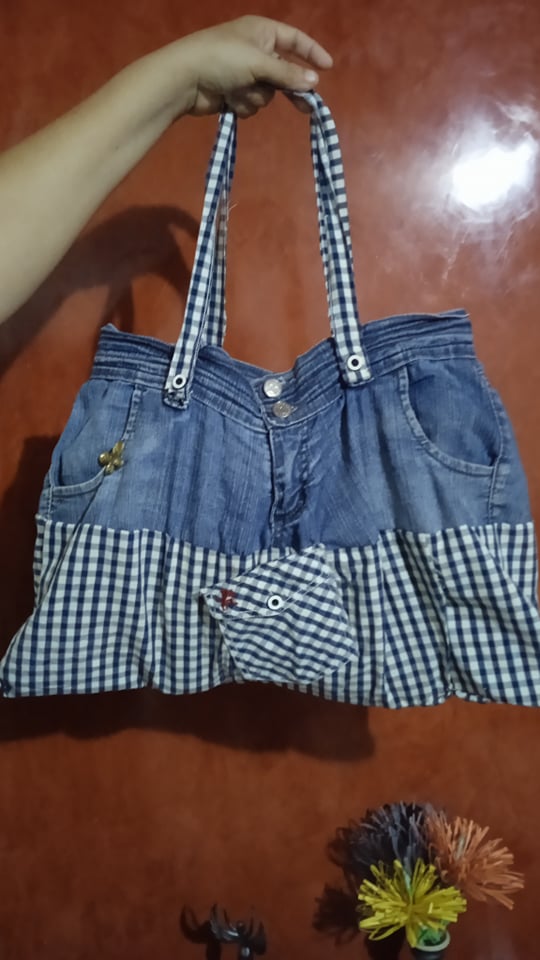
[ESP-ENG] No tires tus shores de jeans viejos!!! mira lo que puedes hacer | Don't throw away your old jeans!!! see what you can do!
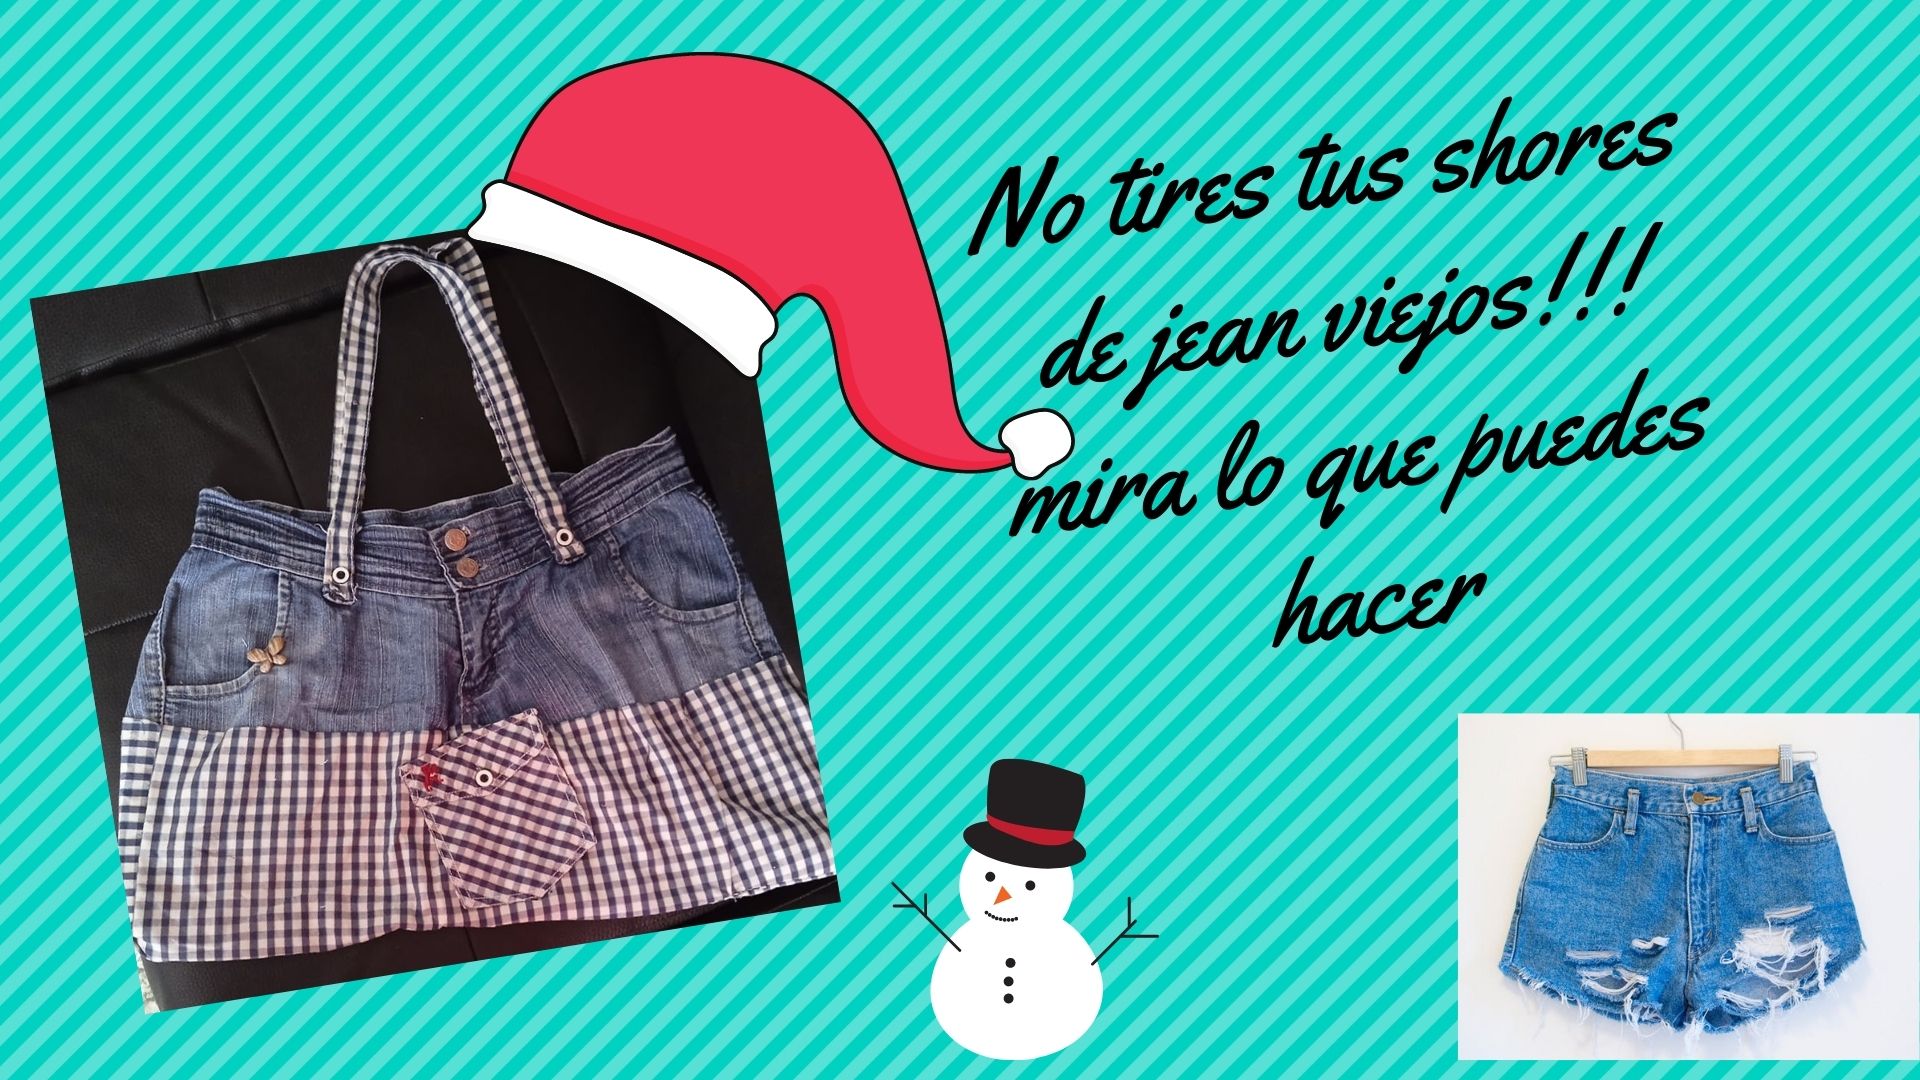
Definitely many times we do not know what to do with our old jeans shores, most of the time, we give them away or throw them away, today I want to show you what you can do with them, a nice bag, practical, simple and above all very nice, everything is a matter of getting creative when it comes to give the final touch, then I will show you the steps to follow.
.jpg)
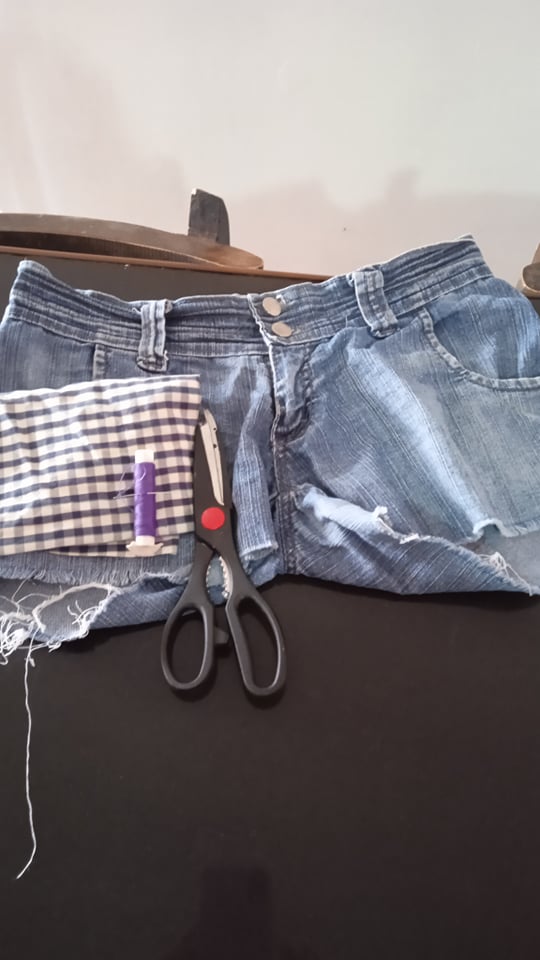
- Los materiales a utilizar son:
- Un short de jean viejo o que ya no uses.
- Tijera.
- Hilo de coser.
- Aguja de cose.
- Retazo de tela de cualquier color, cabe destacar que el retazo de tela que yo usé era de una camisa vieja, que tenía bolsillo.
- The materials to be used are:
- An old jean short or one that you no longer wear.
- Scissors.
- Sewing thread.
- Sewing needle.
- Piece of fabric of any color, it should be noted that the piece of fabric I used was from an old shirt, which had a pocket.
.jpg)
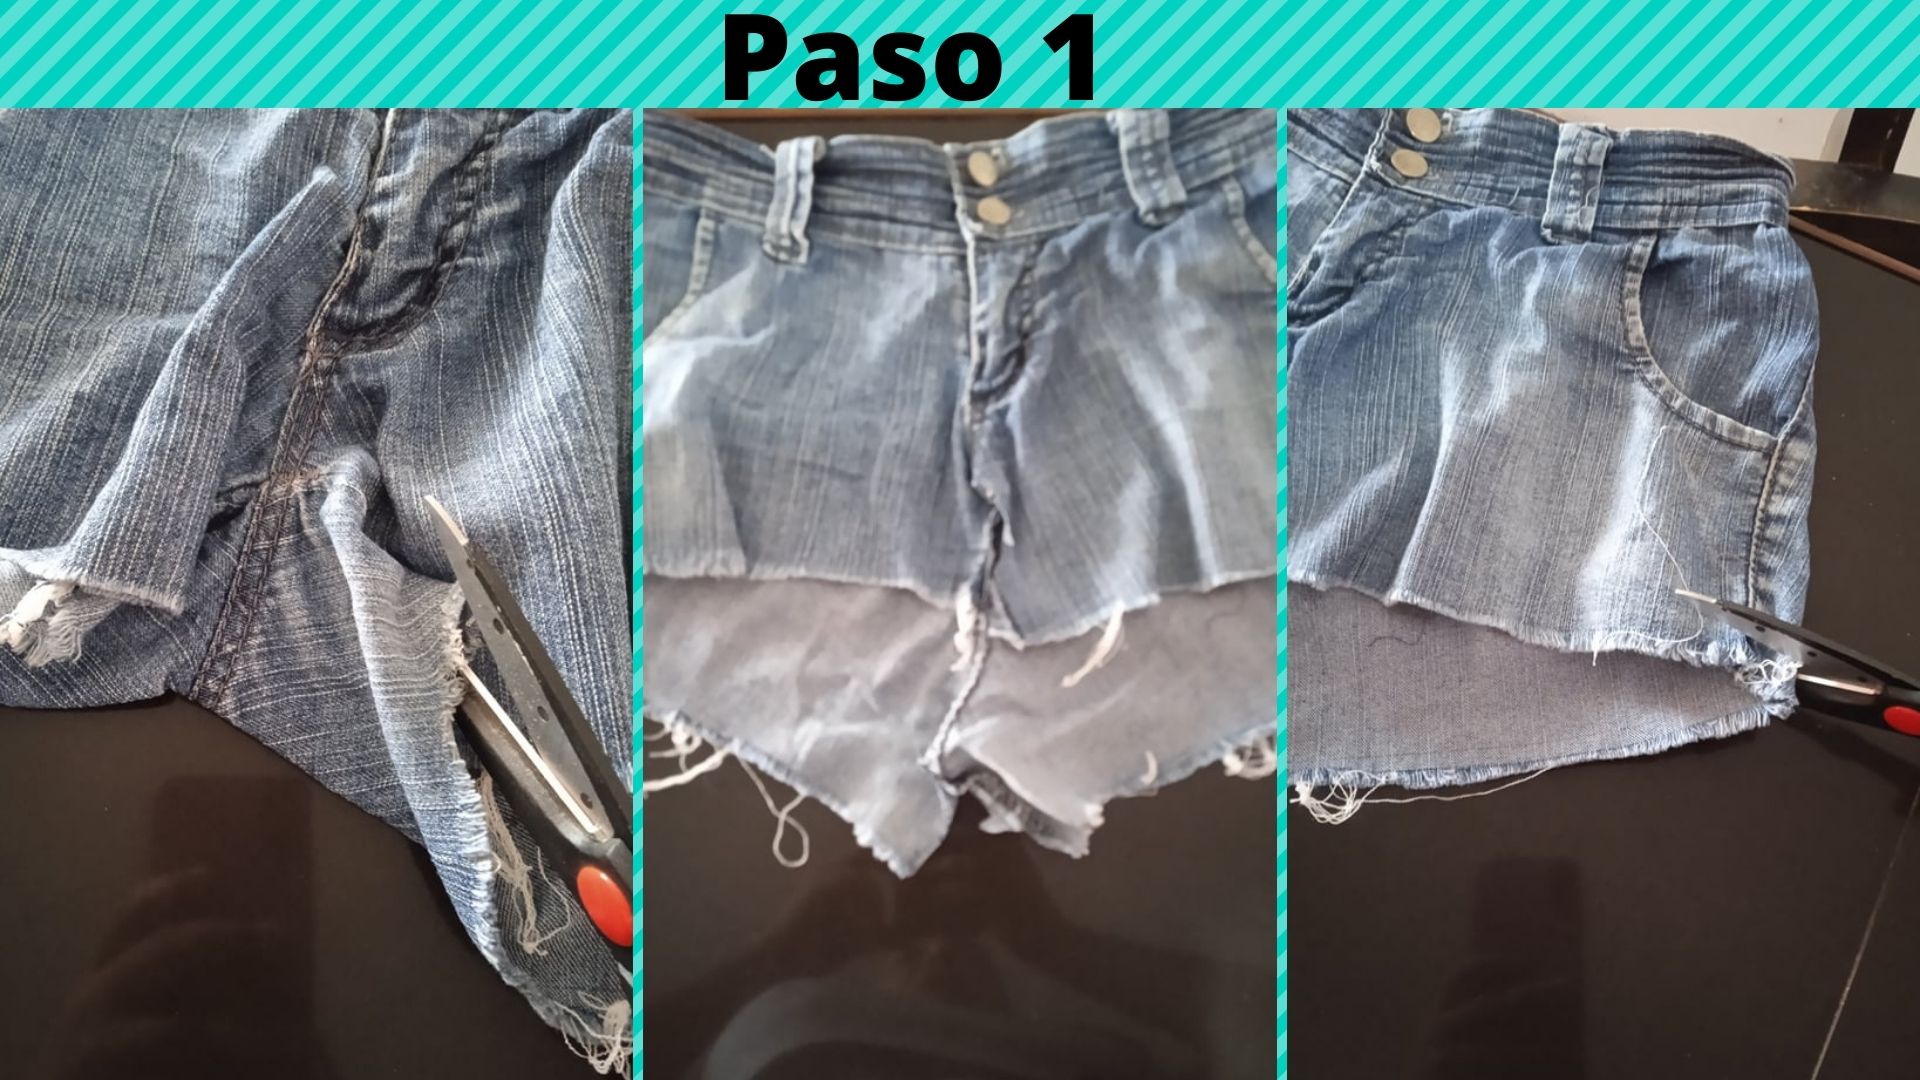
- Paso 1: Lo primero que debemos hacer es cortar la entrepiernas del short, una vez que lo hayamos hecho, procedemos a emparejar recortando en línea recta para deshacernos de la tela sobrante.
- Step 1: The first thing to do is to cut the crotch of the shorts, once we have done this, we proceed to match by cutting in a straight line to get rid of the excess fabric.
.jpg)
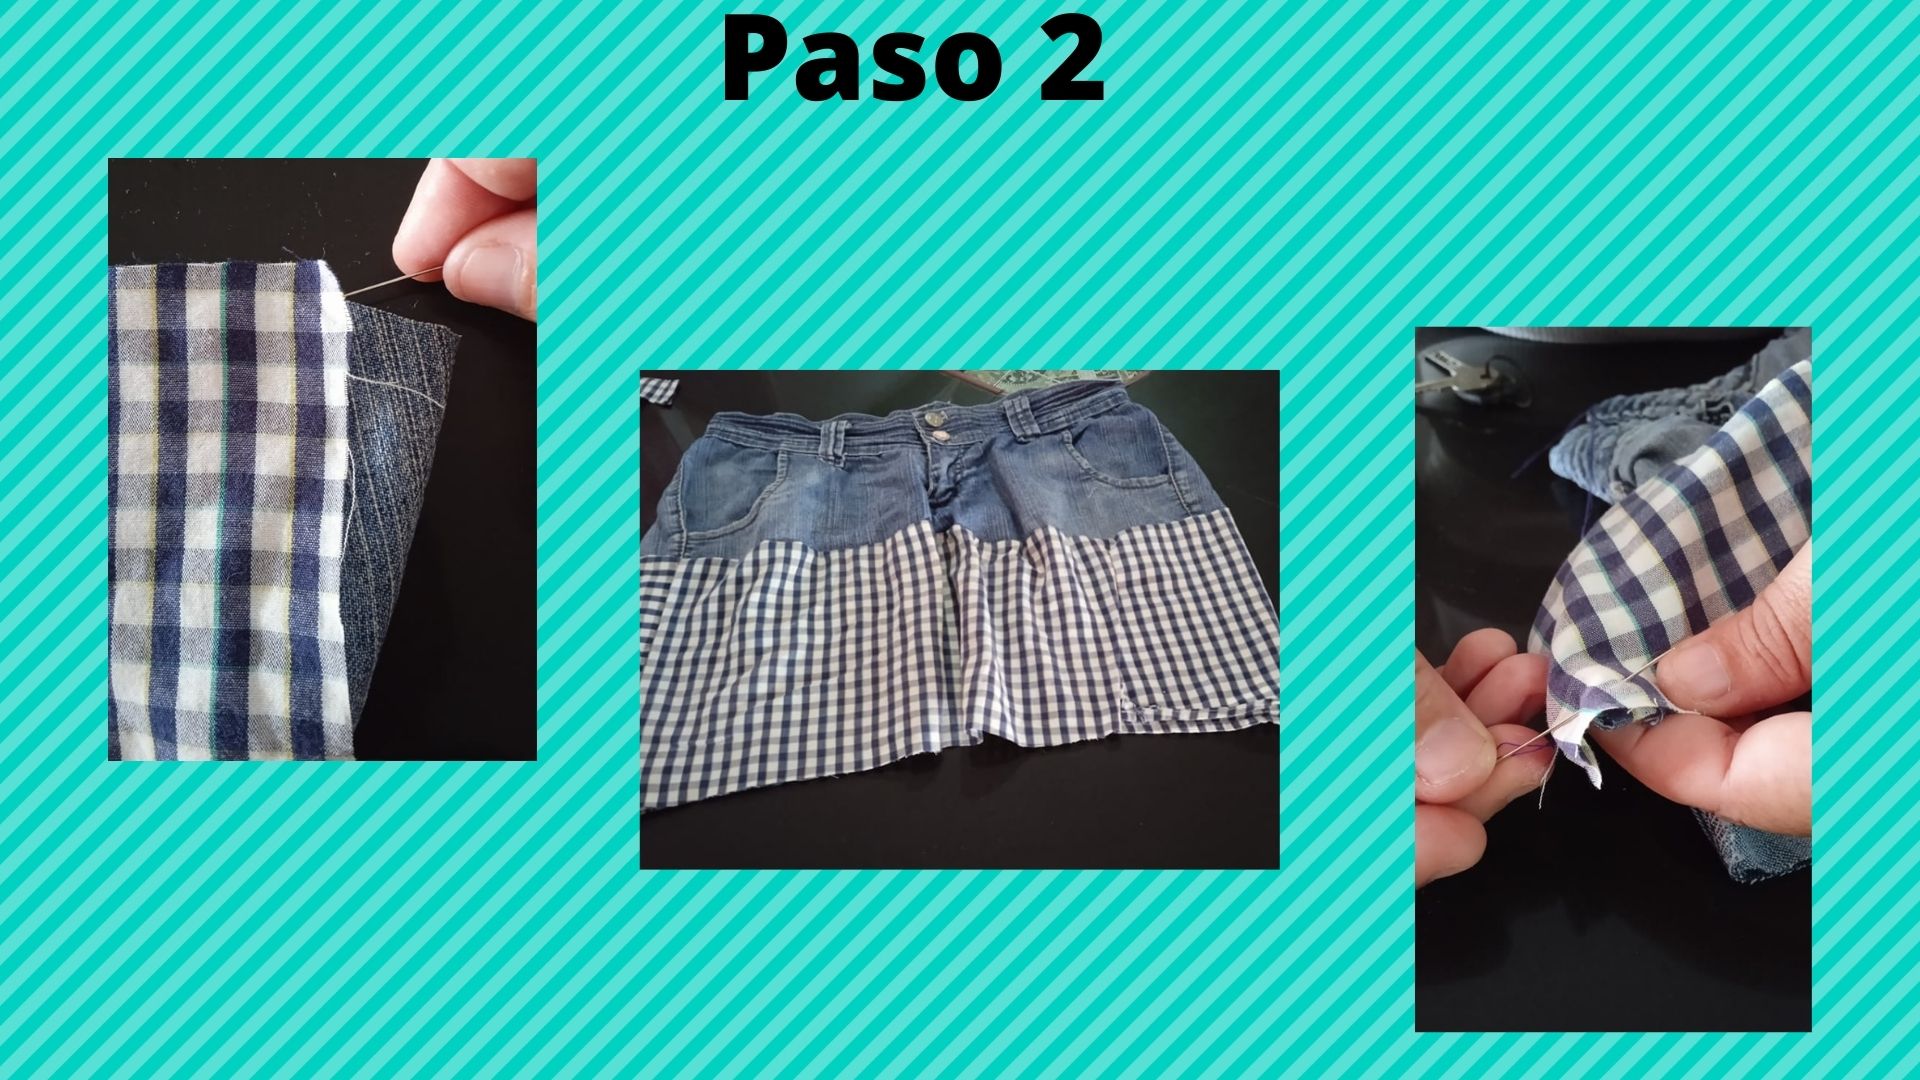
- Paso 2: Luego de emparejar, agarramos el retazo de tela de la misma medida de la parte superior del short, la colocamos encima del short derecho con derecho y cosemos por toda la orilla, luego volteamos del lado derecho para ver como nos va quedando, volteamos nuevamente del lado al revés y cosemos abajo por toda la orilla.
- Step 2: After matching, take a piece of fabric of the same size as the top of the shorts, place it on top of the shorts right sides together and sew all around the edge, then flip it right side out to see how it will fit, flip it right side out again and sew all the way around the edge.
.jpg)
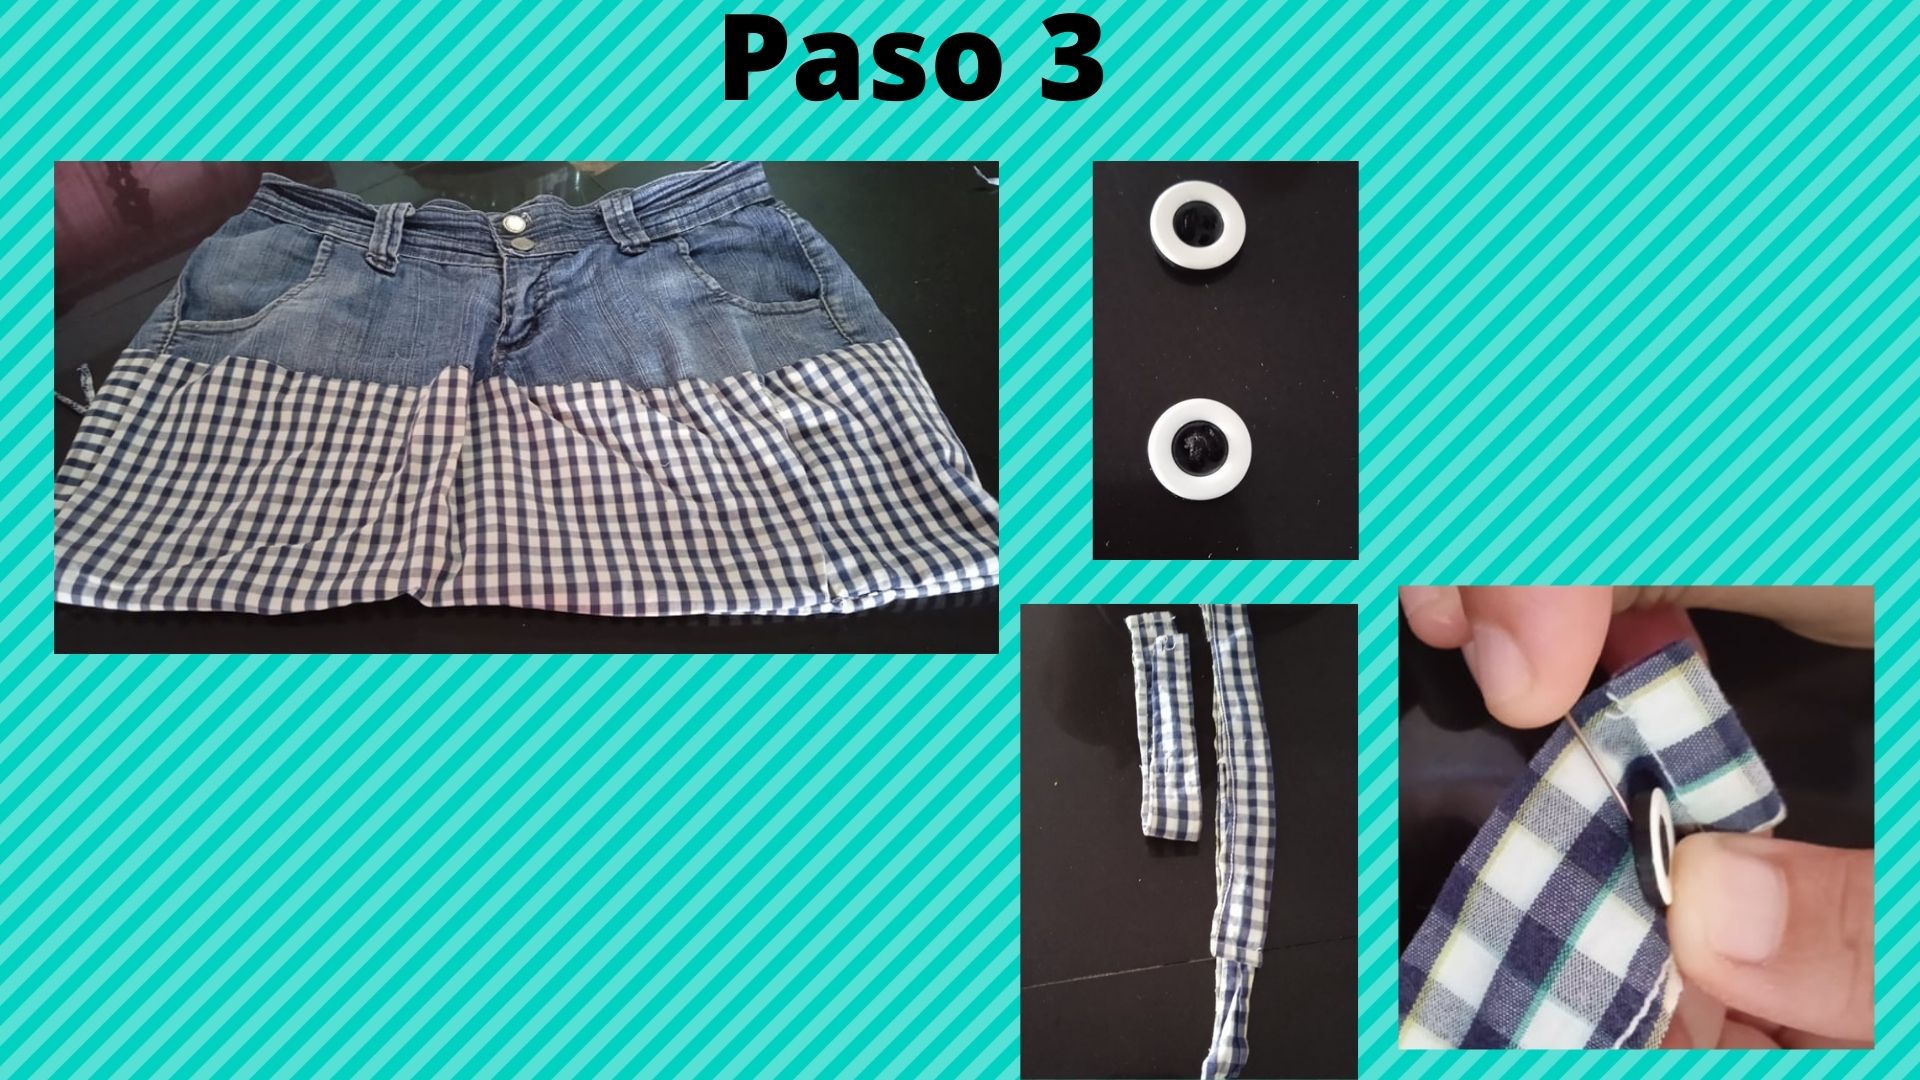
- Paso 3: Al terminar de coser la orilla de la parte de abajo, volteamos el bolso del lado derecho, luego agarramos 2 botones y 2 tiras de la misma tela, cabe destacar que los botones que usé fueron del retazo de tela de camisa, y las tiras fueron las costuras del retazo, cosemos en una de las tiras un botón de cada lado en la parte inferior.
- Step 3: When we finish sewing the bottom edge, we turn the bag right side out, then we grab 2 buttons and 2 strips of the same fabric, it is worth mentioning that the buttons I used were from a piece of shirt fabric, and the strips were the seams of the piece, we sew on one of the strips a button on each side at the bottom.
.jpg)
- Paso 4: Al terminar de coser los botones en la tira, la colocamos sobre una de las tirillas delanteras del short, cosa que cubra la tirilla completa y procedemos a coser de ambos lados, deberá quedar como muestra la tercera imágen.
- Step 4: When we finish sewing the buttons on the strip, we place it on one of the front straps of the shorts, so that it covers the entire strip and proceed to sew on both sides, it should look like the third image shows.
.jpg)
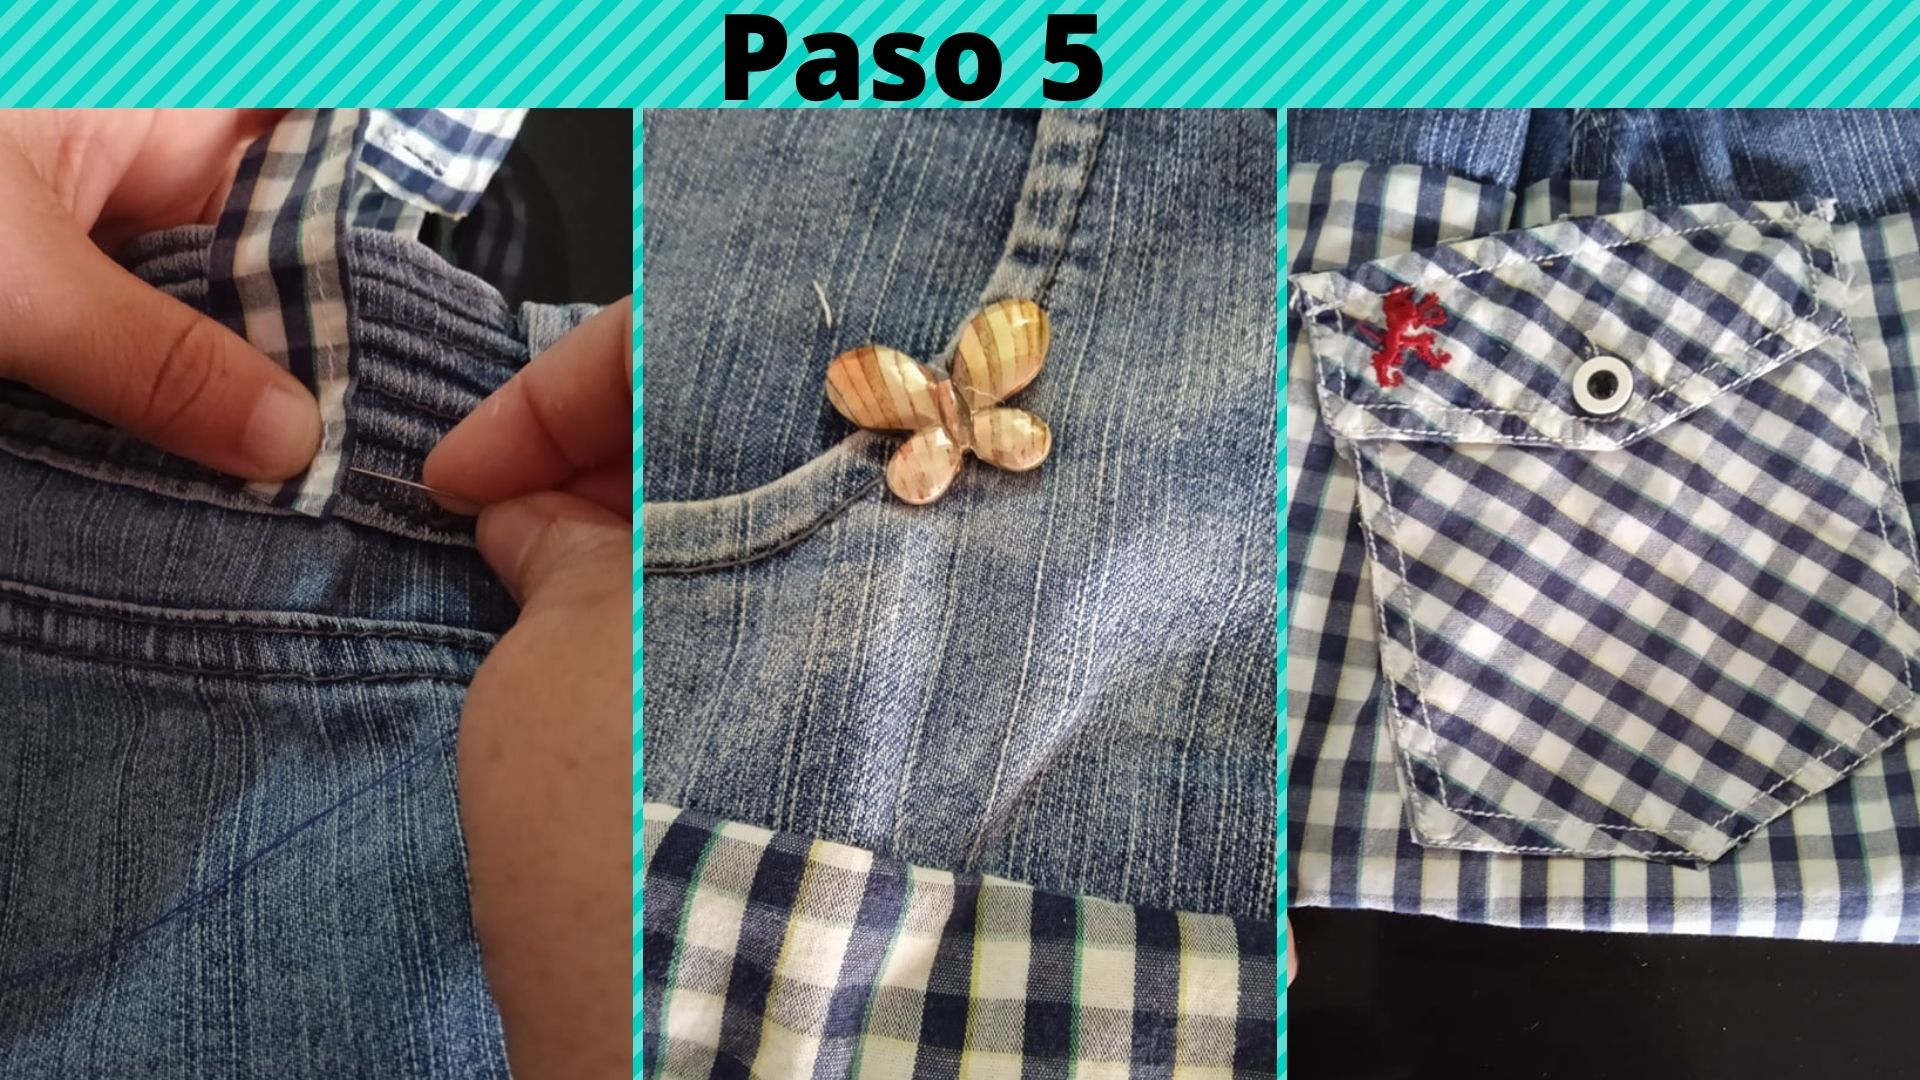
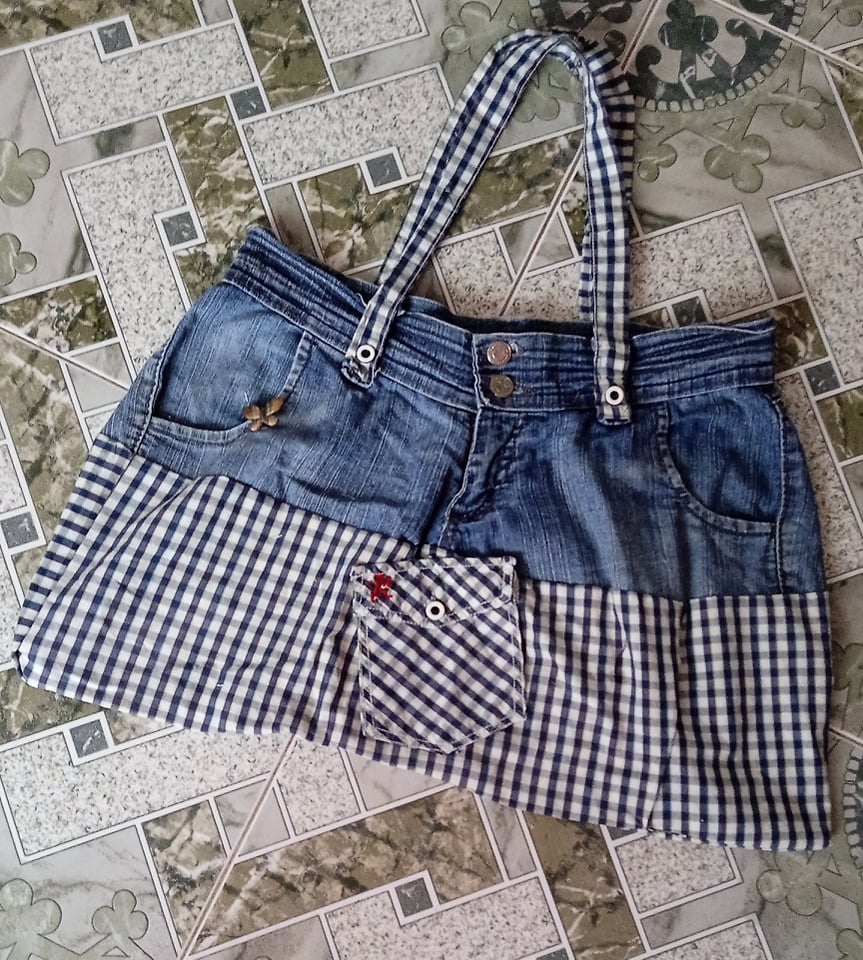
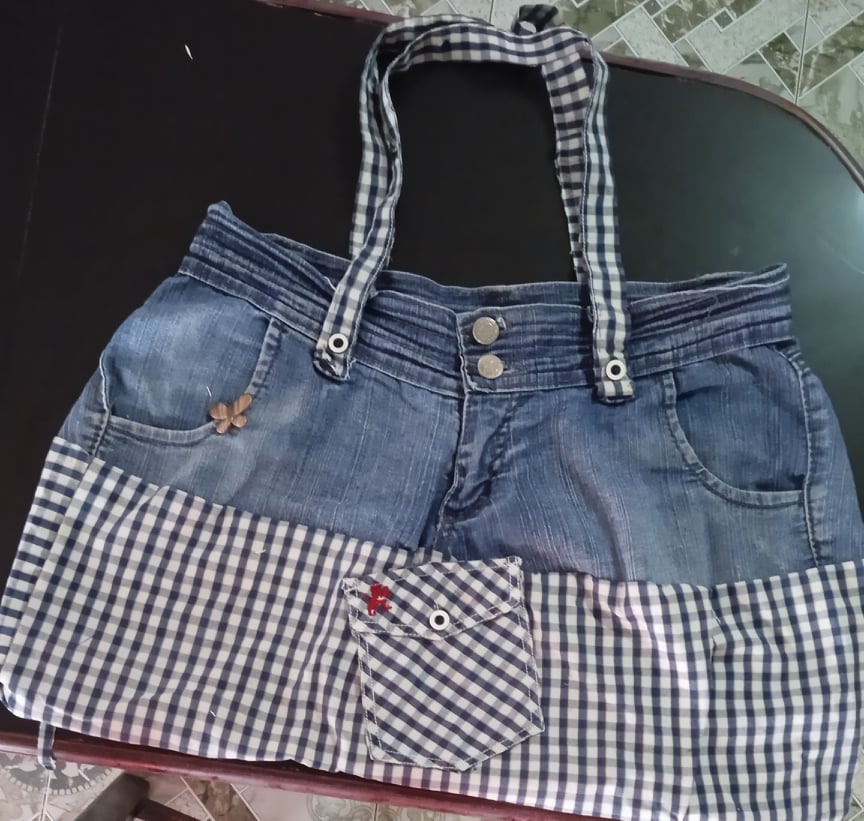
- Paso 5: Cosidas las tiras delanteras, procedemos a coser las tiras de la parte de atrás, luego para el final decoramos nuestro bolso a nuestro gusto, yo le coloqué una linda mariposa en uno de los bolsillos delanteros, y coloque un bolsillo del mismo retazo de tela en la parte delantera del bolso.
- Step 5: Once the front strips are sewn, we proceed to sew the back strips, then for the end we decorate our bag as we like, I placed a nice butterfly in one of the front pockets, and I placed a pocket of the same fabric in the front of the bag.


0
0
0.000
Me gusta mucho la idea, es genial. Cuando consiga uno ya casi inservible probaré.
Hola, me alegra que te haya gustado, gracias por comentar.
Thanks for sharing, @yannet80 this really looks amazing thanks
Thanks for commenting my friend.
You’re welcome @yannet80
Excelente idea, gracias por compartir, a mi tambien me encanta reciclar 😁
Muchas gracias.