Embroidered heart, but with padding/Corazón bordado, pero con relleno [ENG/ESP]
ENGLISH
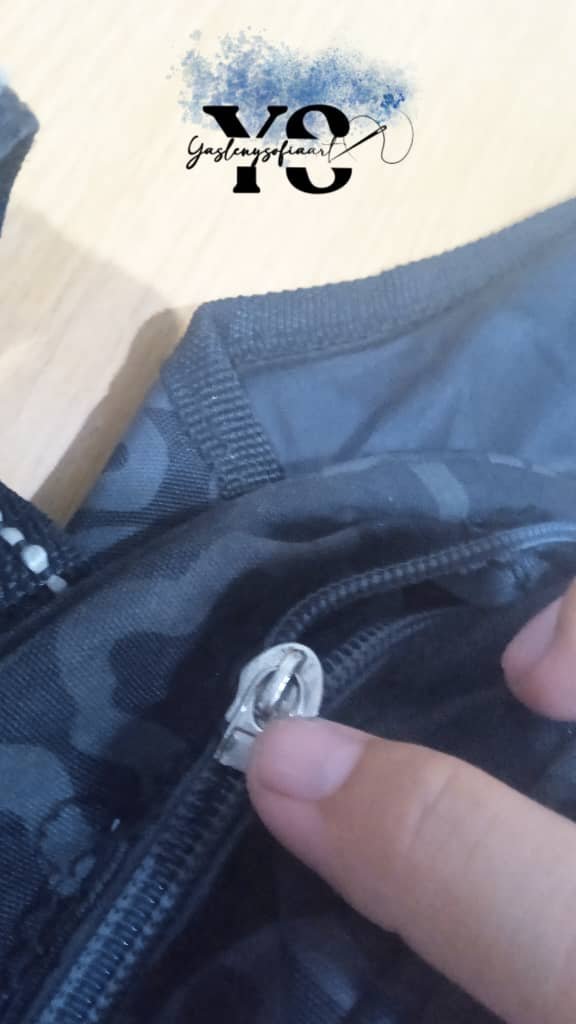
Greetings @needleworkmonday community, a few weeks ago, I changed the zipper on a bag which had not been used for some time, for the same reason that the zipper was not working. I changed it for another zipper that my mom had among her things, it was not the same color of the bag, which was black, but like a greenish gray, something like that, so it didn't look so bad.

But a few days ago, the handle of the slider broke and, in order not to remove again all the stitching I did by hand, I decided to make a simple embroidery, which would allow me to move it. Now, I wanted to do like the style of the Dragon sphere that I made, but instead of sewing a fabric on the back of it, I wanted the same embroidery to be seen on both sides and something quilted, saying to make a heart.

-White or preferably red embroidery cloth
-Red embroidery thread
-Red sewing thread
Embroidery and sewing needle -Embroidery and sewing needle
-Scissors
-Embroidery hoops

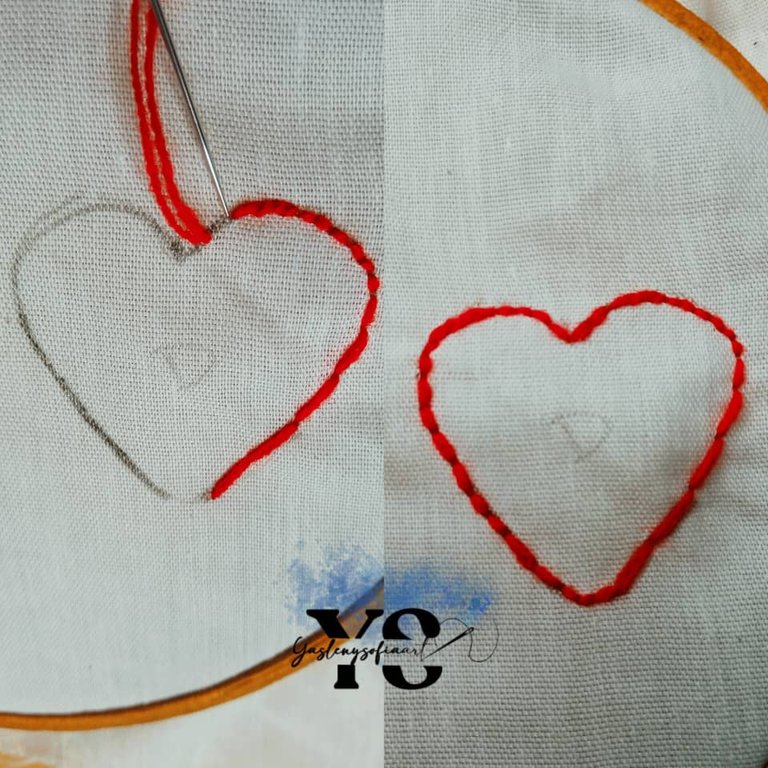
The first thing I did was to draw the heart and draw the mold on a piece of cardboard. To help me draw it, I used a small coin, traced two parallel circles and from under those two, a kind of triangle. I extracted the mold and copied it on the fabric, which is a finite one, like the most separated wefts, when I know what it is called, I will tell you or if someone knows what it is, I would like you to tell me.

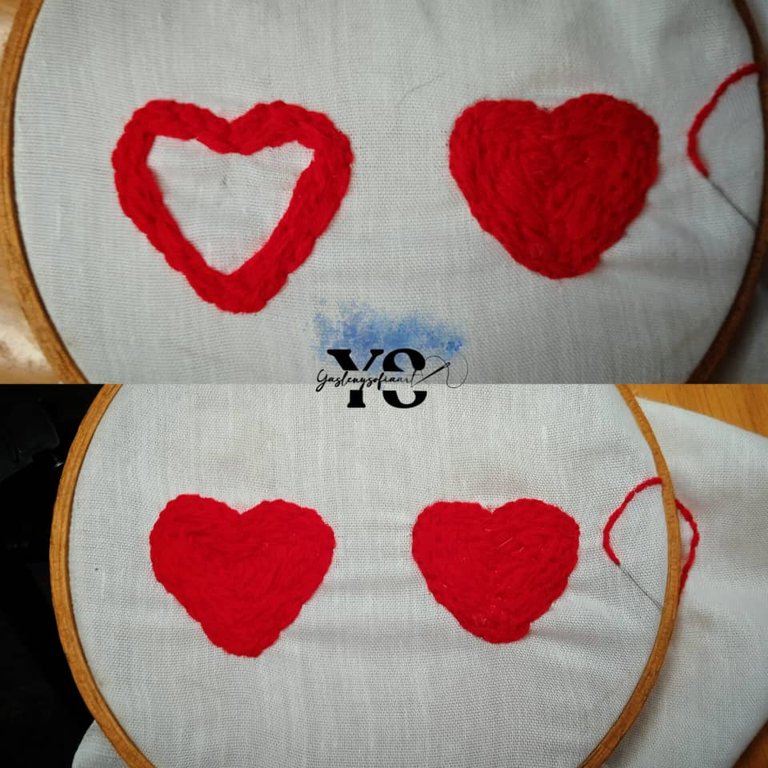
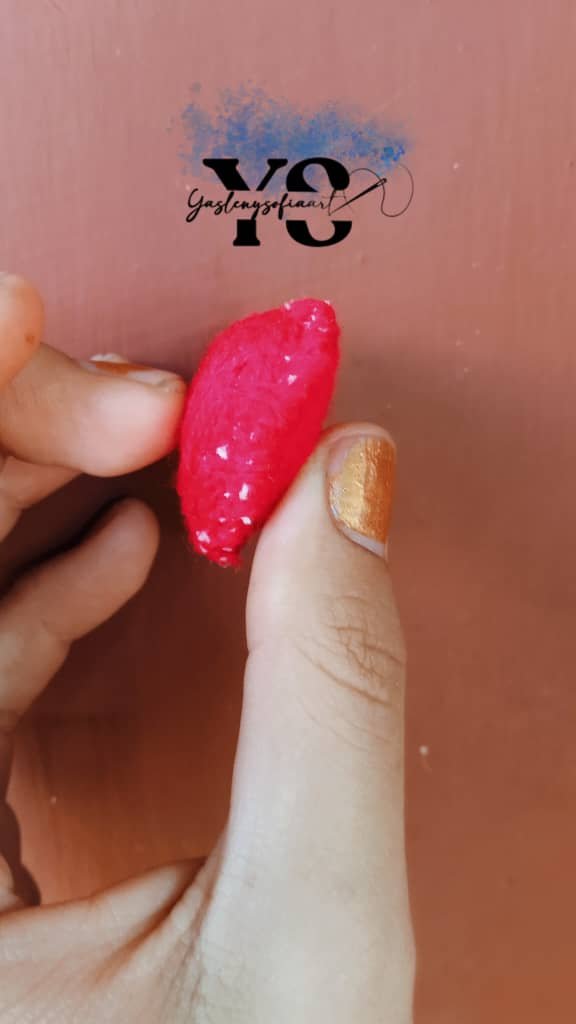
Continuing, I adjusted the fabric with the embroidery hoops and took the needle with the red thread and began to outline the hearts with the step back technique, to finish filling it completely, both hearts.
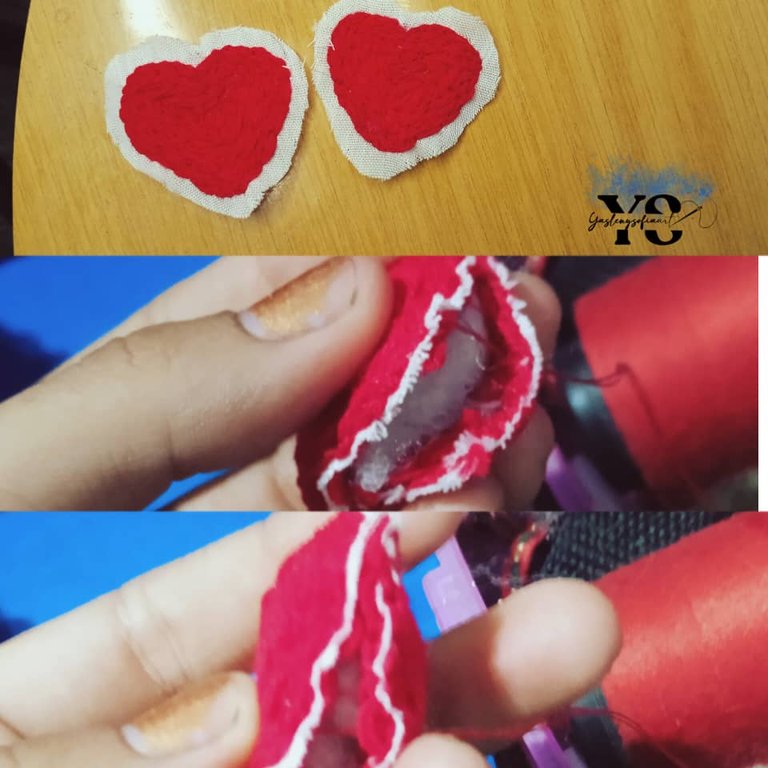
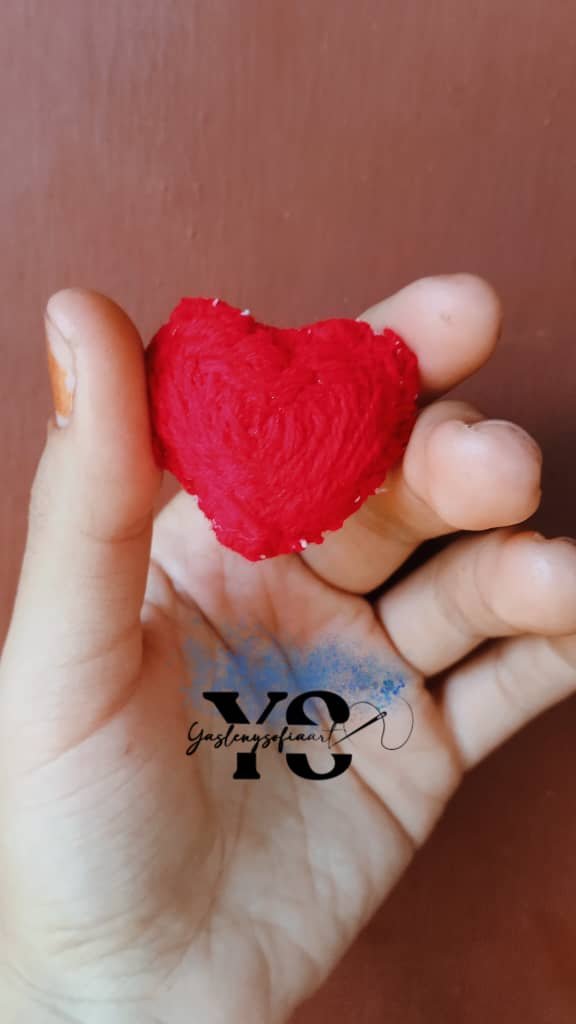
After that, I cut the figures, leaving some of the white fabric. I joined both sides with sewing thread; before closing it, I introduced stuffing, as if I was making a stuffed animal, but in this case, I was edging the fabric. Even though I ended up joining both hearts, a bit of the white fabric was still visible, so, with the same red embroidery thread, I filled in those white parts, resulting in this way.

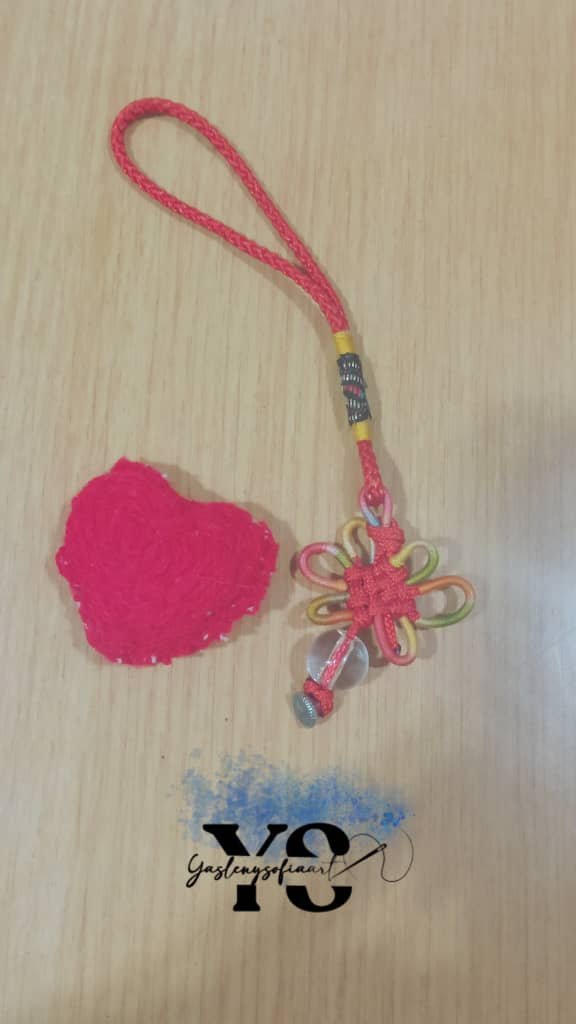
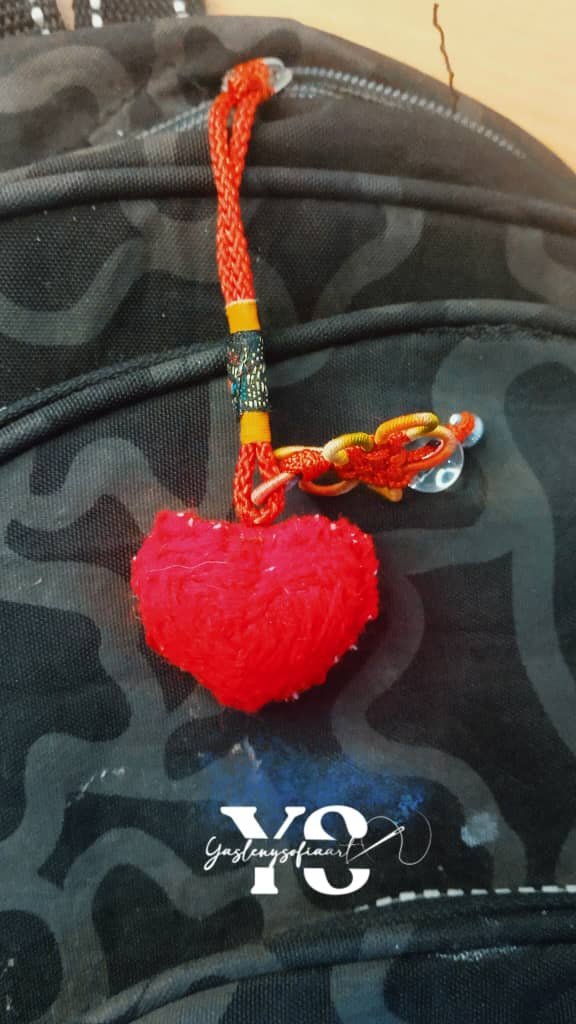
Now, I didn't know whether to put a ring on it to adjust it to the cursor handle or with a thread. In the end, among my things I got this ornament made I think with mouse glue, I did not elaborate it and, but it seemed to me that the heart fit well there; later I want to learn how to make an ornament like that I got.

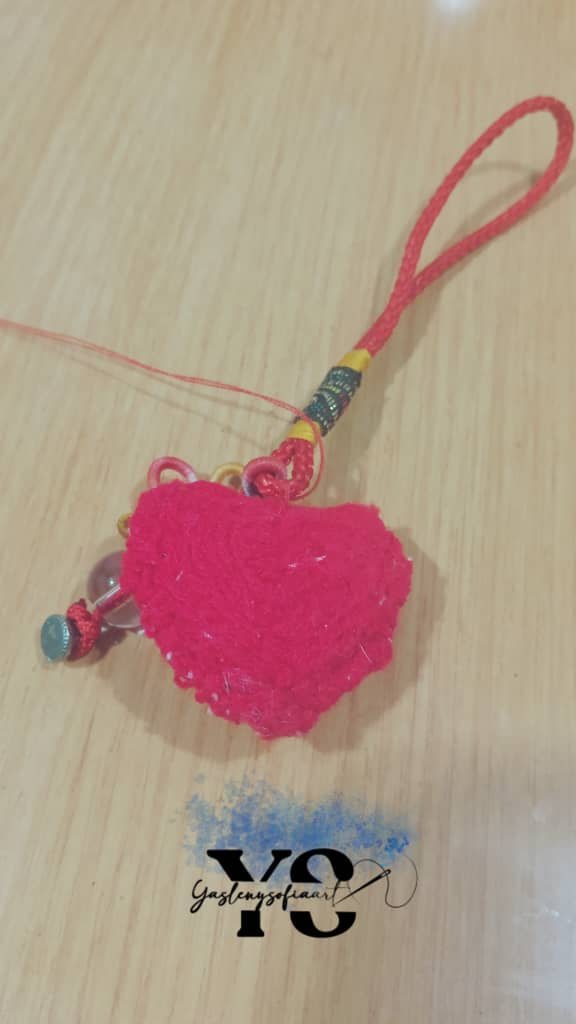
I sewed the heart to that trim and then threaded that cord through the pull hole, sewing at the joints. In the end the bag looks like this.
Translated using DeepL
Thank you for reading my post. I hope you liked it. I will be attentive to answer your comments. You can visit my blog, follow my content and social networks.
FACEBOOK / INSTAGRAM / TWITTER

ESPAÑOL
Saludos comunidad de @needleworkmonday, hace unas semanas atrás, le cambie el cierre a un bolso del cual llevaba tiempo sin usar, por el mismo motivo de que no le funcionaba la cremallera de la misma. Se lo cambie por otra cremallera que tenia mi mamá entre sus cosas, no era del mismo color del bolso, el cual era negro, sino como un gris verdoso, algo así, por lo que no se veía tan mal.

Pero hace unos días atrás, se le rompió el tirador del cursor y, para no quitarle nuevamente toda la costura que hice a mano, decidí hacer un bordado sencillo, que me permitiera moverlo. Ahora bien, quería hacer como el estilo de la esfera de Dragón que elaboré, pero en vez de coserle una tela en su parte posterior del mismo, quería que se viera por ambos lados el mismo bordado y algo acolchado, diciendo por realizar un corazón.
-Tela para bordar, de color blanco o preferiblemente rojo
-Hilo de bordado rojo
-Hilo de costura rojo
-Aguja para bordado y costura
-Tijera
-Aros de bordado
Lo primero que hice fue dibujar el corazón y sacar el molde en un cartón. Para ayudarme a dibujarlo, usé una moneda pequeña, tracé dos círculos paralelamente y de bajo de esos dos, una especie de triangulo. Extraje el molde y lo copié en la tela, que es una finita, como las tramas más separadas, cuando sepa como se llama, les indicaré o si alguien sabe cual es, me gustaría que me indicara.
Continuando, ajusté la tela con los aros de bordar y tomé la aguja con el hilo rojo y comencé a contornear los corazones con la técnica paso atrás, para terminarla de rellenarla por completa, ambos corazones.
Posterior a ello, corté las figuras, dejando un poco de la tela blanca. Uní ambas caras con hilo de costura; antes de cerrarlo, le introduje rellene, como si estuviese haciendo un peluche, pero en este caso borde la tela. A pesar de que terminé uniendo ambos corazones, aún se podía apreciar un poco de la tela blanca, así que, con el mismo hilo de bordado rojo, rellené esas partes blancas, resultado de esta manera.
Ahora bien, no sabía si ponerle una argolla para ajustarlo al tirador del cursor o con un hilo. Al final, entre mis cosas conseguí este adorno hecho creo con cola de ratón, no lo elaboré y, pero me pareció que el corazón encajaba bien ahí; más adelante deseo aprender hacer un adorno como ese que conseguí.
Cosí el corazón a ese adorno y luego pasé ese cordón por el orificio del tirador, cosiendo en las uniones. Al final el bolso se ve de esta manera.
Gracias por leer mi post. Espero que les haya gustado. Estaré atenta a responder sus comentarios. Pueden visitar mi blog, seguir mis contenidos y redes sociales
0
0
0.000
This is absolutely going to be useful for the zipper handle better than the one that broke away. This is a nice idea from you.
Well done dear
Thank you very much, it definitely makes it better for me to unzip. Regards🤗
Muchas gracias, definitivamente, se me hace mejor abrir la cremallera. Saludos🤗
Que bueno que pudiste hacer uso de tus habilidades para solucionar esta situación, además todo luce muy bonito. Gracias por compartir. Saludos!
Muchas gracias. Saludos 😊
That’s so creative of you and it’s really awesome how you brought this up because sometimes a zipper not having a holder is really worrisome.
This is cute
Thank you very much 🤗. Yes and to remove it again, I was lazy, I solved with that one. 😊
Muchas gracias 🤗. Si y para quitarla nuevamente, me daba pereza, solventé con ese. 😊
You’re welcome
Eso de lo bueno de ser creativos, le damos a vida a lo que otros lo darían por perdido, te felicito querida quedaron excelente
Si, hasta le quedó muy bien al bolsito, ahora mi hermana me lo quita prestado 😅
jaja que lindo