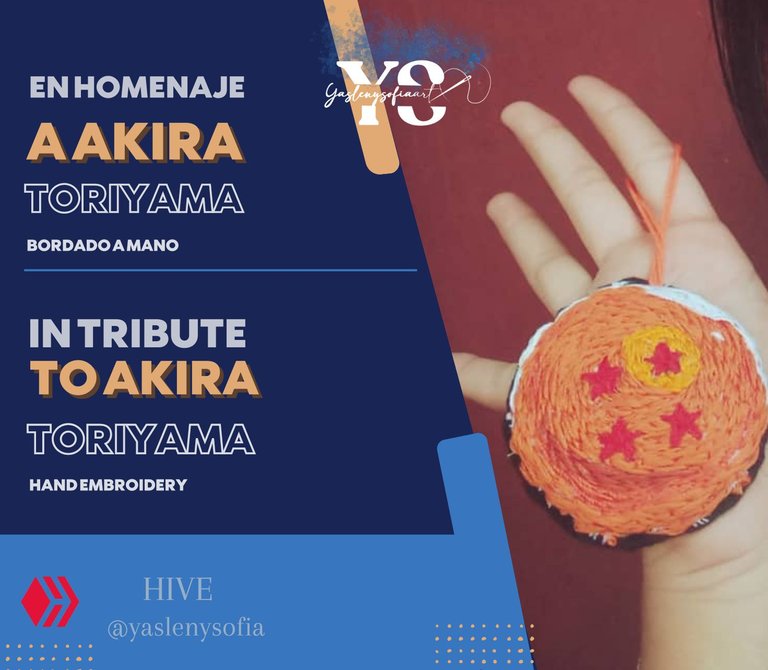
In tribute to Akira Toriyama [ENG/ESP]
ENGLISH
Greetings @needleworkmonday community, a few days ago was announced a news that not only saddened many anime fans, but also shocked the whole world, being the departure of Akira Toriyama, creator of one of my first anime of my childhood: Dragon Ball, for that reason I wanted to pay tribute to him by making an embroidery of a dragon sphere, a characteristic element of this series. I loved making it, it was relaxing, here I leave you the process of its elaboration.

- Threads for embroidery: orange color (preferably in various shades); yellow color (in low tone), red color and white color.
- White fabric or the color of your choice, suitable for embroidery.
- Piece of black felt fabric, it will be for the final base of the embroidery.
- An orange cord.
- Embroidery hoop.
- Scissors.
- Needles
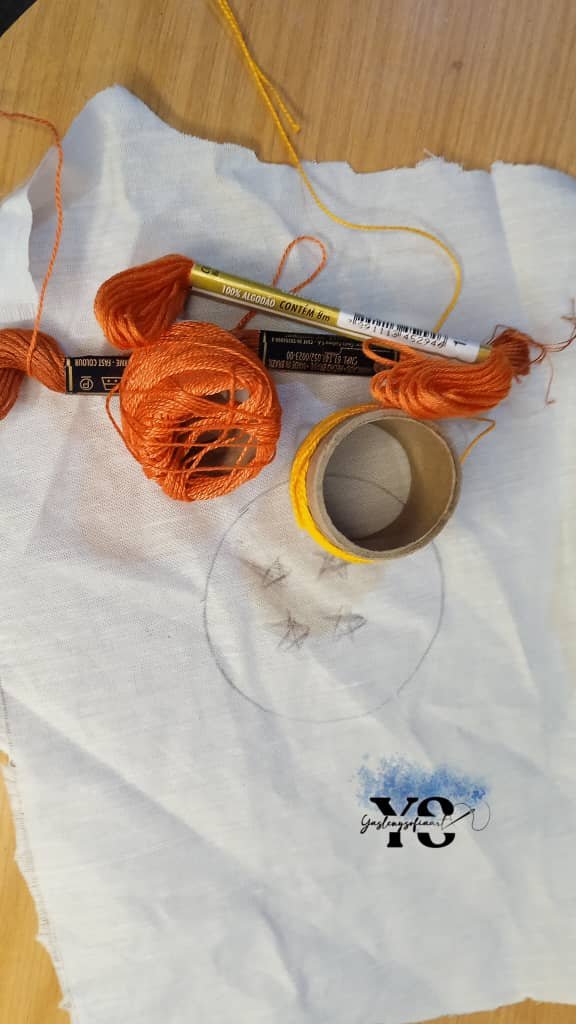

First I looked for a reference image of the N°4 sphere, since with this one the main character of the anime is better identified. The following image was the one I liked the most, it doesn't look so flat and I needed one that would play with the tones, to give more depth to the embroidery.

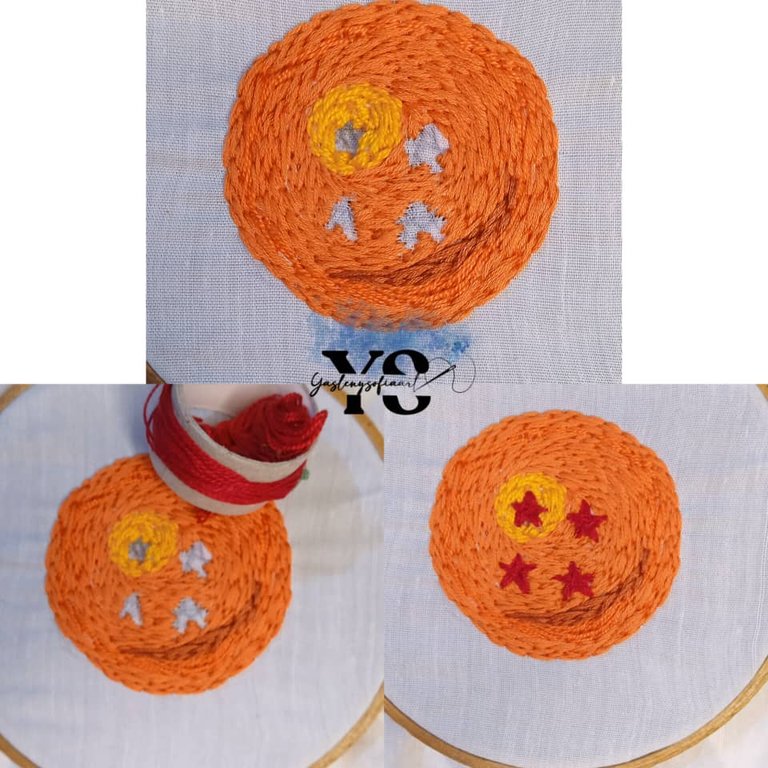
Then, I made the drawing on the white fabric, here to trace the circular shape, I was guided with an object at home, because the circles do not come out straight. When I had already traced the drawing, with its 4 stars, I pressed the fabric with an embroidery hoop; the size of the fabric is about 15cm long and 25cm wide, approximately.
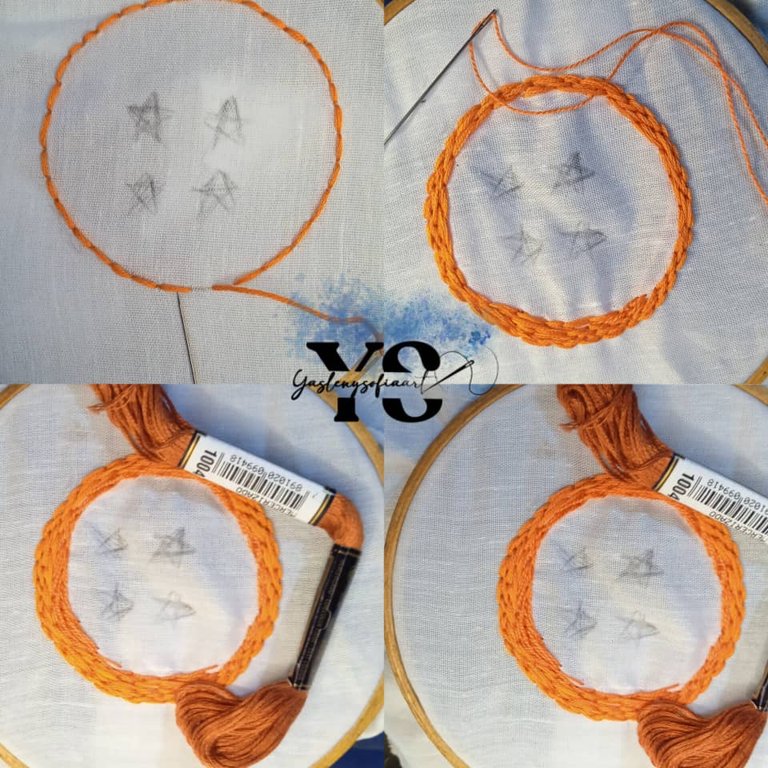
Now, with the step back technique, I traced the entire edge of the circle, using the 6 strands of orange embroidery thread. In total, at the beginning I made between 3 to 4 laps, clarifying that this step back, the outline that comes out I make it disformed, that is to say as if they were a kind of brick, I feel that it generates a greater texture to the embroidery.
After that, with the lighter orange thread, I embroidered 2 turns of embroidery with the step back and with the darker orange thread I had on hand, I embroidered a small half moon on the lower part, simulating a shadow effect.
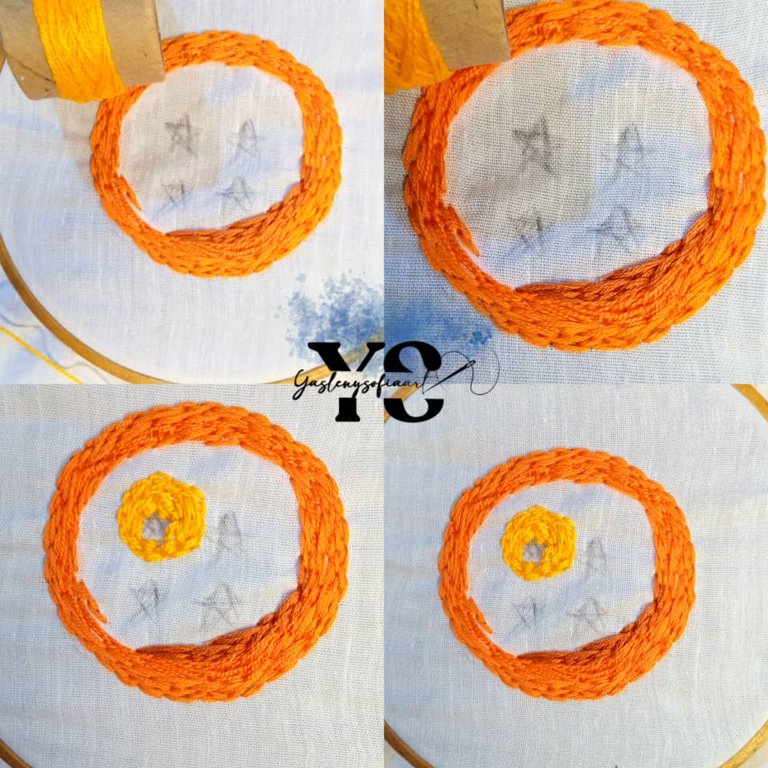
Once I had those tones, I continued embroidering with the original orange, observing that the reference image had a small yellow circle in the upper left corner, so I decided to embroider that first, before continuing with the whole sphere. Once that part was done, I continued with the whole sphere until the end.
Continuing with the same, I embroidered with red thread the stars, I did not do it at the beginning, because it has happened to me that the thread around it can swallow it, so, the one that is in the foreground, so to speak, I leave it at the end. At the end of what would be the orange part, I embroidered all around the edge with black yarn, but I didn't like it, so I took it off, finishing with white thread, that reflection in the upper part that has the reference image.
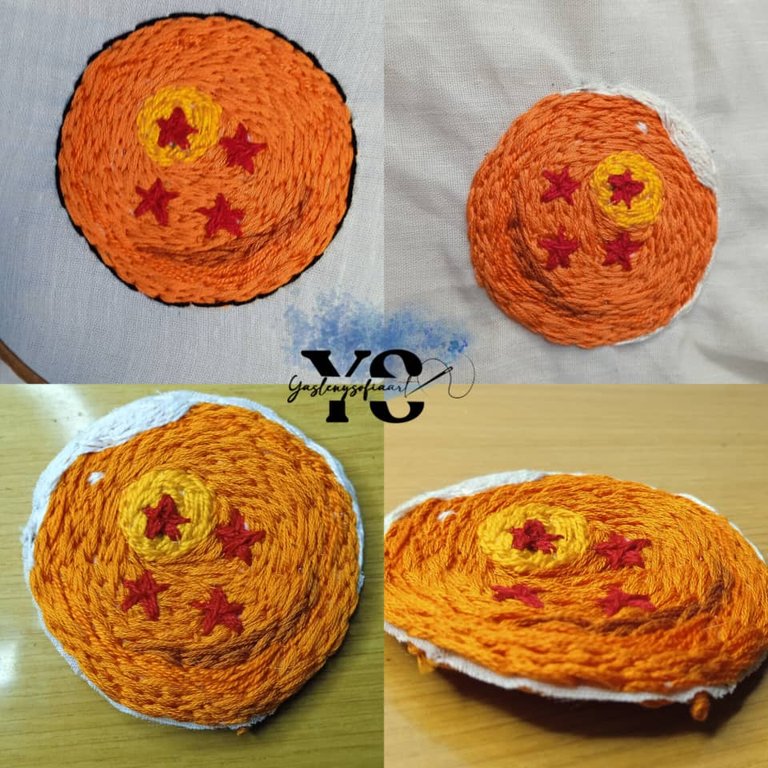
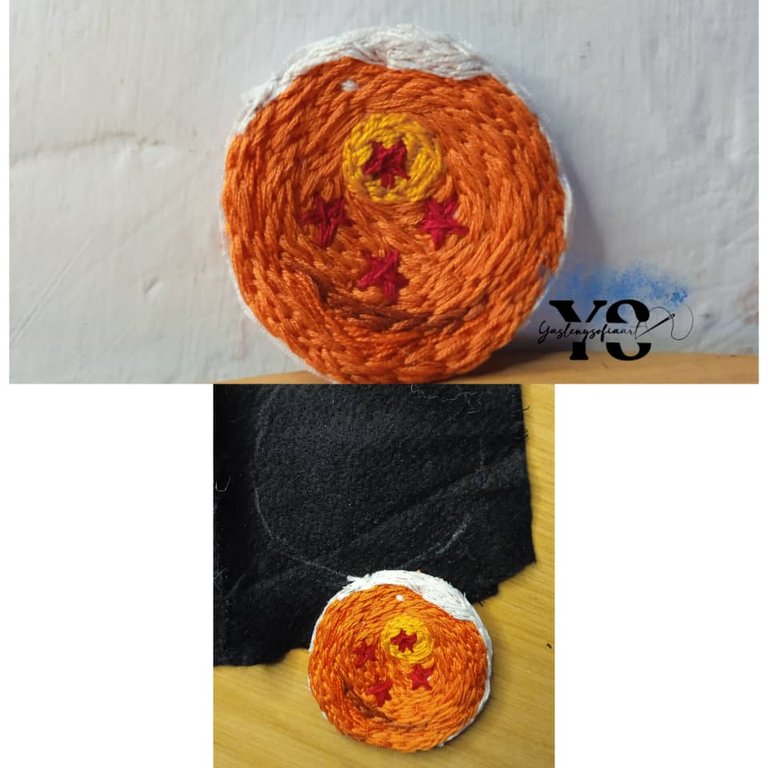
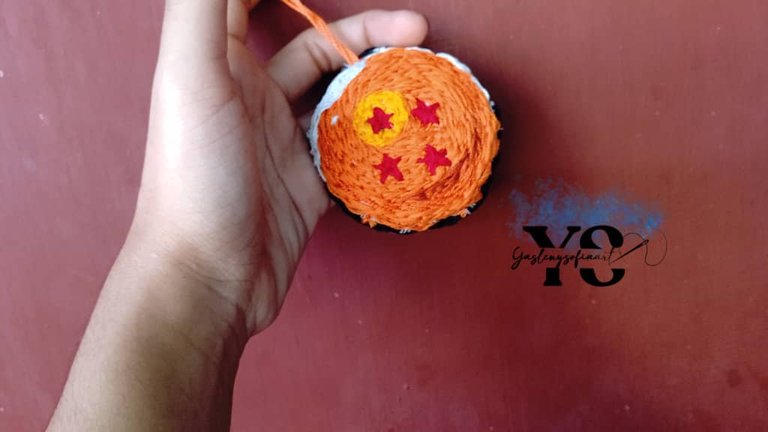
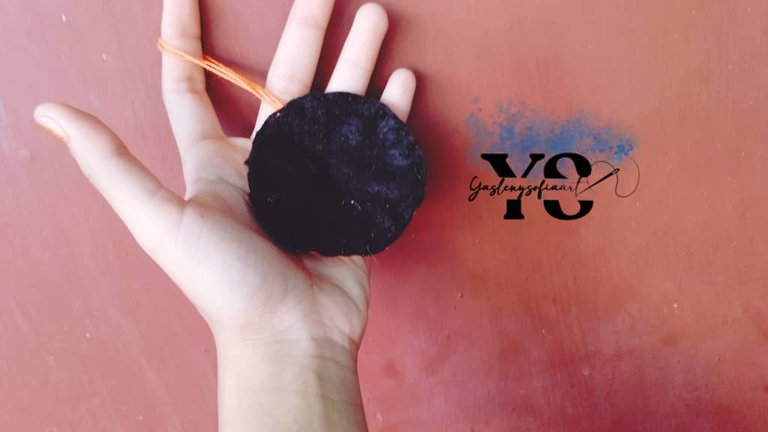
Finishing all the embroidery part, I took a piece of black felt that I had at hand, making a circle a little larger than the sphere; once the sphere was cut, I sewed it to the black felt and, before finishing the seam, I introduced an orange cord, so that it could be attached and so it was, I took out two circles of felt, one where I put the embroidery and the other for a better finish and not to see the finish of the previous seam. The sphere came out with a size of 6.5 cm in diameter, but you can make it the size you want.
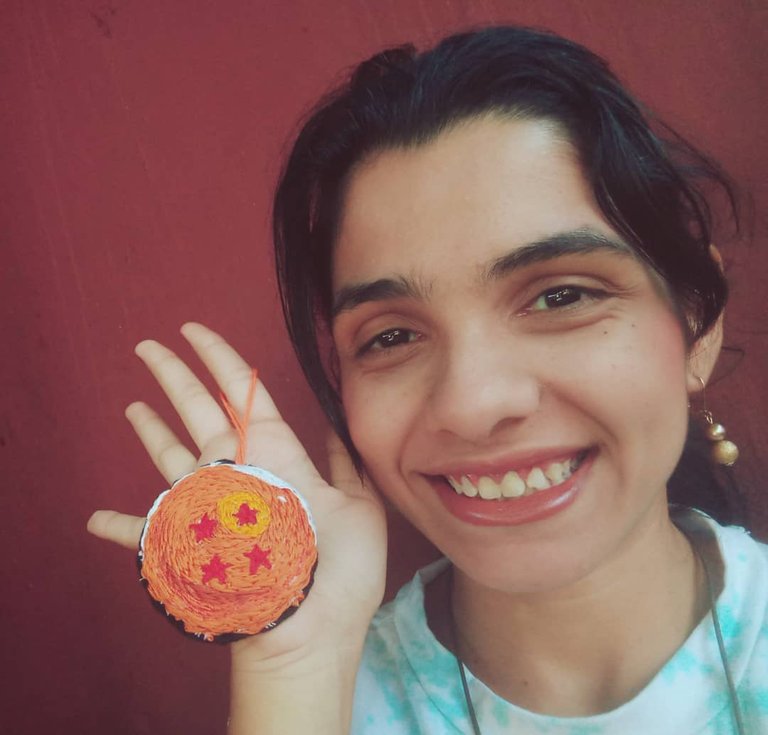
This was the result, what did you think? I felt very satisfied, of course there is always room for improvement, but I really wanted to make this tribute to this great artist who will always be remembered.

Thank you for reading my post. I hope you liked it. I will be attentive to answer your comments. You can visit my blog, follow my content and social networks.

ESPAÑOL
Saludos comunidad de @needleworkmonday, hace unos días atrás se dio a conocer una noticia que, no solo entristeció a muchos fans de los animes, también conmocionó a todo el mundo, siendo la partida de Akira Toriyama, creador de unos de mis primeros animes de mi infancia: Dragon Ball, por tal motivo quise rendirle homenaje haciendo un bordado de una esfera de dragón, un elemento característico de esta serie. Me encantó hacerla, fue relajante, aquí les dejo el proceso de su elaboración.
- Hilos para bordar: color naranja (preferiblemente en varios tonos); color amarillo (en tono bajo), color rojo y color blanco.
- Tela blanca o el color de su preferencia, que sirva para bordar.
- Retazo de tela de fieltro negra, será para la base final del bordado.
- Un cordón naranja.
- Aro para bordar.
- Tijera.
- Agujas
Primero busqué una imagen de referencia de la esfera N°4, ya que con esta se identifica mejor el personaje principal del anime. La siguiente imagen fue la que más me gustó, no se ve tan plana y necesitaba una que jugará con los tonos, para darle más profundidad al bordado.
Luego, hice el dibujo en la tela blanca, aquí para trazar la forma circular, me guie con un objeto en casa, pues el hacer los círculos no me salen derechos. Al tener ya trazado el dibujo, ya con sus 4 estrellas, prensé la tela con un aro de bordar; el tamaño de la tela es de uno 15cm de largo por unos 25cm de ancho, aproximadamente.
Ahora sí, con la técnica paso atrás, tracé toda la orilla del círculo, usando las 6 hebras de hilo naranja para bordar. En total, al inicio hice entre 3 a 4 vueltas, aclarando que este paso atrás, el trazo que sale lo hago disforme, es decir como si fuesen una especie de ladrillo, siento que genera una mayor textura al bordado.
Posterior a ello, con el hilo naranja más claro, le hice 2 vueltas de bordado con el paso atrás y con el hilo naranja más oscuro que tenia a la mano, en la parte inferior, bordé como una pequeña media luna, simulando un efecto sombra.
Ya al tener esos tonos, proseguí bordando con el naranja original, observando que la imagen de referencia tenia como un pequeño circulo amarillo, en la esquina izquierda superior, por lo que decidí bordar eso primero, antes de continuar con toda la esfera. Al tener ya realizada esa parte, ya aquí si continué toda la esfera hasta el final.
Continuando con la misma, bordé con el hilo rojo las estrellas, no lo hice al inicio, porque me ha pasado que puede el hilo alrededor lo traga, así que, el que esta en un primer plano, por así decirlo, lo dejo al final. Al finalizar lo que sería la parte naranja, le borde en toda la orilla con hilo ovillo negro, pero no me gustó, así que se lo quité, terminando por bordarle con hilo blanco, ese reflejo en la parte superior que tiene la imagen de referencia.
Finalizando toda la parte del bordado, tomé un retazo de fieltro negro que tenia a la mano, haciendo un circulo un poco más grande al de la esfera; ya cortada la esfera, la cosí al fieltro negro y, antes de finalizar la costura, le introduje un cordón naranja, para que pueda sujetarse y así quedó, saqué dos círculos de fieltro, uno donde puse el bordado y el otro para un mejor acabado y no se viera el acabado de la costura anterior. La esfera me salió de un tamaño de 6,5 cm de diámetro, pero pueden hacerla del tamaño que desean.
Este fue el resultado, ¿Qué les pareció? Me sentí muy satisfecha, claro siempre se puede mejorar, pero realmente deseé hacer este homenaje a este gran artista que siempre será recordado.
Gracias por leer mi post. Espero que les haya gustado. Estaré atenta a responder sus comentarios. Pueden visitar mi blog, seguir mis contenidos y redes sociales
0
0
0.000
I’m so sorry for your loss
The result is really cool and it’s so nice of your pay your tribute to first anime creator
Thank you very much 😊. Hugs 🤗
Muchas gracias 😊. Abrazos 🤗
You’re welcome
¡Hola Yasleny! Que linda manera de rendir homenaje al creador de un comic que seguramente marcó a toda una generación. Muchas personas lo despidieron con mucha emoción y sentimiento. Me gustó tu idea de hacer este bordado, quedó muy linda. Te felicito 💕
Si, fue un gran golpe para el mundo del anime, más por las historias que siempre brindaba. Muchas gracias. Abrazos 🤗
Yes, it was a big blow to the anime world, more for the stories it always provided. Thank you very much. Hugs 🤗