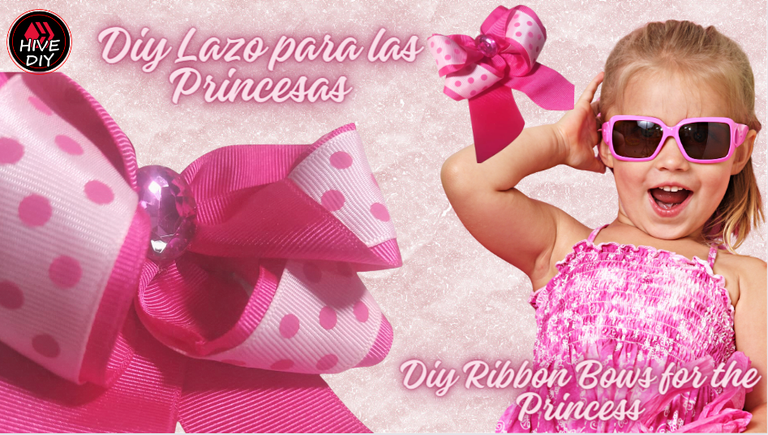
Diy Lazos para las Princesas / Diy Ribbon Bows fot the Princess
Pues si, se hacer lazos, tocados y algunas cosas más. Todo comenzó cuando tuve a mis hijas y a uno como mamá se le despierta una sensibilidad y una creatividad que no estaba antes. Yo le compraba cosas a mis hijas, pero sobre todo quería hacerlas, por eso siempre iba a las mercerías para comprar materiales, y por supuesto que siempre compraba demás.
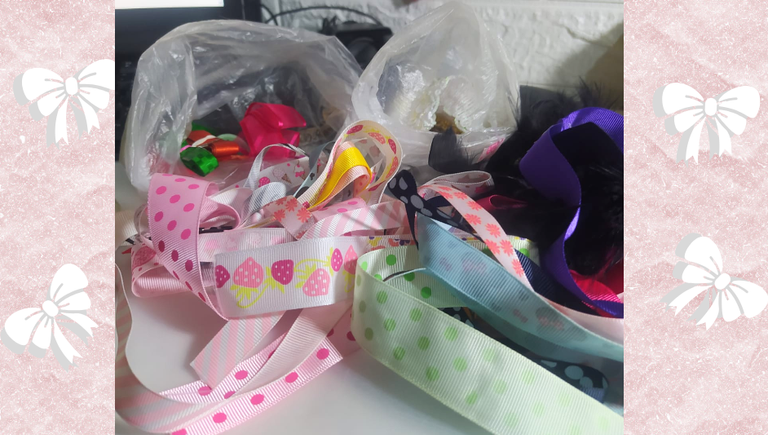
Esto no estaba del todo mal, porque siempre que mis hijas tenían una fiesta o un compartir, un acto en el colegio, o en danza, pues podía resolver sin salir de casa, porque disponía de un cierto stock de materiales. Hoy estuve revisando mi bolsa de cintas y tenía este pequeño desastre a mi disposición, y entre todos escogí dos cintas y una piedra acrílica para realizar este diseño de Lazo para princesa, que esta vez me toca regalárselo a mi sobrina.
Well yes, I know how to make bows, headdresses and some other things. It all started when I had my daughters and as a mother a sensitivity and creativity is awakened that was not there before. I bought things for my daughters, but above all I wanted to make them, that's why I always went to haberdashery stores to buy materials, and of course I always bought more.
This was not at all bad, because whenever my daughters had a party or a sharing, an event at school, or at a dance, I could solve it without leaving home, because I had a certain stock of materials. Today I was going through my bag of ribbons and I had this little disaster at my disposal, and together I chose two ribbons and an acrylic stone to make this Princess Bow design, which this time I have to give to my niece.
Siempre es bueno trabajar con lo que tenemos en casa, pero hay un material que te recomiendo especialmente para la confección de lazos y tocados para el cabello, y es el hilo de tapicería.
Realmente es un plus para garantizar que tus creaciones no se van a romper o abrir, ya que el hilo de tapicería es muy fuerte, a pesar de lo delgado que es, ya que lo puedo utilizar con mi aguja normal. Los demás materiales, es importante lo que tengas y también lo que esté de moda es importante, hay materiales que tienen diseños de algún artista o dibujo de moda, que si los guardas mucho pueden perder vigencia.
It is always good to work with what we have at home, but there is a material that I especially recommend for making hair bows and headdresses, and that is tapestry thread.
It really is a plus to guarantee that your creations are not going to break or open, since the tapestry thread is very strong, despite how thin it is, since I can use it with my normal needle. The other materials, what you have is important and what is fashionable is also important, there are materials that have designs from some artist or fashion drawing, which if you keep them for too long they can lose validity.

- Cinta unicolor
- Cinta con diseño
- Silicón caliente, tijera y yesquero
- Piedra acrílica
- Pinza de cabello estilo caimán
- Clips de presión y alfileres
- Unicolor ribbon
- Tape with design
- Hot silicone, scissors and tinder
*Acrylic stone - Alligator style hair clip
- Snap clips and pins

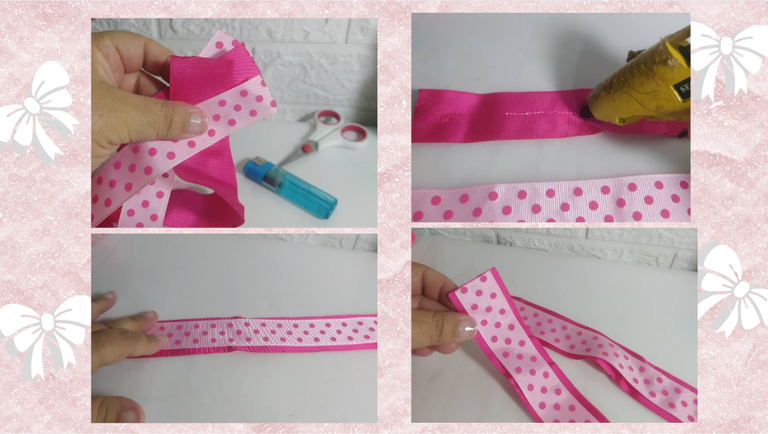
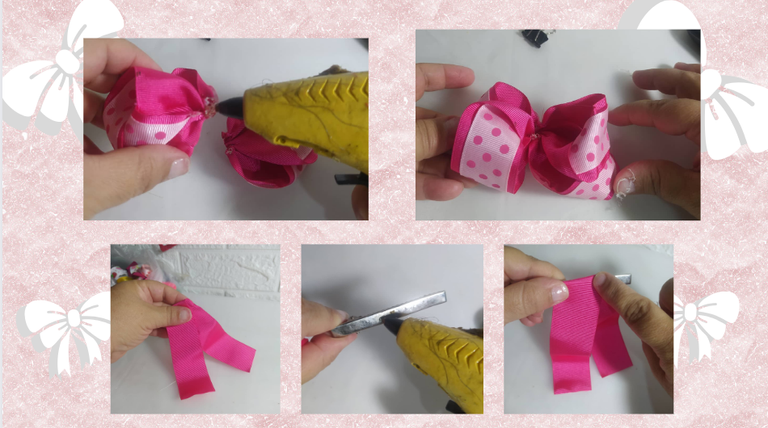
Este lazo o pequeño tocado solo necesito dos cintas una unicolor y otra con un diseño, de cada una voy a necesitar dos tiras de 27 cms cada una, para un total de 4 cintas, que serían 2 unicolor y 2 de diseño.
Lo primero que hice fue colocar silicón caliente en las cintas unicolor y pegar las cintas con diseño, esto haré que el diseño del lazo se vea estupendo por todos sus lados.
For this bow or small headdress I only need two ribbons, one unicolor and one with a design, of each one I will need two strips of 27 cm each, for a total of 4 ribbons, which would be 2 unicolor and 2 design.
The first thing I did was place hot silicone on the unicolor ribbons and glue the design ribbons, this will make the bow design look great on all sides.
Ahora marco la mitad de las cintas con un alfiler, que hago pasar por todo su ancho.
Este primer movimiento que voy a realizar es muy fácil: Ubicándome en la mitad o alfiler, doblo un extremo de la cinta hacia adelanta, y el otro extremo lo doblo hacia atrás, como se ve a continuación:
Now I mark half of the ribbons with a pin, which I pass across its entire width.
This first movement that I am going to perform is very easy: Placing myself in the middle or pin, I fold one end of the ribbon forward, and I fold the other end backwards, as seen below:
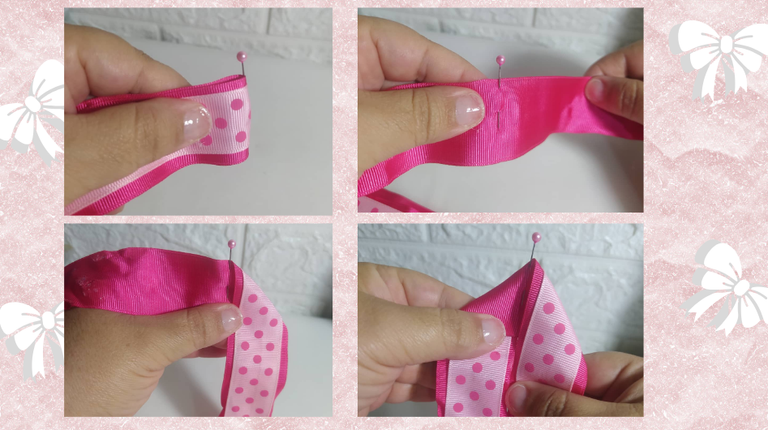
El siguiente movimiento te lo voy a explicar con un gif, pero se trata de cruzar los dos extremos y con esto logro como una esquina. Es importante esto, que ya es lo que le da dimensionalidad al lazo.
I am going to explain the next movement to you with a gif, but it is about crossing the two extremes and with this I achieve like a corner. This is important, as it is what gives dimensionality to the bond.
Nuevamente con un gif te explico que, cada punta de cada extremo, simplemente la pasas para atrás, y como ves todo queda muy exacto.
Again with a gif I explain that, each tip of each end, you simply pass it to the back, and as you see everything is very exact.
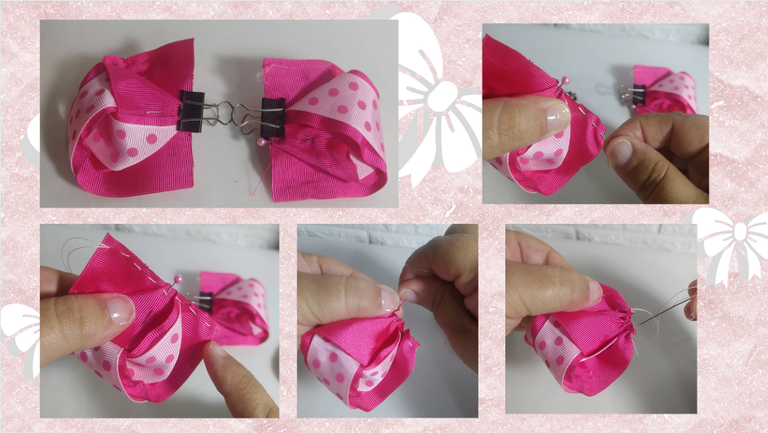
Me ayudo de unos clips de presión para agarrar bien todo lo que hice anteriormente. Lo cual repetí con la otra cinta, y tengo dos piezas.
Voy a retirar el clips de presión, porque ahora voy a fijar cada pieza con puntadas a mano. Hago unas puntadas rectas desde el inicio de un extremo hasta el otro, luego halo el hilo para que todo se arruche y hago un nudo al final, para asegurar todo lo que hice. Esto lo hago con total confianza, ya que el hilo de tapicería no se va a romper, es una garantía total.
I use some pressure clips to help me get a good grip on everything I did previously. Which I repeated with the other tape, and I have two pieces.
I'm going to remove the snap clips, because now I'm going to secure each piece with hand stitches. I make some straight stitches from the beginning of one end to the other, then I pull the thread so that everything bunches up and I tie a knot at the end, to secure everything I did. I do this with complete confidence, since the upholstery thread is not going to break, it is a total guarantee.
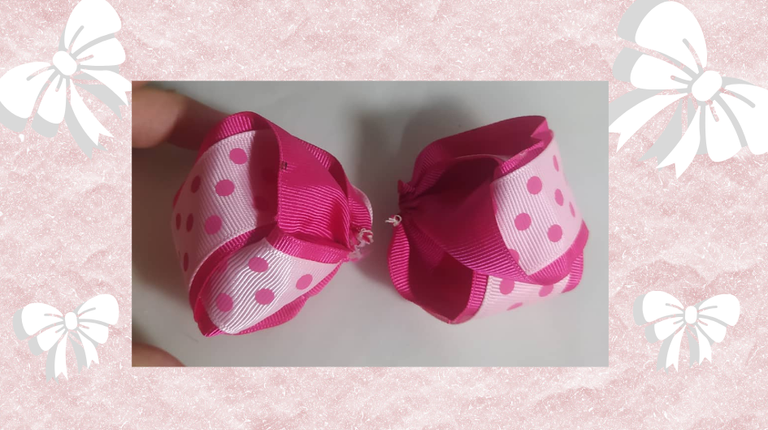
Ya tengo las dos piezas anudadas perfectamente. El próximo paso será, unirlas.
I already have the two pieces knotted perfectly. The next step will be to unite them.
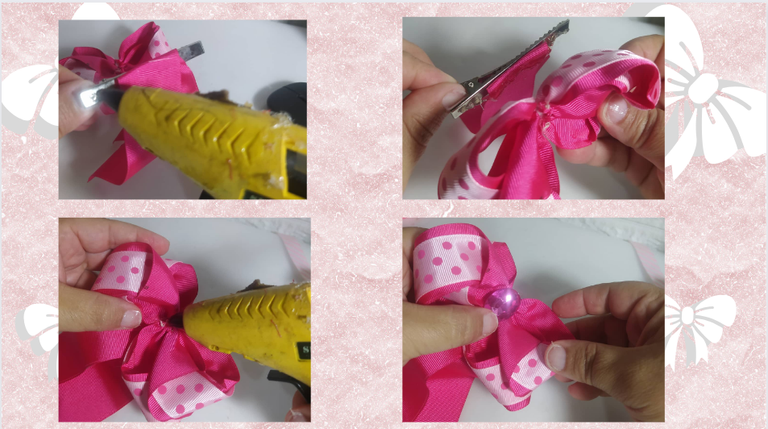
Para unirlas uso la pistola de silicón caliente, y estos materiales responden muy bien a este pegamento caliente, quedará muy asegurado.
Ahora en mi pinza de caimán, voy a colocar un trozo de cinta unicolor que me quedó.
To join them I use the hot glue gun, and these materials respond very well to this hot glue, it will be very secure.
Now on my alligator clip, I'm going to place a piece of unicolor tape that I had left.
Ahora coloco el lazo que hice sobre el trozo de cinta. y para en el centro decidí colocar una piedra acrílica que su color queda muy bien.
Now I place the bow I made over the piece of ribbon. And in the center I decided to place an acrylic stone whose color looks very good.
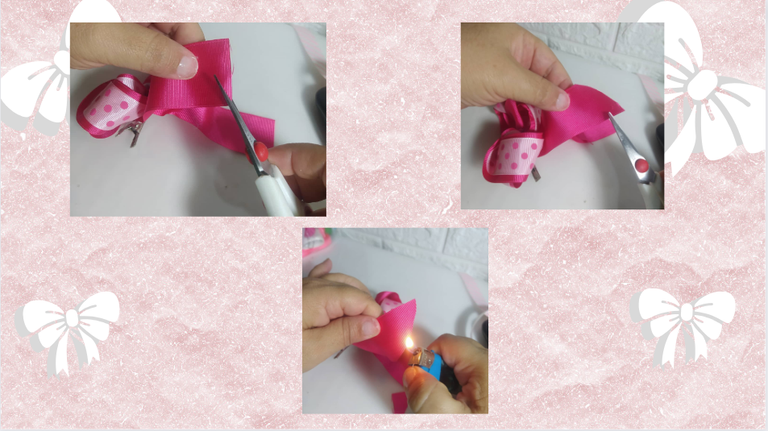
Para terminar, le hago un diseño a las puntas y las quemo con el yesquero para garantizar que no se deshilachen.
To finish, I design the ends and burn them with the tinderbox to ensure they don't fray.
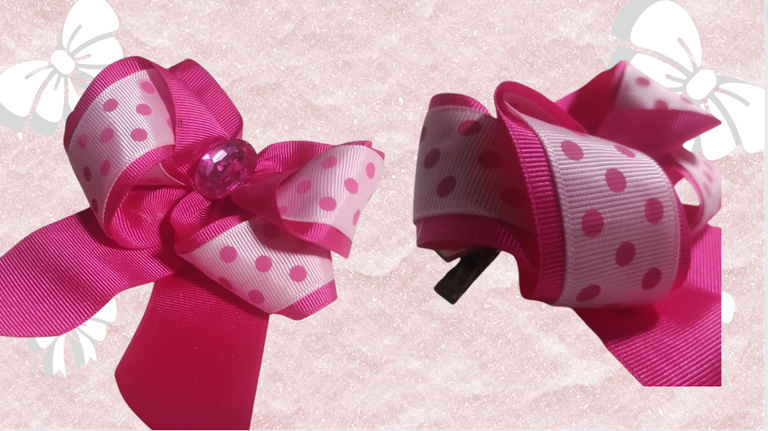
Esto es todo el trabajo de este diseño. Lo hice durante mucho tiempo, me encantaba que lo hacía muy rápido y lograba un hermoso diseño que tiene mucho interés por el volumen de todas las vueltas de las cintas.
El diseño de la cinta es lo que hará diferente y especial, y también la combinación de colores.
This is all the work of this design. I did it for a long time, I loved that I did it very quickly and achieved a beautiful design that has a lot of interest due to the volume of all the turns of the ribbons.
The design of the ribbon is what will make it different and special, and also the color combination.
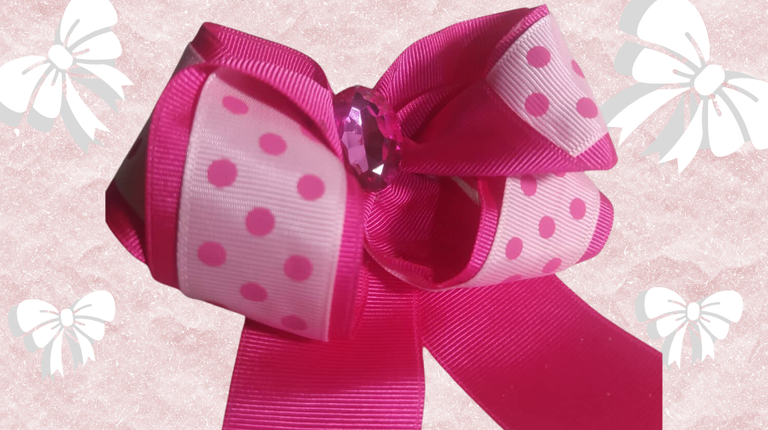
En estas imágenes pueden ver que realmente da mucho volumen. Este diseño puede hacerse de dos piezas si te gusta hacer dos colitas a las niñas, también este diseño se puedo usar uno solo para una sola cola, dependiendo del peinado que quieres decorar con lazos. Si te decides por dos, no te preocupes ya que es muy rápido de hacer.
In these images you can see that it really gives a lot of volume. This design can be made in two pieces if you like to make two ponytails for the girls, this design can also be used alone for a single ponytail, depending on the hairstyle you want to decorate with bows. If you decide on two, don't worry as it is very quick to make.
Cero que voy a realizar más lazos en esta comunidad, ya que tengo que aprovechar los materiales que tengo. Y aunque mis hijas ya están grandes, siempre puedes regalar a una sobrina o incluso lo poner en el grupo de WhatsApp y seguro lo puedes vender, así que igualmente tienes una oportunidad de emprendimiento.
I'm certainly not going to make more connections in this community, since I have to take advantage of the materials I have. And although my daughters are already grown, you can always give it to a niece or even put it in the WhatsApp group and you can surely sell it, so you still have an entrepreneurial opportunity.
---------- ❤️❤️❤️❤️ ----------
Las fotos las tomé con mi teléfono Redmi Note 8
Apps que utilicé:
Canva para la Portada y Collage
Utilicé el Traductor Deepl
Mi redes sociales:
Discord: YennysYaneth#0189
Twitter: @yennysferm
Instagram: @yennysyaneth
---------- ❤️❤️❤️❤️ ----------
I took the photos with my phone Redmi Note 8
Apps I used:
Canva for Cover and Collage
I used Deepl Translator
My social networks:
Discord: YennysYaneth#0189
Twitter: @yennysferm
Instagram: @yennysyaneth
Me encantan estos lazos. No conocía esta forma de hacer la parte del moño ...me encantó. Tengo que hacer unos para mi princesa. Gracias por compartir
!discovery 40
Gracias amiga por tu comentario, me gusta cuando Creadores de Contenido tan especiales como tú, valoran mi post. Es un halago
Hay que usar esos materiales que acumulamos, y también desempolvar las técnicas que sabíamos hacer y que tenemos por ahí dormidas en el recuerdo.
This post was shared and voted inside the discord by the curators team of discovery-it
Join our Community and follow our Curation Trail
Discovery-it is also a Witness, vote for us here
Delegate to us for passive income. Check our 80% fee-back Program
Yay! 🤗
Your content has been boosted with Ecency Points, by @hive-130560.
Use Ecency daily to boost your growth on platform!
I did caught a glimpse of how to do this. Thank you for adding those gifs it makes understanding this better, I have wanted to equally learn how to make hair now ties like this….
¡Felicidades! Esta publicación obtuvo upvote y fue compartido por @la-colmena, un proyecto de Curación Manual para la comunidad hispana de Hive que cuenta con el respaldo de @curie.
Si te gusta el trabajo que hacemos, te invitamos a darle tu voto a este comentario y a votar como testigo por La Colmena.
Si quieres saber más sobre nuestro proyecto, te invitamos a acompañarnos en nuestro servidor de Discord.
Muy agradecida con @la-colmena y @curie por su apoyo y acompañamiento a los Creadores de Contenido
¡¡¡Buen trabajo!!! Gracias por publicar tu excelente contenido en Hive Diy.
Tu comunidad necesita de tu apoyo, Vota Hive DIY como Wintess aquí
Vota en el siguiente Link:
https://vote.hive.uno/@hivediy
Que buen tutorial amiga, está muy bello ese lazo y más en esos colores tan lindos, parece estilo Barbie. Yo hasta ahora solo he hecho lazos de foami pero debo ponerme a hacerlo con cinta, este se ve bien para empezar 🤗
Qué bonitoss
Gracias amiga