Diy Organizador de Escritorio con Reciclaje (Eng / Esp)

Recycling a cardboard box I made this Desktop Organizer, in which I have my notebooks near my work area, organized and creating a nice environment. I always use these notebooks because they are my Hive Blog notes such as statistics, ideas, projects, notes of materials to buy, others are my passwords and personal agenda, other notes of classes and courses I have done, etc.. That is, I use them every day, so I made this Organizer that I placed on my desk next to the monitor in an ideal space for it, since it is a thin space where I can not place anything else.
Reciclando una Caja de cartón realicé este Organizador de Escritorio, en el que tengo mis libretas cerca de mi área de trabajo, organizadas y creando un lindo ambiente. Estas libretas siempre las utilizo ya que son de mis Notas de Hive Blog como estadísticas, ideas, proyectos, notas de materiales que debo comprar, otras son de mis claves y agenda personal, otra de notas de clases y cursos que he realizado, etc. Es decir, que todos los días las utilizo, por eso realicé este Organizador que lo ubiqué en mi escritorio a un lado del monitor en un espacio ideal para él, ya que es un espacio delgado donde no puedo colocar otra cosa.

These notebooks and planners that I use every day, I like them to be of a medium size because I eventually take them and carry them with me in my purse, and then place them on my desk again, they are very easy to use and carry. This organizer is also very nice because its size, ideal for this type of notebook makes it very discreet and does not take up much space on the desk.
Estas libretas y agendas que utilizo todos los días, me gustan que sean de un tamaño mediano porque eventualmente las tomo y llevo conmigo en mi cartera, y luego las coloco en mi escritorio de nuevo, son muy fáciles de usar y transportar. Este organizador es muy lindo también ya que su tamaño, ideal para este tipo de libreta lo hace muy discreto y no ocupa mucho espacio en el escritorio.

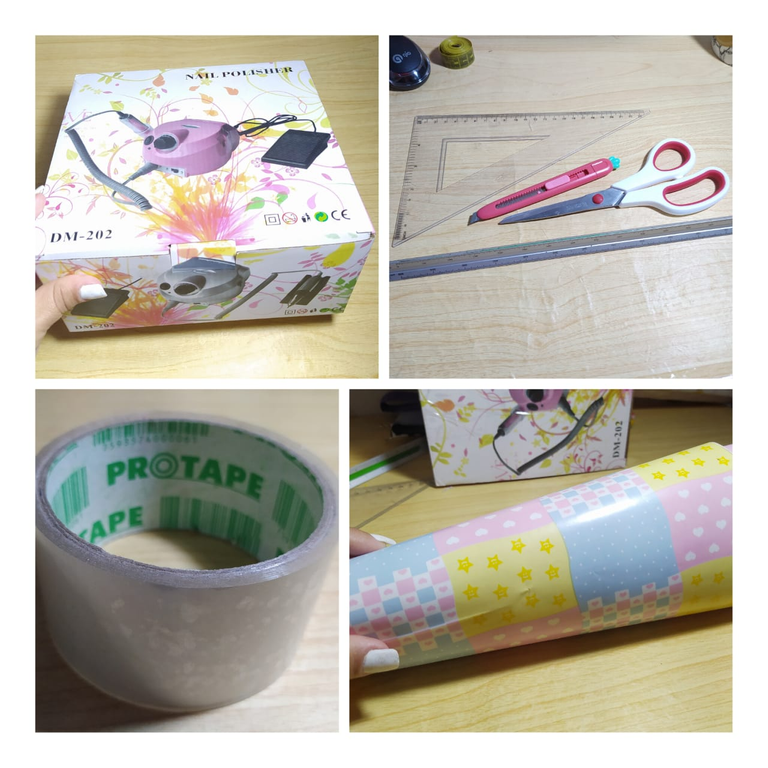
For this project I used a cardboard box from a manicure kit I bought a few months ago and as old age gave me and now I keep boxes all the time, I had it available to make a craft, I really liked it because it is a very firm and hard material, what I need so I can store my agendas.
Para este proyecto ocupé una caja de cartón de un equipo de manicure que compré hace unos meses y como la vejez me dio y ahora ando guardando cajas todo el tiempo, pues la tenía disponible para hacer una manualidad, me gustó mucho porque es de un material muy firme y duro, lo que necesito para que pueda almacenar mis agendas.
- Strong recycled cardboard box
- Ruler, scissors, cutter and pen
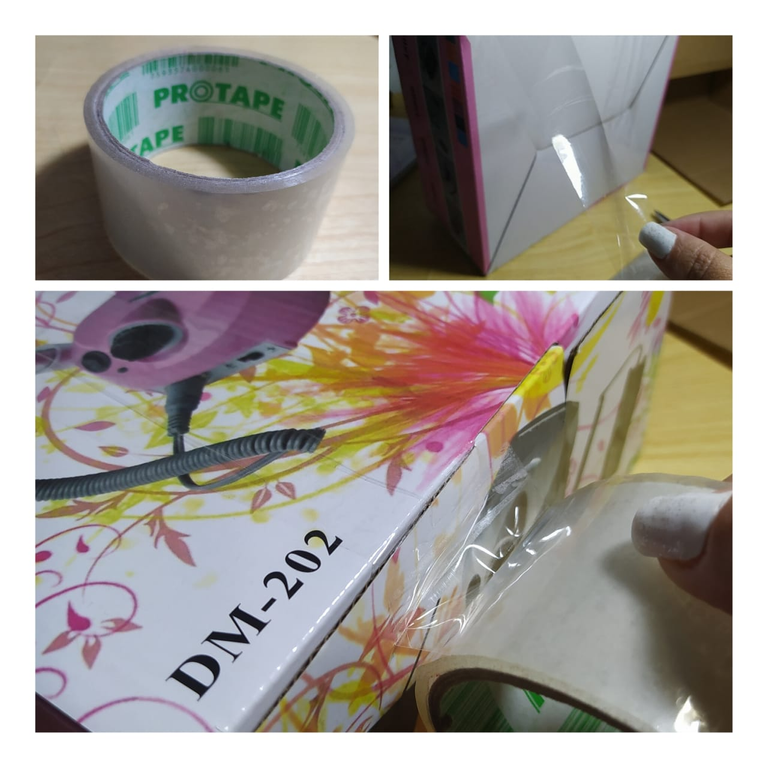
- Transparent adhesive tape
- Contact paper with design
- Caja de cartón reciclada que sea fuerte
- Regla, tijera, cuter y bolígrafo
- Cinta adhesiva transparente
- Papel contac con diseño

I checked the box well, removed the divisions inside. This box, as I mentioned before, is very firm and strong cardboard, also the outside is made of a plasticized material, which is very good for the contact paper to adhere to, and it is in very good condition.
Revisé bien la caja, retiré las divisiones que tenía adentro. Esta caja como mencioné anteriormente, es muy firme y fuerte el gramaje del cartón, además por fuera es de un material plastificado, lo cual es muy bueno para que adhiera el papel contact, y está en muy buen estado.
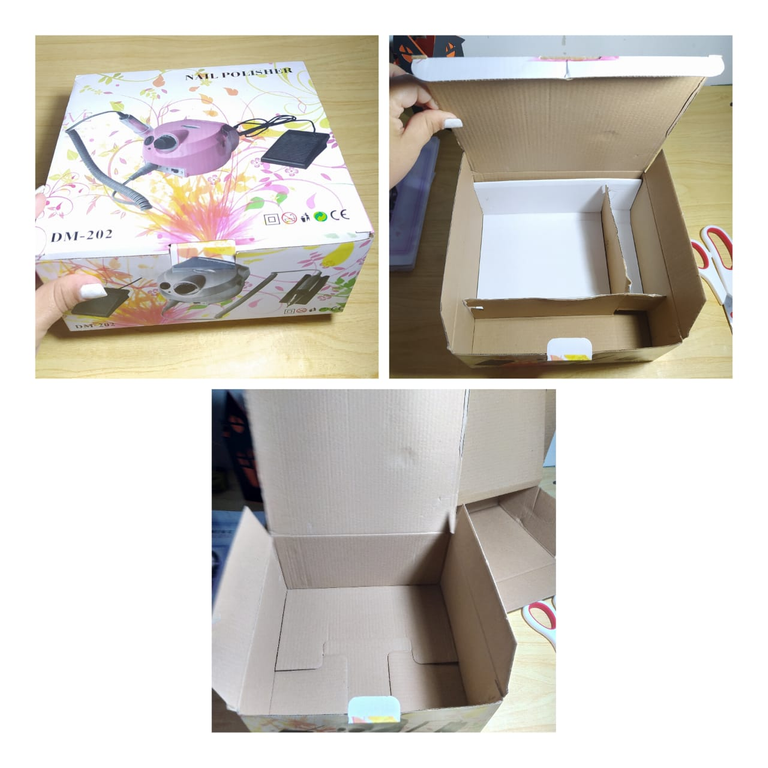
Since the organizer requires me to make cuts in the box, I am going to close it and reinforce it with adhesive tape all around, since cutting it could disassemble one side that currently has the opening function.
Ya que el organizador amerita que haga cortes en la caja, la voy a cerrar y a reforzar con cinta adhesiva por todo el alrededor, ya que al cortarla se pudiera desarmar por un lado que actualmente tiene la función de abrir.
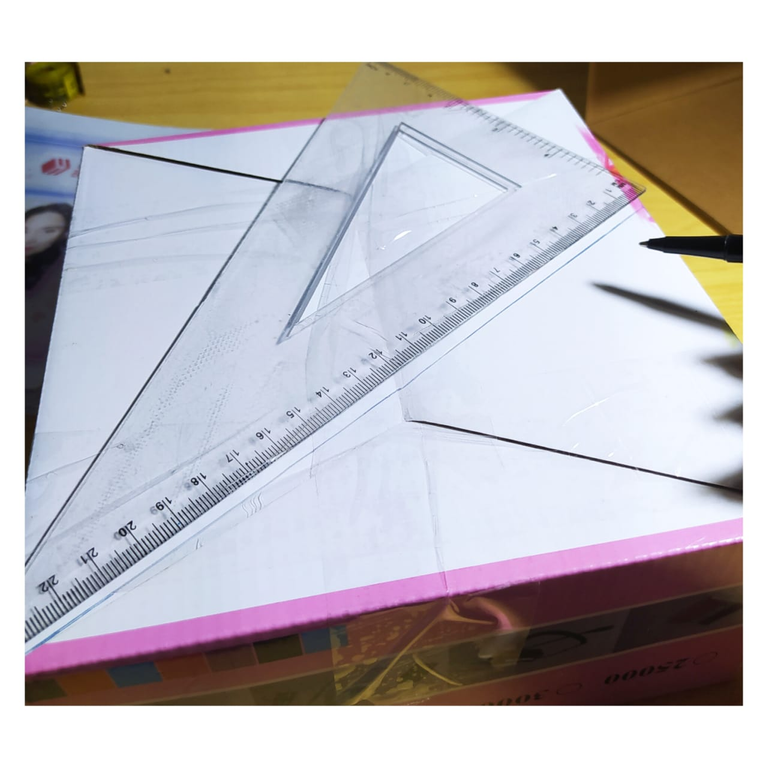
According to the design I thought of, I have designated a front and defined it to have a height of 8cms, so at that point I draw a line with the square to make sure it is straight.
De acuerdo al diseño que pensé, he designado un frente y lo definí para que tuviera una altura de 8cms, de manera que en ese punto trazo una línea con la escuadra para garantizar que esté derecha.
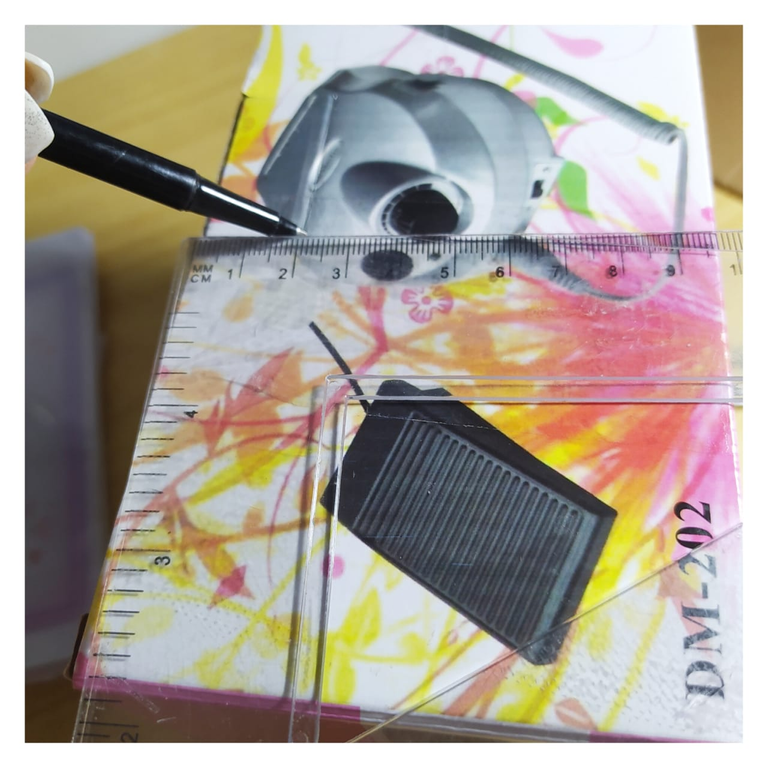
Now, on what will be the sides I make a straight line from the 8cms point of the front towards the top corner.
Ahora, en lo que serán los lados hago una línea recta desde el punto de los 8cms del frontal hacia la esquina superior.
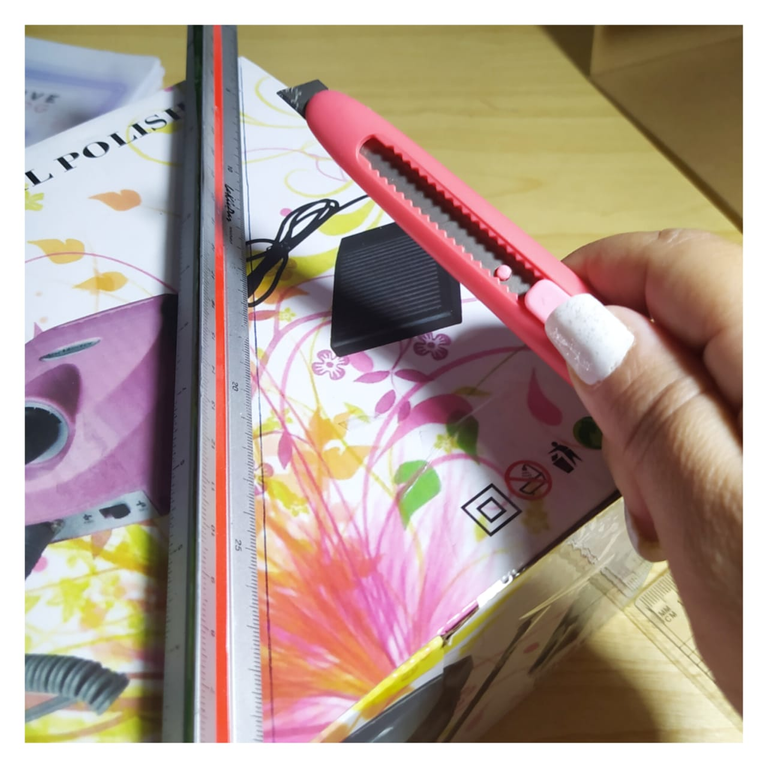
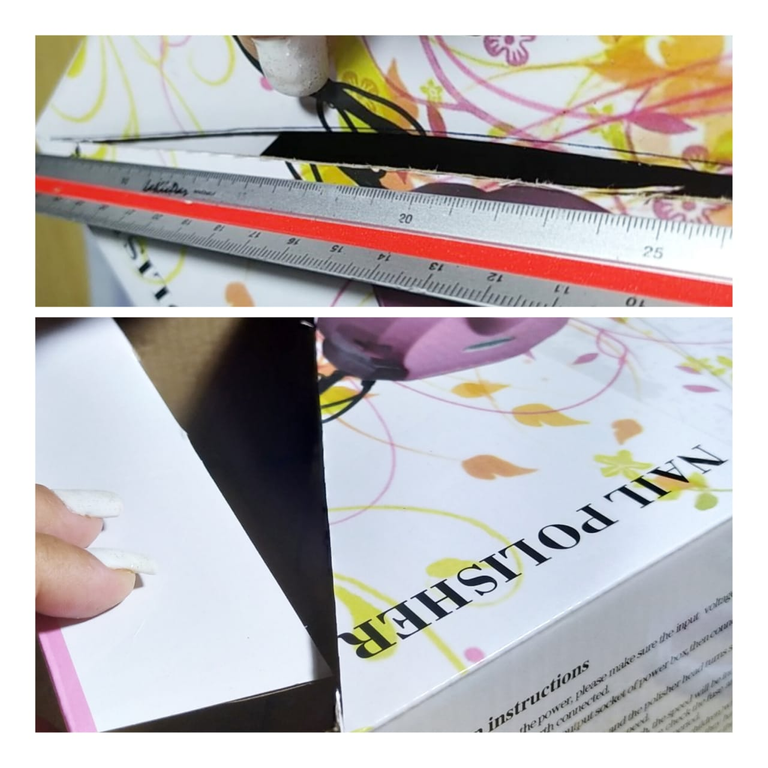
In total there were 3 lines, 1 on the front and 2 on the sides. I am going to cut them with the cutter, making smooth and repeated cuts so that the cardboard does not tear and they are clean cuts, I also use a metal ruler so that the cutter does not damage the plastic ruler, it is preferable this way.
En total fueron 3 líneas que son 1 frontal y 2 laterales. Éstas las voy a cortar con el cuter, haciendo cortes suaves y repetidos para que no se rasgue el cartón y sean cortes limpios, además utilizo una regla de metal para que el cuter no me dañe la regla plástica, es preferible así.
I separate the pieces I cut, and as you can see they were clean cuts.
Separo las piezas que corté, y como se puede apreciar fueron cortes limpios.
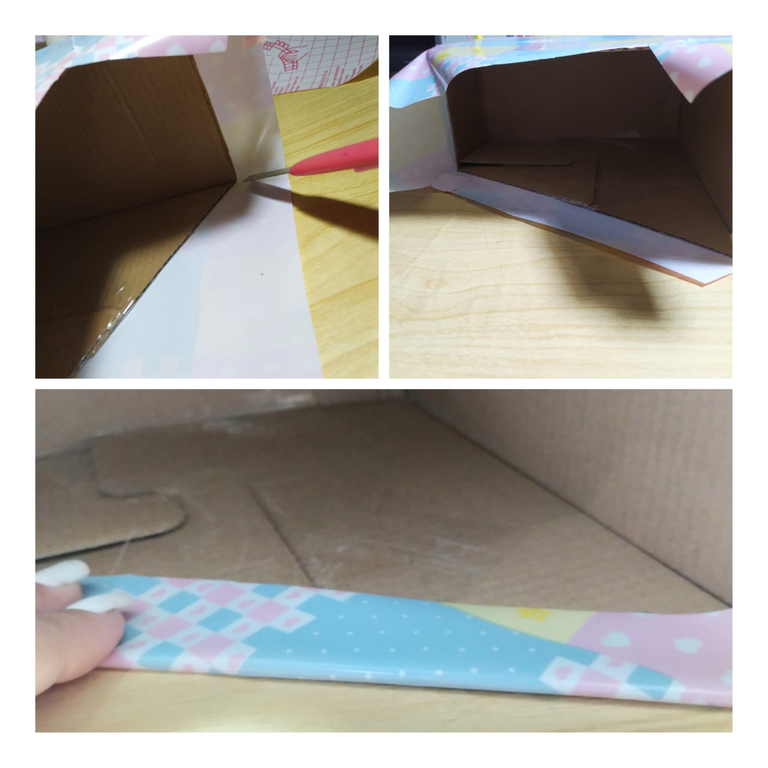
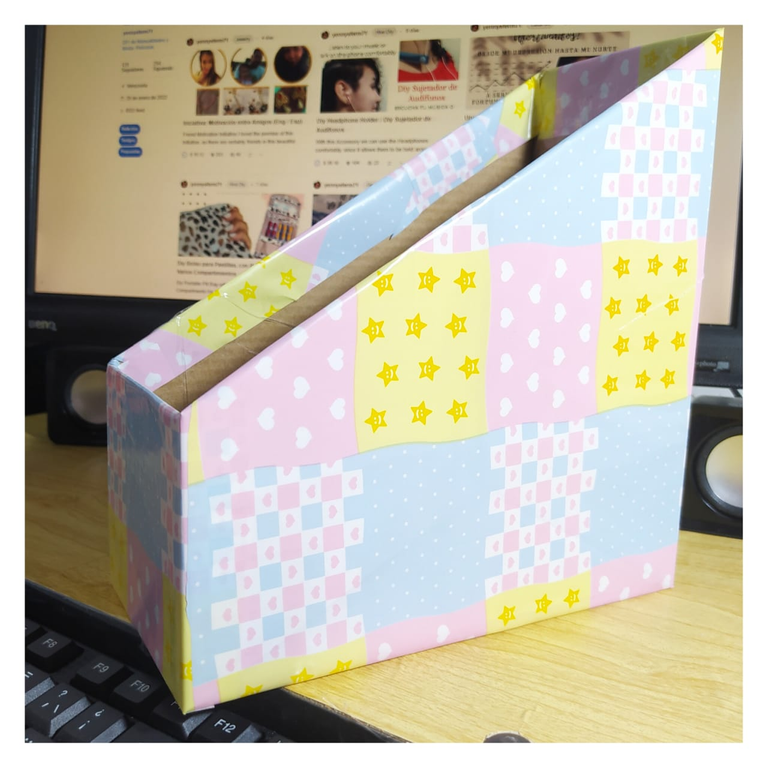
This is what the box should look like with the 3 cuts made. Note that the inside of the box must also be reinforced with the transparent adhesive tape, to ensure that the box will not eventually fall apart.
Así debe quedar la caja con los 3 cortes realizados. Fíjate que efectivamente hay que reforzar por dentro también con la cinta adhesiva transparente, para garantizar que no se vaya a desarmar la caja eventualmente.

Now I work with the contact paper, I separate and start lining the front part of the box where the box is lower in height.
Ahora trabajo con el papel contact, separo y comienzo a forrar por la parte delantera o frontal donde es más baja de altura la caja.

Just as we cover a notebook, we use a piece of cloth or a stocking to flatten the paper so that there are no wrinkles or air pockets.
Tal y como forramos un cuaderno nos ayudamos de un trozo de tela o una media para ir aplanando el papel de manera que no queden arrugas o bolsas de aire.

I cut the corners with the cutter, and glue an edge towards the inside, trying to make it more or less the same width, for aesthetic reasons only.
Las esquinas las corto con el cuter, y pego un borde hacia adentro, tratando que sea más o menos del mismo ancho, por un tema de estética únicamente.
The explanation is quick, the time is taken by lining it little by little to make it look as good as possible. I've already finished this step by step, and it looks really beautiful, I loved it.
La explicación es rápida, el tiempo se lo toma uno forrando poco a poco para hacer que quede lo mejor posible. Fíjate que ya se terminó este paso a paso, y se ve realmente bello, a mi me encantó.
And to think that one throws away many boxes without giving them a valuable use as this idea, which solves a problem of organization and space, with a box that could have simply been discarded. Well... others throw them away, not me because I'm the crazy one who keeps boxes...But as the saying goes: He who keeps, always has..
Y pensar que uno bota muchas cajas sin darle una utilidad valiosa como esta idea, que me resuelve un problema de organización y espacio, con una caja que se pudo haber simplemente desechado. Bueno... que botan otros, yo no porque yo soy la loca que guarda cajas...Pero como dice el dicho: El que guarda, siempre tiene.

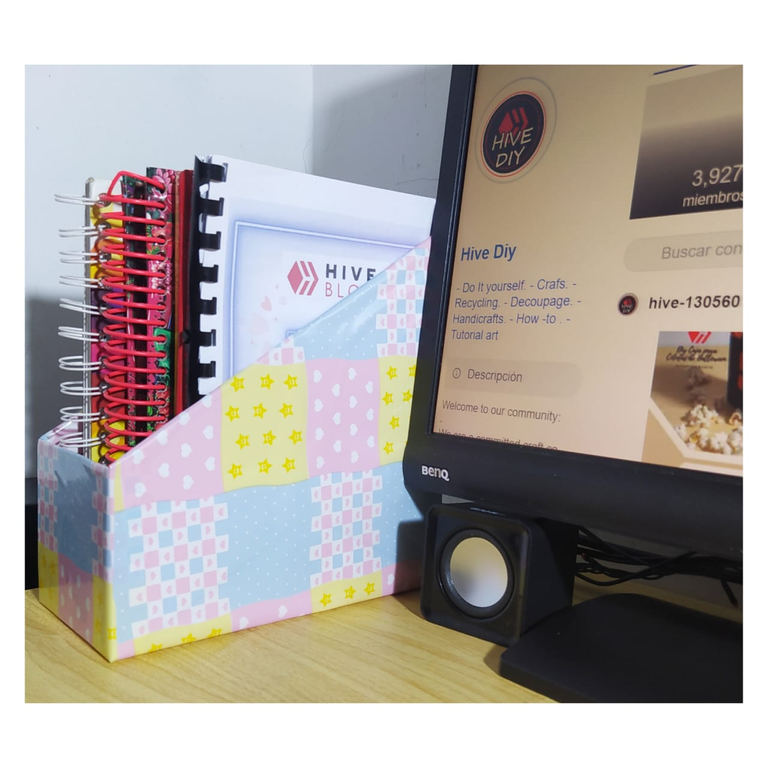
Here I present them with my notebooks and agendas, to one side of the monitor, I could still place it further back and it would take up less useful space for my work, it looks very beautiful.
Aquí se las presento con mis libretas y agendas, a un lado del monitor, podría aún ubicarla más atrás y ocuparía menos espacio útil para mi trabajo, se ve muy hermosa.
I hope you liked this Tutorial, surely you already knew it, but sometimes the question is not whether we know something or not, because in fact sometimes we know it but we are not ready to use that knowledge and definitely do something practical that helps us and works. But we must be encouraged, especially with tutorials this simple that add to our organization and comfort.
Deseo que te haya gustado este Tutorial, seguramente ya lo sabías, pero a veces la cuestión no es si sabemos algo o no, porque de hecho a veces lo sabemos pero no nos disponemos a utilizar ese conocimiento y definitivamente hacer algo práctico que nos ayuda y funciona. Pero hay que animarse, sobre todo con tutoriales así de sencillos que nos suman a nuestra organización y comodidad.
Thank you for reading my post, I cordially invite you to my next publication.
Best regards...
Gracias por leer mi post, los invito cordialmente a mi próxima publicación.
Un abrazo...
---------- ❤️❤️❤️❤️ ----------
I took the photos with my Redmi Note 8 phone
Apps I used:
Canva for the Cover
Inshot for the Collage
I used Deepl Translate
My social networks:
Discord: YennysYaneth#0189
Twitter: @yennysferm
Instagram: @yennysyaneth
---------- ❤️❤️❤️❤️ ----------
Las fotos las tomé con mi teléfono Redmi Note 8
Apps que utilicé:
Canva para la Portada
Inshot para los Collage
Utilicé el Traductor Deepl
Mi redes sociales:
Discord: YennysYaneth#0189
Twitter: @yennysferm
Instagram: @yennysyaneth
https://twitter.com/1484196455719915527/status/1582596266739236865
The rewards earned on this comment will go directly to the people sharing the post on Twitter as long as they are registered with @poshtoken. Sign up at https://hiveposh.com.
Te quedó hermoso y muy prolijo. Me encanta también el papel con el que lo forraste!!😍 es una idea super útil, gracias por compartirla 🌺
Gracias @imena me alegra que te guste, gracias a ti por pasar por aquí 🤗🤗
Me gusto mucho este organizador. Necesito unos cuantos, tan fácil que se puede hacer y por ser vertical no solo organiza sino que permite administrar mejor el espacio. Tengo muchas cosas distribuidas en los diferentes espacios donde estan neudtras computadoras y nada está en orden. Creo que me tope con tu publicación en el momento apropiado y no se si sabías que una de las claves del éxito es el orden. Yo si lo sabía pero me hace falta trabajar mucho en esto, excelente herramienta!
Gracias @marbrym tienes toda la razón, porque he notado que cuando mis cosas están ordenadas llegan mejor las ideas, creo que nos genera una tranquilidad que hace propicia la creatividad.
Un abrazo amiga 🤗🤗
Así es amiga, así que gracias por darnos ideas para mantener en orden nuestros espacios
Congratulations @yennysferm71! You have completed the following achievement on the Hive blockchain and have been rewarded with new badge(s):
Your next target is to reach 1250 replies.
You can view your badges on your board and compare yourself to others in the Ranking
If you no longer want to receive notifications, reply to this comment with the word
STOPSupport the HiveBuzz project. Vote for our proposal!
Yay! 🤗
Your content has been boosted with Ecency Points, by @yennysferm71.
Use Ecency daily to boost your growth on platform!
Support Ecency
Vote for new Proposal
Delegate HP and earn more
Te quedó muy hermoso, y bastante útil la verdad, a veces tengo todas mis agendas en todos lados y al mismo tiempo en ningún lado JAJAJA, gracias por esta gran idea
jajaja me pasaba igual @vaneenieves pero esta sencilla manualidad aporta orden y la haces muy, muy rápido. Deseo que te animes a hacerla en un momentito, y gracias por pasar por aquí.
Un abrazo 🤗🤗
Hola linda! ✨
Te quedó realmente precioso y súper fácil de hacer.
Me viene muy bien esta idea,pues yo también tengo mis libretas con contraseñas, apuntes, materiales que necesito comprar y siempre la pierdo. Viene súper bien para tenerlos organizados.
Gracias por compartir linda, saludos. ✨😊👋🏻
La vieja escuela no falla, tener agendas para mí no pasa de moda. A veces leo experiencias de otros compañeros que formatearon la pc y perdieron las claves y cosas así, y hay cosas que hay que tenerlas muy respaldadas. A su vez, tenerlas en un lugar organizado es valioso en el momento que las necesitamos.
Gracias por pasar por aquí amiga... Un abrazo 🤗🤗
Hola muñeca, que lindo te quedo este organizador de libretas!
Que buena idea, también tengo mis libreta de apuntes por allí..
En eso de guardar cajas me identificó jajaja ✨💜
Saludos cariñosos!!
Hola amiga @alizmarpaola me alegra que te guste. Esto fue muy rápido y sencillo, su valor está en lo útil que es tener las agendas y notas en un lugar, eso es un gran aporte al orden y armonía de nuestro espacio de trabajo. Me alegra que te haya gustado, y te agradezco por pasar por aquí.
Un abrazo 🤗🤗
¡Enhorabuena!
✅ Has hecho un buen trabajo, por lo cual tu publicación ha sido valorada y ha recibido el apoyo de parte de CHESS BROTHERS ♔ 💪
♟ Te invitamos a usar nuestra etiqueta #chessbrothers y a que aprendas más sobre nosotros.
♟♟ También puedes contactarnos en nuestro servidor de Discord y promocionar allí tus publicaciones.
♟♟♟ Considera unirte a nuestro trail de curación para que trabajemos en equipo y recibas recompensas automáticamente.
♞♟ Echa un vistazo a nuestra cuenta @chessbrotherspro para que te informes sobre el proceso de curación llevado a diario por nuestro equipo.
Cordialmente
El equipo de CHESS BROTHERS
Muy lindo y práctico!!!💜😊
Gracias @somethingnice por pasar por aquí y por tu apreciación.
Un abrazo 🤗🤗