Diy Pulsera de Cuentas y Broche / Diy Bead Bracelet and Clasp
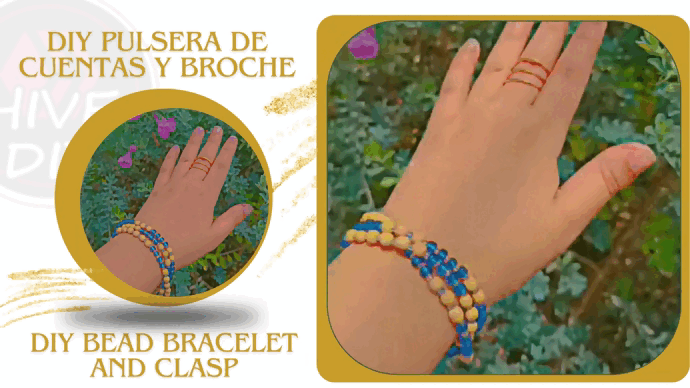
Esta pulsera es tan sencilla y tiene tantas posibilidades de combinación, que la amarás. Hoy te explico como hacer esta pulsera de cuentas y broche plateado, que será un Plus total en cualquier outfit.
Saludos amigos de nuestra comunidad Hive Diy, como les mencioné en algún post anterior quiero retomar la Creación de Contenido relacionado a la elaboración de Bisutería, ya que tengo muchos materiales guardados y hay que aprovecharlos. Además, hay varias técnicas que aprendí en el pasado y quiero recordarlas y ponerlas en práctica. Esta pulsera tiene muchas posibilidades, hoy para empezar haré una muy sencilla, que me encantó el resultado. En la portada, la mano de mi hija que ya se adueñó de la pulsera, y esto me hace muy feliz, es más emotivo hacerle una pulsera con mis manos y con mucho amor, que comprarla. Y compartir el paso a paso con Uds. me es muy gratificante también.
This bracelet is so simple and has so many combination possibilities, you will love it. Today I explain how to make this bead bracelet and silver clasp, which will be a total Plus in any outfit.
Greetings friends of our Hive Diy community, as I mentioned in a previous post, I want to return to the Creation of Content related to the creation of Jewelry, since I have many materials saved and we must take advantage of them. Also, there are several techniques that I learned in the past and I want to remember them and put them into practice. This bracelet has many possibilities, today to start I will make a very simple one, I loved the result. On the cover, my daughter's hand has already taken possession of the bracelet, and this makes me very happy, it is more emotional to make a bracelet with my hands and with a lot of love than to buy it. And sharing the step by step with you is very gratifying to me as well.

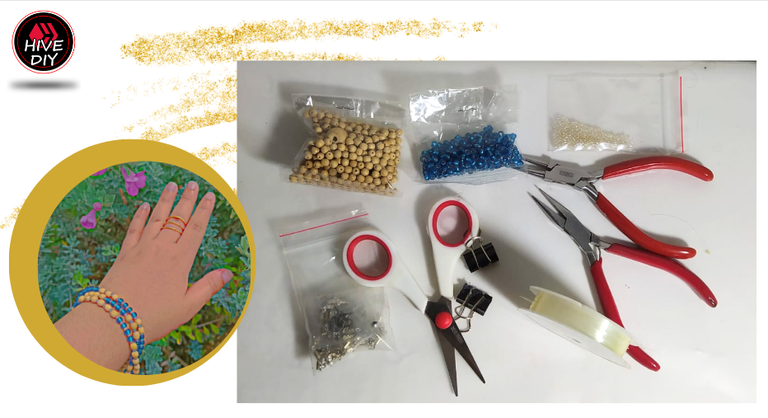
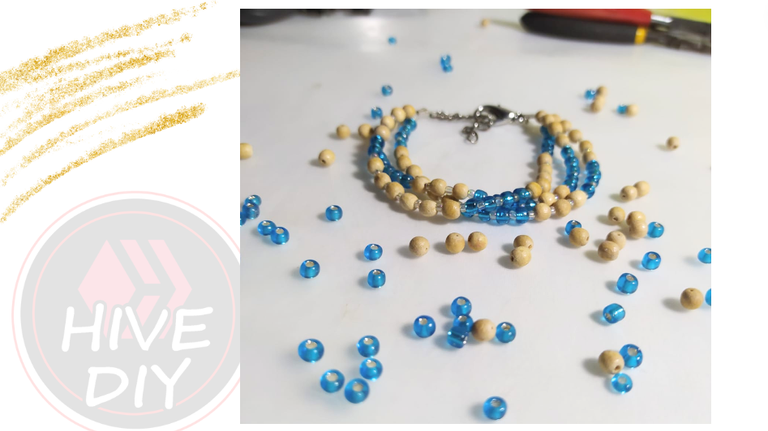
- Cuentas beige
- Cuentas azules
- Cuentas pequeñas transparente
- Cadena y Broche
- Terminales
- Nylon de bisutería
- Pinzas de bisutería y tijera
- Clips de presión
- Cinta métrica
- Beige beads
- Blue beads
- Small transparent beads
- Chain and Clasp
- Terminals
- Jewelry nylon
- Jewelry tweezers and scissors
- Snap clips
- Measuring tape
Me di cuenta que tenía nylon, y es un material que había abandonado o cambiado por el alambre dorado, pero adivinen que... No tengo alambre dorado en mi stock de materiales. Entonces, el nylon me estaba coqueteando mucho para usarlo. Ahora que lo pienso no se porque lo había olvidado, ya que es muy amable y fácil de usar, solo hay que saber ajustarlo bien para garantizar que no se desarmen las piezas que confeccionamos con él.
A continuación les presento el proyecto de hoy DIY Pulsera de Cuentas y Broche.
I realized that I had nylon, and it is a material that I had abandoned or changed for gold wire, but guess what... I don't have gold wire in my stock of materials. So, nylon was really flirting with me to wear it. Now that I think about it, I don't know why I had forgotten it, since it is very nice and easy to use, you just have to know how to adjust it well to guarantee that the pieces we make with it do not fall apart.
Below I present today's DIY Bead Bracelet and Brooch project.

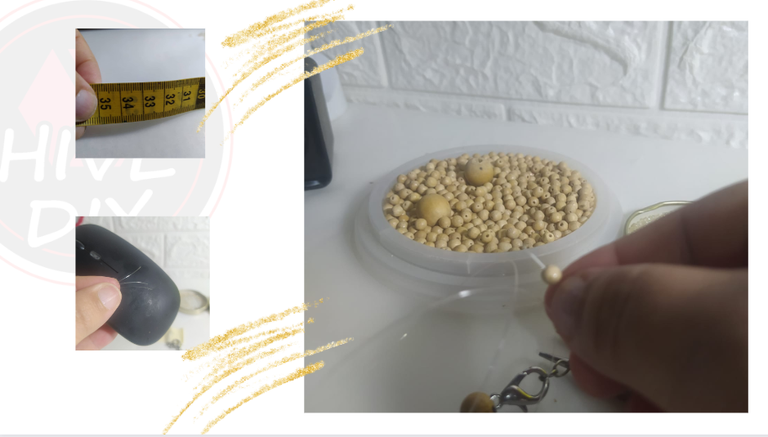
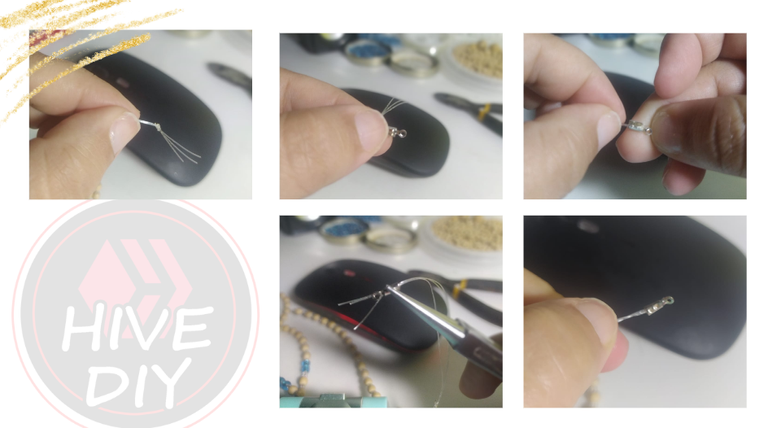
Para esta pulsera corté 3 tiras de nylon, de 35 cms cada una. Las tiras de la pulsera quedaran más cortas, pero esta cantidad es para tener más comodidad para trabajar. En el siguiente collage te coloco las tiras de nylon al frente de un mouse para que se vean mejo, ya que con tanto blanco de fondo no se ven.
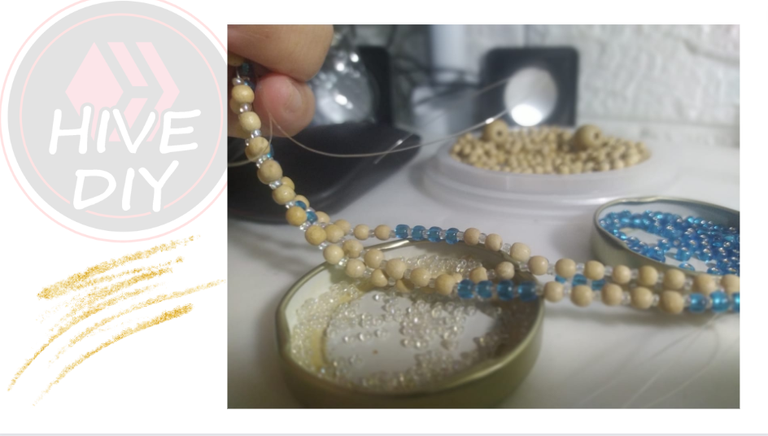
En este punto aún no estaba segura si el diseño con estas cuentas que escogí se vería bien. Comencé a colocar las cuentas en el nylon. Este paso es el que realmente lleva tiempo, ya que los agujeros son muy pequeños y hay que colocar una por una.
For this bracelet I cut 3 strips of nylon, 35 cm each. The straps of the bracelet will be shorter, but this amount is for more comfort when working. In the following collage I place the nylon strips in front of a mouse so that they can be seen better, since with so much white background they cannot be seen.
At this point I still wasn't sure if the beaded design I chose would look good. I started placing the beads on the nylon. This step is the one that really takes time, since the holes are very small and have to be placed one by one.
Cada tira la hice diferente para dar mayor interés al diseño. Sí era más o menos el mismo patrón, pero con diferentes cantidades de cada cuenta para que no se vean iguales.
Estas cuentas que son muy pequeñas, que por cierto fueron las más fastidiosas para meter en el nylon ya que son transparentes, aunque uno las ve muy pequeñas y transparente realmente son muy necesarias en el diseño, ya que le aporta brillo y distancia entre las otras cuentas de colores, el diseño se ve más armónico y no se ven apretadas.
I made each strip different to give greater interest to the design. Yes it was more or less the same pattern, but with different amounts of each bead so they don't look the same.
These beads are very small, which by the way were the most annoying to put in the nylon since they are transparent, although one sees them as very small and transparent, they are really very necessary in the design, since they give it shine and distance between the others. colored beads, the design looks more harmonious and they do not look tight.
Los extremos de las tiras de nylon las amarro con un nudo muy simple, las tres juntas. Para ayudar a que queden bien anudadas, me ayudo de las pinzas, es muy importante que el nudo esté bien apretado.
Luego, las meto en el Terminal que también será conector, y por ellos su forma. Con la pinza lo cierro asegurándome que quede bien presionado. Podría colocar una gota de pegamento, pero con el nudo y el terminal bien pisado con la pinza, te aseguro que no se soltará. Corto el excedente de nylon, ese que se ve fuera del terminal.
I tie the ends of the nylon strips with a very simple knot, all three together. To help them be tied well, I use tweezers; it is very important that the knot is tight.
Then, I put them in the Terminal, which will also be a connector, and therefore its shape. With the clamp I close it making sure that it is well pressed. I could add a drop of glue, but with the knot and the terminal firmly pressed with the tweezers, I assure you that it will not come loose. I cut the excess nylon, the one that is visible outside the terminal.
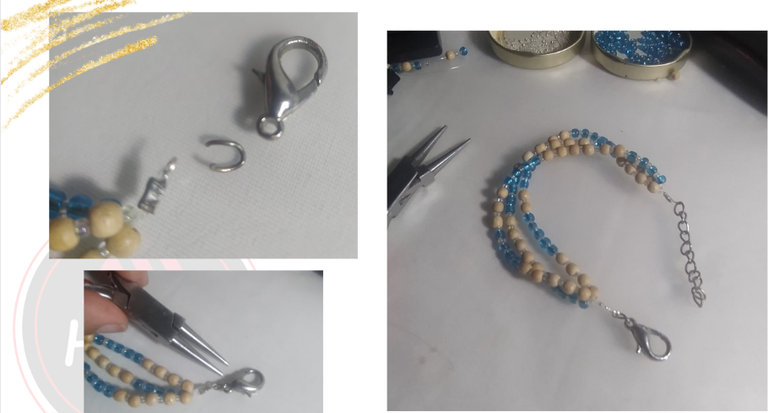
Con una argolla de la cadena que abro con la pinza, procedo a conectar el broche y la propia cadena en la otra tira. En caso que el pedacito de cadena no sea de la que permite abrir sus piezas para usarlas como aro de conexión, pues si necesitaremos dos aros.
With one ring of the chain that I open with the clamp, I proceed to connect the clasp and the chain itself to the other strip. In case the piece of chain is not one that allows you to open its pieces to use them as a connecting ring, then we will need two rings.
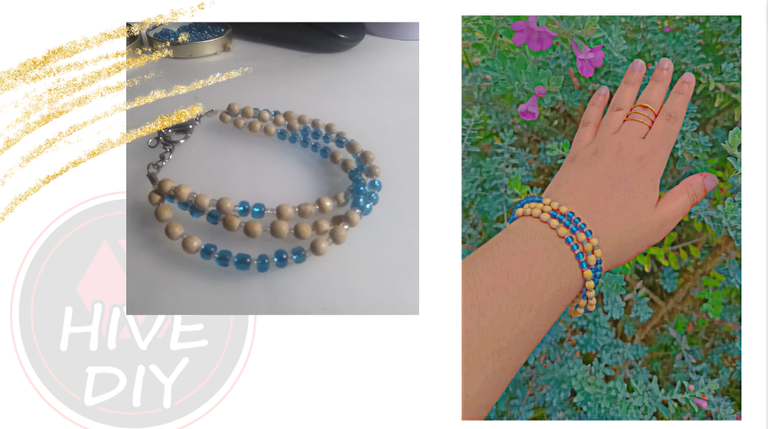
Ya he finalizado la pulsera, Me gusta mucho el resultado de la pulsera y lo rápido que se realiza. Además, pueden ver que las tiras tienen mucho movimiento, se sobreponen entre ellas y esto me agrada, ya que ese movimiento le agrega como feminidad, en mi opinión.
I have already finished the bracelet. I really like the result of the bracelet and how quickly it is made. Also, you can see that the strips have a lot of movement, they overlap each other and I like this, since that movement adds femininity, in my opinion.
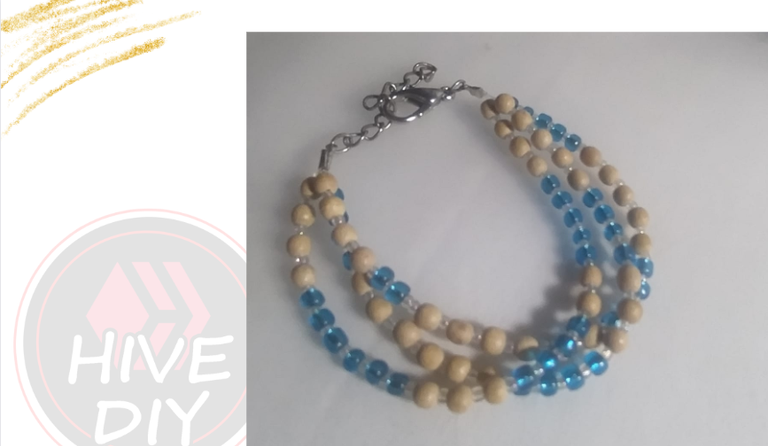
Esta combinación de colores me gustó muchísimo, lo hice de acuerdo a los materiales que tenía, pero me sorprendió como ambos colores destacan cada uno, y serían muy utilizables en los look que tengamos.
I really liked this color combination, I did it according to the materials I had, but I was surprised by how both colors stand out, and they would be very usable in the look we have.
Como les mencioné anteriormente, esta es la mano de mi hija que ya se adueñó de la pulsera y se ve estupenda.
Este diseño varía muchísimo, de acuerdo a los materiales que usemos, incluso podemos colocar dijes para darle más lujo, pero ese diseño ya lo tengo pendiente para un próximo post, quise empezar con el más sencillo.
As I mentioned before, this is my daughter's hand that already owned the bracelet and it looks great.
This design varies a lot, depending on the materials we use, we can even place charms to give it more luxury, but I already have that design pending for a future post, I wanted to start with the simplest one.
Deseo que les haya gustado esta publicación, y ahora a visitar mercerías e imaginar combinaciones para crear y crear, porque efectivamente podemos crear nuestras propias bisuterías y con calidad.
I hope you liked this publication, and now let's visit haberdashery stores and imagine combinations to create and create, because we can indeed create our own jewelry and with quality.


---------- ❤️❤️❤️❤️ ----------
Las fotos las tomé con mi teléfono Redmi Note 8
Apps que utilicé:
Canva para la Portada y Cpllage
Gifs con Imagen Online Convert
Utilicé el Traductor Deepl
Mi redes sociales:
Discord: YennysYaneth#0189
Twitter: @yennysferm
Instagram: @yennysyaneth
---------- ❤️❤️❤️❤️ ----------
I took the photos with my phone Redmi Note 8
Apps I used:
Canva for the Cover and Cpllage
Gifs with Image Online Convert
I used Deepl Translator
My social networks:
Discord: YennysYaneth#0189
Twitter: @yennysferm
Instagram: @yennysyaneth
Muy bonita en verdad, lo mejor es que puedes usar las combinaciones que quieras y es un lindo regalo además.
Hola @wendy23 totalmente de acuerdo contigo, saber hacer estos accesorios te sacan de apuro a la hora de hacer un regalo, me ha pasado y es muy bien recibido cuando cuidamos las técnicas y la calidad de los materiales.
Gracias por pasar y comentar
the bracelet is so nice and colourful. Bravo
Thank you @diyhub 😍
Amiga, te quedó super linda la pulsera... me encantan los colores, luce muy moderna y juvenil, es un accesorio que puedes disfrutar para infinidad de ocasiones.
Muchas gracias por compartir, un saludo.
Hola @kristal24 es cierto, un blue jean con una camisa blanca por ejemplo, sube de nivel con accesorios coloridos y frescos. Hay que seguir creando para nosotras, para nuestras amigas y familiares.
Gracias por pasar y comentar
Your bracelet looking very beautiful 📿
Thank you @cryptomother 😍
Welcome dear
https://ecency.com/hive-130560/@cryptomother/diy-pen-stand-from-soap
Yay! 🤗
Your content has been boosted with Ecency Points, by @hive-130560.
Use Ecency daily to boost your growth on platform!
Esta mas bonita que las que se compran en la calle jiji 👀 los colores que usaste estan hermosos, la hacen lucir mas elegante en la muñeca de tu pequeña ❤️
Parece facil, pero cuando quiero ponerlo en practica me doy cuenta que no me resulta tan facil jajaja debe ser la impaciencia lo que me juega en contra 😂
https://twitter.com/hivediy47901/status/1757813534409257278