Flower sphere Origami - [ENG-ESP]
Greetings friends!
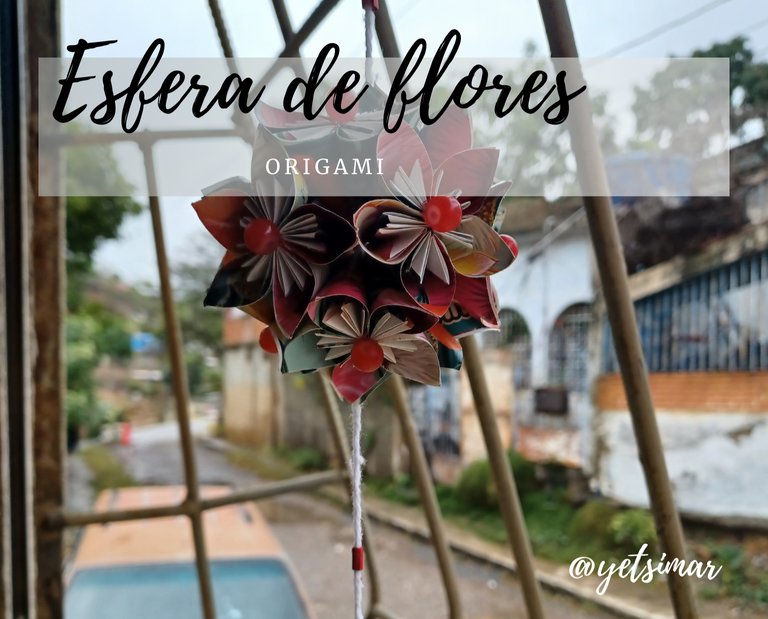
Espero estén teniendo una excelente semana, el día de hoy presento esta manualidad que hice en estos dias lluviosos, se trata de esta bella esfera de flores hecha en la técnica de origami, les mostraré el proceso de realización, espero que sea de su agrado.
I hope you are having a great week, today I present this craft that I did in these rainy days, it is this beautiful sphere of flowers made in the origami technique, I will show you the process of realization, I hope you like it.
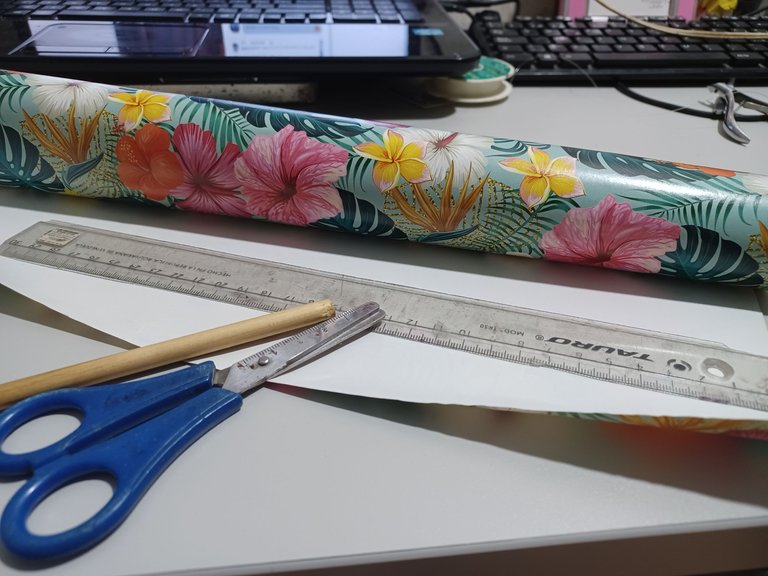
Patterned paper
Scissors
Rulers
Pencils
Thread
Materiales:
Papel estampado
Tijeras
Reglas
Lápices
Hilo
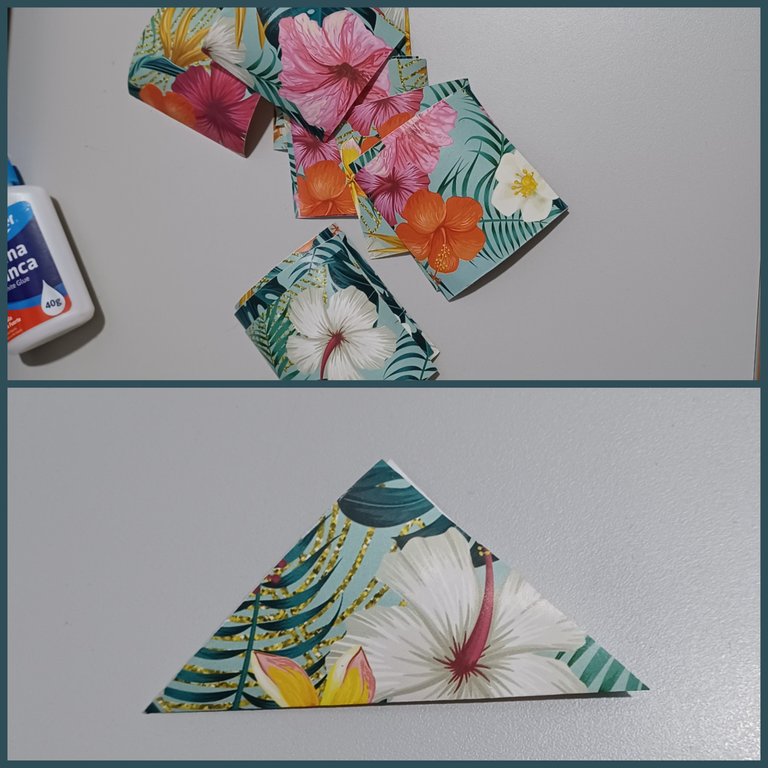
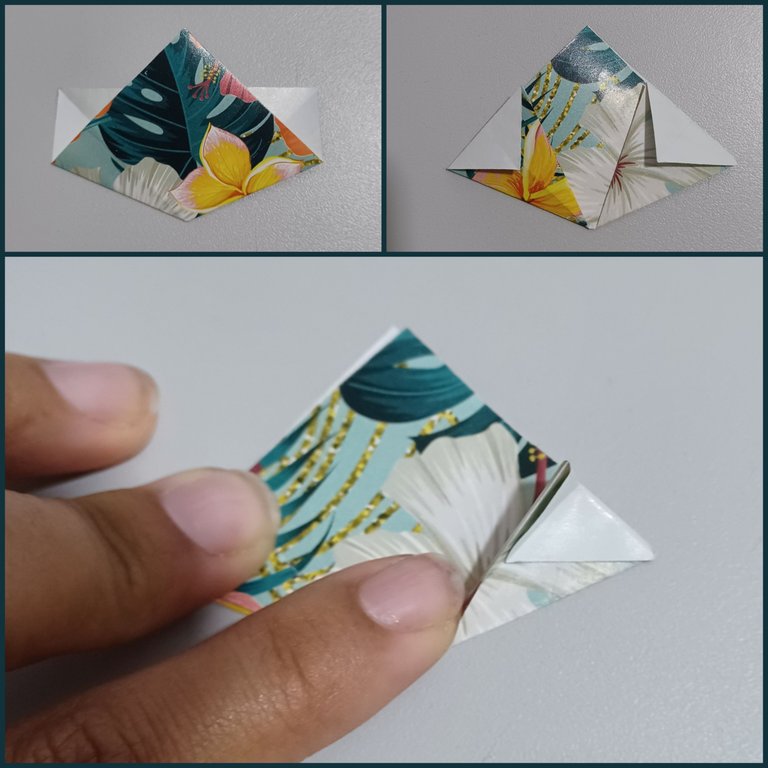
Lo primero que hice fue marcar cuadrados de 6x6cm en el papel estampado un total de 60 cuadritos, luego procedí a tomar uno por uno a hacer los dobleces para crear cada uno de los pétalos, haciendo un primer doblez en diagonal como se muestra en la segunda imagen.
The first thing I did was to mark 6x6cm squares on the patterned paper a total of 60 squares, then I proceeded to take one by one to make the folds to create each of the petals, making a first fold diagonally as shown in the second image.
Luego doblo ambas esquinas hasta el centro, luego abro cada una y presiono nuevamente para que este todo plano, hasta que resulte como en la tercera imagen.
Then I fold both corners to the center, then open each one and press again to make it all flat, until it looks like in the third image.
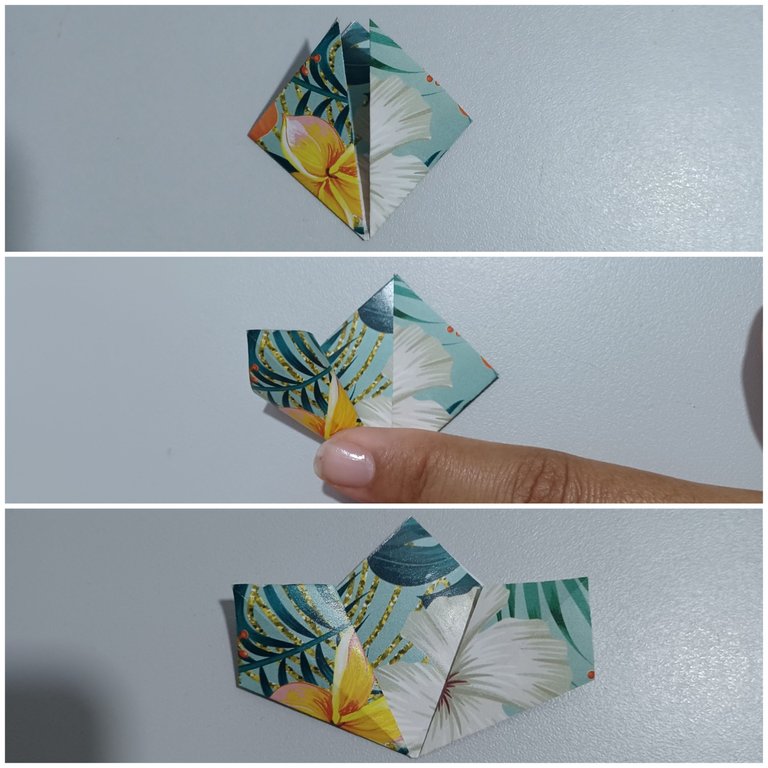
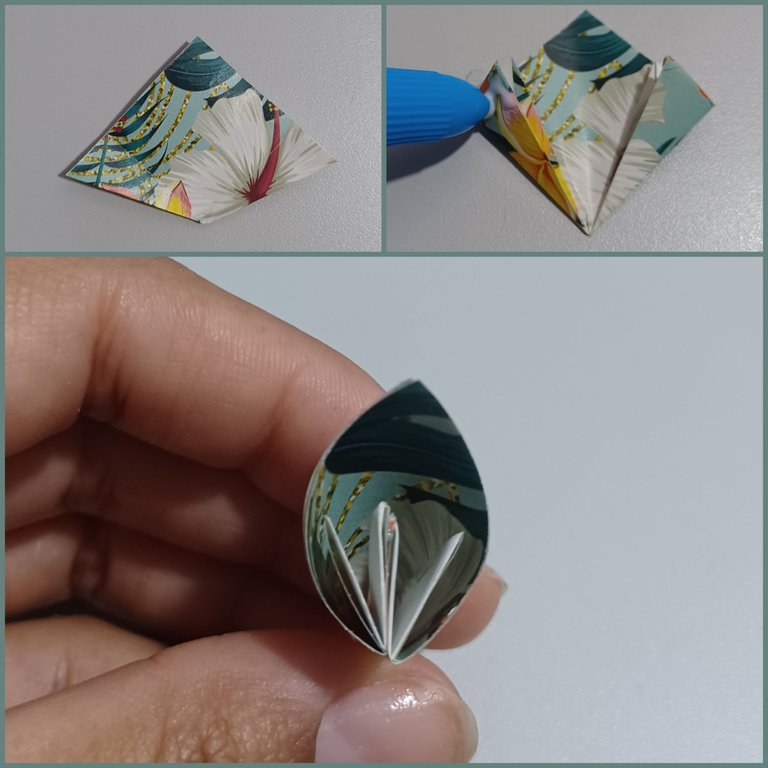
Luego los triángulo sobrante los doblo hacia atrás y luego doble una de las alitas hacia afuera cubriendo la parte doblada.
Then I fold back the excess triangles and fold one of the wings outwards covering the folded part.
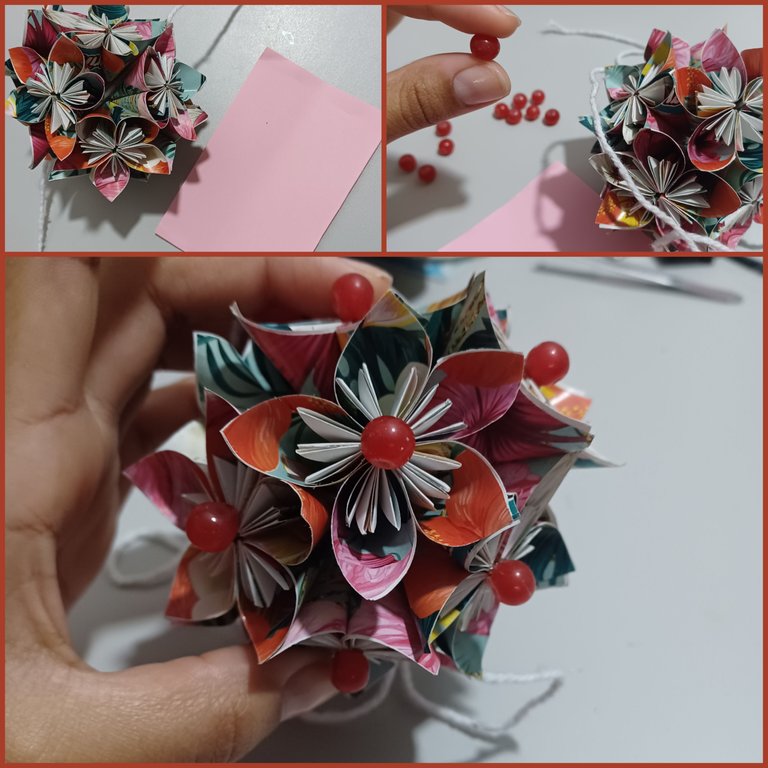
Luego doblo ambas hacia adentro y coloco un poco de pega en cada una de las pestañas y así formó cada uno de los pétalos, repito este proceso en los primeros 5 cuadritos y los pego juntos hasta formar la florecita.
Then I fold both inwards and place a little glue on each of the tabs and thus formed each of the petals, I repeat this process in the first 5 squares and glue them together to form the little flower.
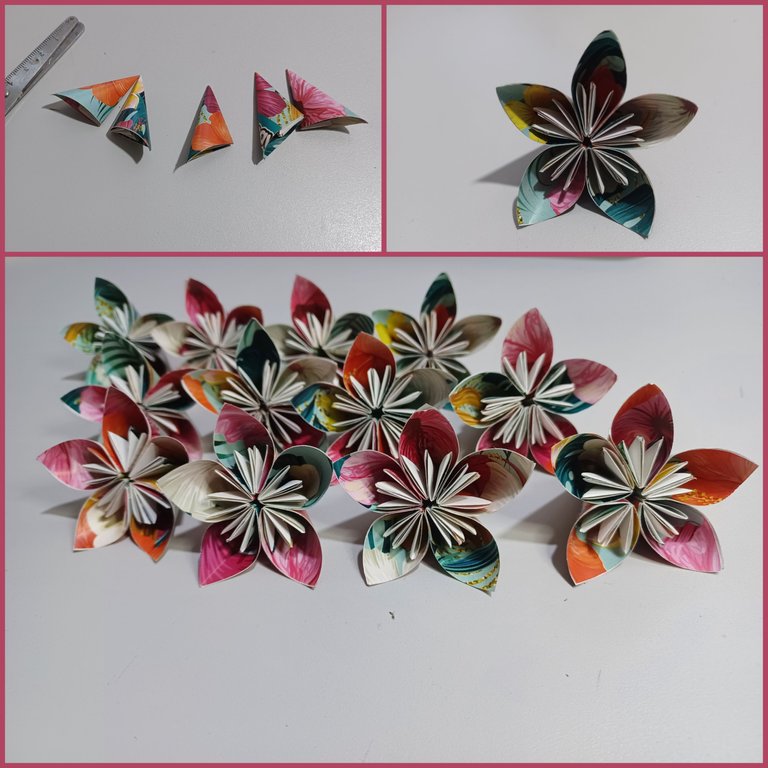
Del mismo modo repito el proceso con el resto de los cuadritos hasta crear 12 florecillas.
In the same way I repeat the process with the rest of the squares until I create 12 little flowers.
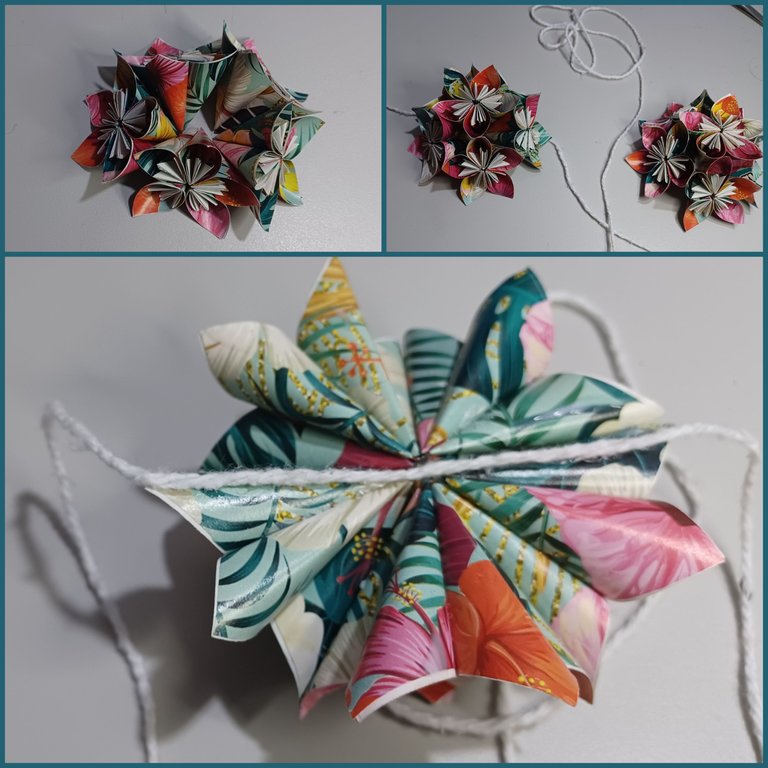
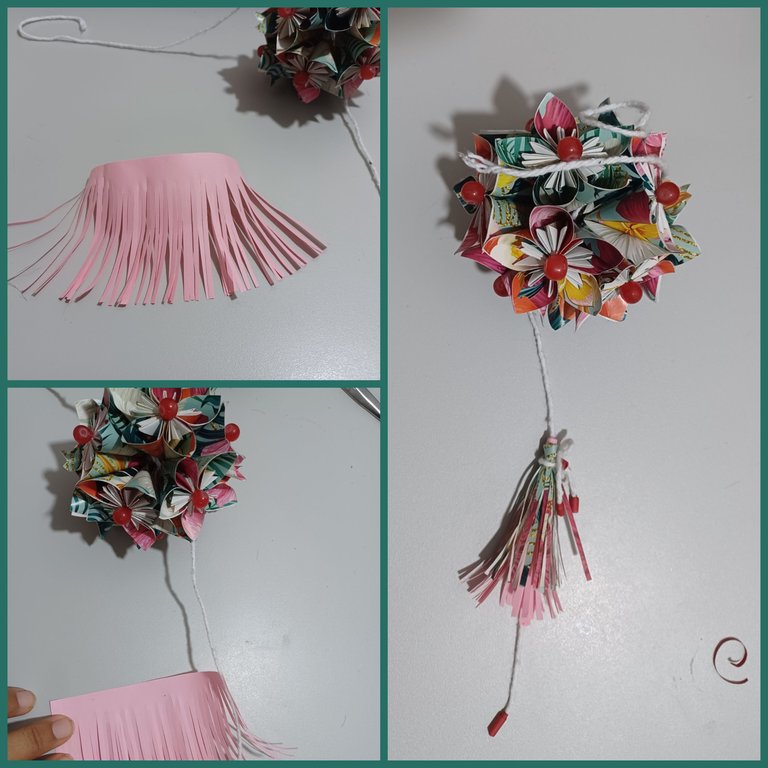
Luego dispongo 5 florecillas con las puntas juntas y las pego usando pega blanca, y en el medio coloco una siesta flor para forma la primera media esfera, luego repito con las otras 6 flores.
Pegue un trozo luego un trozo de hilo pabilo pasando por el medio y pego junto.
Then I arrange 5 little flowers with the tips together and glue them using white glue, and in the middle I place a flower nap to form the first half sphere, then I repeat with the other 6 flowers.
Glue a piece then a piece of wick thread through the middle and glue together.
Luego procedí pegar estas piedritas en el centro de cada una de las flores, para pegarlas use silicon en barra, me gustó mucho como lucen las piedritas en el centro de cada florecitas.
Then I proceeded to glue these little stones in the center of each of the flowers, to glue them I used silicon stick, I really liked how the stones look in the center of each flower.
Luego hice una borlita para colgar en el extremo inferior del hilo para ello tome un rectángulo e hice cortes perpendiculares y luego lo enrolle sobre si mismo sobre el hilo pabilo, luego coloque uno igual con el papel estampado sobre el rosado que había hecho.
Then I made a tassel to hang on the lower end of the thread, for this I took a rectangle and made perpendicular cuts and then rolled it on itself over the wick thread, then I placed one with the same patterned paper over the pink one I had made.
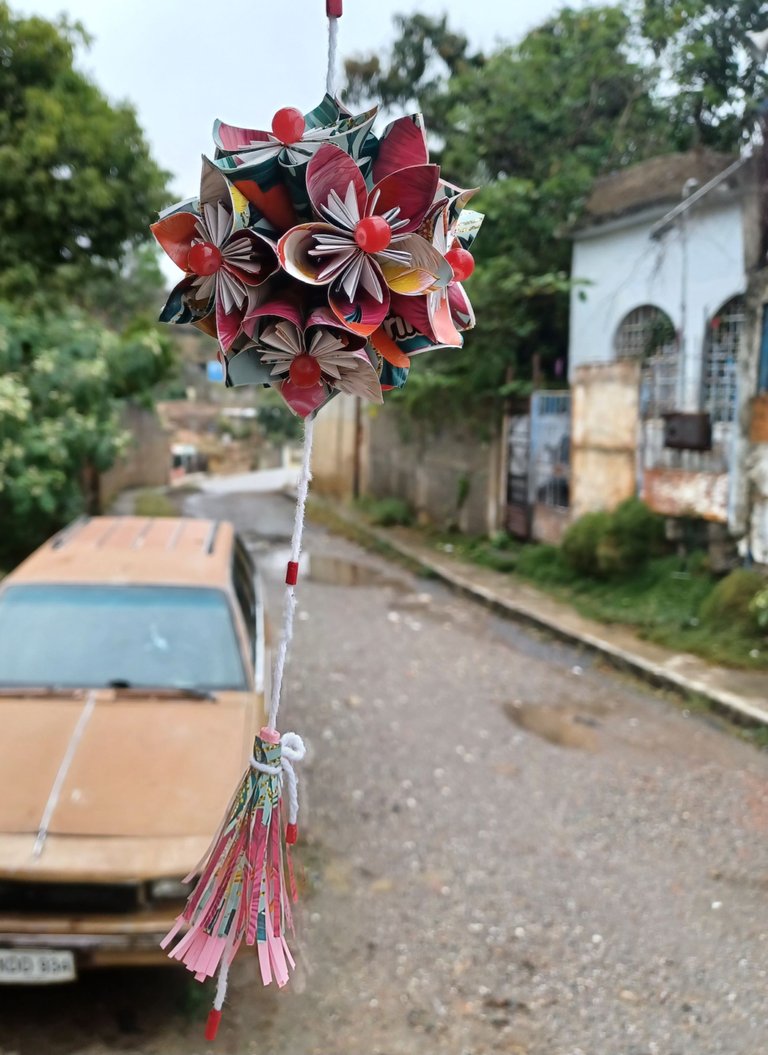
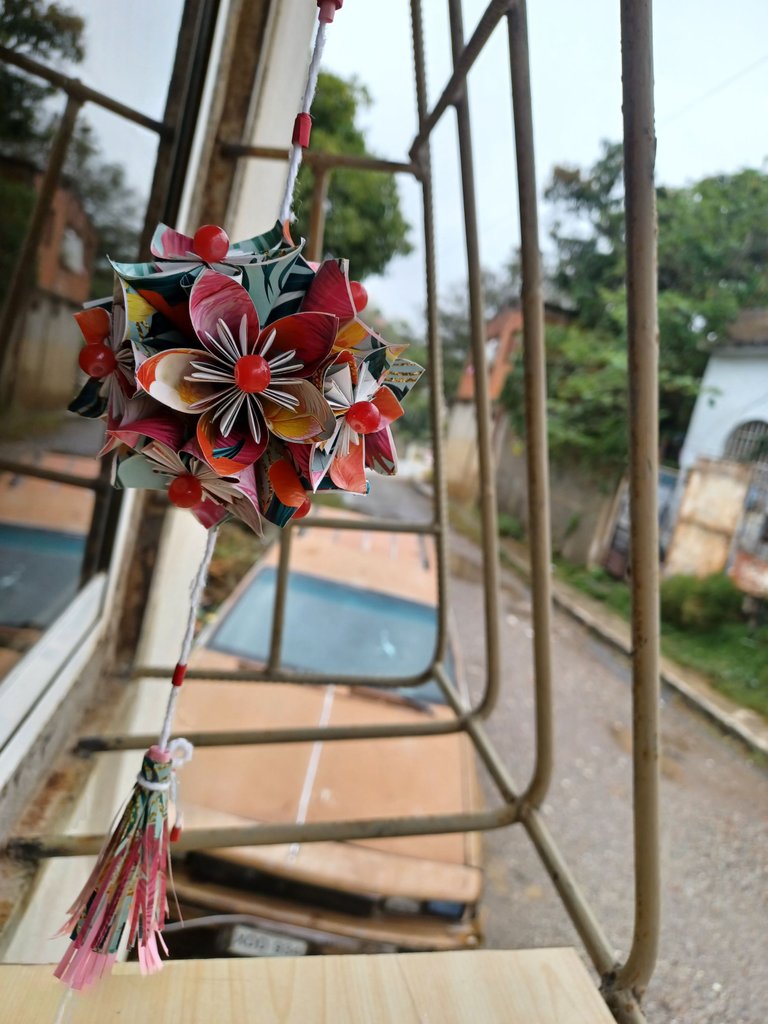
Luego lo coloque en la ventana de la casa y luce realmente muy bonito, me gustó mucho hacer esta manualidad aunque por la cantidad de pétalos fue más largo de lo que pensé, espero que haya sido del agrado de todo y que hayan entendido mi explicación del proceso.
Then I placed it in the window of the house and it looks really very nice, I really enjoyed making this craft although the amount of petals was longer than I thought, I hope you liked it and that you understood my explanation of the process.


https://twitter.com/1268416168500527104/status/1636437791163727892
https://twitter.com/2774723569/status/1636469808538570754
https://twitter.com/275026898/status/1636550260418854915
https://twitter.com/2471487180/status/1637249867402690560
The rewards earned on this comment will go directly to the people( @chacald.dcymt, @kristal24, @alizmarpaola, @irenenavarroart ) sharing the post on Twitter as long as they are registered with @poshtoken. Sign up at https://hiveposh.com.
Que lindooo! Me encantó. Lo imagino en la ventana de mi taller bailando con el viento. Gracias por compartir este bello trabajo 😘💜
🎆🎇🎉🎊🌧️💐✨🌾🌱🌹🌙🌿🍃🥀⚡🌺☘️🍀🌈🌷⭐🪴🌵🌸🌟💮🌴🌳💫☀️💮☔🌲🌳🌍🌌🌠☄️🏵️🐝🌻🌼🍄🐞🦋💙☕💜🍍🎆🎇🎉🎊
!LADY
View or trade
LOHtokens.@chacald.dcymt, you successfully shared 0.1000 LOH with @yetsimar and you earned 0.1000 LOH as tips. (1/3 calls)
Use !LADY command to share LOH! More details available in this post.
Amiga @yetsimar te quedó super lindo! Felicidades por ese GRAN trabajo, me encantó!
I've seen this paperwork before but this sphere style is new and fantastic. Beautiful work.
Mi Yetsimar, me encanto lo lindo, cuchi y delicado de esta esfera de flores Origami..💗
Seguro adorna muy bonito esa ventana, mientras Juliana hace su baile también al son del viento💗💗✨
Que trabajo tan hermoso mi bella @yetsimar. Te felicito...
Que tengas un hermoso día... 💕
!PIZZA
PIZZA Holders sent $PIZZA tips in this post's comments:
@dayadam(2/5) tipped @yetsimar (x1)
Please vote for pizza.witness!
Qué hermoso trabajo, muy bien explicado y el resultado final es asombroso!
Pero que preciosidad de trabajo, me encanta, el papel floral le dio mucha vistosidad 😍 y las cuentas rojas wow se ven como frutos