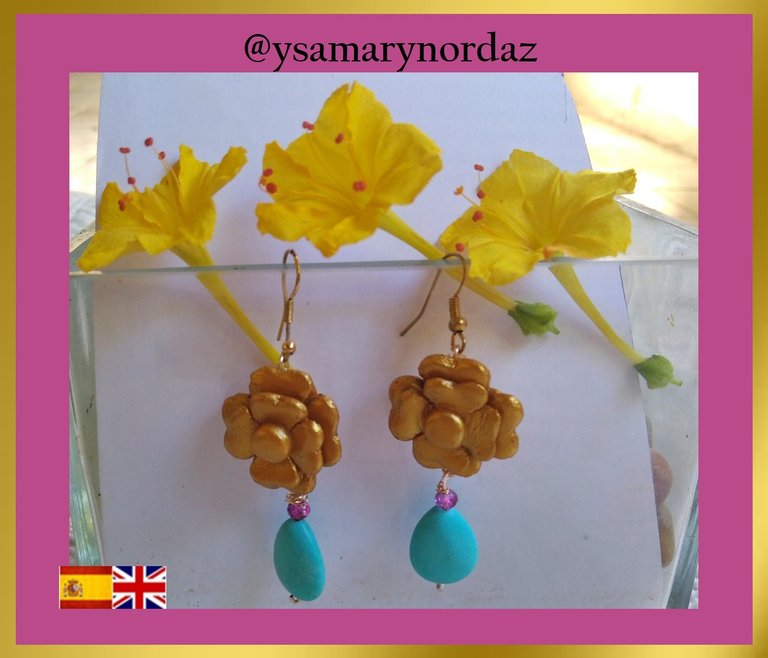
Zarcillos elaborados con masa flexible / Earrings made with flexible clay
Hola a toda la comunidad de #jewelry. Para mí es un placer compartir con ustedes un paso a paso de un accesorio que, particularmente, me gusta usar mucho. Los zarcillos son una de mis prendas favoritas, a la hora de realizar este tipo de accesorio tenemos un sin fin de opciones en cuanto a materiales se refiere. En esta ocasión realizaré unos zarcillos de un material con el cual me gusta trabajar: masa flexible. Esta masa es muy parecida a la plastilina, con ella se pueden realizar muchas manualidades; de igual manera, esta se puede emplear en la bisutería. A continuación, les presento el siguiente paso a paso. ¡Vamos a comenzar!
Hello to the entire #jewelry community. For me it is a pleasure to share with you a step by step of an accessory that I particularly like to use a lot. Earrings are one of my favorite garments, when it comes to making this type of accessory we have endless options in terms of materials. On this occasion I will make tendrils of a material with which I like to work: flexible dough. This mass is very similar to plasticine, with it you can make many crafts; In the same way, it can be used in jewelry. Then I present the next step by step. Let's get started!
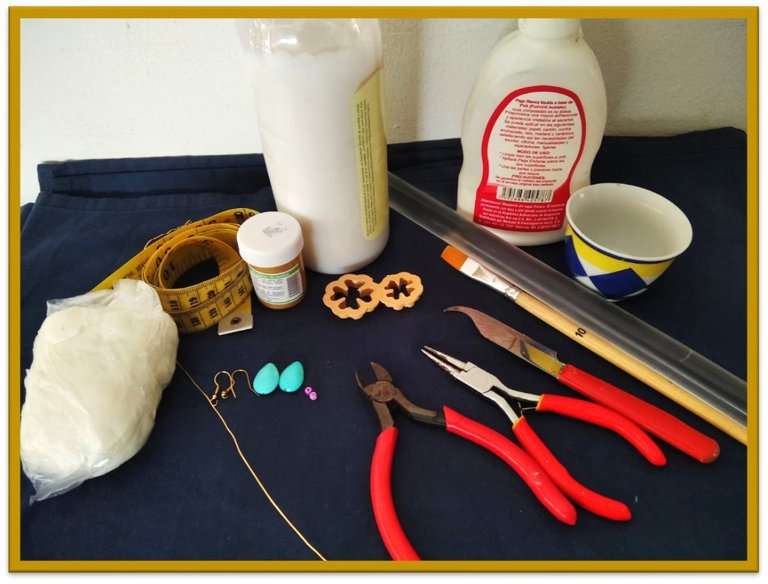
Materiales:
•Masa flexible
•Crema humectante
•Pega blanca
•Moldes de flor (uno grande y uno pequeño).
•Pintura dorada
•Barniz
•Pincel
•Rodillo
•Cinta métrica
•2 piedras azul turquesa
•2 cristales color morado
•Alambre
•Esteca de cuchillo
•2 ganchos de zarcillos
•Pinza
•Tenaza
Materials:
•Flexible clay
•Moisturizing lotion
• White glue
• Flower molds (one large and one small).
• Gold paint
• Varnish
•Brush
•Roller
•Measuring tape
• 2 turquoise blue stones
• 2 purple crystals
•Wire
• Pottery clay cutter
• 2 earring hooks
•Pincer
• Plier
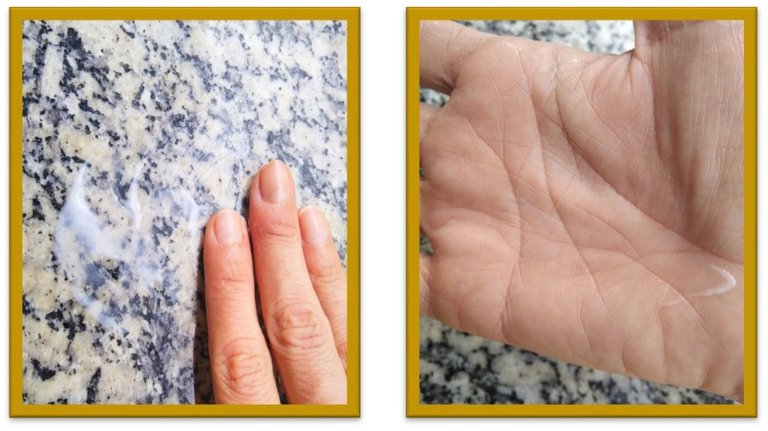
Paso 1
Limpia la superficie donde trabajarás la masa y unta un poco de crema humectante en ella, de esta manera la masa no se pegará. Igualmente, te recomiendo colocar en tus manos para que sea más fácil el amasado.
Step 1
Clean the surface where you will work the dough and spread a little moisturizer on it, this way the dough will not stick. Likewise, I recommend placing it in your hands to make it easier to knead.
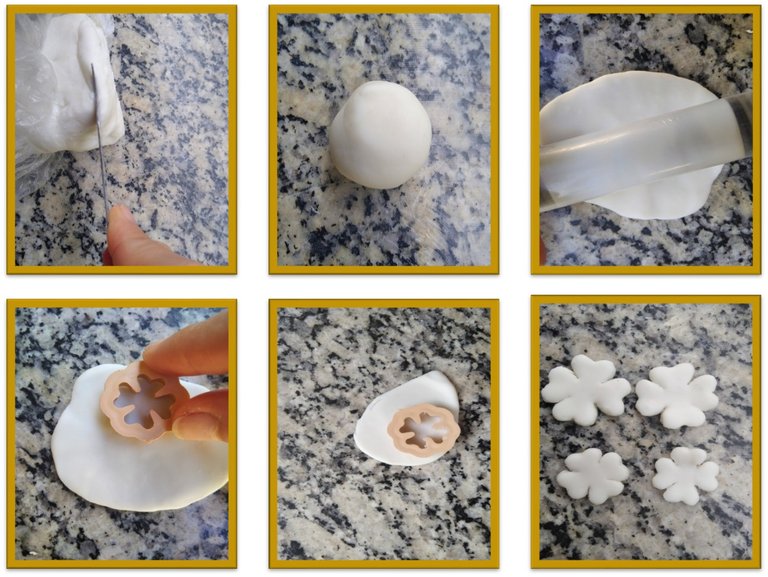
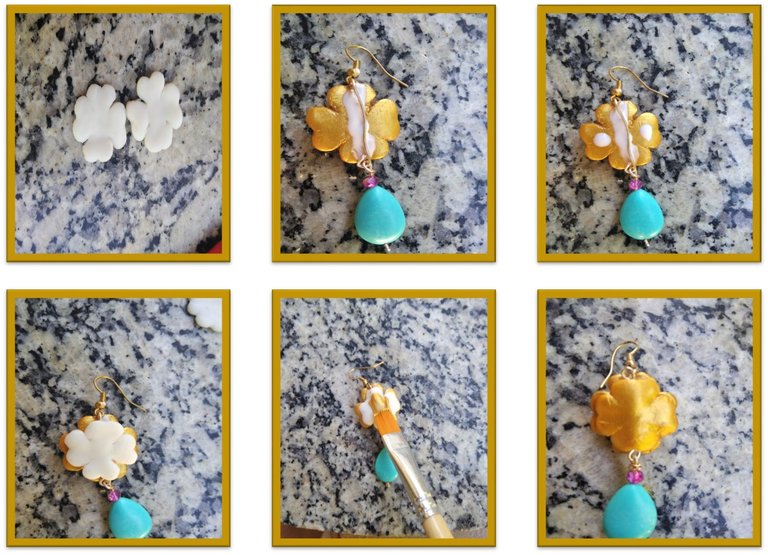
Paso 2
Coloca la masa flexible sobre la superficie y con la ayuda de la esteca de cuchilla corta una porción. Forma una pequeña pelota, luego con la ayuda del rodillo extiéndela. Una vez extendida, coloca el cortador de flor grande sobre la masa para así extraer dos flores. Este mismo procedimiento debes realizarlo con el cortador de flor pequeña.
Step 2
Place the flexible dough on the surface and with the help of the pottery clay cutter cut a portion. Form a small ball, then with the help of the roller extend it. Once extended, place the large flower cutter on the dough to extract two flowers. This same procedure must be done with the small flower cutter.
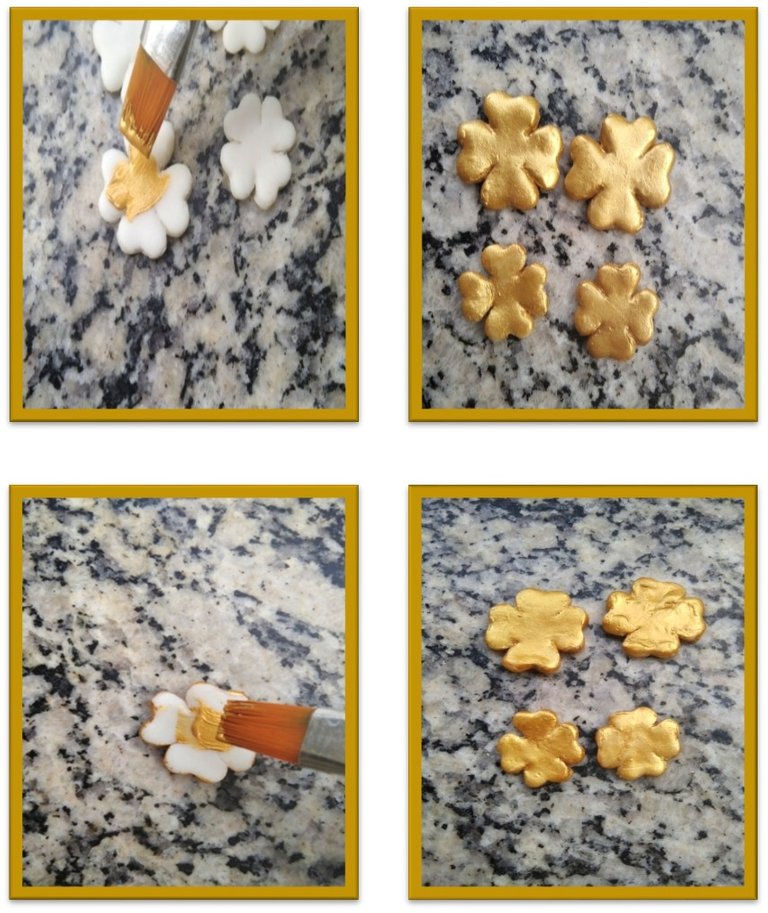
Paso 3
Pinta con la pintura dorada las flores por ambas caras.
Step 3
Paint the flowers on both sides with gold paint.
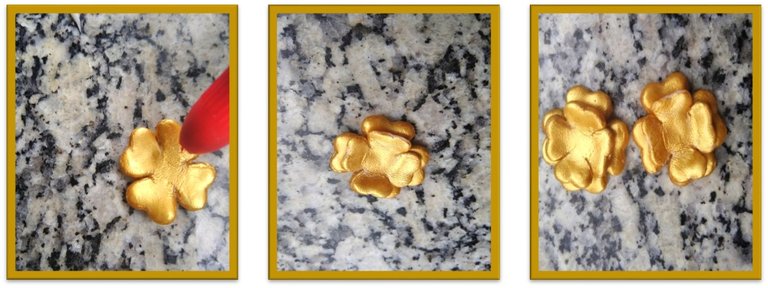
Paso 4
Coloca pega en el centro de la flor grande. Luego, pon encima de la misma la flor pequeña.
Step 4
Place glue in the center of the large flower. Then, put the small flower on top of it.
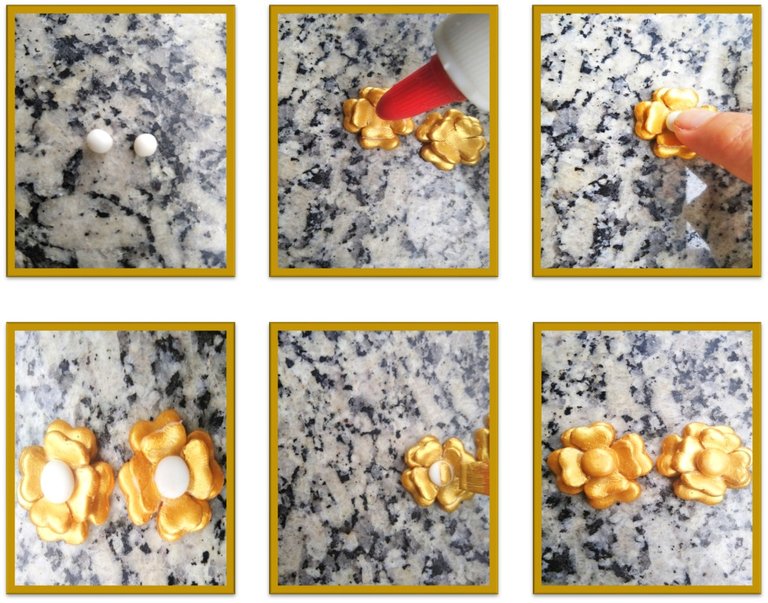
Paso 5
Forma con la masa dos bolitas y pégalas en el centro de cada flor. Luego, píntalas de dorado.
Step 5
Shape the dough into two small balls and stick them in the center of each flower. Then paint them gold.
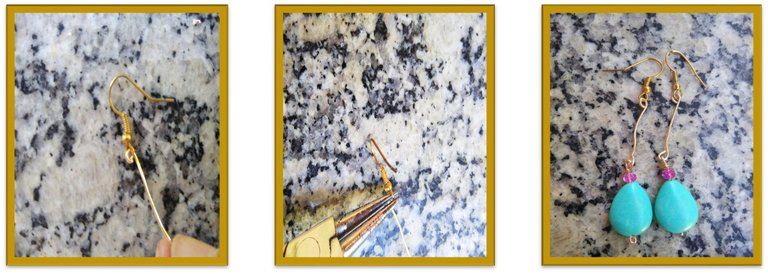
Paso 6
Con ayuda de la pinza dobla la punta del alambre. Luego, mide con la cinta métrica 3,5cm y corta; ahora, dobla la otra punta y así formas lo que será la base del zarcillo.
Step 6
With the help of the pincer, bend the tip of the wire. Then, measure 3.5cm with the tape measure and cut; now, fold the other end and thus form what will be the base of the earring.

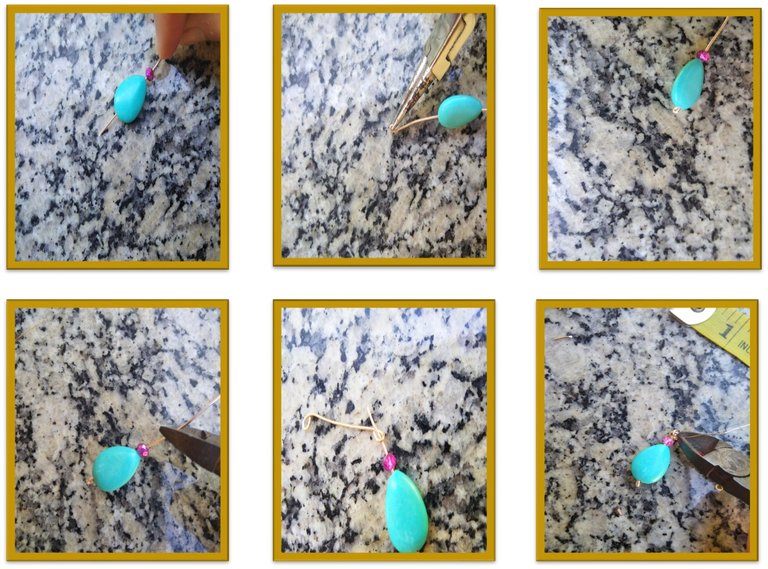
Paso 7
Toma el alambre e introduce el cristal morado y luego la piedra turquesa. Dobla la punta del alambre con la pinza para asegurar la piedra. Ahora, introduce el alambre con las piedras por una de las puntas de la base que realizaste anteriormente y, con ayuda de la pinza en la parte superior realiza un entorchado; luego corta con la tenaza el excedente del alambre.
Step 7
Take the wire and insert the purple crystal and then the turquoise stone. Bend the end of the wire with the pincer to secure the stone. Now, introduce the wire with the stones through one of the ends of the base that you made previously and, with the help of the pincer at the top, make a twist; then cut the excess wire with the plier.
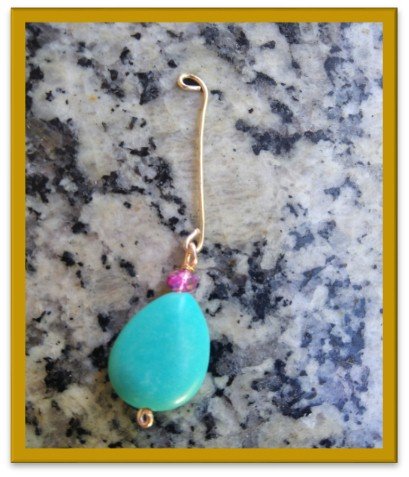
Paso 8
Una vez que tienes las piedras en la base de alambre, es el momento de colocar el gancho de zarcillo. Introduce el gancho en la parte superior de la base y ajusta con la pinza.
Step 8
Once you have the stones on the wire base, it's time to attach the earring hook. Insert the hook into the upper part of the base and adjust with the pincer.
Paso 9
Realiza el mismo procedimiento hecho en el paso 2. Extrae dos flores pequeñas, ahora coloca pega en la parte de atrás de la flor dorada y une la base del alambre con las piedras y el gancho de zarcillo. Posteriormente, pega la flor blanca de esta manera no se verá el alambre. Luego, pinta la flor de dorado.
Step 9
Follow the same procedure as in step 2. Extract two small flowers, now glue the back of the golden flower and join the base of the wire with the stones and the earring hook. Later, glue the white flower in this way the wire will not be seen. Then, paint the flower gold.
Paso 10
Para que la flor aún se vea más brillante aplica una capa de barniz. Y Deja secar por un día.
Step 10
To make the flower look even brighter, apply a layer of varnish. And let it dry for a day.
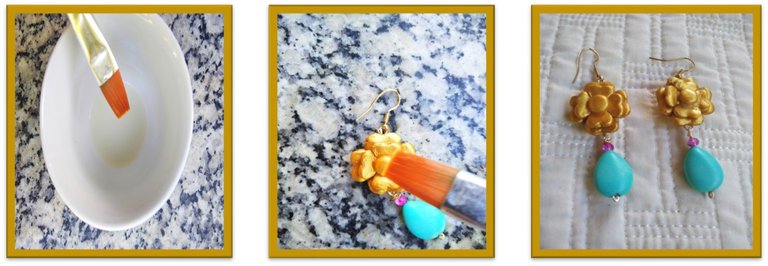
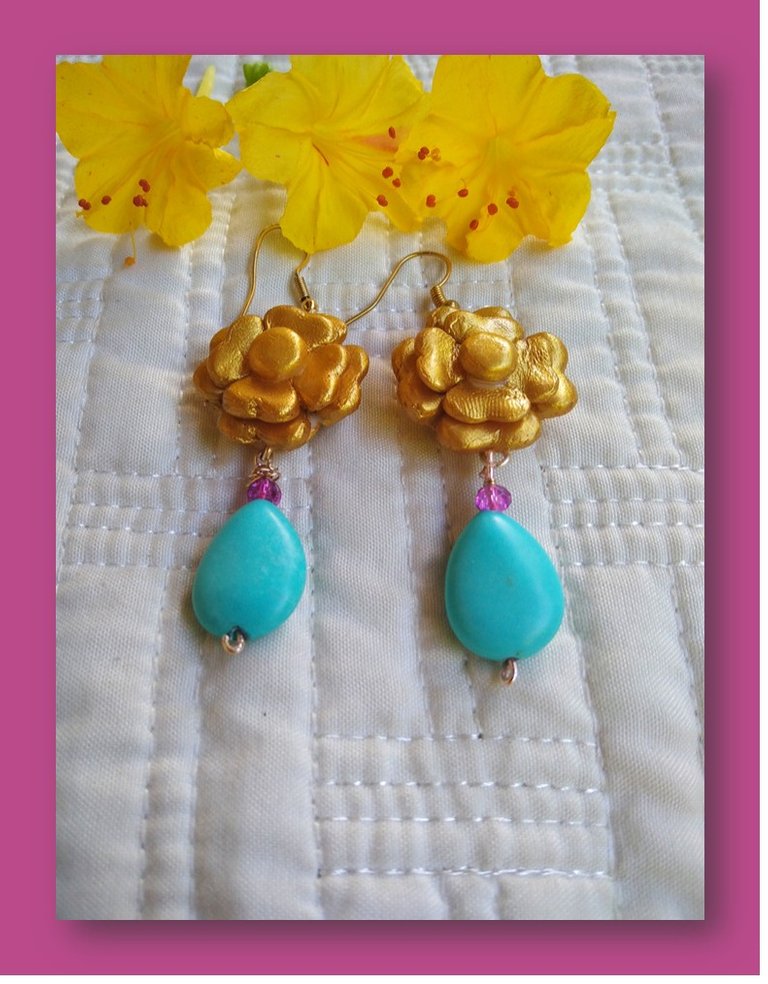
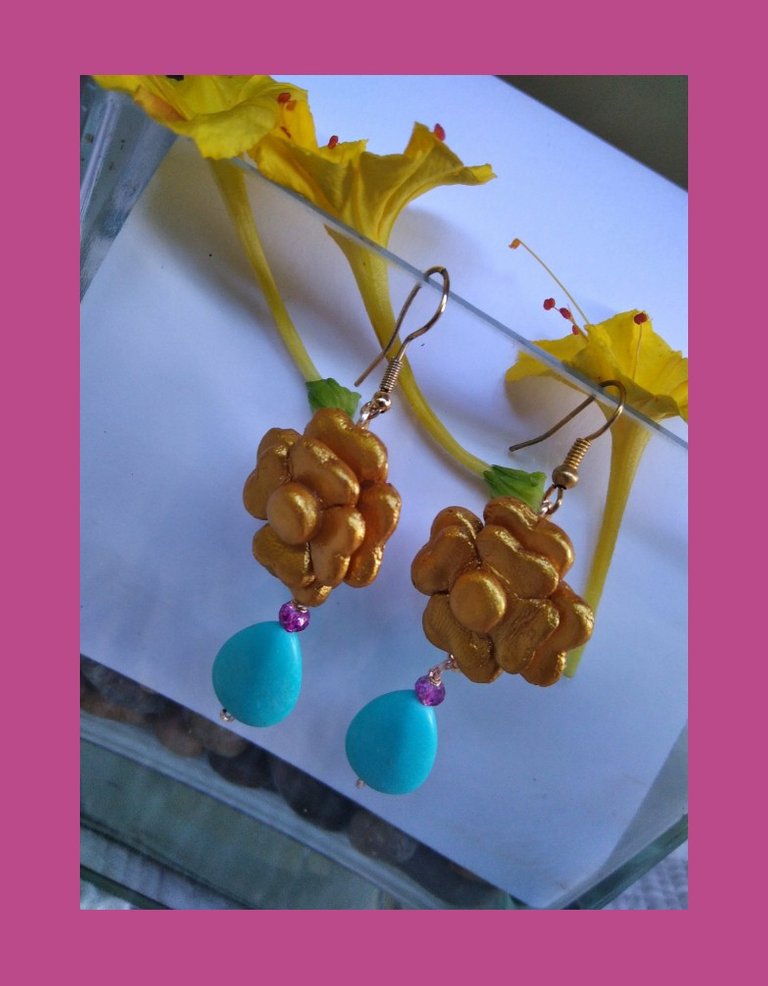
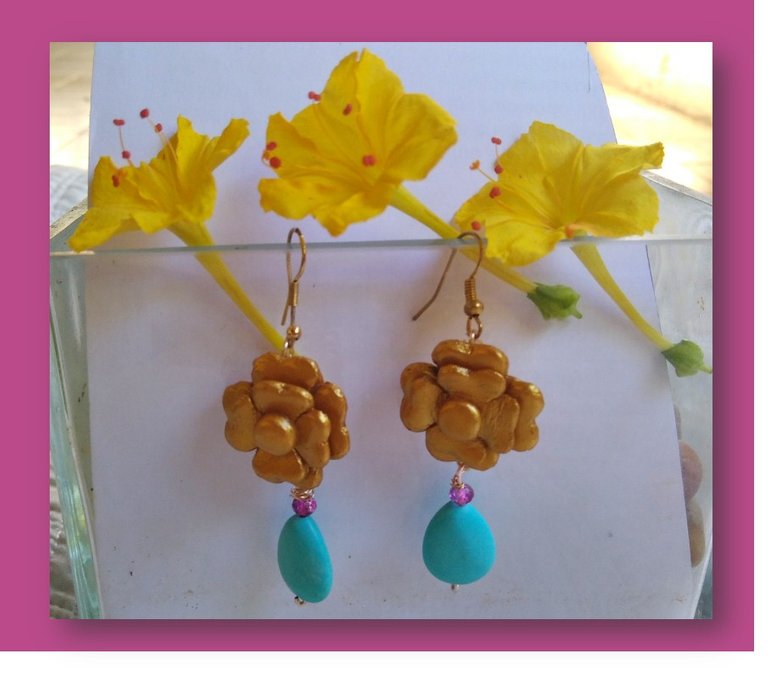
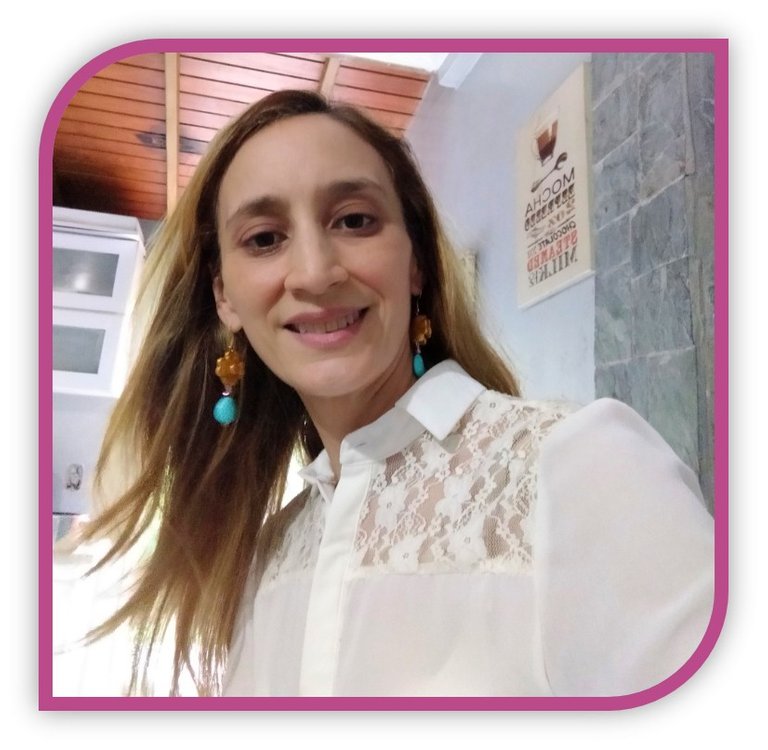
Los zarcillos están terminados, el resultado final me ha gustado mucho, los tres colores dorado, azul turquesa y morado combinan muy bien. Las piezas hechas con masa flexible son piezas duraderas y puedes crear múltiples accesorios. Espero se animen a realizar este paso a paso. ¡Hasta una próxima oportunidad!
The earrings are finished, I really liked the final result, the three colors gold, turquoise blue and purple combine very well. Pieces made with flexible clay are durable pieces and you can create multiple accessories. I hope you will be encouraged to carry out this step by step. See you soon!
Las fotografías fueron tomadas por mí con mi teléfono celular Redmi Note 8.
Utilicé el programa Microsoft Power point
Traducción: Google Translation
The images were taken by me with my Redmi Note 8 cell phone.
Translation: Google Translation
I used the program Microsoft Power point
Bellos..un hermoso trabajo manual y muy creativo. El turquesa con dorado queda precioso.
Exitos.
Mucgas gracias por tu comentario @artsugar. ¡Saludos!
Amiga @ysamarynordaz nos encanta la masa flexible, con ellas se hacen nos accesorios hermosos tal como los que nos traes hoy, la flor que has realizado es hermosa y al unirla con las piedras de bisutería haz logrado realizar una pieza hermosa, bello trabajo 😉
Muchas gracias, por su mensaje. Me complace mucho saber que le ha gustado mi trabajo.
¡Felicidades! Esta publicación obtuvo upvote y fue compartido por @la-colmena, un proyecto de Curación Manual para la comunidad hispana de Hive que cuenta con el respaldo de @curie.
Si te gusta el trabajo que hacemos, te invitamos a darle tu voto a este comentario y a votar como testigo por La Colmena.
Si quieres saber más sobre nuestro proyecto, te invitamos a acompañarnos en nuestro servidor de Discord.
Congratulations @ysamarynordaz! You have completed the following achievement on the Hive blockchain and have been rewarded with new badge(s):
Your next target is to reach 9000 upvotes.
You can view your badges on your board and compare yourself to others in the Ranking
If you no longer want to receive notifications, reply to this comment with the word
STOPCheck out the last post from @hivebuzz:
Support the HiveBuzz project. Vote for our proposal!