DIY: The family-sized toothbrush holder. If you can't find it on the shelf, then build it yourself!
Good day guys and girls of Hive and especially to the DIY people out there. My name is Zak Ludick from Cape Town South Africa.
Today I am going to share with you a little side project that has been following me around the house for months really. I am proud to say that it did not get side-lined to collect dust and that I finished the job and the item is in use!
Whether you are an avid crafter and builder or just appreciate seeing how people build things I think there is fantastic freedom in the knowledge and realization that in today's world of buying cheap junk from the store, squeezed out of the industrial sector, people can still go ahead and make their own items.
In fact, if you want decentralization, you actually need to consider what you can make yourself if you were cut off from a factory in China and a Farm in Brazil.
Only then do we start a journey towards becoming an eco-friendly species and are able to govern ourselves are free people... but that it a whole other series of posts is it not?
I have put together the whole process of how I made a toothbrush holder for my family. Let's get into it!
A little work area
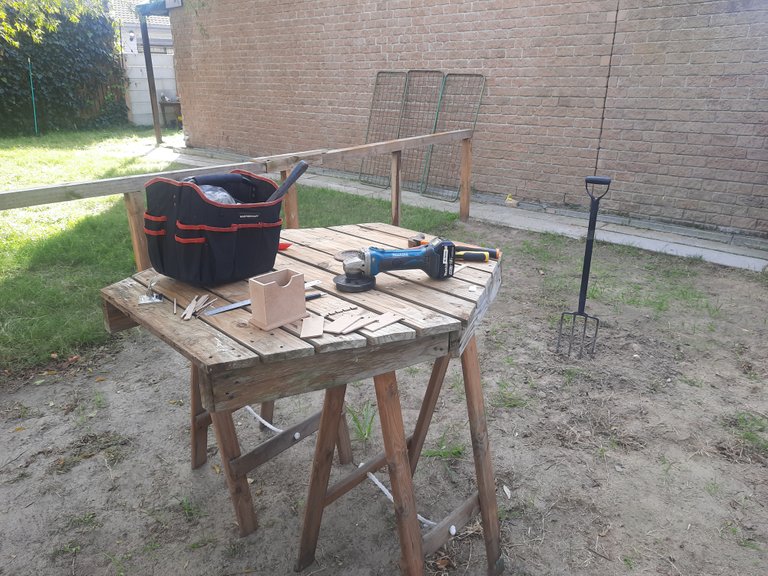
My little workshop in the garden, quickly set up. (Before I built my workbench in the garage. I did not even start or complete the whole project on this work surface because it was a little side project I would work on here and there as I went along.
It did make for a nice little quick working spot when I needed it and it was a nice day out!
Toothbrush holder
What is a toothbrush holder? Why don't you just use a cup?
Well, we are a family of 5! Myself, @zakludick, my partner @clairemobey, our daughter @aimeludick and our sons, @merenludick and @matthew-williams. Yes... we are all on Hive, though mom and dad are the active ones!
So sticking 5x toothbrushes into a cup causes two or three things that I do not like: The brushes touch. The kids stick their toothbrushes into the cup wet and the wetness collects at the bottom of the cup and starts to become gross! And sometimes, they don't know which is their own toothbrush.
An interim solution has been to color-code our toothbrushes.
But what I really wanted was a holder that would hold each toothbrush away from the other brushes.
I set out to the stores to find something like it, anything and I found nothing comparable. So I planned to make my own out of something, anything that was a suitable size.
The Materials
I found this coaster box at a PNA craft section.
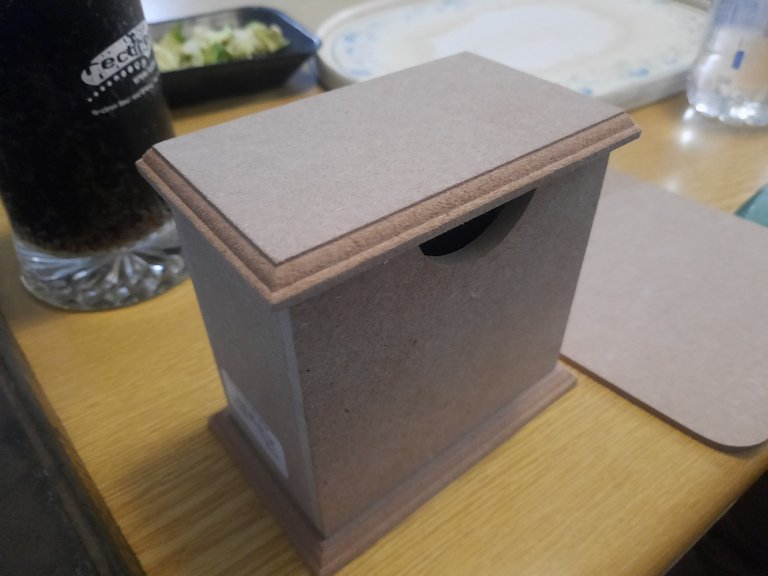
Coaster Box.
A sturdy little box, I will not be needing the lid. I instead found another use for the lid later on.
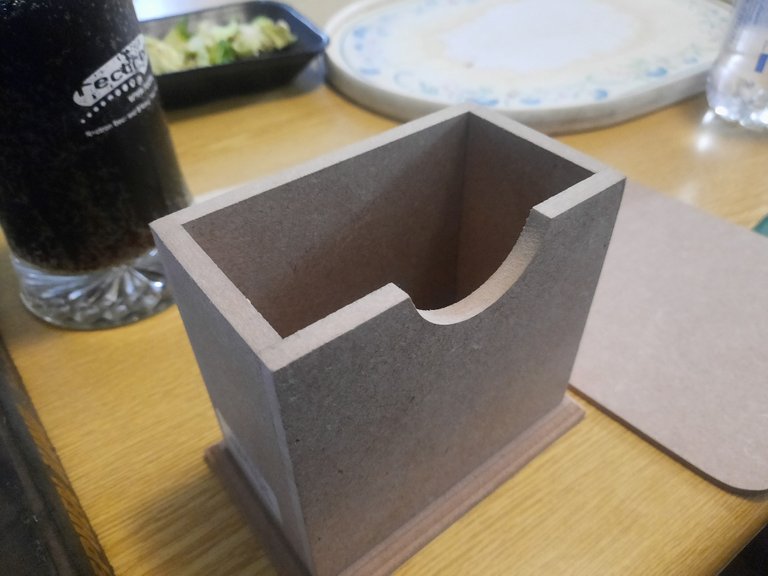
Coaster Box without lid.
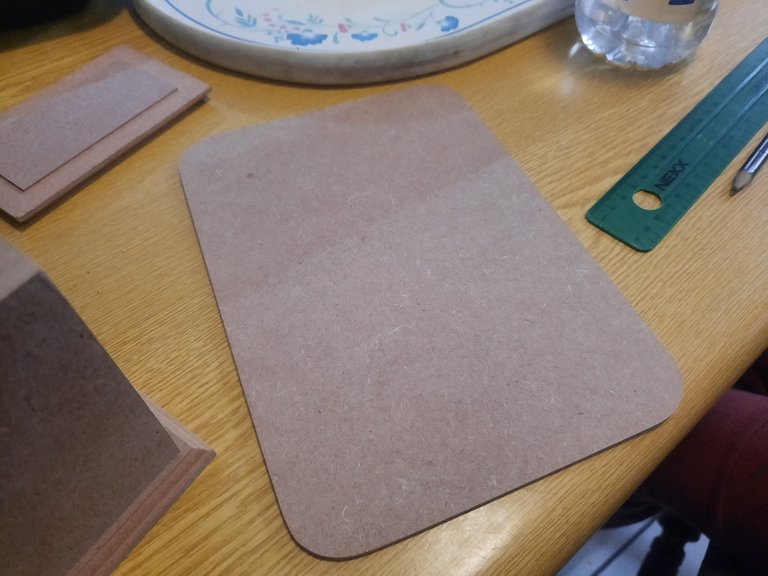
Notepad backing.
This notepad board is to you can make your own mini clip-board I guess. I was going to create dividers with this.
The Process
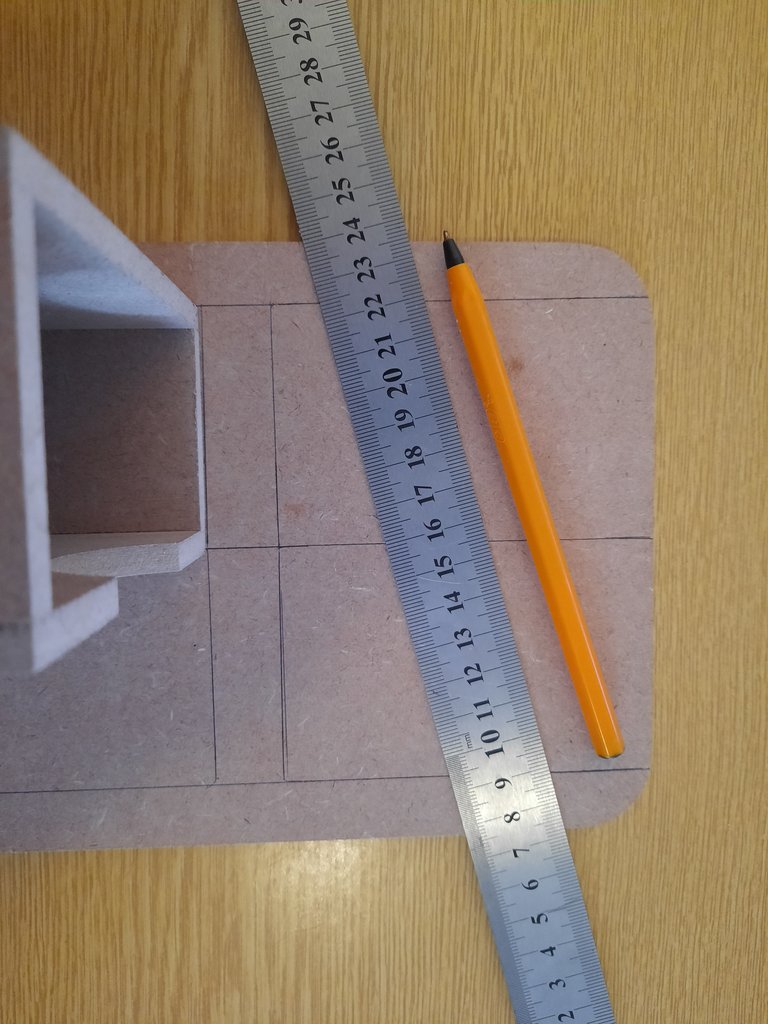
Measuring out the paddles.
Easily enough, I measured out what I would use to make my dividers and divided it up on the board.

Deciding what to chop out.
The initial chopping out was done carefully. There is a saying: You can always cut more off, but you cannot put it back on again once you have taken it off!
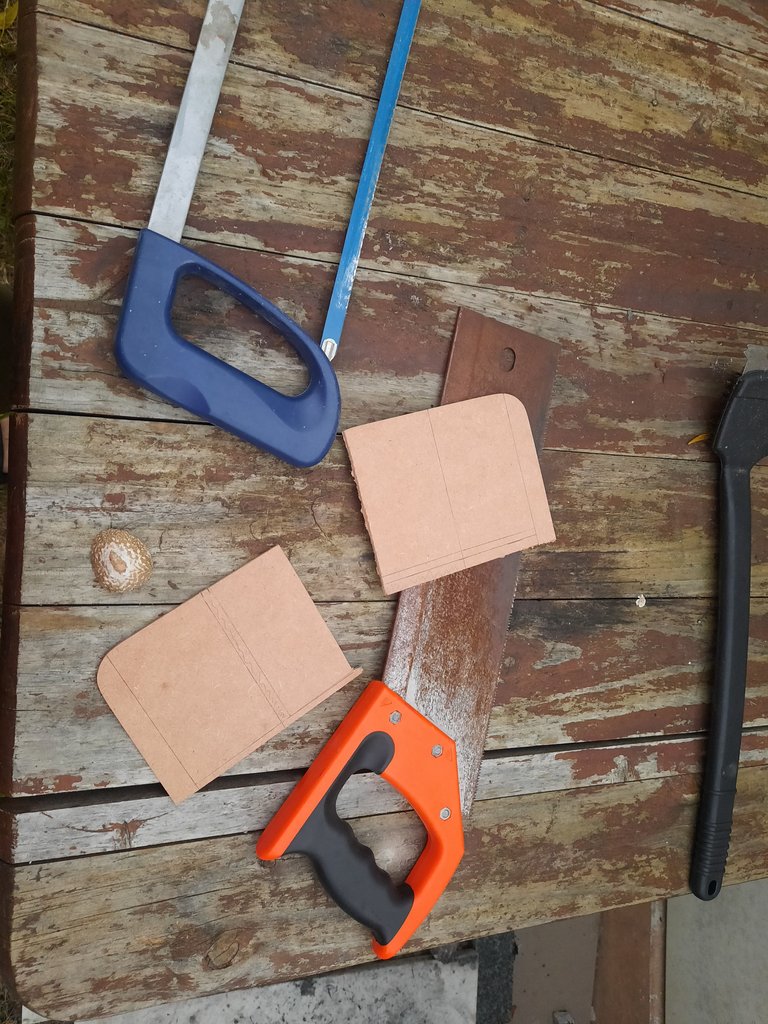
First cuts and chops.
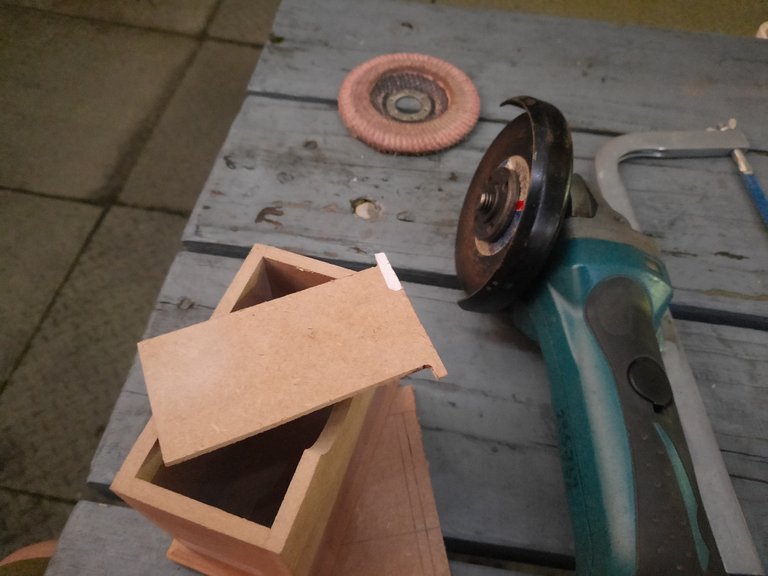
Switching to the Grinder.
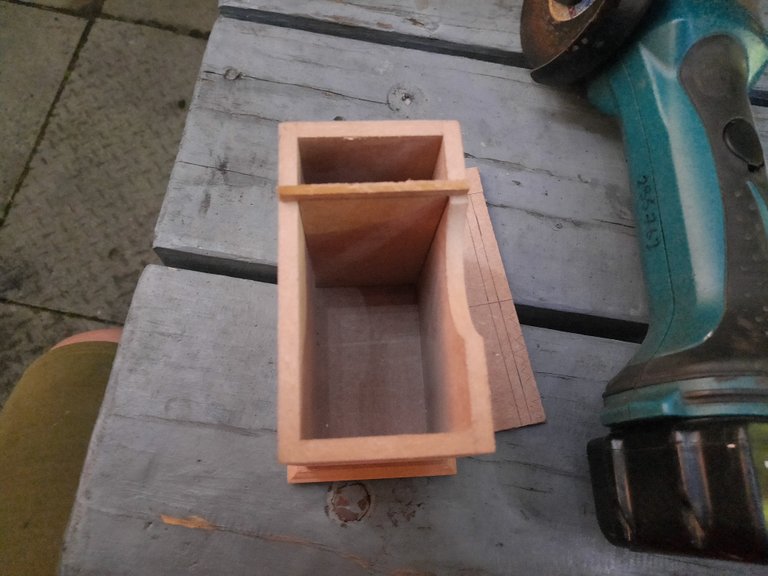
Dry-fit the first paddle.
I pretty much got to here on my first session. As I said, I was only able to work on this in bits an pieces in between other work and goings on in the house.
2nd session
This was done outside as my cover picture will show.
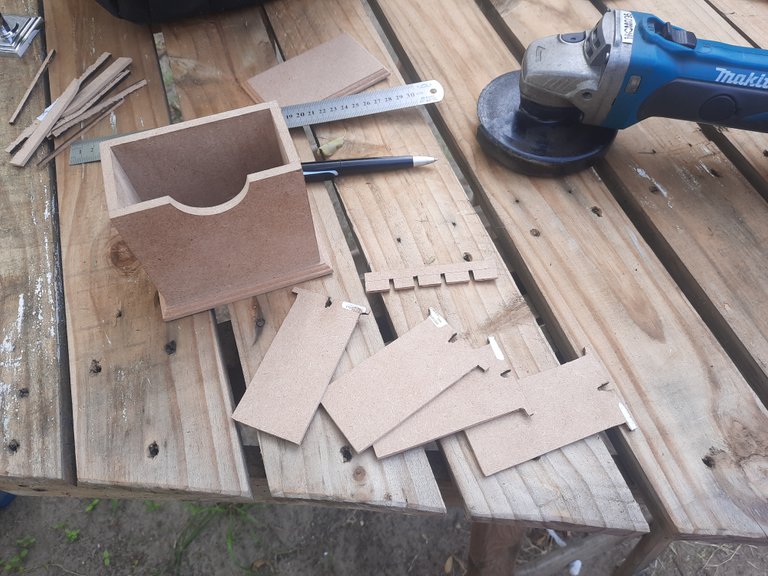
Cut the other paddles and separator.
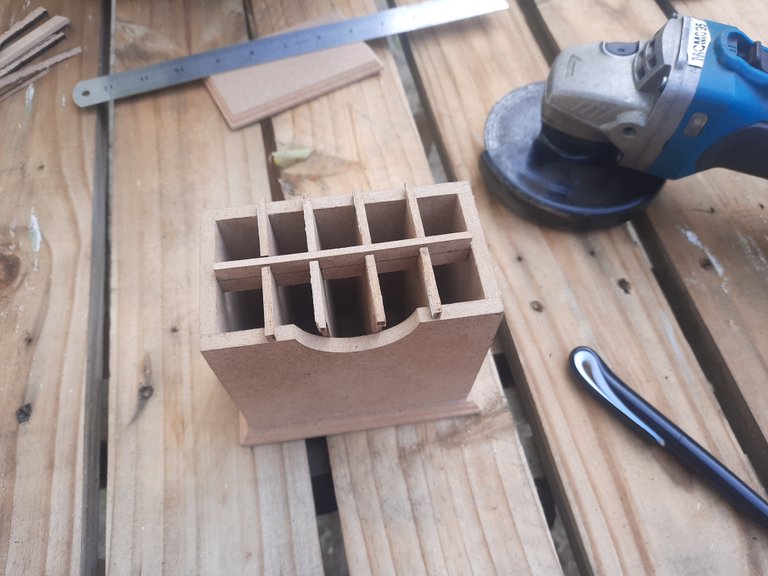
Dry-fit it all together.
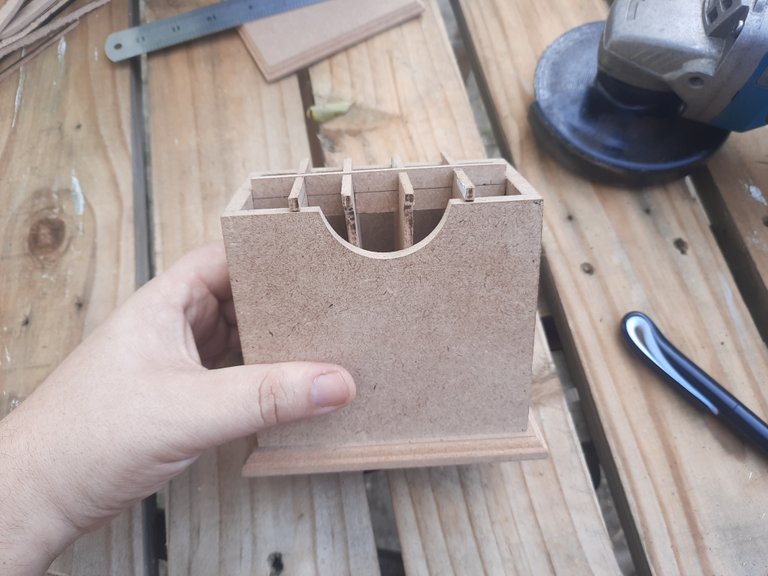
Another dry-fit view.
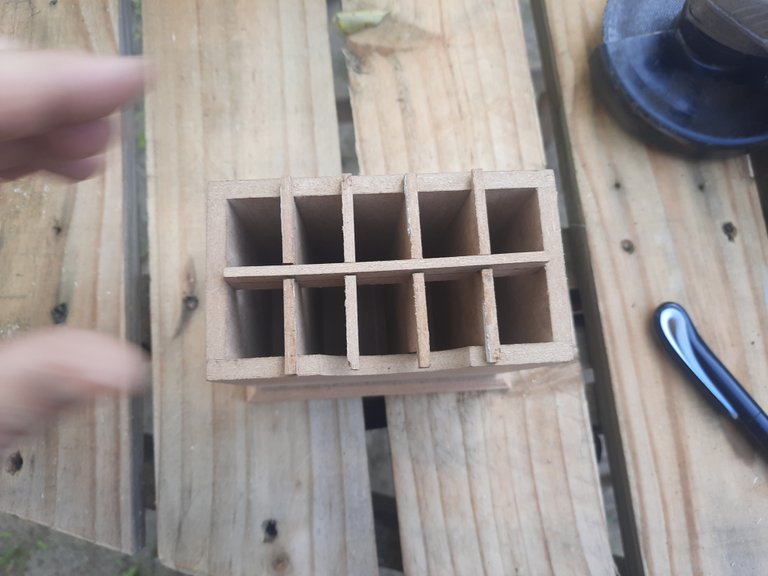
Another dry-fit view. From the top

Testing out with the toothbrushes.
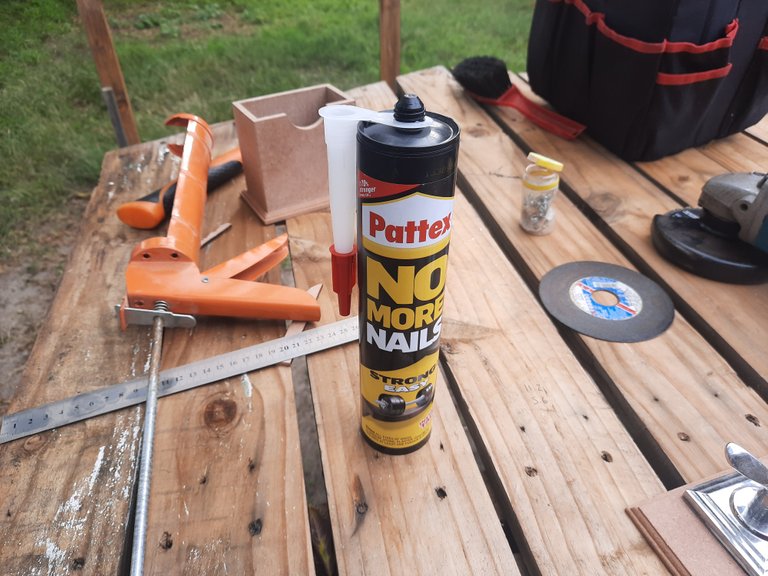
The solution to a problem - No more nails.
These little panels were far too small for nails so I bought myself a tube of no-more nails!
I only got to the gluing on the 3rd session and then let it dry and then cleaned it up again, on the 4th session I started undercoating it.
Painting time.
With some regular white PVA paint I coated this thing in white. Next to it is the clothes hook that got ripped out of the bathroom door and kind of hung there by a single screw.
This is what I used the coaster box lid for and I mounted this nicely onto this solid piece of wood. Plus all the little tiers matched up!

First coat of paint.
Final paint and marking.
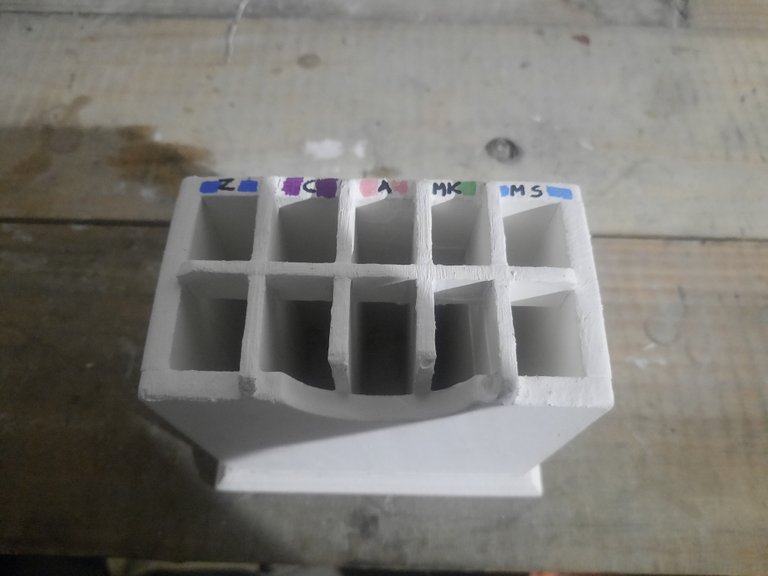
I actually resorted to dipping and hanging this thing upside down over the paint tin for several hours to get the paint inside all the compartments and then touched it up again. With the help of @aimeludick's markers, we marked out which slot is for whom.
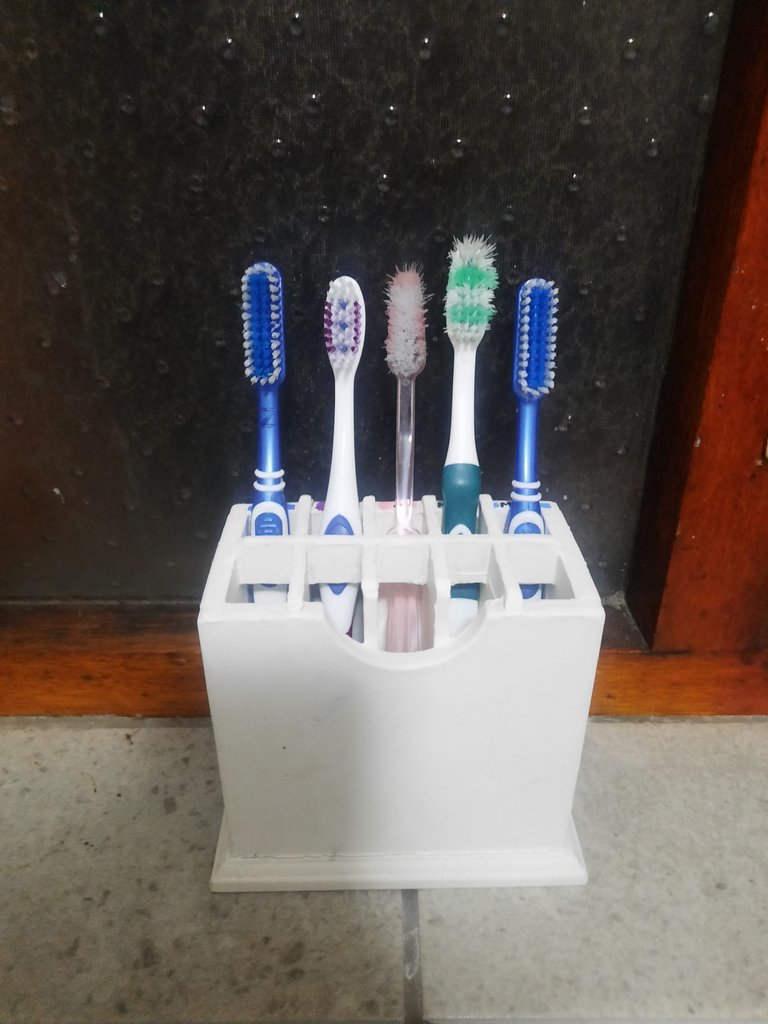
Final product.
And there we go! A project that was finally completed. Overall it took about 2 months from start to finish because of all the gaps in between when I had no time to work on it and there was always something else to do.
But now this is done and I can focus on the NEXT project in the house to do.
Until I post about one of those...
Cheers!
@zakludick
You are so amaising with everything you do around the house! So innovative! Love you babe ❤️
It is a pleasure to build things for our home, my love. To make it more beautiful or easier to live for you, for me, and for the kids. It makes me happy to see the things I make and improve are in use. 😊
Very cool! I would probably do more heavy-duty DIY things if I had power tools and I wasn't deathly afraid of them, haha. No more nails is pretty useful for a lot of things actually. Looking forward to your next project!
Thank you!
Yeah power tools are a real game changer. I used to be quite a PC nerd that knew nothing about tools. I am fortunate to have gone through all the things in my life that took me through all the paces to teach me all of these things.
More projects soon! Already photographed!
I have one of those tiny Ryobi multi-tool things that my husband got me for my birthday. That is as 'power tool' as I am willing to go. And yeah, even that was a game-changer!
Very handy machine! I wish I had one!
It has proven quite useful for me. I have soft squishy hands with not a lot of strength, so it really helps with the things I cannot do with 'brute force' that you probably would be able to do no problem, haha.
nice and neat 😎
Hehe, thanks. I do try!
Also notice how my toothbrush separates @zakludick's toothbrush from the kids' ones 🤣 Sheldon
😜