Workshop! Modifying the Pipe Rack to turn it into a Scaffold Stand
Good day everyone! Zak here from Cape Town, South Africa here! I was in the workshop last week with my friend Barry (@loadreaper), who started working at our company finally.
My bosses asked me if I knew someone with a driver's licence who would be willing to learn to work in our trade (HVAC) and I knew Barry was looking for work. About a month and a half later and he is in the workshop with us! That's great!
Anyway, you can read about Barry's first week in his post HERE. The pictures for this post and his post is credited to him and to me. We both took pictures of our projects and shared with one another.
I want to speak specifically about my scaffold rack in this post!
The Reason
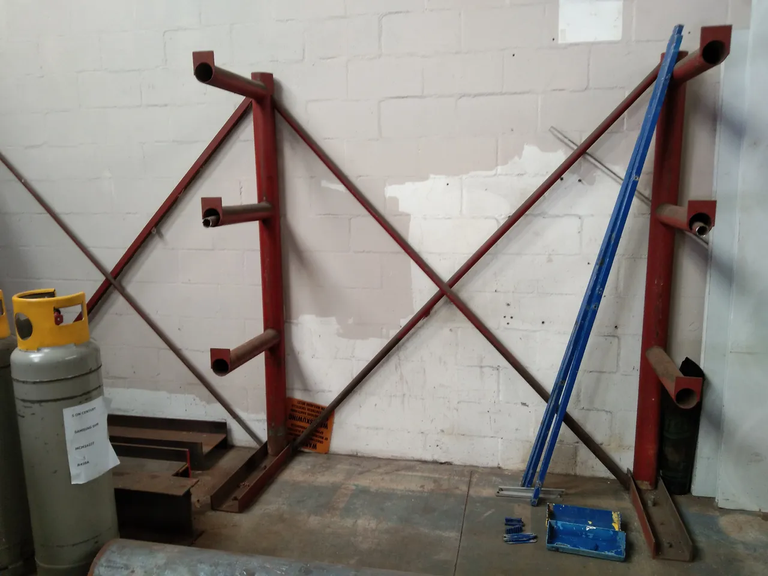
So the reason that I wanted to chnage the Pipe Rack downstairs into a Scaffold Rack is because those pipes are leftover stock that stands there for months (or years) on end and the scaffolding gets used week by week and we on the second storey storage above the one store room!
This was madness as guys were hauling up and down the scaffolding at great risk up and down the stairs while the pipes just lay there.
So I swapped the two around!
I would need to make some modifications as the pipe rack's bars were too short to support the scaffold frames and they would just fall over.
The Modification!
This is what the rack looked like when we started.
There was some pipe that we were told we could get rid of, this I cut into identical sizes. The lips of the rack was cut into semi-circles so the other pipe could fit over like a sleeve.
These sleeves would make full contact at the bottom of the pipe, be held up in the front by the now cut and rounded tips and then the back is held up by one or two large nuts that were wedged into the gap.
The nuts are big so I had to hit the pipe with a mallet to get it to slide into place and thus wedge the whole thing down.
I was not done though as I welded the sleeve to the pipe rack's existing steel.
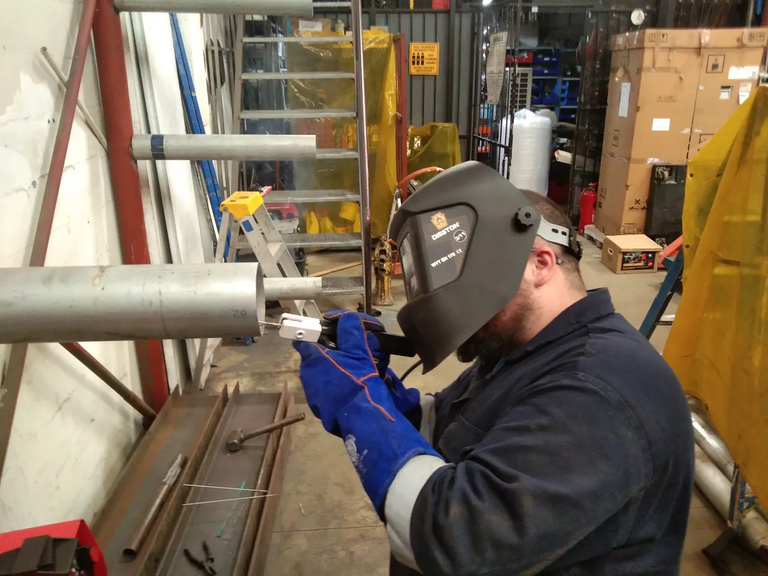
This means that I ground off some of the paint and then welded inside the pipe as well as at the back at the bottom of the pipe where the two pieces made good contact.
Now it looks like this:

Next step
The next step was to cut out semi-circles to install a down pipe. I had never quite done this (myself), but I have been watching people work for years, doing their safety and I love watching DIY videos. So plans of how to go to action sprang into my mind.
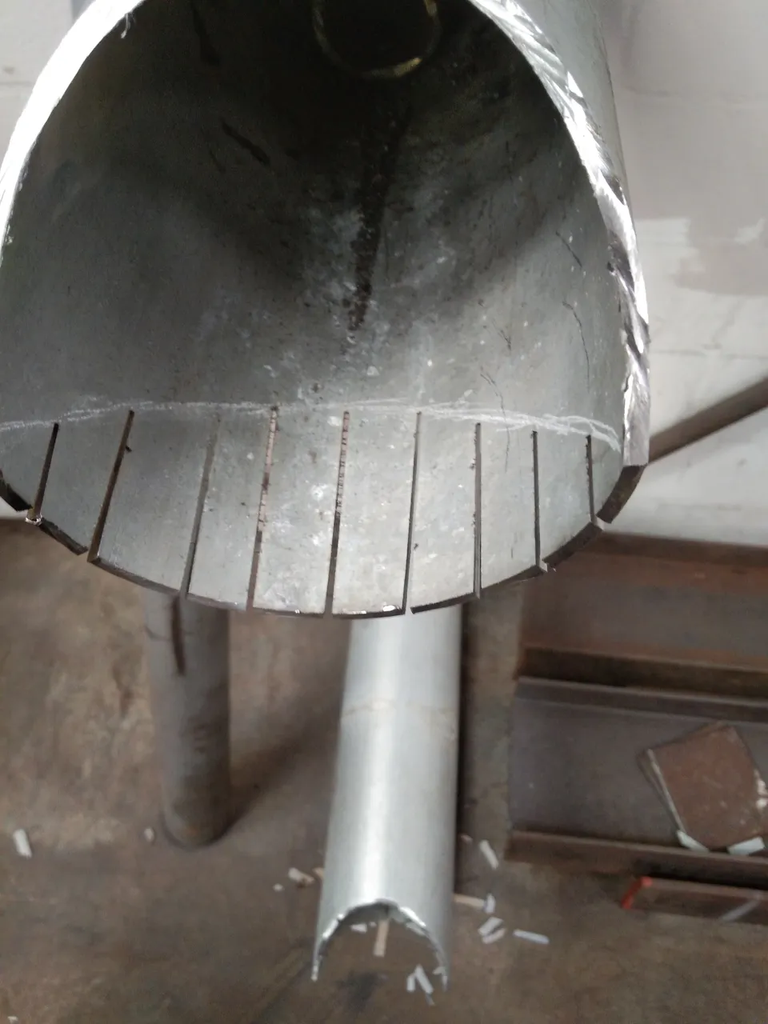
The best way to cut a semi-circle was quickly discovered as this:
Draw your semi-circle using the pipe of the brace you want to fit. Then cut lines into the pipe.
This allows you to cut a rounded edge, each piece falling free. You cannot cut curves with a grinder blade, the blade cannot bend while cutting so this helps you do the cut in sections and you get your round edge!
Straight lines.

Now cut along the chalk line.
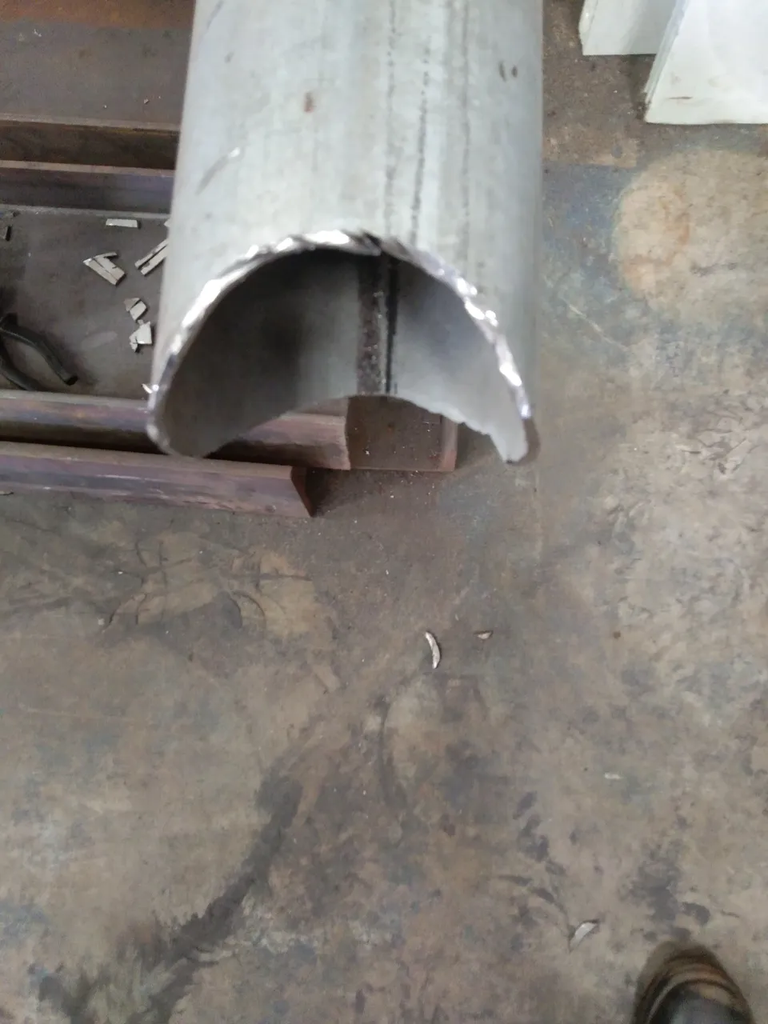
Done!
Upcoming step!
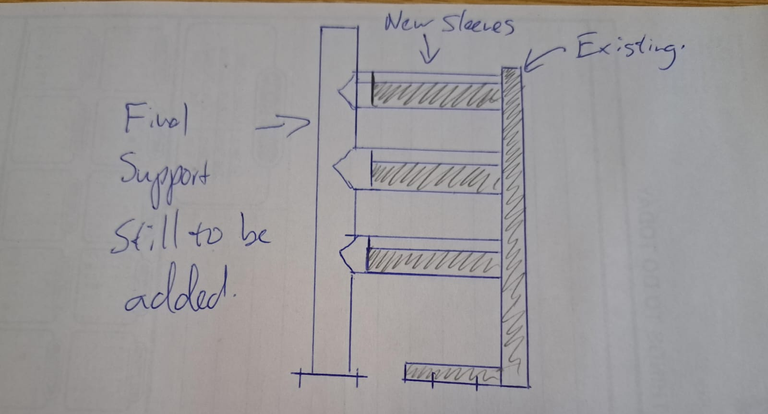
The next phase will be to install the down pipe and lock that into the workshop floor. We will be taking another two poles the same size as the sleeves, weld on feet that have a drilled hole at the bottom. This will then be put into place to mark the holes for the Rawl-bolts to be drilled and mounted.
The pipe will then go back on and I will weld all of the pipes to the down pipe!
This will have to be later when I have a chance... or as soon as I have a chance since I am mostly busy with a ship in the harbor.
Thank you for reading my post!
Cheers!
@zakludick