DIY - How to Set-up Screen-recording on a PC Using Share X
We had a problem yesterday (16th July, 2022) during the Hive Learners' periodic training for newbies, with a focus on crypto gaming on the Hive Blockchain with @Ksam as the lead and @Starstrings01 as moderator (or sort of). We needed to record the meeting so that those unable to join in are able to watch the recordings later. But, we were unable.
The screen-recording application Starstrings01 was relying on suddenly started requesting a paid upgrade to enable him to download his recordings.
Startstrings01, was like: "I will have to pay to download my own recordings, that's BS". (Not quite like that though, but somewhat close). So, I offered to help. I had two main options in mind:
- TechSmith Camtasia
- ShareX

TechSmith Camtasia was a paid option and quite quality with a video editor baked in, along with the paid option download size is quite large, though it needs very brief set up process.
ShareX on the other hand is totally free as it is an open source, and is just 7.0mb in size (though could technically as for up to 50mb). But that's nothing close to the around 300mb required for Camtasia.
So, go to solution was ShareX. Though, the meeting wasn't successful, and it was a result of a combination of factors, which my recommendation could easily fit in somewhere, but as Starstrings puts it, "The Universe is not in favour of the meeting 🤣"
That was a bit too much for failure but, he knows better. However, I guided him on how to setup ShareX on his Windows laptop/desktop, but his attempt was not as fruitful, so as part of my creative Sunday project, I said to myself, why not share the guidelines here, so, if that sounds good to you, let's begin.
Why do you need a Screen-recorder?
The answer is simple, with a screen-recorder, you can capture events on your computers display (be it a mobile phone, laptop and/or desktop). This is always useful in demonstrating processes for teaching and training purposes, recording meets as is in this case, and other numerous reasons.
For mobile devices, I recommend using the built in screen recorders for Samsung and Apple devices, if your device doesn't seem to a have a reliable screen-recorder, Fooview is my best option for Android devices.
For PC, there are myriads of good options, but let's begin with ShareX.
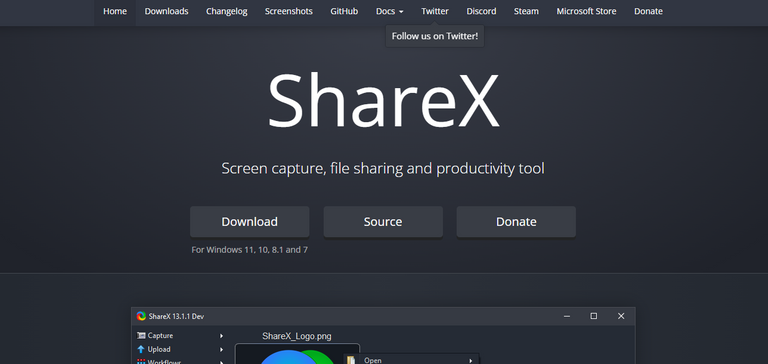
Downloading ShareX
Simply visit their website https://getsharex.com/ and download the installer from the download link provided.

Note that ShareX is a screenshot-first tool, but has a lot of additional features under the hood.
Install ShareX
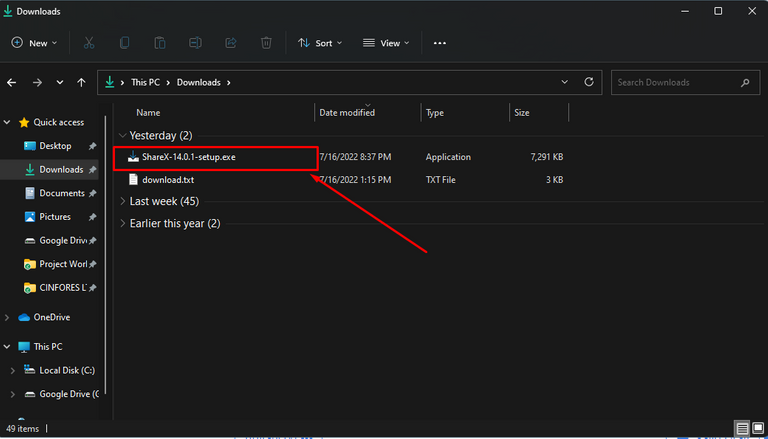
After downloading, find the ShareX installer on your downloads and install. Simply double click on the file to install. Accept all the licensing agreements and click next repeatedly and if install was successful, you will be shown the screenshot below.
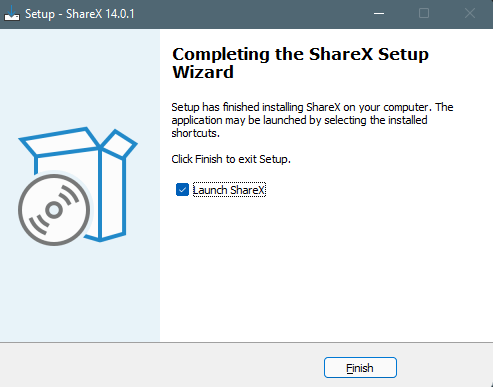
Allow the app to launch, and then move to the next step. Remember, our aim is to screen-record with this app.
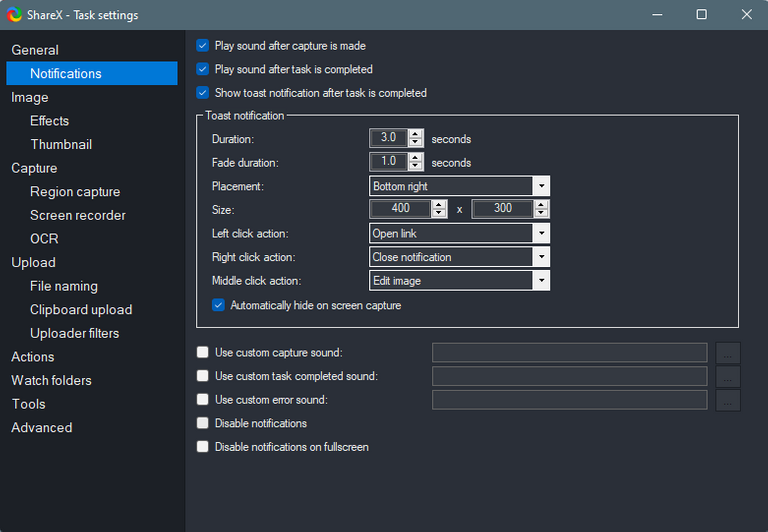
Set-up ShareX for Screen-recording
Go to your task manager, and find ShareX icon  in the area close to your battery and WiFi icon, you may need to click the arrow up option to reveal it.
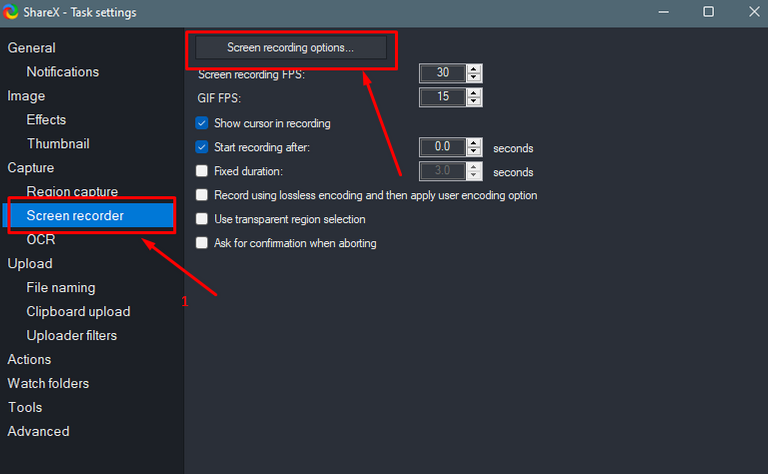
While hovering your mouse over ShareX, right click on it to reveal the options, and then select "Task Setting", shown here.
While there, select "Screen recorder", and then "Screen recording options".
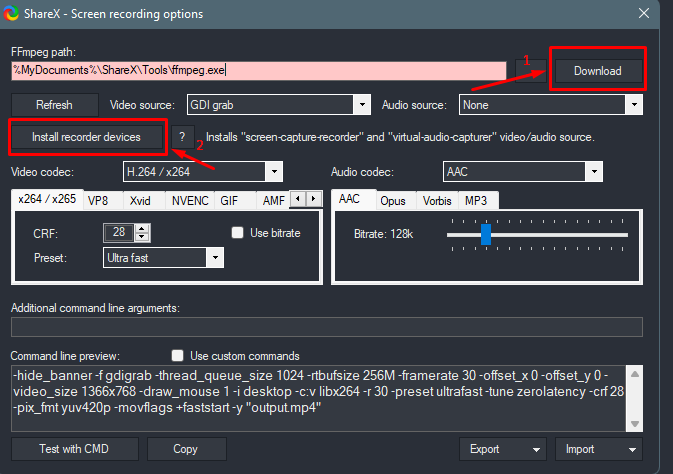
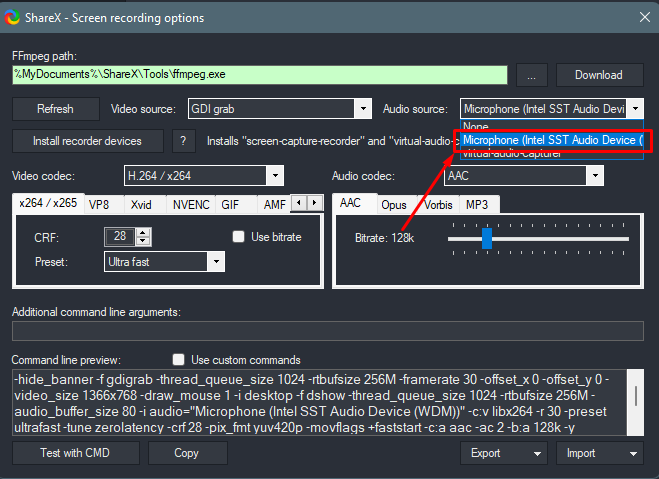
Setting Up Screen-recording options in ShareX
While your in the "Screen recording options", download the following, "FFmpeg.exe" and "Install recorder devices".
Installing FFmpeg.exe

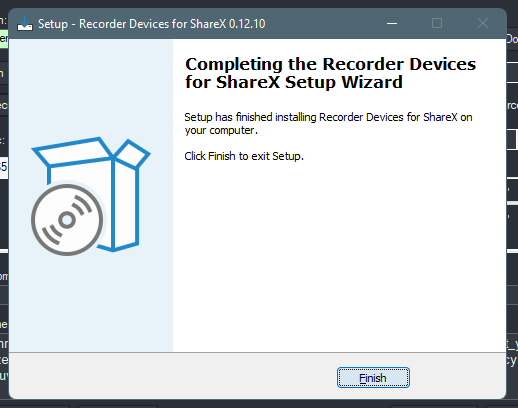
Installing Recorder Devices
Final Setup
- Select a video source: Select GDI Grab as your video source

Incase during your testing, video capture didn't come out as preferred, you can alternatively select "screen-capture-recorder".
- Select and audio source - Choose your system's microphone from the drop down under Audio Source.
Once done, close the recording option interface and try out screen-recording.
Screen Recording Using ShareX
You can also record gifs such as the one above. However, the process for doing a screen-recording has been clearly demonstrated. Once you select the screen-recording option, select the region you want to record and you will find your recordings counting.
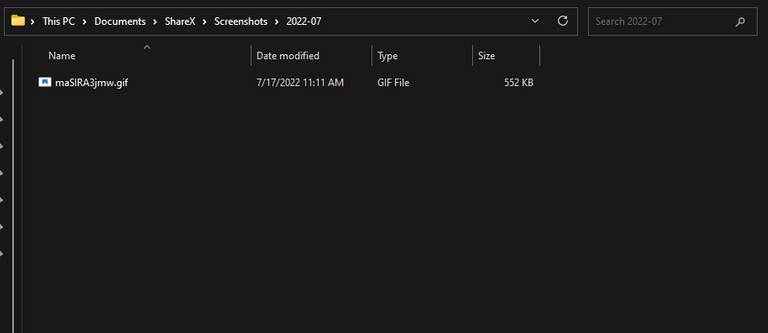
Find your Recordings made on ShareX
Simply go to your File Explorer > Documents > ShareX > Screenshots > Year and Month (eg. 2022-07) and you will find your files.
That's all for now
I hope Starstrings and Ksam find a better alternative to make our next meeting and training a success, if you find the ShareX interesting as well, you can try it out. If you have any questions, I will be waiting for you.
Wow, this is very useful, I will try in the next few days to see if I can record anything. The only negative thing is that, if I'm not mistaken, my laptop doesn't have a microphone in good condition. Anyway, this is a great contribution.
Blessings to you.
Thanks a lot for finding it useful. If you've the correct drivers installed, you can plug in a wired headset or even Bluetooth headset. It will do the work too!
Yay! 🤗
Your content has been boosted with Ecency Points, by @zestimony.
Use Ecency daily to boost your growth on platform!
Support Ecency
Vote for new Proposal
Delegate HP and earn more
It's great to see you put yesterday scenario into good use, and here I've got to learn a new stuff which I hope to put into good use ones I purchase a laptop.
I'm happy you found it interesting. Thanks Vickoly
Man you be boss oh! You did are using windows 11… God when! This is a nice tutorial, I would try it out.
Lol. Thanks bro. Yea. I'm using Windows 11, but not what you think. I've been working on a project of converting Chromebooks to Windows laptops, Chromebooks are very cheap, like the one I'm using is just around 25k.
It usually comes preloaded with Linux (ChromeOS), but I managed to load it Windows 11.
So, the whole long and short is that, I'm using recent software on cheap hardware! 😅
Seriously? So if I give you money, you can get one for me?
Yea. Or you can get it, and I'll guide on every step. The good thing about Chromebooks is that they can easily last 7-10 hours on battery and are very small that you can carry them easily anywhere.
Send me a model to check.. I can plan to get one when I am capable.
Alright. Though, it's an 11.6 inch laptop. You can lookup Dell Chromebook Wolf.
I prefer streamlabs obs when recording my games
Wow this is a really educative posts.. But I honestly think @starstrings01 should really get one of those paid apps for video recording because he’s a big man and can afford it.
When you have whine me finish tell me oh
That's true! He's a whale na, isn't he?
You haven't given me the position yet oh!