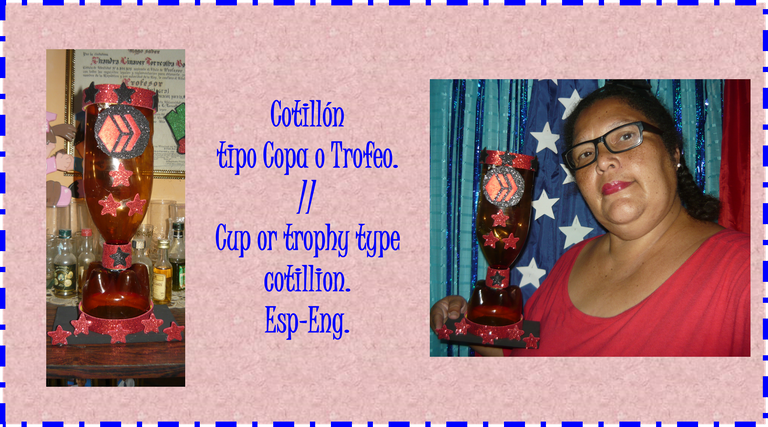
Cotillón tipo Copa o Trofeo. // Cup or trophy type cotillion. Esp-Eng.
Saludos mis amigos artistas y creadores que nos reunimos aquí y traemos para todas esas bellas creaciones que hacemos con ese maravilloso don que tenemos y que nos dieron, es una bendición.
Este cotillón me recordó cuando yo trabaja en la escuela, que siempre procure hacerle yo misma los cotillones a mis alumnos, para sus fiestas, sentía una gran satisfacción al hacerlo. Como también ice para las competencias deportivas en la escuela, de ahí fue que hacia unas copas o trofeos así, que se llenaba de golosinas a los campeones.
Si se hace con material de provecho, reciclados ya les cuento sobre los materiales y como la hice.
Materiales:
- 1 botella plástica, puede ser cualquiera yo escogi una de malta, por su color como bronce.
- Tijeras, reglas, lápiz, cinta métrica,
- Pistola, barra de silicon.
- Tabla pequeña de 16 x 10 (esto es opcional.
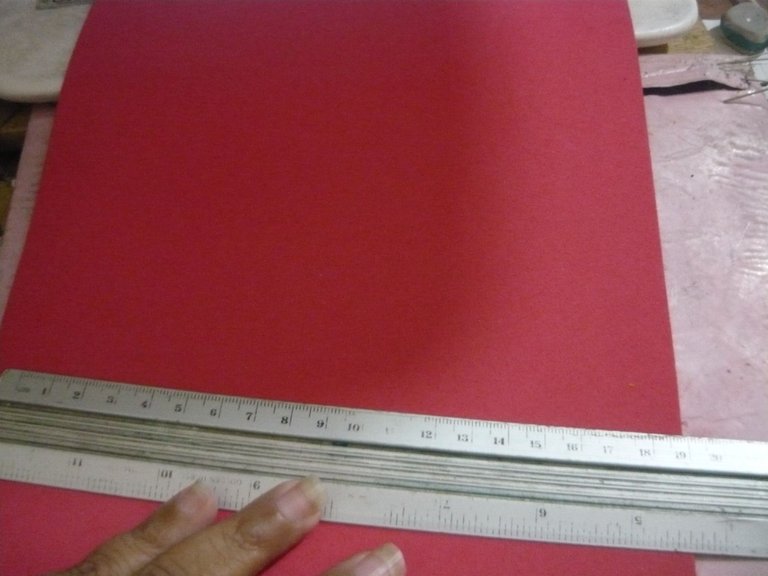
- Foami negro y rojo escarchado.
- Pintura negra y pincel.
Manos a la obra:
-Previamente lavar la botella debe estar limpia y seca, otra botella donde se debe ver bonita la copa con la botella de Chinotto, la verde.
- Como mi trofeo lleva la tablita para la base la pinte con pintura negra y con el pincel.como dos manos o capas de pintura y se deja secar.

Ahora vamos con la botella,
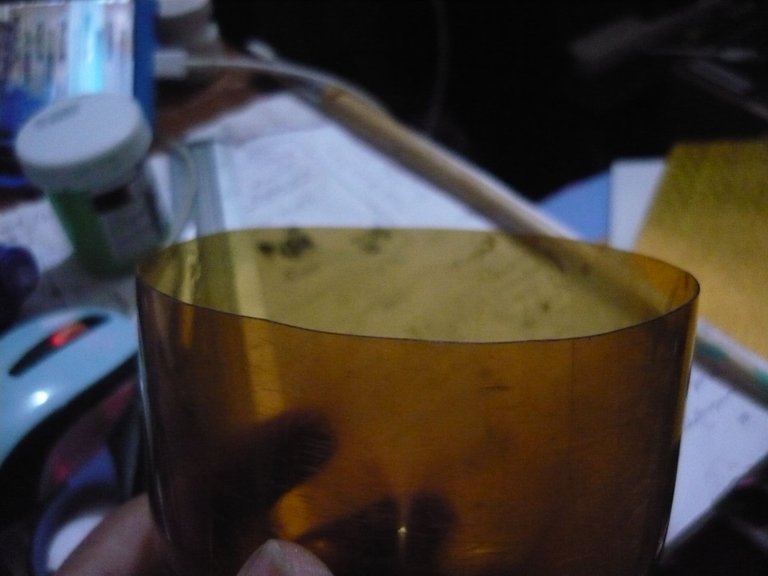
- Cortar la botella, eso lo hice primero calentando un cuchillo, luego emparejo con la tijera, aun no debemos botar nada, porque no sabemos que podamos usar.
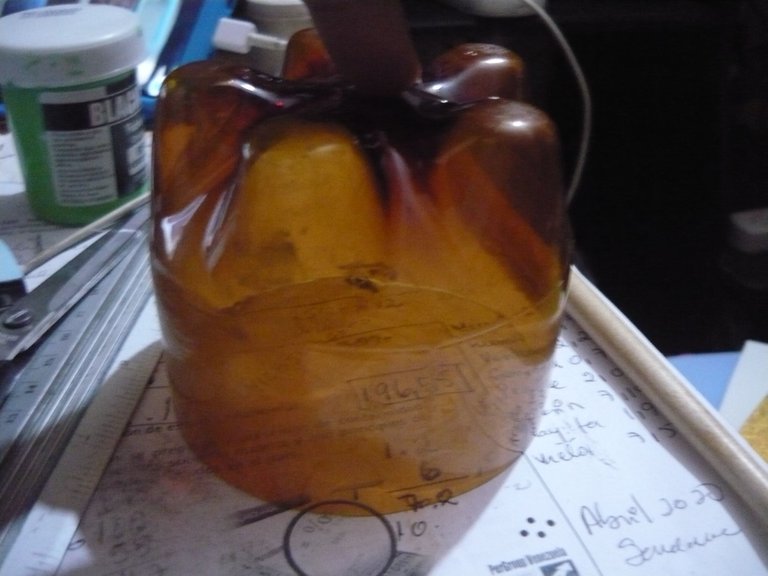
- La parte abajo de la botella no la botamos esa nos va servir para la base del trofeo.
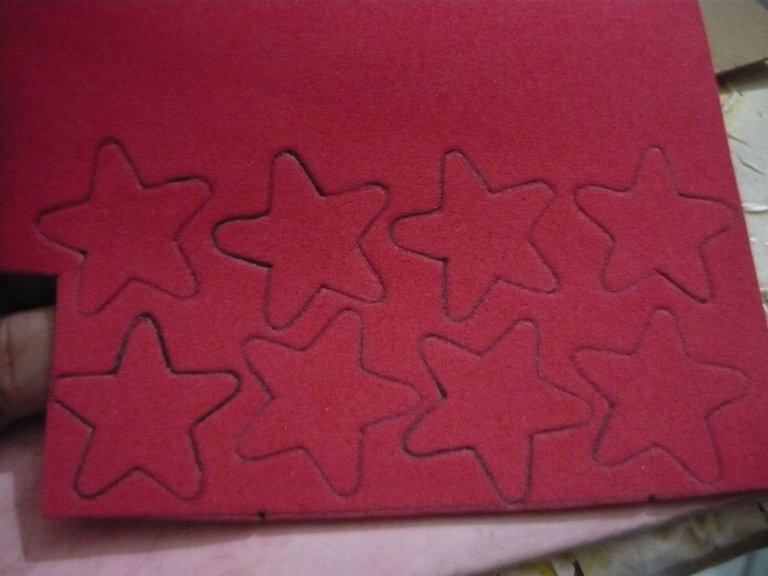
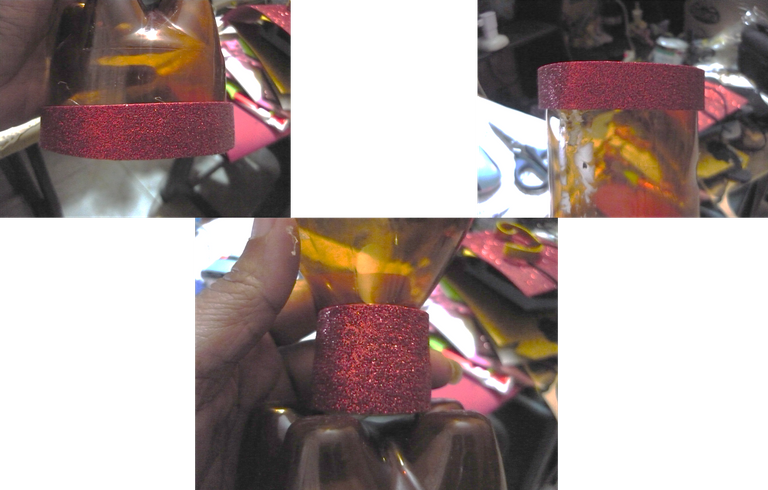
- Antes de armar el trofeo, marco unas estrellas pequeñas en el foami rojo escarchado, y unas cintas del mismo foami, para la parte de abajo del trofeo, en el cuello de la botella y arriba.
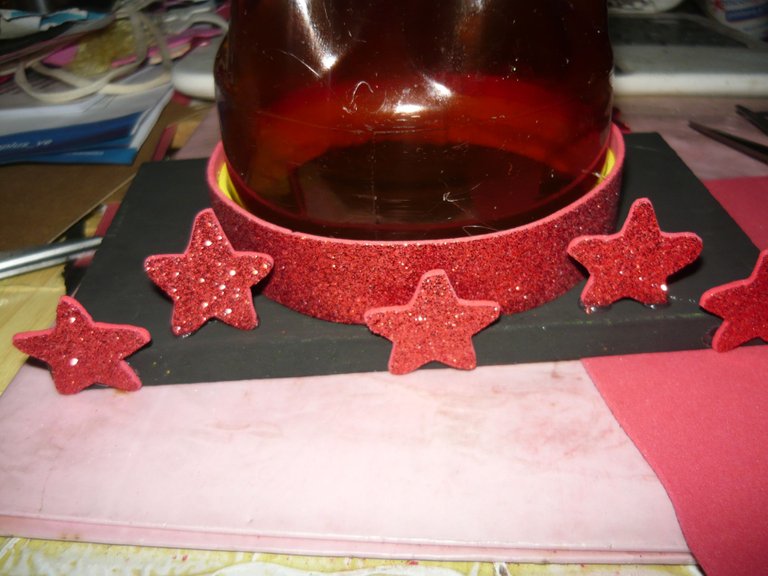
Ahora armemos el trofeo; pegamos primero la parte de abajo, a la tabla y después unas estrellitas, que queden paraditas, y en el borde de la tabla or el frente también.
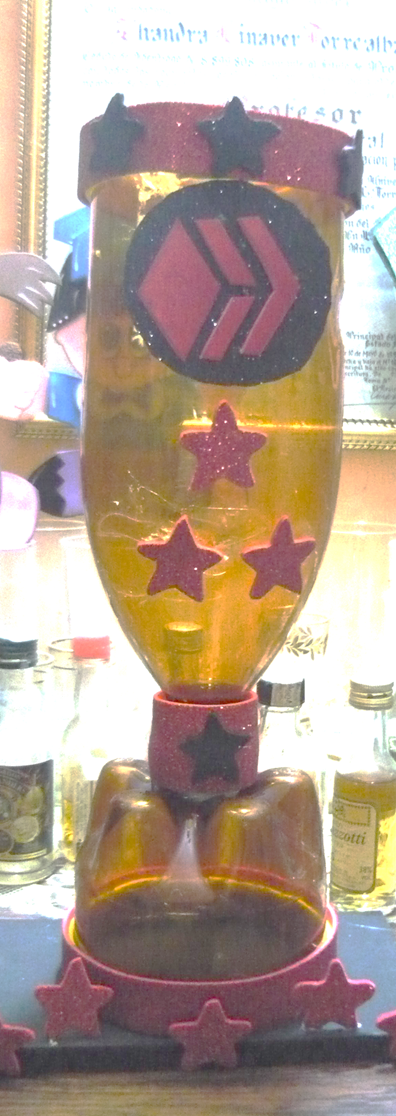
Luego la otra parte de la botella sobre la base y al fibal decoramos con mas estrellas y el logo de Hive, así fue una Copa Hive.
Solo faltan las golosinas y entregarla a los campeones, je je je.
Ven que fue muy fácil, con materiales reciclados, para quienes deseen hacerlo para una escuela, pidan las botellas a los alumnos, recuerdo que una vez los hice asta con los vasos de helados, de los carros heladeros, yo le ponía a cada quien su nombre y todos felices.
Hay muchas alternativas para hacer muchas cosas bellas, bien sea para sus fiestas o como una entrada extra de dinero.
Las fotos tomadas con mi cámara Panasonic.

Greetings my friends artists and creators that we gather here and bring for all those beautiful creations that we make with this wonderful gift that we have and that we were given, it is a blessing.
This cotillion reminded me of when I worked at school, I always tried to make the cotillions myself for my students, for their parties, I felt a great satisfaction in doing so. As well as for the sports competitions at school, I used to make cups or trophies like this, which were filled with candy for the champions.
If it is made with useful, recycled material I will tell you about the materials and how I made it.
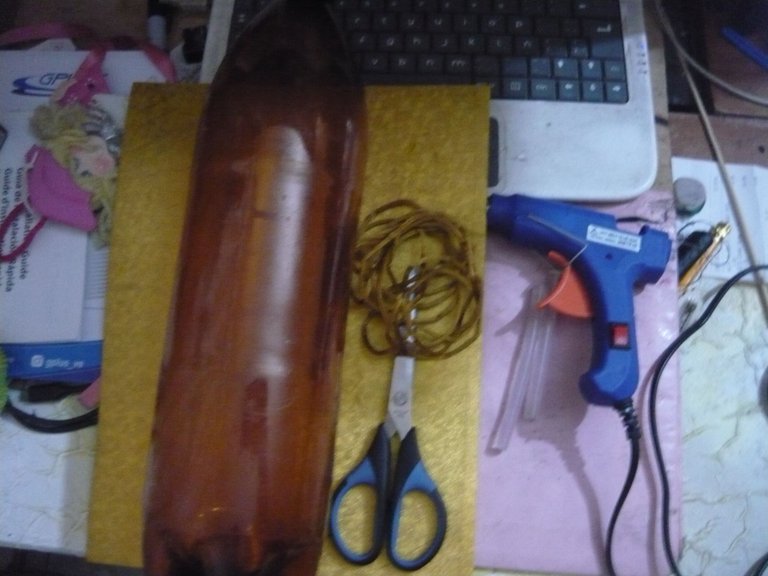
Materials:
- 1 plastic bottle, it can be any one, I chose a malt bottle, because of its bronze color.
- Scissors, rulers, pencil, tape measure,
- Gun, silicone stick.
- Small 16 x 10 board (this is optional).
- Black and red frosted Foami.
- Black paint and brush.
Let's get to work:
-Previously wash the bottle must be clean and dry, another bottle where it should look pretty cup with Chinotto bottle, the green one.
- As my trophy has the little board for the base I painted it with black paint and with the brush.as two coats or coats of paint and let it dry.
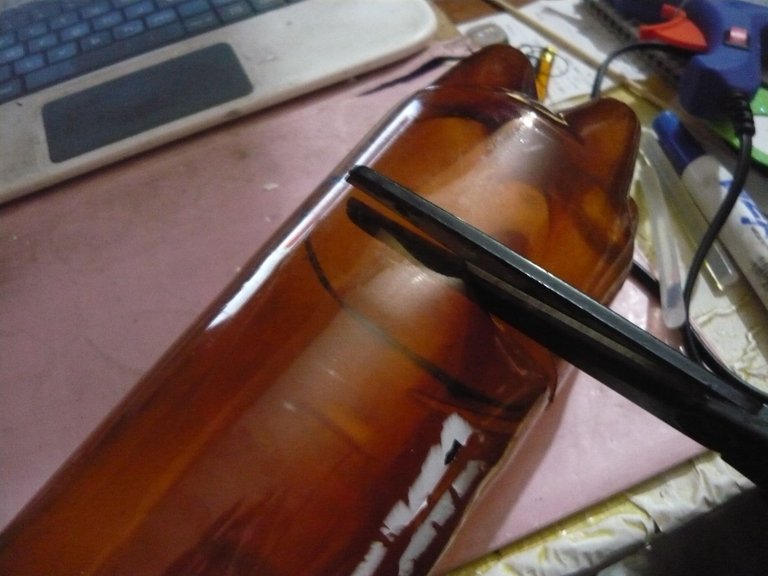
Now let's go with the bottle,
- Cut the bottle, I did that first by heating a knife, then I match with the scissors, we should not throw anything away yet, because we do not know what we can use.
- The bottom part of the bottle we don't throw it away, that will serve us for the base of the trophy.
- Before assembling the trophy, I mark some small stars on the frosted red foami, and some ribbons of the same foami, for the bottom of the trophy, on the neck of the bottle and on the top.
Now let's assemble the trophy; first we glue the bottom part to the board and then some little stars, so that they stand upright, and on the edge of the board or the front as well.
Then the other part of the bottle on the base and at the end we decorated with more stars and the Hive logo, so it was a Hive Cup.
The only thing missing is the candy and handing it to the champions, heh heh heh heh.
You can see that it was very easy, with recycled materials, for those who want to do it for a school, ask the students for the bottles, I remember that once I made them even with the ice cream cups, from the ice cream carts, I put each one's name and everyone was happy.
There are many alternatives to make many beautiful things, either for your parties or as an extra income.
Photos taken with my Panasonic camera.