Reparando Bombillo LED // Repairing LED Bulb Esp-Eng
Hola mis amigos de esta comunidad que nos da mucho aliento a todos a hacer las cosas bien donde aprendemos y también enseñamos, así como yo aprendí de un tutorial como reparar un bombillo Led, aquí les enseño como y así también aprenden.
Hello my friends of this community that gives us much encouragement to all to do things well where we learn and also teach, just as I learned from a tutorial how to repair a LED bulb, here I teach you how and so also learn.

Ese bombillo que ven en la foto fue el que repare, lo compre hace un año, se daño este año, menos mal que no lo bote con la idea de que se podia reparar y lo guarde, entonces fue cuando encntre un tutorial en Tik Tok de como reparar bombillos led.
That bulb that you see in the photo was the one I repaired, I bought it a year ago, it was damaged this year, luckily I did not throw it away with the idea that it could be repaired and I kept it, then I found a tutorial in Tik Tok on how to repair LED bulbs.
Cabe aclarar primero, que es un bombillo ahorrador pero diferente de los otros, ya que son de tubos bueno no sabria decirles, tienen reparación también pero si es mas profunda la reparación,mientras que los ahorradores LED, son mas fáciles de reparar.
It should be clarified first, that it is a saving bulb but different from the others, as they are tubes, well I could not tell you, they also have repair but if the repair is deeper, while the LED savers, are easier to repair.
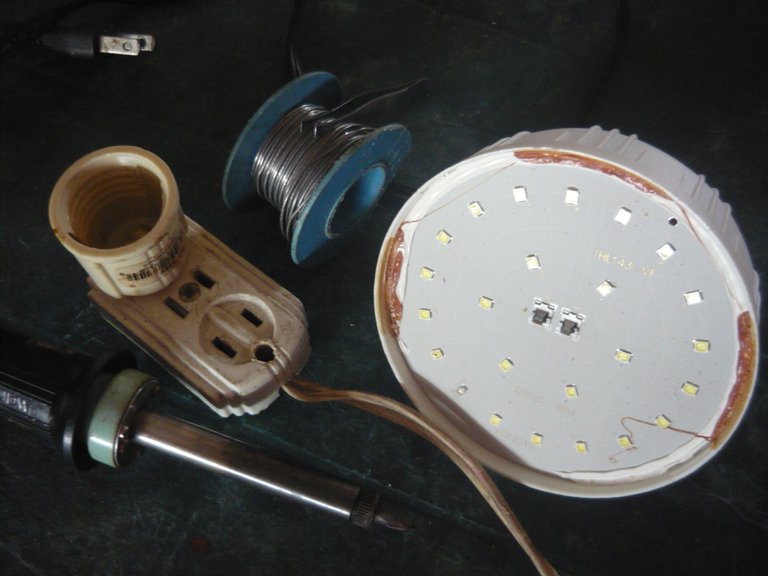
Para esto use los siguientes materiales: // For this I used the following materials:
-El Bombillo, que creo no se que con algo de calor se puede despegar, este se despego no se como.
-Cautin.
-Estaño.
-Pinza de cejas (puede ser otra).
-Extension con tomacorriente.
-Probador de bombillos.
-The bulb, which I believe that with some heat can take off, this one came off I do not know how.
-Cautin.
-Tin.
-Eyebrow tweezers (can be another one).
-Extension with outlet.
-Light bulb tester.
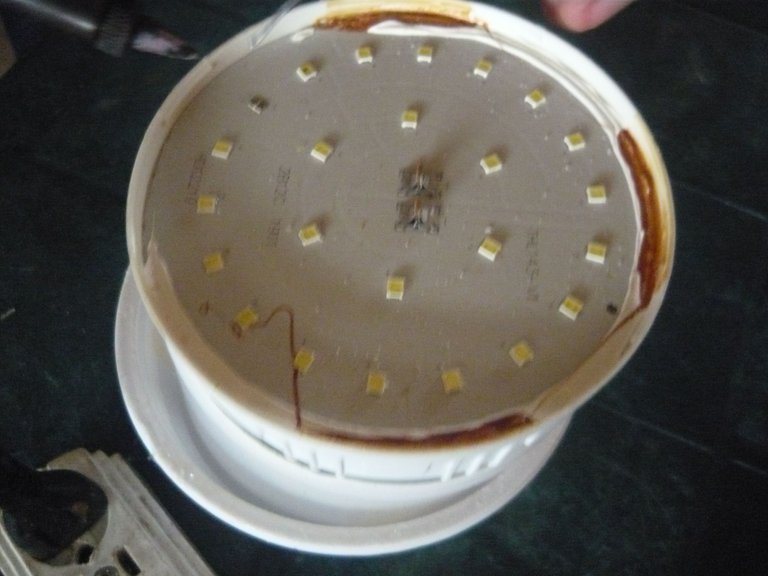
Limpiamos bien de algún sucio el bombillo, restos de pega o algo similar, para poder ver bien cual es la falla, debo enchufar la extensión colocar colocar el probador de bombillos y conectar el bombillo.
We clean well of some dirty bulb, remains of glue or something similar, to be able to see well which is the fault, I must plug the extension to place the bulb tester and connect the bulb.
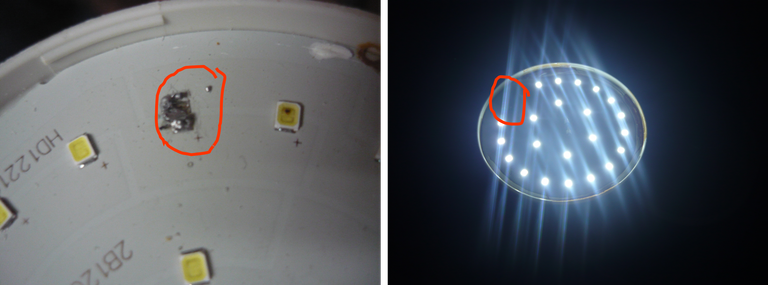
Los bombillos led, tienen como unos taquitos, eso es lo que da la luz, lo que prende, sin prender podemos apreciar que hay uno que no se como lo demas, ese puede ser el que este quemado.
The led bulbs, have as some taquitos, that is what gives the light, what turns on, without turning on we can see that there is one that is not like the rest, that may be the one that is burned.
Se fijan ya conectado el bombillo hay uno que no prende, ya vemos que es un solo, eso lo probamos con una pinza que toque ambos extremos del taquito y prenden sino se hace eso no prende ninguno, asi no sabriamos cual es el de la falla.
They are fixed already connected the bulb there is one that does not turn on, and we see that it is a single, that we try it with a clamp that touches both ends of the taquito and turn on but it does not do that does not turn on any, so we would not know which is the fault.
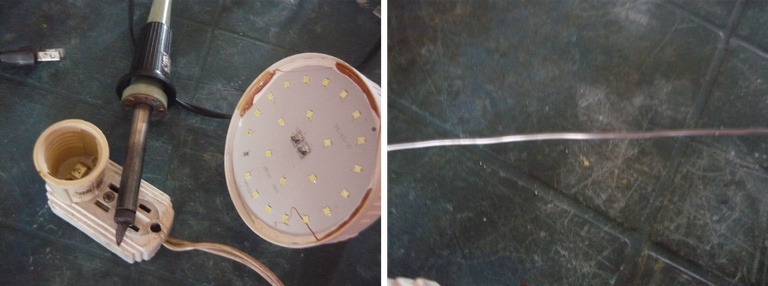
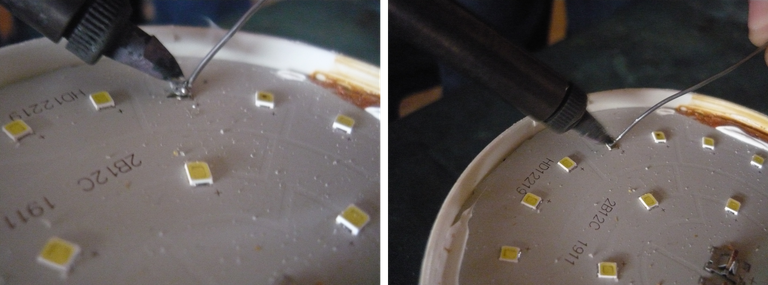
Quitamos el bombillo, para hacer la operación, digo la reparación, enchufamos el cautin esperar que se caliente bien
We remove the bulb, to make the operation, I mean the repair, we plug the soldering iron and wait for it to heat up well.
La función del cautin es que bien caliente derrite el estaño que es un material blando, lo que se va derritiendo es lo que va cubrir el taquito quemado.
The function of the soldering iron is that it melts the tin which is a soft material, what is melting is what is going to cover the burnt socket.
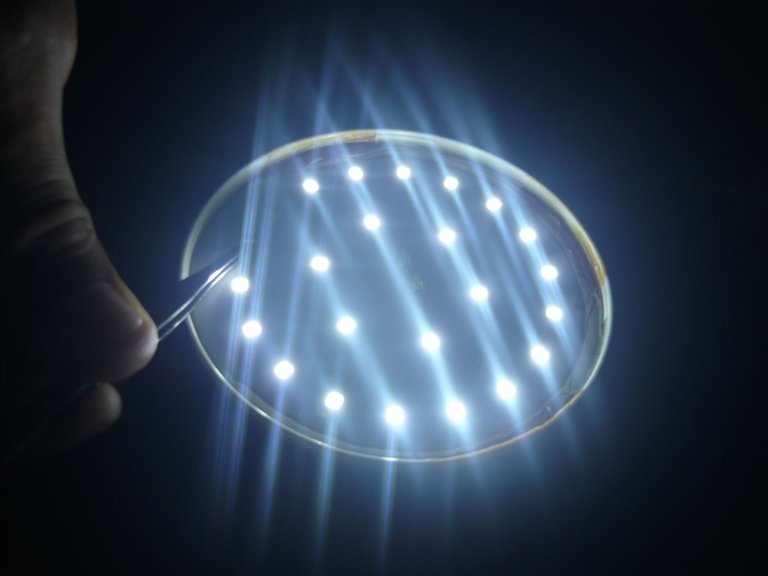
Esperar que se seque un poco, volvemos a probar el bombillo, y listo prende de nuevo, que bueno, donde se coloco el estaño eta apagado por supuesto ya que se quito la plaquita, la funcion del estaño es unir esa pieza para que los demas taquitos enciendan y asi el bombillo nos da luz de nuevo.
Wait for it to dry a little, we test the bulb again, and ready to light again, that good, where the tin was placed eta off of course since the plate was removed, the function of the tin is to join that piece so that the other taquitos turn on and so the bulb gives us light again.
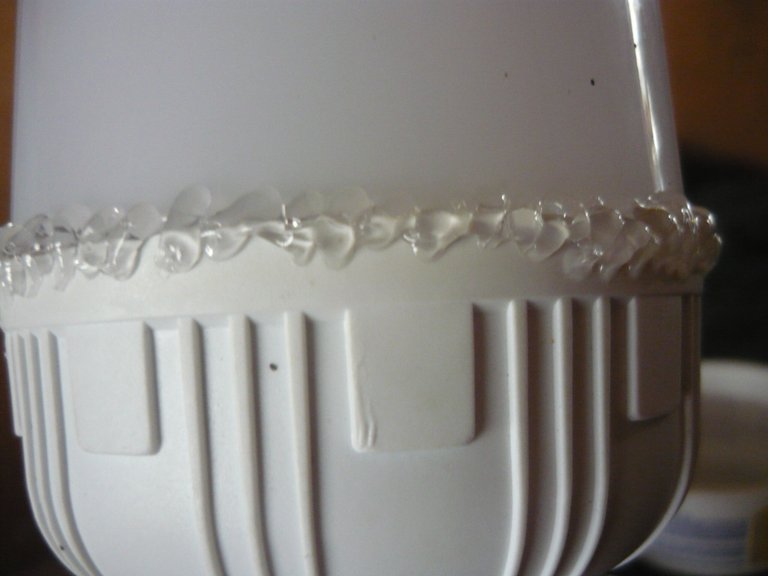
Ya se probo que quedo bien, ahora pegar el bombillo, no se con cual pega lo hicieron, pero yo lo pegue con silicon, por a parte externa en todo el contorno que en un caso que se queme otro de los taquitos es mas fácil despegar el silicon y hacer de nuevo la reparacion, pero ojala no se quemen mas taquitos.
I don't know with which glue they did it, but I glued it with silicon, on the external part in all the contour that in a case that burns another of the taquitos it is easier to take off the silicon and to make the repair again, but hopefully no more taquitos are burned.
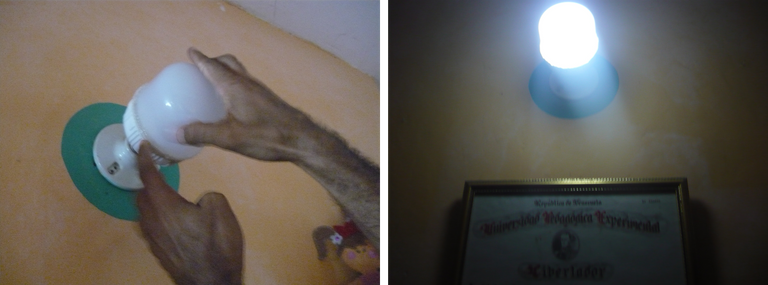
Y así ya estuvo este tutorial de como reparar un bombillo led, asi que si compran un bombillo led, y se daña, no los boten así de una vez, esperen para repararlos, si no pueden ustedes mismos, busquen en un familiar, un vecino, que los ayude.
So if you buy a led bulb, and it gets damaged, don't throw it away at once, wait to repair it, if you can't repair it yourself, look for a family member, a neighbor, to help you.
Todas las fotos fueron tomadas con mi camara Panasonic.
All photos were taken with my Panasonic camera.
Contenido propio y original, traducido con DeepL
Own and original content, translated with DeepL
Gracias a todos por su atención.
Thank you all for your attention.

Amiga gracias por compartir. Un abrazo ❤️
De nada espero que te sirva si se llega el caso, sino fino es mejor que no se dañen ja ja gracias.
Jajaj mejor que no se dañen pero ya con tu tutorial lo puedo poner en práctica
Esta forma de reparar las luces LED se ve mucho en Youtube, pero hay que tener presente lo siguiente. al quitar un led y hacer un puente con el Estaño, la potencia que van a recibir el resto de los LEDS es superior por lo cual también se va a acortar el tiempo de vida útil y se va a calentar más.
lo mas aconsejable seria, no hacer un puente con estaño sino, remplazar el diodo malo por otro Diodo LED o al menos poner un Diodo de 300 mWatts a 1 Watt -- Esto hará que la resistencia al voltaje se mantenga y evitará que los otros Leds se esfuercen mas recibiendo mas potencia, en otras palabras durará mas el arreglo.
👍👍
Ah bueno otra opcion el detalle esta en ver si eso que dices lo venden. En dado caso bueno se usa estaño si le quita o resta potencia. Peeo tambien se debe ahorrar energia.
Si lo vi peeo no en YouTube en otra gracias