Some Tips For Making a Wood Bow
Hello, and welcome to my page!
This post was going to be a tutorial on building a wood bow for archery, but I discovered that I don't have enough pictures from my bow builds to write a tutorial. I decided that with the pictures that I have, this post will be more about tips for parts of the process of building the bow.
These tips are for the process of building a non laminated bow from one piece of wood. I did glue another piece of wood to the middle of the bow for the grip, but that doesn't affect the limbs of the bow.
For the 3 bows that I made, I used oak 1"X 2" lumber. It's not the best bow wood, but it works ok. Hickory is a lot better, and ash is also a good bow wood. Osage Orange is supposed to be about the best wood for making a non-laminated wood bow, at least here in the U.S., but I don't have access to that unless I want to buy it from the internet. Ash and hickory are also hard to get in this area, but you can find oak at the local lumber store.
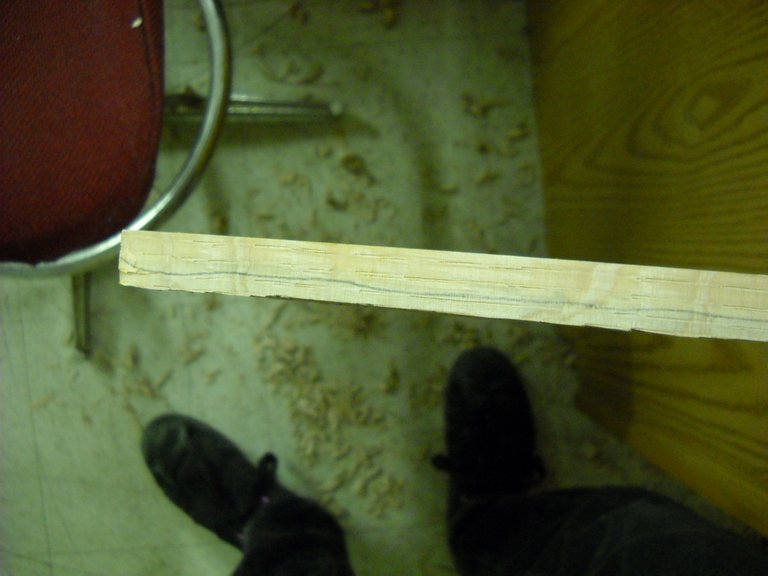
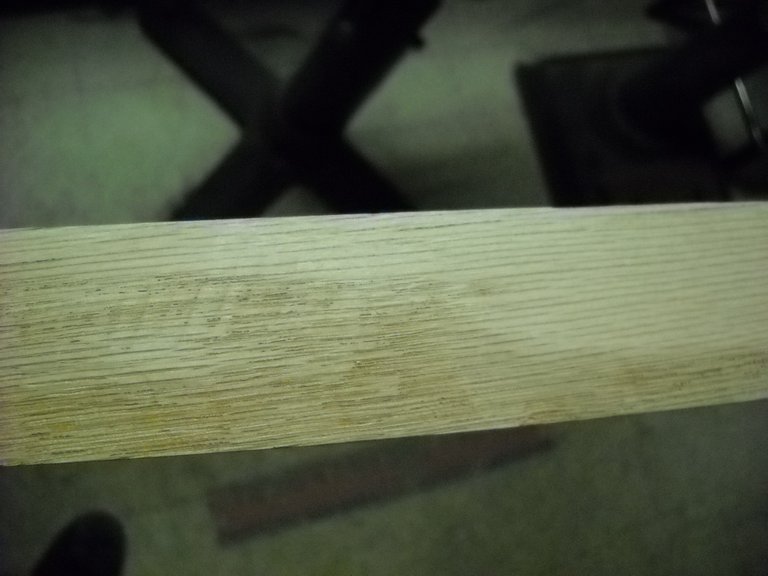
When you look for a piece of wood for your bow project, you have to inspect the piece of wood for the right grain structure. What you want to find is a board that's cut in a way that the grain pattern runs straight down the board. When shaping the limbs of the bow, you need to follow the grain of the wood. If the grain structure is too wavy or dives through the piece of wood, it won't make a bow that won't break at some point. The limb will split along the grain structure.
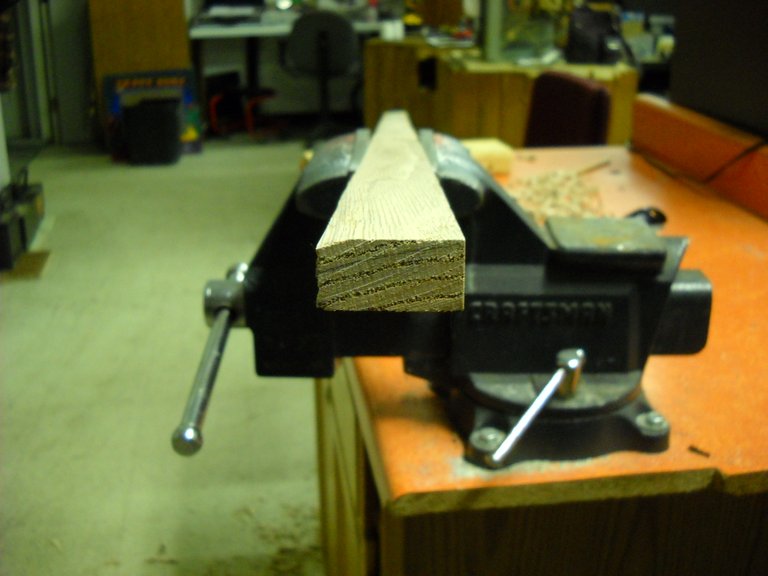
This is a pretty good example of the kind of grain structure that you would be looking for on the edge of a board. You can see where I drew a pencil line down the board as a guide for following the grain. This is the easiest way that I found to follow the grain in the board.


It's necessary to follow the grain when you're shaping the back of the bow. The back is the side that's away from you when you hold the bow out to shoot it. You're basically following the ring structure in the wood. If you cut through the ring structure, you lose the strength of the wood.
For the ends of the piece of wood for the bow, you want the ring structure to go across the width of the end. This example isn't the best, but it's good enough to work with. This is from the third bow that I built.
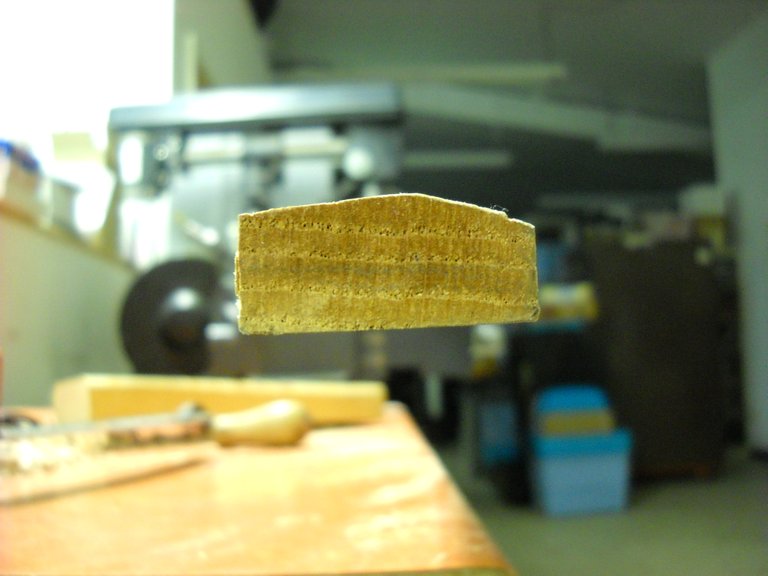
This one is better. This is from the second bow that I built.
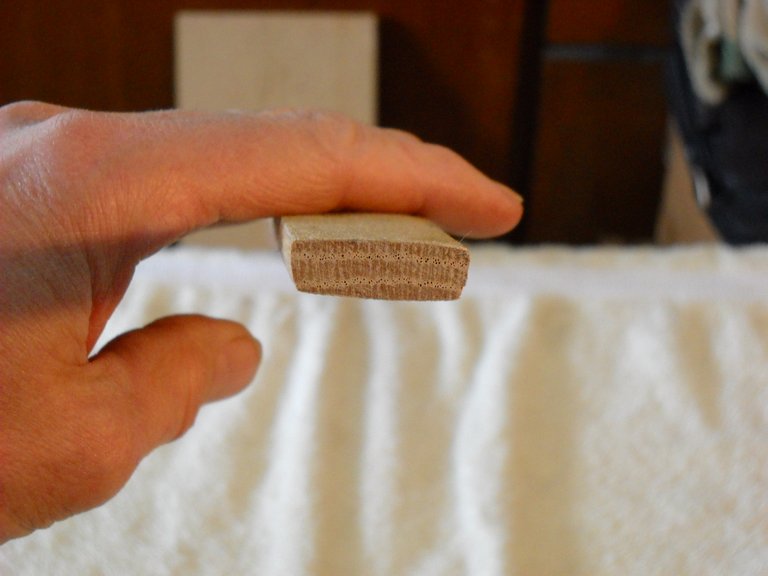
You can see the dense layers separated by narrow porous layers in the rings. When you shape the back of the bow, you want to follow one of the porous layers with your cutting tools and remove it to just where the dense layer is showing. Try to cut into the dense layer as little as possible. The integrity of that layer is what gives the back of the bow strength. This is about the best picture I have to show how it looks when you go from the porous layer to the dense layer, from rough to smooth.
When you shape the bow, you normally shape the back of the bow first to follow one ring from one end to the other, leaving as much of that ring intact as you can. You want to finish the basic shaping of the back of the bow before you start shaping the belly.
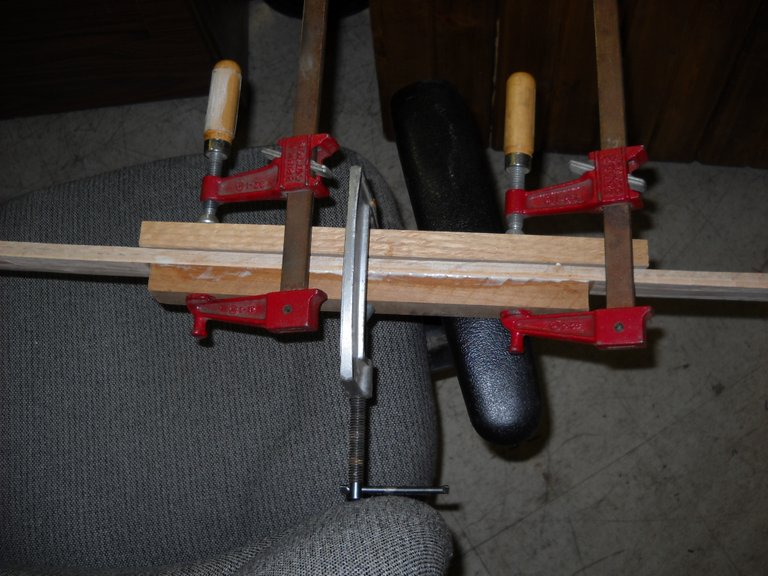
When you start on the belly of the bow, you have to find the center of the bow, assuming you have it cut to the length you want. You find the center line and then mark out your grip area. You will leave that area alone as you shape the rest of the bow. You want that area thick for the grip. If the piece of wood is thin, like the boards that I used, you can add extra thickness to the grip area by gluing another piece of wood to the grip area. I make the grip piece a bit longer than I think I'll need so that I can contour it into the belly of the bow when I'm shaping it. I used a waterproof wood glue, Titebond 3, for this. I used a piece of wood on the back of the bow to clamp on, to protect the wood of the back from clamp marks.
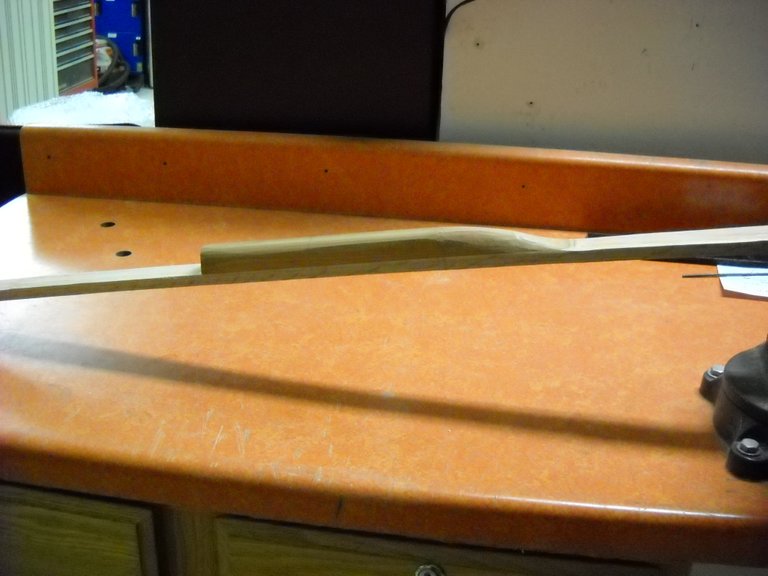
This is what it looks like after roughing in the shape of one end of the grip. I don't have a decent picture of the grip after shaping both ends.
When you shape the limbs of the bow, you want to start removing wood at about the same distance from the center of the bow so that you can keep both limbs about the same. The bow will start out very stiff, you want to take wood off the belly of both limbs making them gradually thinner as you work to the outer ends of the limbs, without making them too thin. You have to decide how much draw weight you want the bow to have. The thinner you make the limbs, the less draw weight you'll have. You don't want to hurry through this process, you'll need to test the limbs fairly often for draw weight and to try to make the limbs bend equally when you draw back the bow.
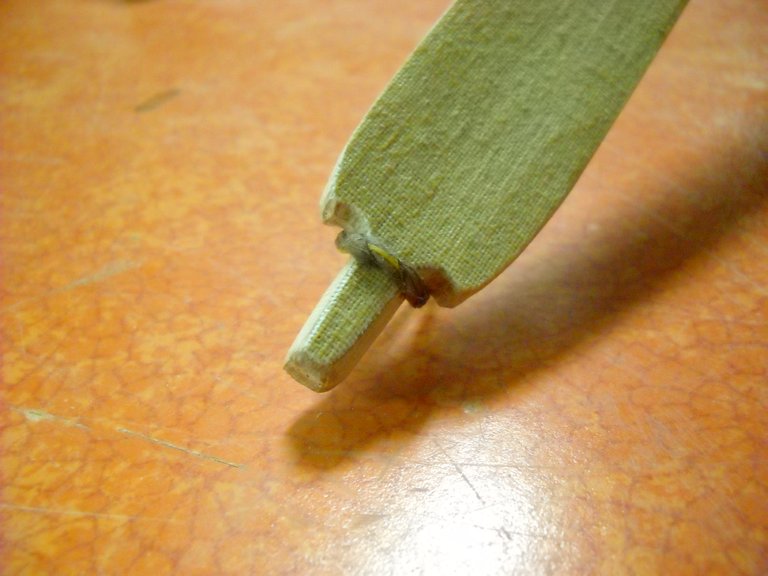
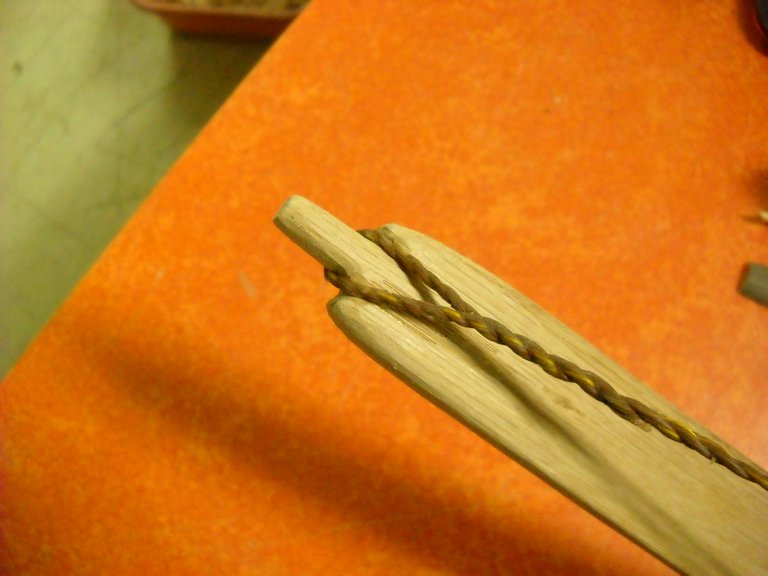
It's a good idea to make the string notches on the ends of the bow when you start the process so that you can use a piece of cord to test the bow with. For one of my bows, I used the method that you see on some Native American bows, which is basically carving a peg for the string at the end of the limb. This bow has a linen backing glued to the bow for a bit of extra strength.
For these bow projects, I used a bench vice to hold the piece of wood so that I could shape the bow with my carving tools.
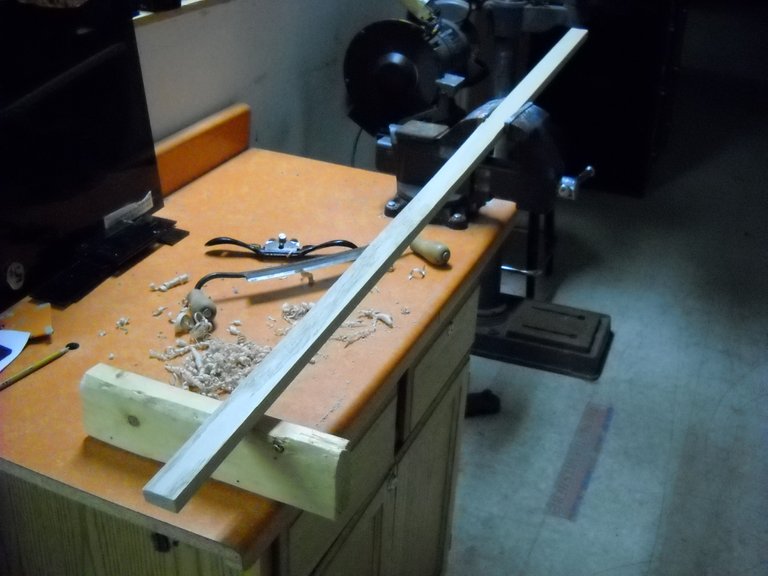
The carving tools that I used the most for these bows are a drawknife and a spokeshave. The drawknife removes wood quicker, but is not as good for delicate work. For removing wood more carefully when you're refining the shape of the limbs or making finer cuts to adjust the bending of the limb, I use the spoke shave. You can also use a rasp and coarse files for a lot of this work.
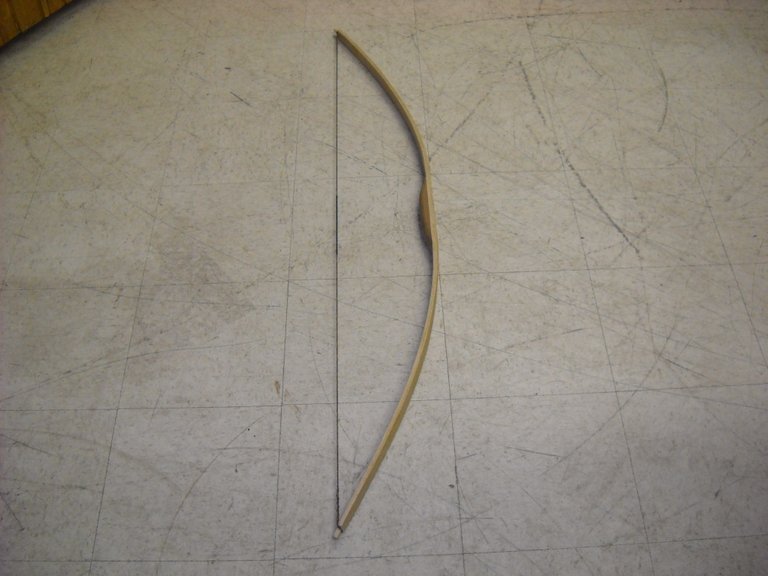
I don't have any good pictures of the finished bows to show you. I have this picture of bow #2 when I was testing the limbs to see if they both were bending about the same. With a tile floor, you can use the squares as a visual reference to see if the limbs have about the same shape when they bend. In this picture, you can also see the shape of the grip better.
I made these bows back before I retired in 2014. I haven't made another bow since then, I didn't feel like I needed to make another bow from an oak board. A couple years ago, I was given a couple of split pieces from a hickory log that I've had in the basement drying in case I decide to make another bow. These pieces of hickory are a bit more of a challenge because they're not straight. They have a curve in them, making it a bit harder to shape into a bow. It can be done, it's just trickier. I may decide to work on making a bow from one of the pieces, but there's a lot of wood removal necessary just to get to the basic shape of a bow stave. It hasn't been near the top of my list of projects yet, but I might think more about it when we start getting warmer weather outside. I'd rather have the mess outside than in the house.
Well, that's all I have for this post. Thanks for stopping by to check it out!

Yew are very talented at making bows alright. Interesting to learn about the process.
Questo post è stato condiviso e votato all'interno del discord del team curatori di discovery-it.
This post was shared and voted inside the discord by the curators team of discovery-it
Hello!
This post has been manually curated, resteemed
and gifted with some virtually delicious cake
from the @helpiecake curation team!
Much love to you from all of us at @helpie!
Keep up the great work!
Manually curated by @phage93.
@helpie is a Community Witness.
Thanks for such talent and hardworking.
Posted using Partiko iOS
Very interesting. Do you make your own arrows too?
Yes, I have in the past. I will admit, it's a lot easier to buy the raw arrow shafts than to make your own. I've made some cedar arrow shafts, and I've also used bamboo garden stakes to make a few arrows. You have to straighten the bamboo shafts with heat. It's a bit tricky, but you can end up with arrows that work pretty well.
Hi amberyooper,
Visit curiesteem.com or join the Curie Discord community to learn more.
Congratulations @amberyooper! You have completed the following achievement on the Steem blockchain and have been rewarded with new badge(s) :
You can view your badges on your Steem Board and compare to others on the Steem Ranking
If you no longer want to receive notifications, reply to this comment with the word
STOPVote for @Steemitboard as a witness to get one more award and increased upvotes!
This is so cool. These are some great tips for when the zombies start attacking and we all need to go back to making our own weapons.
These are not some tips but a great tutorial for making a wooden bow. Excellent all the explanation, the tools that are used and the work with the wood. The finish is magnificent. Kind regards @amberyooper
I have not seen a bow made before and have not tried archery, though it is in my bucket list. Thank you for showing it to us! I can see that there are many things to consider and many steps to it and work that goes into it. How long does it take for you to make a bow? And what makes a type of wood a good bow wood? Is it that they have better grain structure and easier to shape? Your bow looks really cool.
It's hard to say how long it takes to make a bow, it depends on how ambitious you are with the work. If I had to make a rough guess, I'd say 8 to 10 hours for the average bow, more or less.
The best type of wood for a bow is something that's flexible, not brittle, and will return to straight after being bent.
hi dear @amberyooper, it is very interesting to know how to build tools, have you studied or are you self-taught? congratulations on your work and keep on
I am mostly self taught, with the help of a book on how to build a wood bow.