Hawthorn: Re-Potting a Bonsai Tree and Root Pruning [Bonsai]
Here is a full photo demonstration depicting the tricky process of re-potting a bonsai tree.
This is a difficult week for many people, with the Covid-19 virus still on the spread. Everybody is faced with difficult decisions and pressured to stay at home and not go to work, or risk endangering themselves and others.
In the quiet backyard environment, many people are finding solace with nature by participating in solitary gardening hobbies. Even yard work can take our minds off matters beyond our control. For me, now that Spring is quickly approaching, I am sowing seeds in my garden hoping for a crop of edible food, beneficial herbs, flowers to attract pollinators, and compost plant material.
More interesting, I think, is the work I am starting to do on my bonsai trees once again.
Below I'll be covering various steps about how I repotted one of my oldest bonsai trees recently.
Details included in this article: the inspection of the tree, how to prune the roots, how to prepare the pot, how to fill the soil, and how to re-plant the tree into the right position.
Here are the main headings of this article listed below.
- A First Look
- Cutting the Cord
- What Lies Beneath?
- Removing the Root Mess
- Root Enhancement
- Preparing the Bonsai Pot
- Now the Fun Part
- Filling the Gaps
- Almost Forgot!
- Top Dressing
- All Finished
Now let's get started. Shall we?
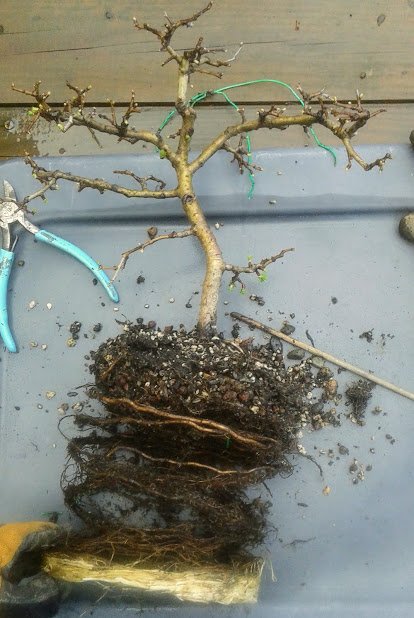
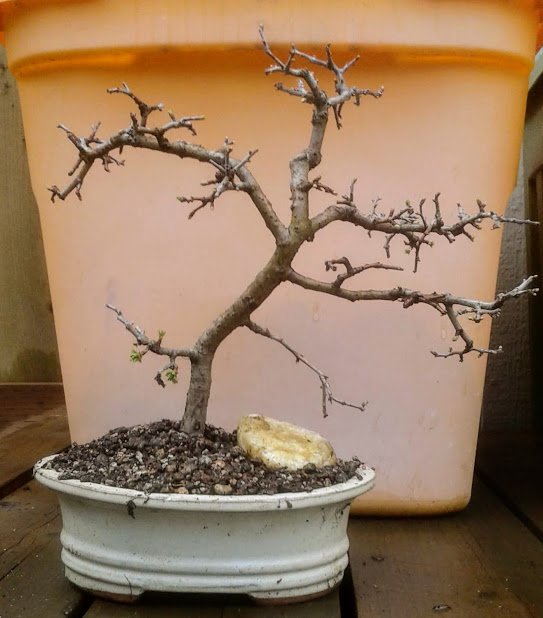
A First Look
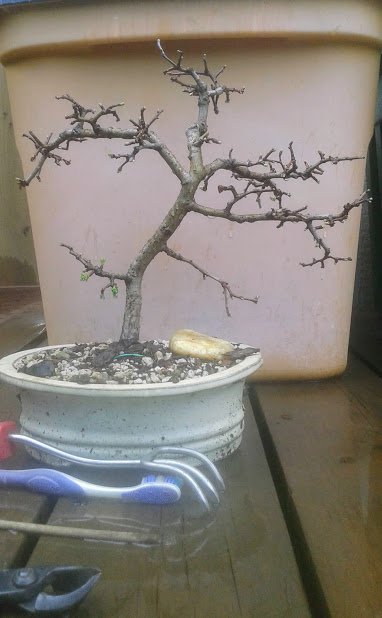
This is my Hawthorn tree. It has no leaves because it's been dormant all winter long. The buds are swelling up. Green is starting to appear on the tips.
Late Winter before the leaves develop is the best time of year to re-pot a deciduous bonsai tree. All of the growth energy is being rushed out of the roots and focused in on those branch tips. Damage to the roots at this time of year is less stressful to the tree. Roots will regrow using the energy produced by the mature leaves that will soon be forming.
Historical Information
ID: 0012
Nickname: Candi
Type: Hawthorn
Age: 7.5 years
Grown: yamadori (collected from my own yard)
Last repotting: 2016? (and now repotted on 3/14/20)
Wired: never

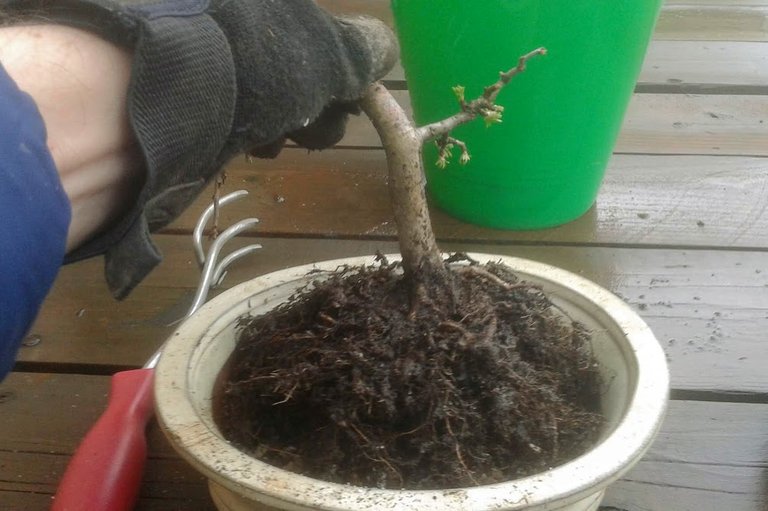
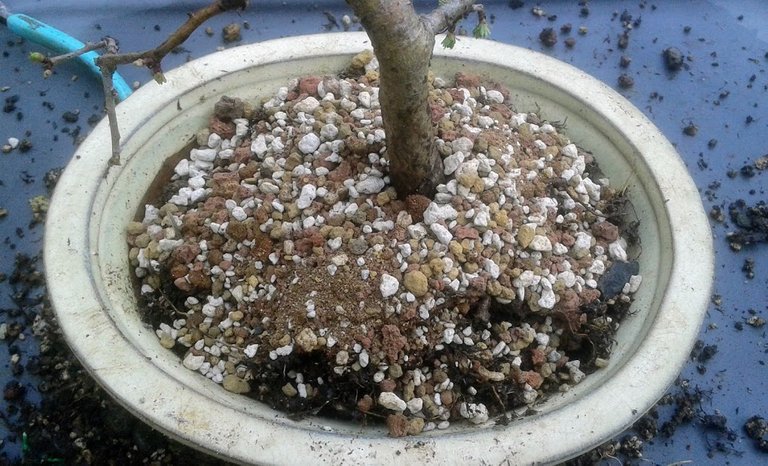
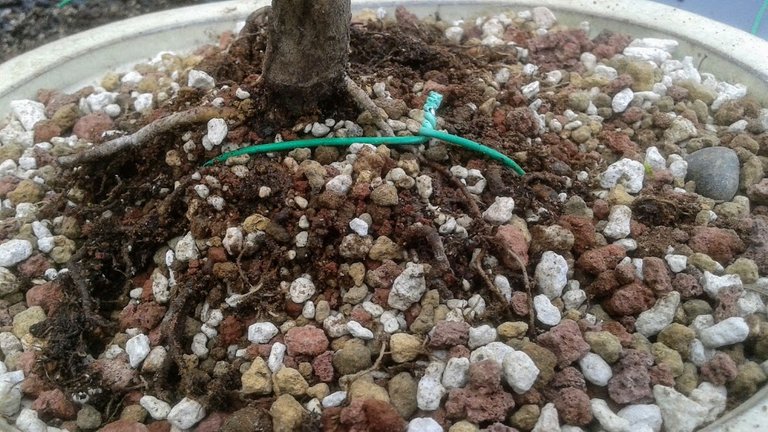
Prior to removing the tree from the pot, I inspect the top roots and top soil first. The soil appears to be working well at allowing water to drain through, and it retains moisture well. Weeds and moss are not a problem.
Also we see wires anchoring the tree into a secure position within the pot. Strong wires holding down the tree are helping the tree grow strong. It allows roots to grow more easily. Tree roots do not like to be jostled around. This can happen every time a tree sways in the wind or when I it rains.
Here we also look at the prominent top roots closest to the trunk. I'll be clearing out some of the surrounding soil to see if more of these roots exposed will enhance the design of the visible tree. Many people look here also to determine which side of the tree, in their opinion of taste, is the best front view. My tree has already been styled, so I think I'll be keeping this as the front.
Cutting the Cord
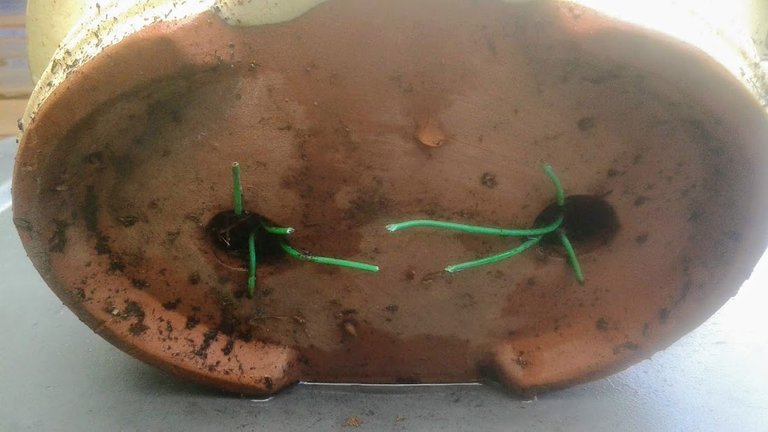
Underneath the pot, I snip off the two anchor wires. Never use expensive bonsai shears or bonsai pruners to cut wires, because it will dull and dent the blades. For small wires like this, any cheap wire cutter tool will do.
After removing the anchor wires, I jab a chopstick around the rootmass. For anyone who has ever baked a cake, the technique is similar to using a knife to cut the cake out of a pan to prevent the edges from sticking.
Keep jabbing the chopstick in around the edges until the tree slides out of the pot. Be careful not to rip and tear, or worst, snap the tree while pulling it out. Grip the tree by the trunk and be gentle as the soil is loosened from the pot.
On larger trees with expensive, heavy pots, it is wise to enlist a helper to avoid any catastrophic accidents. One person holds the tree while the other person grips the pot until the tree is free of the pot.
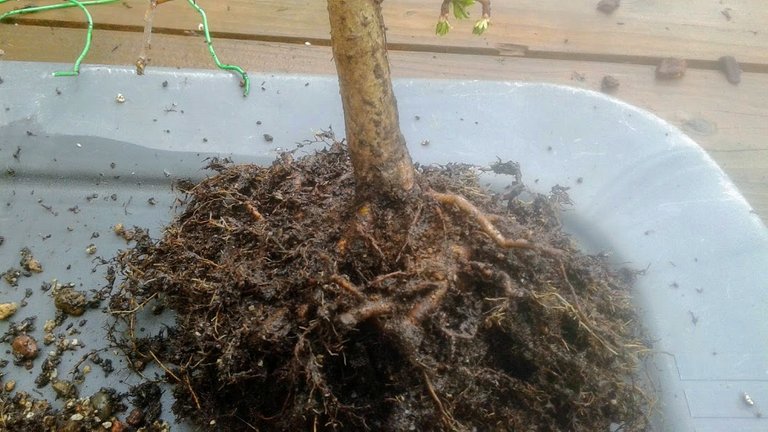
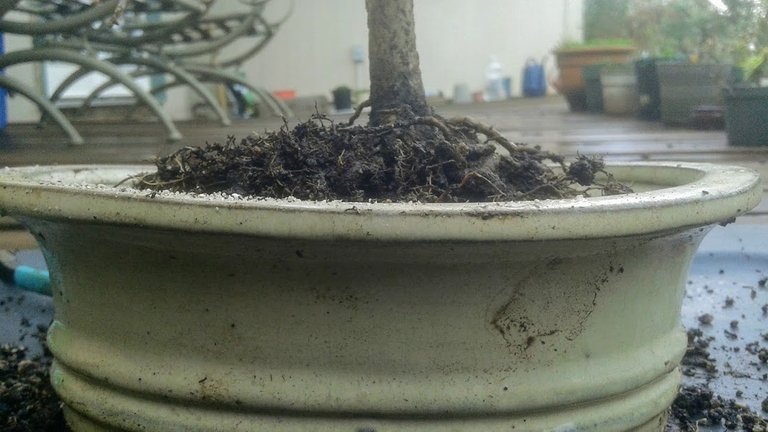
What Lies Beneath?
¡Ay, caramba!
This is the appropriate response if you find a deeply rootbound portion hidden in the base of the pot.
Stretch out the root-bound areas to see how extensive it reaches.
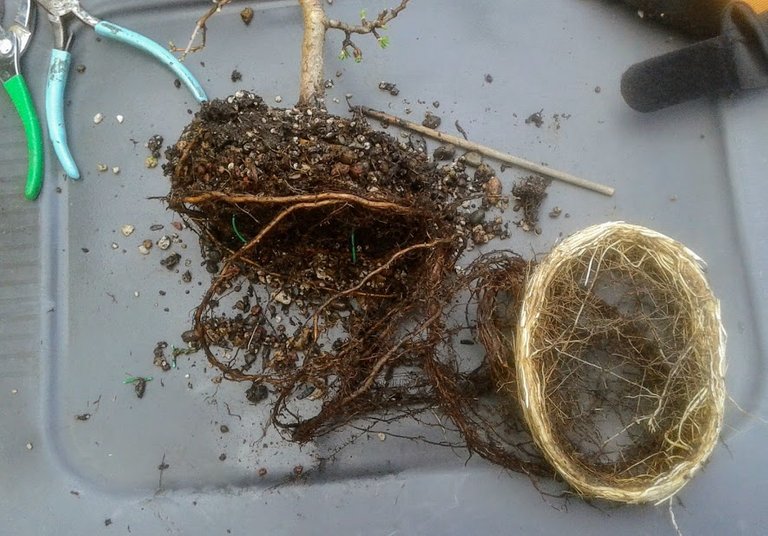
All of the white roots at the bottom are a good sign of tree health. The healthy roots are storing water and nutrients inside the tree. Unfortunately, these roots are now too much mass for this size of pot and this size of tree.
It would have been better if I repotted this a year or two earlier, but I was following advice to allow the tree to remain potted as long as it appears healthy to force smaller feeder roots to form along the surface. Hawthorn seems to grow roots very fast.
Surely this would be an easy tree to propagate by taking root and branch cuttings. A great way to start a tree growing business.
Removing the Root Mess
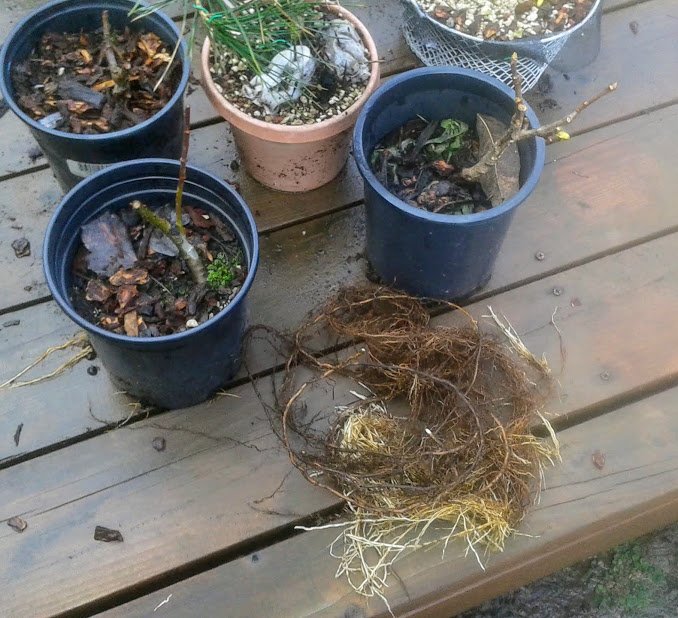
I make the difficult decision and clip the messy bottom roots off completely. The entire tangle was being held on by only three or four cord-like roots. I'm sure these roots are probably four or five feet long if I stretched them out completely. The roots are far too long in length to fit inside the pot.
One goal for re-potting a bonsai tree is to keep the tree in proper proportion to match the vessel it is growing in.
Root Enhancement
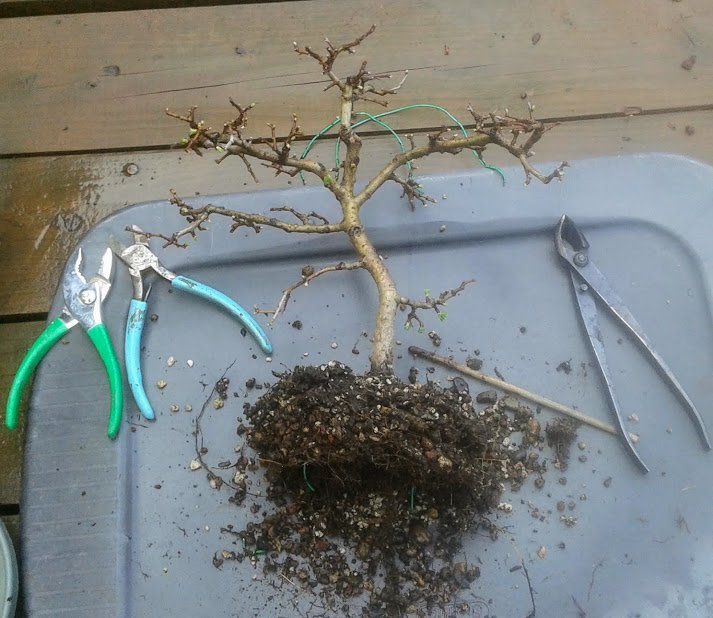
Next I hunt for any other thick roots encircling the root mass and I prune them off.
A little bit of digging around inside the roots can also reveal problem roots that are circling around inside, crossing over other roots, or event strangling roots. I prune off any thick long roots that seem to be causing problems. When I find a large mass of wood sticking down from the center under the trunk, I also chop some of this off to allow more space for small roots to fill the hidden soil space there.
Combing out the roots can help to find more long stringy roots. Spread them all out to full distance. Anything that extends below where the base of the pot will be gets trimmed down to length. Anything that spreads out beyond the width of the walls of the pot also gets trimmed off.
Using the chopsticks I also poke out most of the loose soil.
The old soil composition seems to be a mixture of pumice, lava rock, akadama, and decomposed pine bark. The dark muddy areas are most likely the remains of the fertilizer mixed in to the messy pine bark remains.
There is no need to completely scour the roots clean or rinse off with water. I am removing anything loose that crumbles out. Any weak root that fall out in the process are likely weak or dying. The voids left behind will eventually be replaced by healthier, stronger roots.
Preparing the Bonsai Pot
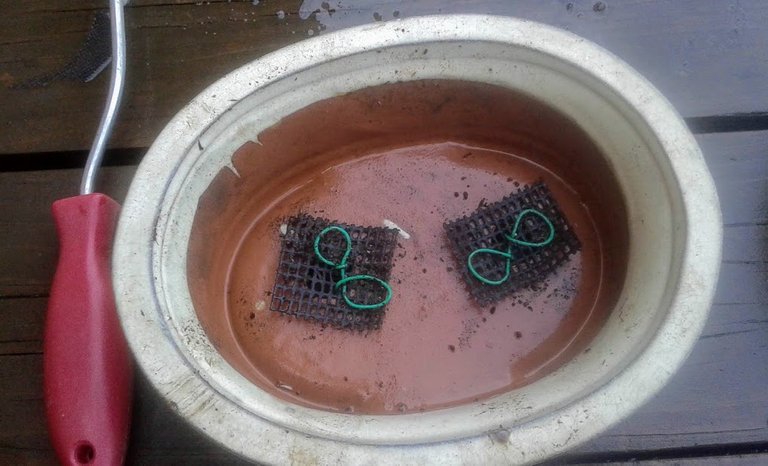
The old screen material and wire knots were saved, and I replaced them exactly as they were before. This will prevent the soil from spilling out the large drainage holes, and allow water to easily drain.
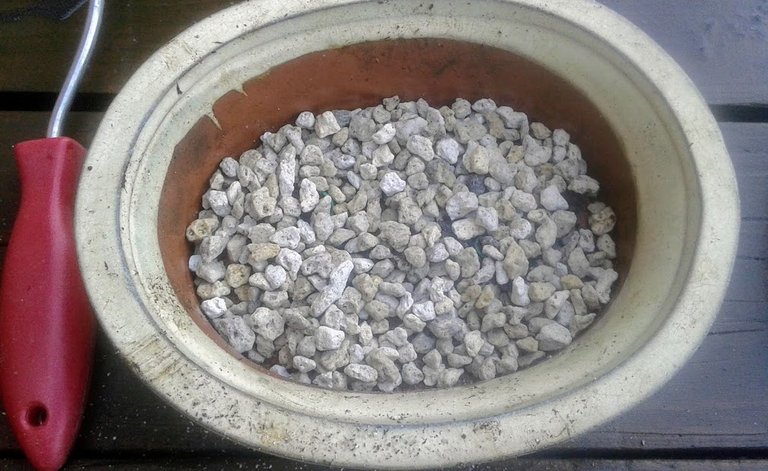
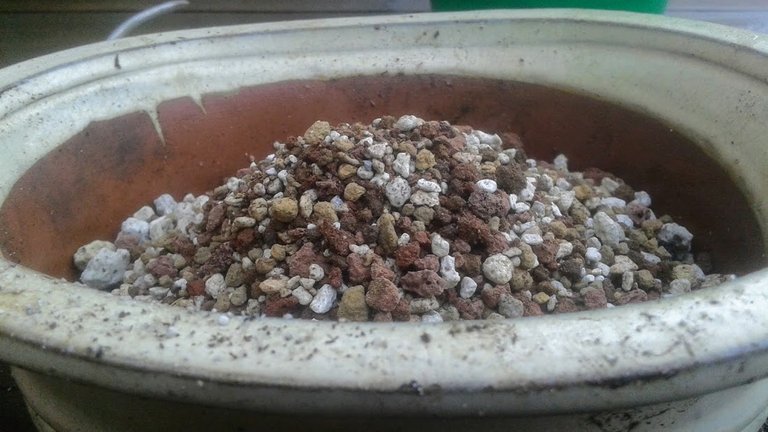
A layer of pumice is spread along the interior base of the pot. These pieces are sifted pieces that are larger than 1/4 inch, and will hopefully discourage the tree from reforming another long winding taproot. A single layer of rocks is plenty.
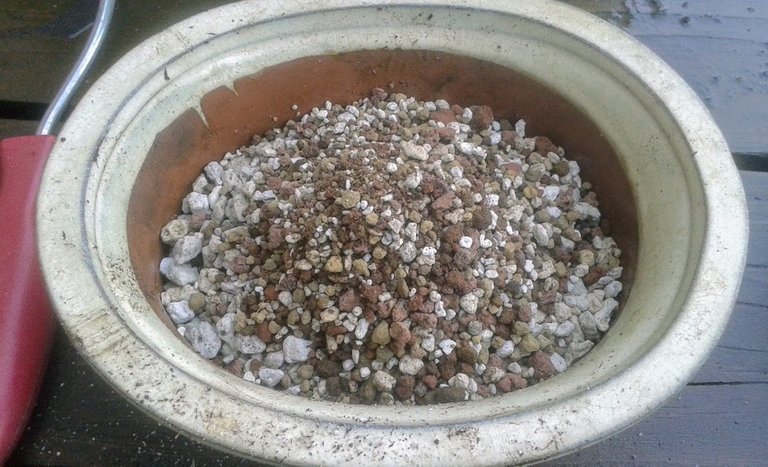
On top, I begin to pour in the ideal recipe for inorganic soil medium for deciduous bonsai.
Bonsai Soil:
- 1 part pumice
- 1 part 1 lava rock
- 2 parts akadama
The extra akadama will help retain the extra soil nutrients and moisture deciduous trees need for healthy roots. It is the most valuable soil ingredient because it also encourages roots to divide into smaller roots. The more small roots a tree has, the quicker it can drink and rejuvenate itself when stressed. Many world class bonsai masters grow their trees in 100% akadama, but this can be expensive.
I've removed a lot of the old pine bark from the soil, so I'm hoping this new soil will help to better sustain the tree and ween it off of the wet wood bark it's grown accustomed to.
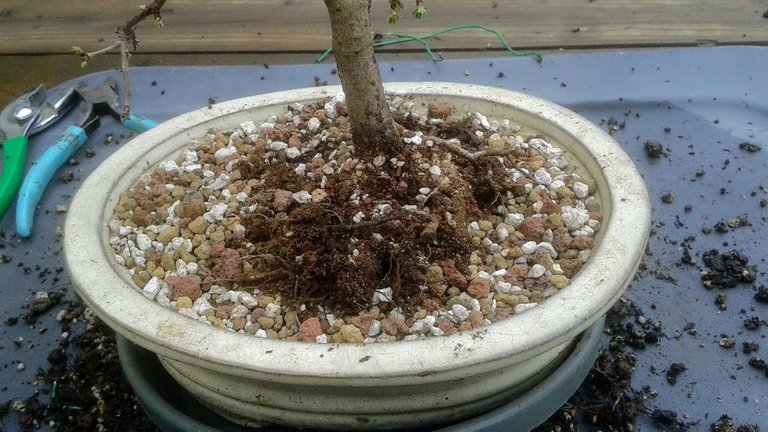
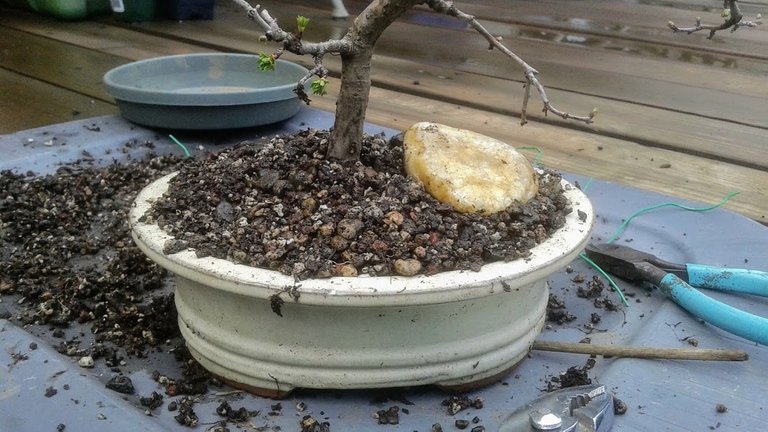
Now the Fun Part
Make a mound of soil, and place the tree on top.
Mash the tree roots into the mound, and rock the tree around a bit to help settle the bottom roots into a good position. Look at the tree from a side view to see if the tree is standing at a good angle.
It is also important to look at the profile of the tree trunk. I like to be able to see the topmost roots slightly above the rim of the pot, but I want the outer roots to be underneath the top of the pot slightly.
If the roots are standing too high up in the pot, then the soil will not be able to re-bury these roots. Those roots will dry out and die, and the tree entire tree can also dry out and die.
If the tree is buried too low inside the pot, then part of the beautiful trunk of the tree is hidden, and rot can ruin the bark or even permanently harm the tree. Many trees and plants can only form root tissue below the base of the trunk, and so burying it deeply will not always encourage root growth.
Filling the Gaps
This part is the most time consuming.
Pour more of the bonsai soil on top of all of the surface roots. With the chopstick, I am using the quick jabbing technique once again. This time the goal is to fill the air pockets under and inside the roots with as much soil as possible. Keep adding more soil and jabbing it in until the soil and roots begin to feel like a solid piece.
When more soil can no longer fit inside, we're done. I like to keep the soil level 1/4 inch below the rim of the pot. This allows water to flow through without spilling water and soil over the edges.
Almost Forgot!
This is very important!
This tree needs a new anchor wire.
After all of that pounding with the chopsticks, halfway through I realized I forgot to guide a wire through the pot to secure the tree firmly inside.
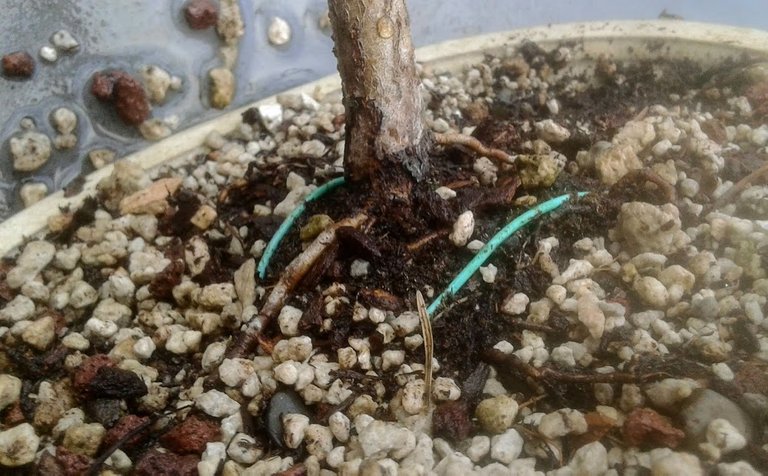
Make sure at least one wire, ideally two or more, is laced under the pot through two of the drainage holes and up over the root ball. I use pliers to pull and twist until I can feel no more slack in the wire. The wire should be snug, but not crushing the roots.
Pressing the wire through the packed soil, like I did, it probably loosened the soil quite a bit. I had to use the chopsticks to re-pack the soil in until the roots were firmly packed into the soil once again.
Top Dressing
To avoid stress on the tree while it adjusts to all of these changes, I decided to take extra precaution by adding a mulch layer on top. I don't like seeing lots of exposed roots on top around the trunk. The smallest roots on top will likely dry up very quickly and die if not protected with a layer of constant moisture. Eventually I want those tiny stick-up roots pruned off the top, but not all at once.
I decided to reuse the old soil removed from the tree, and use this as a top mulch. There is still a lot of minerals and diminished fertilizer inside, which will drip and feed all of the roots below.
The pesky squirrels and birds often chip away at the top layer soil, and it makes a horrible mess on the deck. I would rather have them ravage this old layer of soil than the new soil underneath. Eventually, I'll slowly discard this mulch layer and start to expose the largest roots connecting to the trunk. The smaller roots on top can be air-pruned in small bits at a time, which won't harm the tree after it has been rejuvenated by the Summer sunshine.
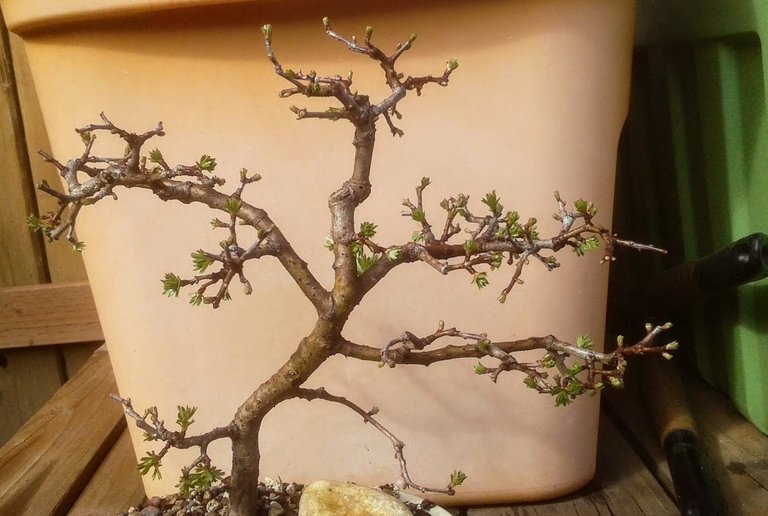
All Finished
The tree is fully planted.
Yes, it looks almost exactly like how it was planted before. Slightly higher up now, allowing for more roots space under the thickened nebari. It's what we don't see that makes the magic of bonsai happen. The new roots will rebuild. Smaller branches and leaves will form as the tree energy is partly diverted into restoring root growth.
It's only been a week later, and I am already seeing signs of vigorous new bud and leaf growth on the tree.
#diy #root-pruning #root #roots #branch #trunk #leaves #art #creative #artform #hobby

This post was shared in the Curation Collective Discord community for curators, and upvoted and reblogged by the @c-squared community account after manual review.
@c-squared runs a community witness. Please consider using one of your witness votes on us here