Nails, string and lots of patience! (ENG/ITA) Chiodi, spago e tanta pazienza!
👉ENG VERSION👈

Hi guys,
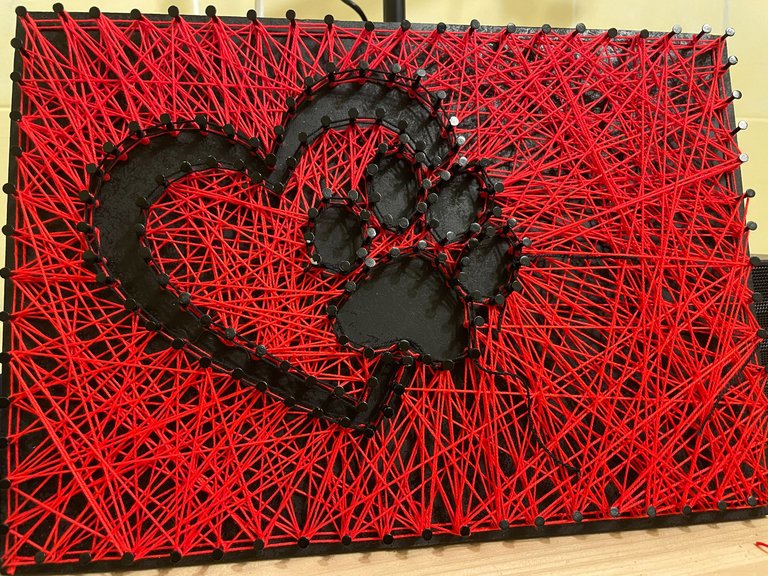
today my friend Sara asked me if I could take a picture using the method I use to make Splinterlands squares.
She asked me something that represented the love she has for her little puppy Olivia and why not? ...
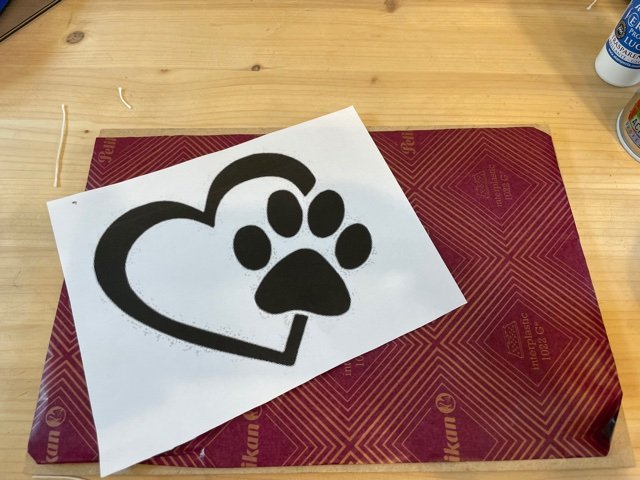
I did a little research on the WEB to find an image suited to my "style" and that above all represented the good that exists between Sara and Olly and here we are ready to make the picture.
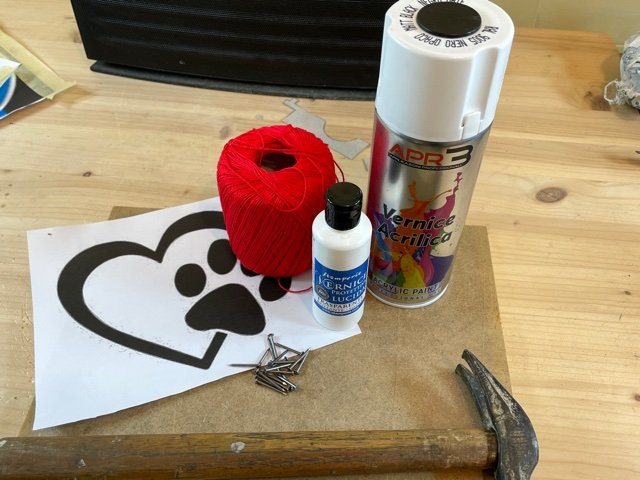
What do we need?
- An image we like.
- A wooden picture, I chose a size 30 x 22 cm.
- Twine, I chose a red colour.
- Paint to paint the wood, I opted for black.
- Nails.
- Glossy or matte protective varnish.
Step 1.
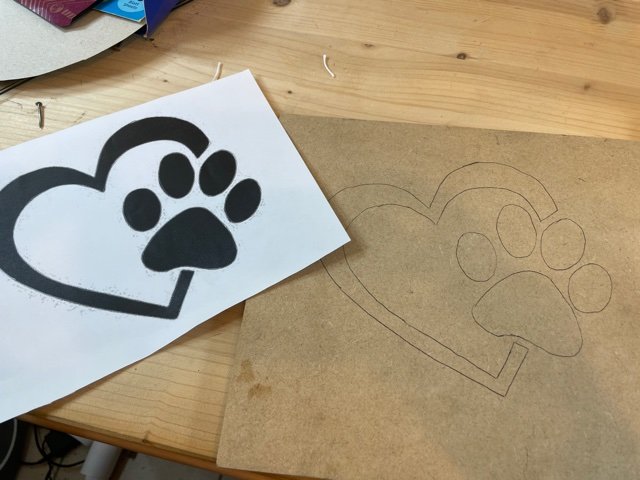
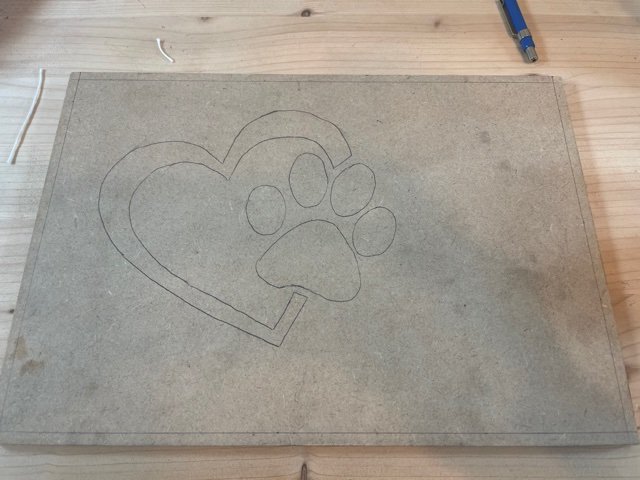
We report the chosen image on the square trying to position it as we see fit, here we go a little to personal taste.
I don't like centring things very much and so I brought it back, with the help of carbon paper, just moved to the left.
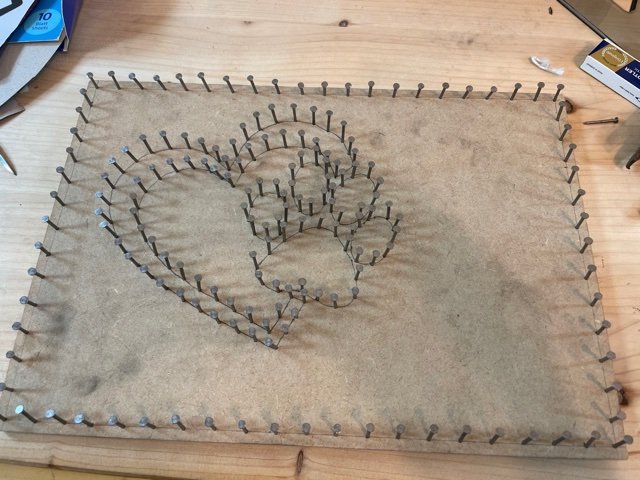
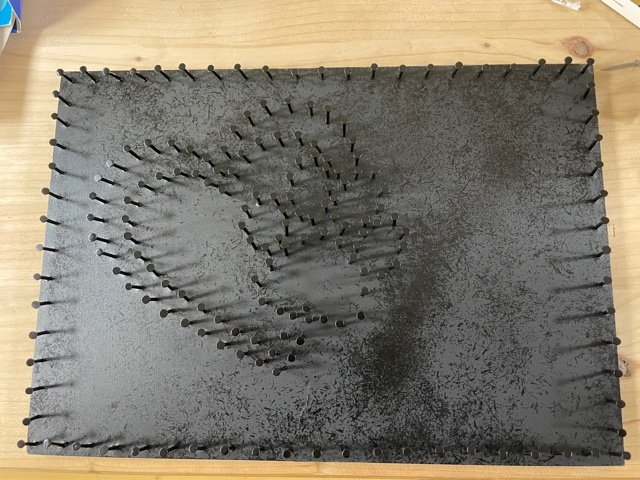
We also draw a frame standing half a centimetre from the edge, staying too close to the edge risks splitting the wood when we go to drive the nails.
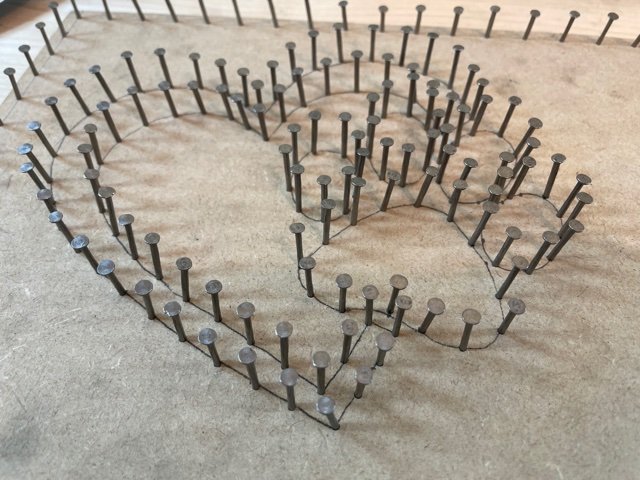
Step 2.
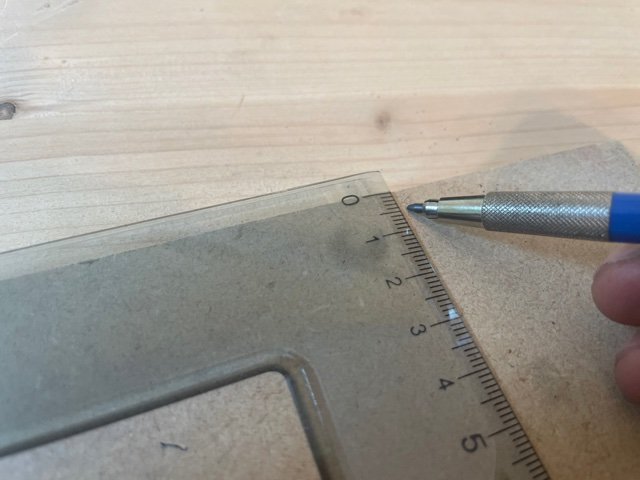
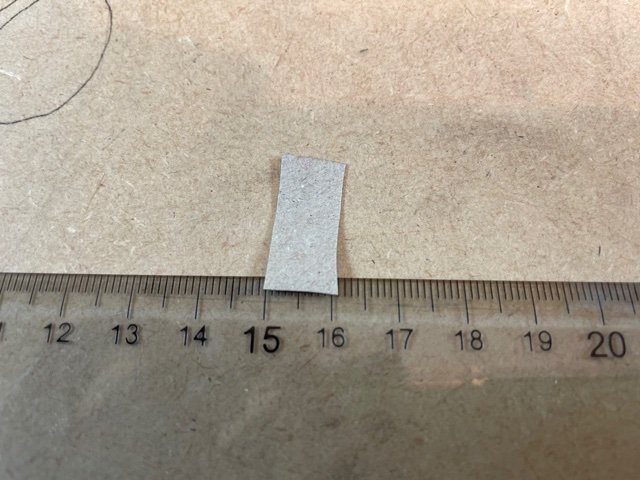
Finished with the drawing and the frame, we create a small thickness of about one centimetre.
I used cardboard, we need this to space the nails on the drawing.
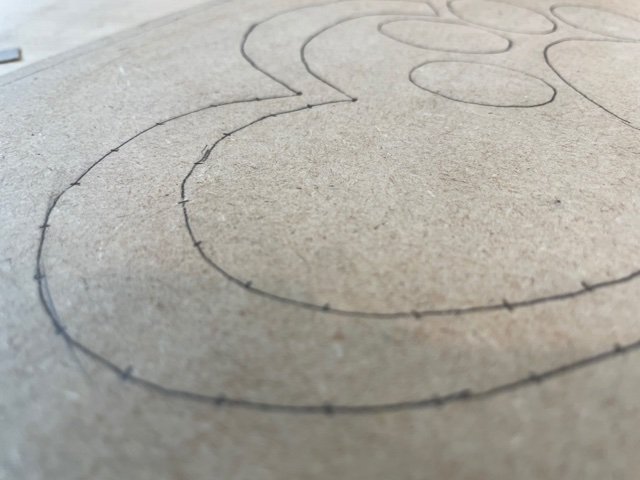
With the help of the shim, we go around the design and the drawn frame creating the points where we will then plant the nails.
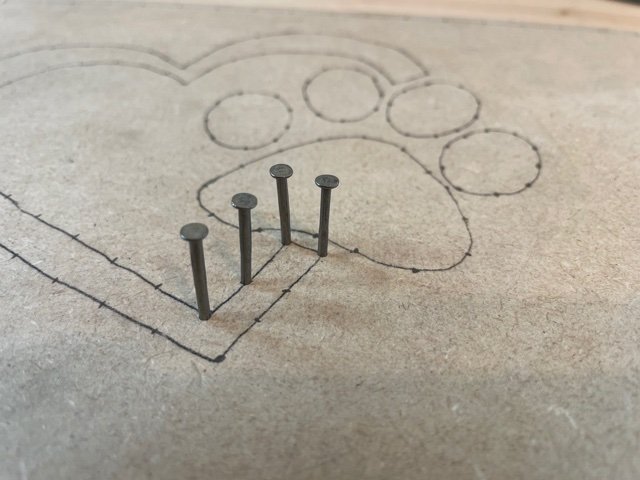
Step 3.
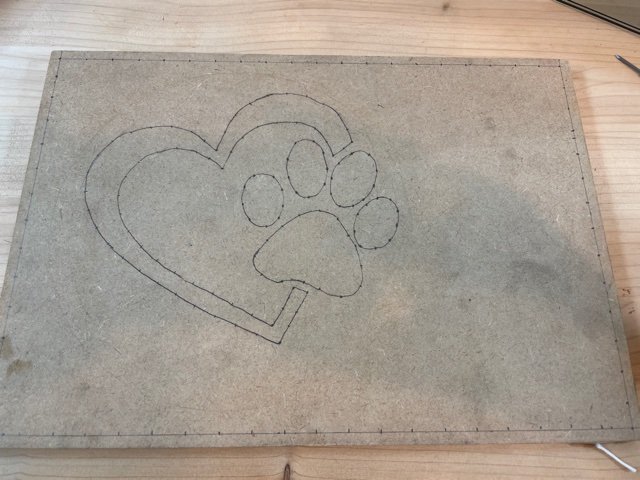
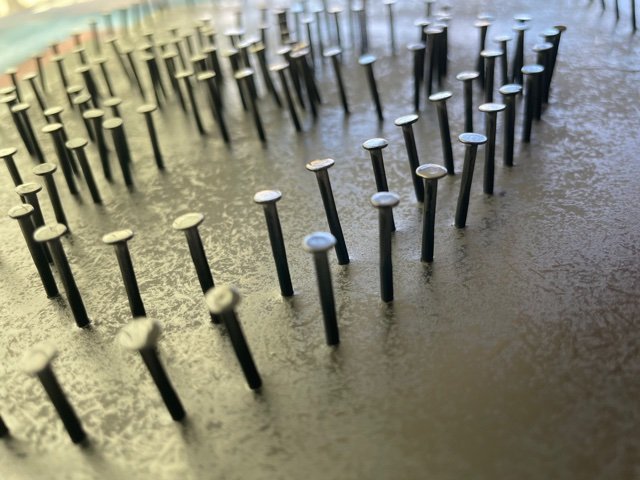
Let's drive the nails !!
At each point drawn on our picture we plant a nail, these will be used to pull our threads once coloured.
I used large-headed nails so that the string cannot come off later.
BEWARE YOUR FINGERS :-) !!
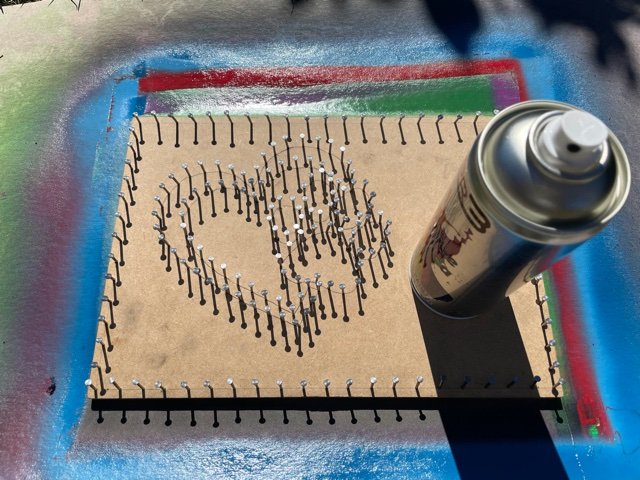
Step 4.
Let's colour!!
Have you chosen your base colour? I decided to paint everything black and then use the red string!
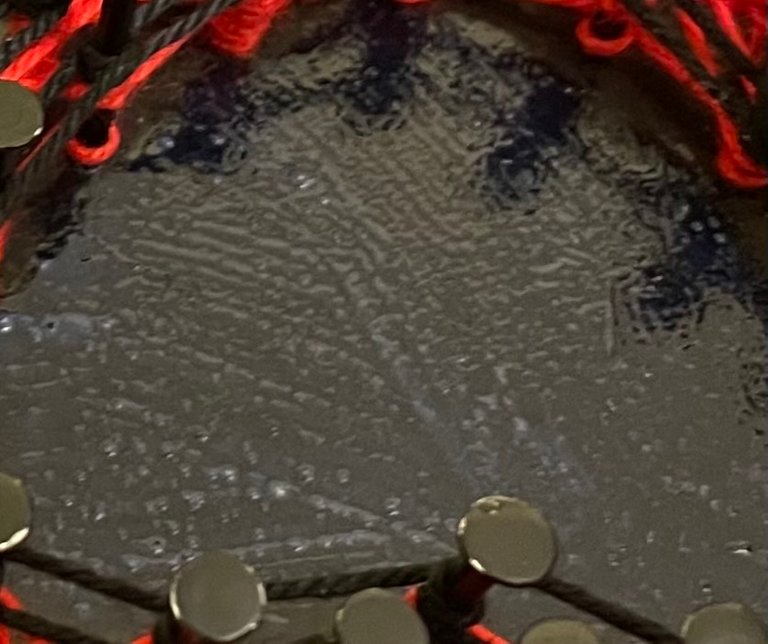
The background colour will be almost completely covered by the string but I prefer to colour to leave some holes between the string and give that effect of seeing and do not see! :)
Let the color dry well so as not to dirty the string, for safety I resumed work the next day.
Step 5.
Once the colour has dried, we go over our image with the protective varnish.
I chose the glossy one but you can also use the matte one ...
I forgot this step in my picture and did it later but I recommend that you paint your image before using the twine.
It is not necessary to paint the whole picture as it will be covered by the string, the important thing is to paint your image well, the only part that will not be covered later.
Step 6.
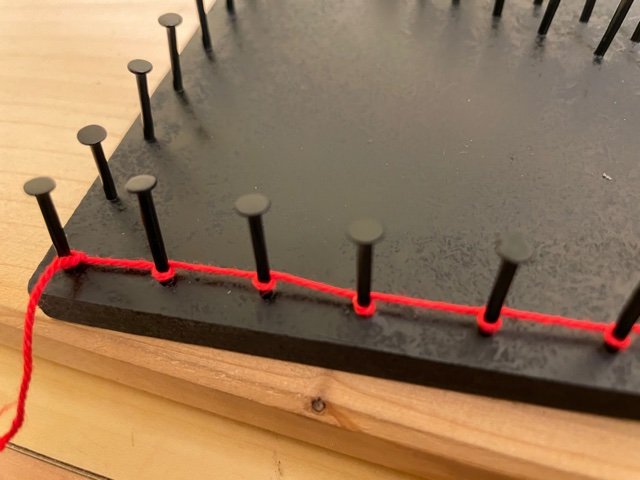
It's time to weave the cobweb, first I did all edges twice the first by turning the twine clockwise the second counterclockwise to form a kind of chain.
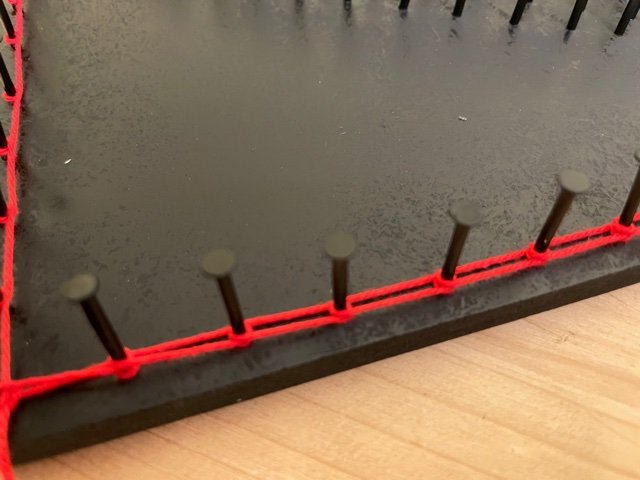
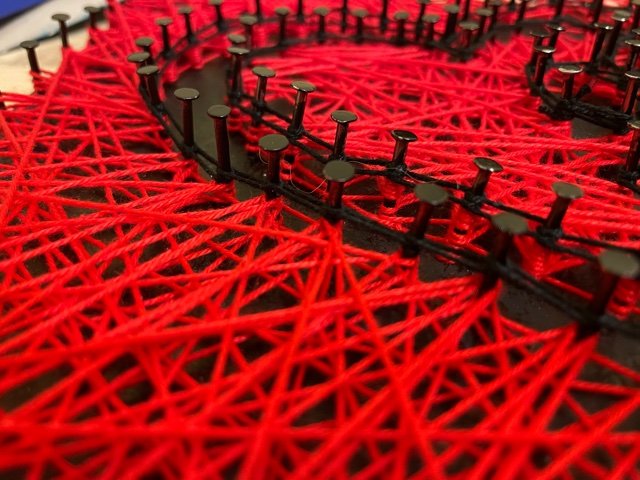
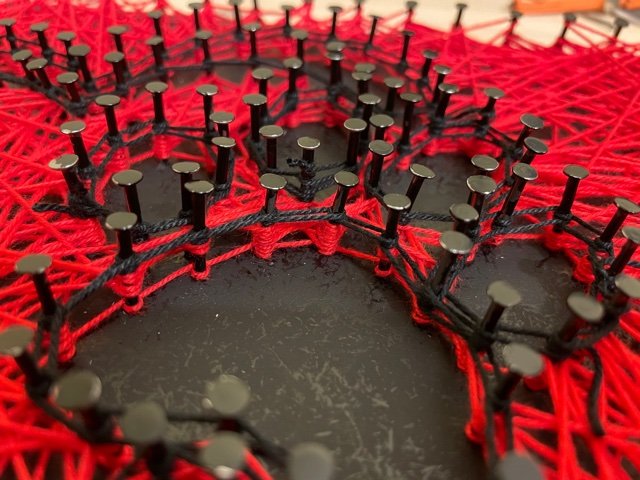
Done all the edges we indulge ourselves as we wish, leaving only our image free from the string, in my case a heart with the fingerprint of little Olivia the dog of Sara.
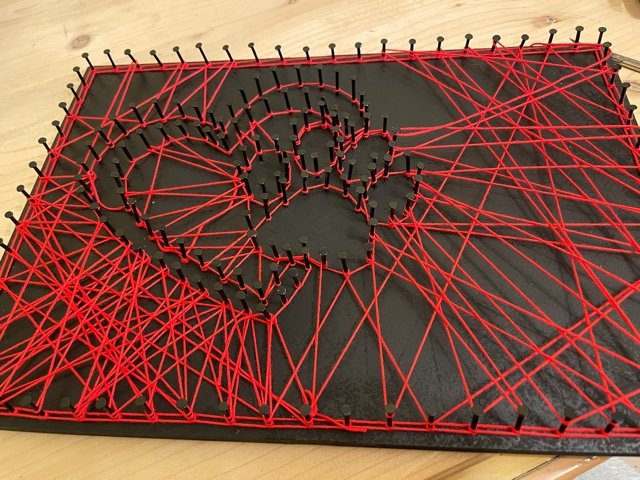
And here is my finished picture what do you think?
I also used black twine to form a chain around the image to better detail the shape of my design.
It took me a total of about two and a half hours to complete everything, much of the time if the nails were taken but above all the twine !! but I am very satisfied and Sara very happy, who immediately hung it at home!
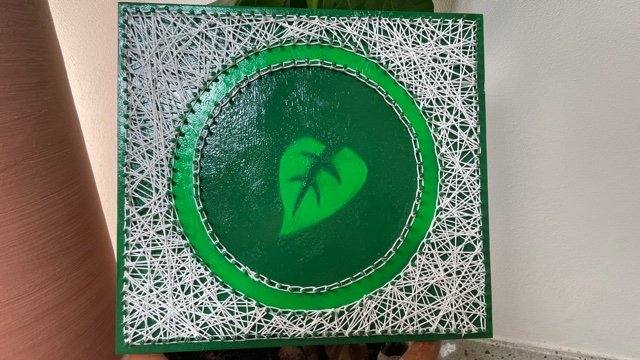
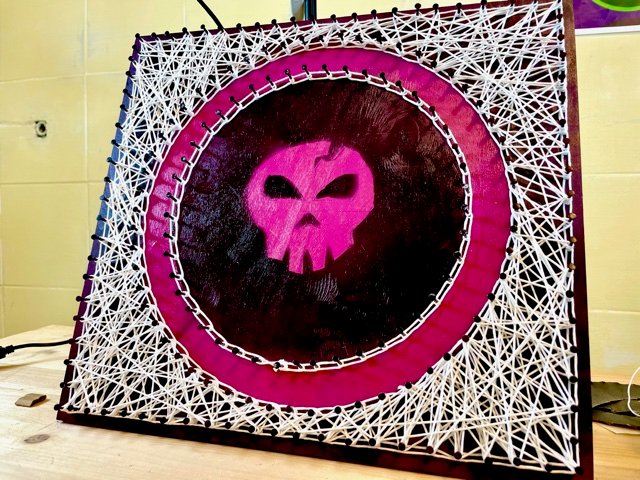
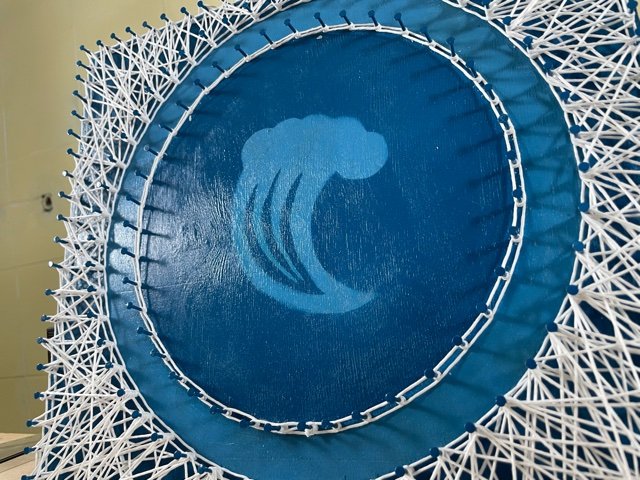
I have made other works with this system such as the Splinterlands logos, which you can find on my blog while others are in the works and I will soon let you cover them.
I hope you enjoyed this little guide, see you in the next picture :-).
The photos are taken by the author.

👉ITA VERSION👈

Ciao ragazzi,
oggi la mia amica Sara mi ha chiesto se potevo fare un quadretto usando il metodo che utilizzo per fare i quadretti di Splinterlands.
Mi ha chiesto qualcosa che rappresentasse l'amore che ha per la sua piccola cucciola Olivia e perchè no?...
Ho fatto una piccola ricerca nel WEB per trovare una immagine adatta al mio "stile" e che soprattutto rappresentasse il bene che c'è fra Sara e Olly ed eccoci pronti per realizzare il quadretto.
Cosa ci serve?
- Una immagine che ci piace.
- Un quadretto di legno, ho scelto un formato 30 x 22 cm.
- Spago, ho scelto il colore rosso.
- Vernice per dipingere il legno, ho optato per il nero.
- Chiodi.
- Vernice protettiva lucida o opaca.
Passo 1.
Riportiamo l'immagine scelta sul quadretto cercando di posizionarla come meglio crediamo, qui si và un pò a gusto personale.
A me di centrare le cose non piace molto e quindi l'ho riportata, con l'aiuto della carta carbone, appena spostata a sinistra.
Tracciamo anche una cornice stando a mezzo centimetro dal bordo, stare troppo vicino al bordo si rischia di spaccare il legno quando andremo a piantare i chiodi.
Passo 2.
Finito con il disegno e la cornice, creiamo un piccolo spessore di circa un centimnetro.
Io ho utilizzato un caartoncino, questo ci serve per distanziare i chiodi sul disegno.
Con l'aiuto dello spessore giriamo intorno al disegno e alla cornice disegnata creando i punti dove poi pianteremo i chiodi.
Passo 3.
Piantiamo i chiodi!!
A ogni punto disegnato sul nostro quadretto piantiamo un chiodo, questi ci serviranno per tirare i nostri fili una volta colorato.
Ho utilizzato chiodi con testa grande in modo che lo spago, successivamente, non possa sfilarsi.
FATE ATTENZIONE ALLE DITA :-)!!
Passo 4.
Coloriamo!!
Avete scelto il vostro colore di base? io ho deciso di dipingere tutto di nero per poi utilizzare lo spago rosso!
Il colore di sfondo verrà quasi coperto tutto dallo spago ma preferisco colorare per lasciare qualche buco tra appunto lo spago e dare quell'effetto di vedo e non vedo!:)
Lasciamo asciugare bene il colore in modo da non sporcare lo spago, io per sicurezza ho ripreso i lavori il giorno dopo.
Passo 5.
Una voltra fatto asciugare il colore ripassiamo la nostra immagine con la vernice protettiva.
Io ho scelto quella lucida ma si può utilizzare anche quella opaca...
Ho dimenticato questo passaggio nel mio quadretto e l'ho fatto dopo ma vi consiglio di verniciare la vostra immagine prima di utilizzare lo spago.
Non è necessario verniciare tutto il quadretto in quanto verrà coperto dallo spago, l'importante è verniciare bene la vostra immagine, l'unica parte che non sarà coperta successivamente.
Passo 6.
E' ora di tessere la ragnatela, come prima cosa ho fatto tutti bordi due volte la prima ruotando lo spago in senso orario la seconda in senso anti orario in modo da formare una specie di catena.
Fatto tutti i bordi ci si sbizzarisce come vuole, lasciando libera dallo spago solo la nostra immagine, nel mio caso un cuore con l'impronta dei polpastrelli della piccola Olivia il cane di Sara.
Ed ecco il mio quadretto finito che ne pensate?
Ho utilizzato anche lo spago nero per formare una catena intorno all'immagine per dettagliare meglio la forma del mio disegno.
Ho impigato in totale circa due ore e mezzo per completare il tutto, molto del tempo se lo sono preso i chiodi ma soprattutto lo spago!! ma molto soddisfatto io e molto contenta Sara che lo appeso subito in casa!
Ho realizzato altri lavori con questo sistema come ad esempio i loghi di Splinterlands, che trovate nel mio blog mentre altri sono in corso d'opera e presto ve li farò federe.
Spero che questa piccola guida vi sia piaciuta ci vediamo al prossimo quadretto :-).
Le foto sono scatti di proprietà dell'autore.
Bellissimi questi lavori
Davvero complimenti per questo tuo lavoro, chiodi, spago e tanta pazienza ma il risultato è davvero bello!
Bravo @blumela
!BEER
View or trade
BEER.Hey @blumela, here is a little bit of
BEERfrom @libertycrypto27 for you. Enjoy it!Learn how to earn FREE BEER each day by staking your
BEER.