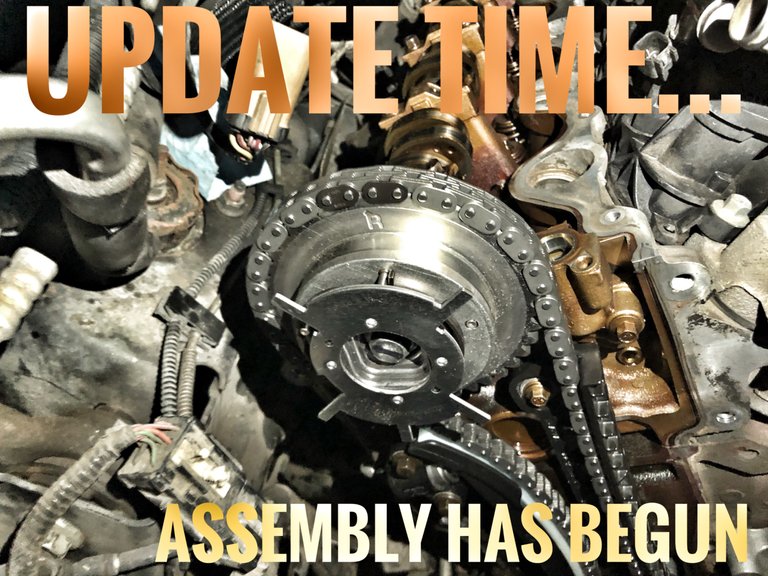
<<Update Time...>>> Assembly Has Begun ~2005 Lincoln Navigator Timing Chain Replacement
This project seems to be never ending! But when I step back and look at it, this repair project typically isn’t done inside a small garage by a “Backyard Mechanic” It’s been tough for me to not just take all day or a couple days and get in and get this job done. Normally when I do repairs the car is out in the driveway or I am at the shop at work and have limited time to complete it. Always feeling a bit rushed toward the end. When you are messing with the Timing of the engine, A/C Compressor, Oil Pump, Water Pump, Oil pan Removal, and the spider web also referred to as the wiring harness that runs a million sensors, injectors, spark plugs... you can’t get in a hurry, especially when it is the first time you have ever done something like this.
Parts and tools are scattered all over the garage, it looks like a dang bomb went off in there. Yet, I know where everything is... I think... :wink:wink. Working on this an hour here and a couple hours there has drug this repair project out a little bit. Now I am finally to the point where I need to do some parts cleaning and begin putting the pieces back together.
So after putting in my 10 hour day as a Lineman, it’s time to throw on the mechanic hat and do a little more work on this 5.4 Triton V8. I gotta get Mama-Splatts’ car up and running, so I can work on my axle swap in my 1997 F-350 :wink:wink My Axle swap kit showed up the other day, so I am getting a little anxious to do the swap.

I figured the best way was to grab a big tub and mix up a Simple Green solution. The washing solution was just a couple inches deep, deep enough to use a little brush and kind of splash and scrub these parts down. I really wish it was deep enough to completely submerge them and let them soak. Hey, you win some and you lose some right?
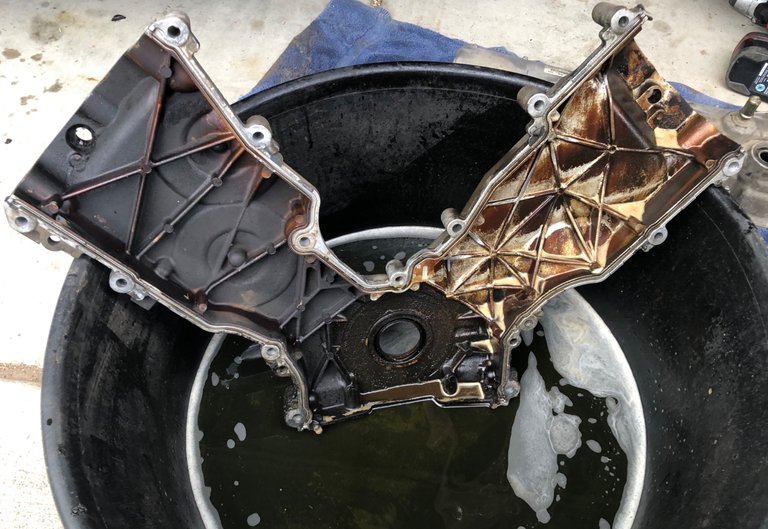
Front Cover
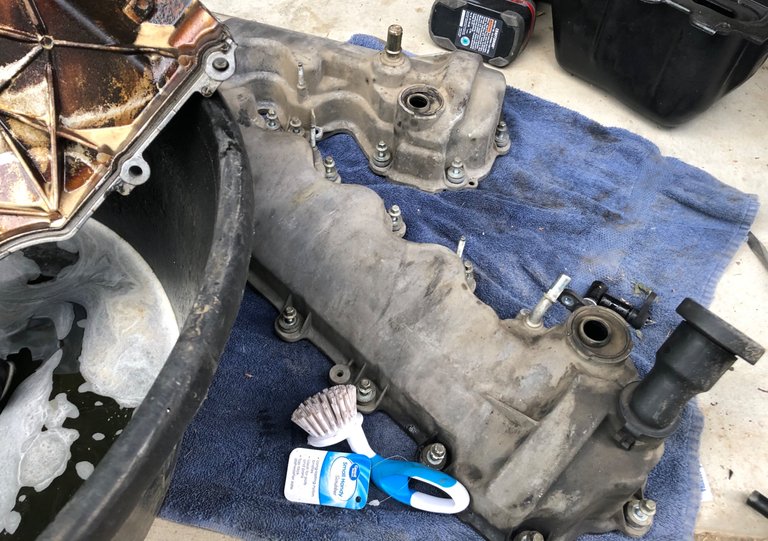
Valve Covers
Sitting on a chair with my little scrub brush, just scrubbing away on all this built up gunk on the underside of these covers. The outside of them wasn’t bad but there were a few sections where the gaskets had started to fail and began leaking oil. Another reason why I am glad I finally pulled the trigger on this job. It wasn’t leaking oil on the ground but I feel that wasn’t too far off. Not to mention I could have possibly lost this whole engine due to this timing chain issue. Funny but not funny is my brother had... had the same motor and didn’t take care of it and ended up destroying the engine. So he had to go and buy a new one. OUCH!!
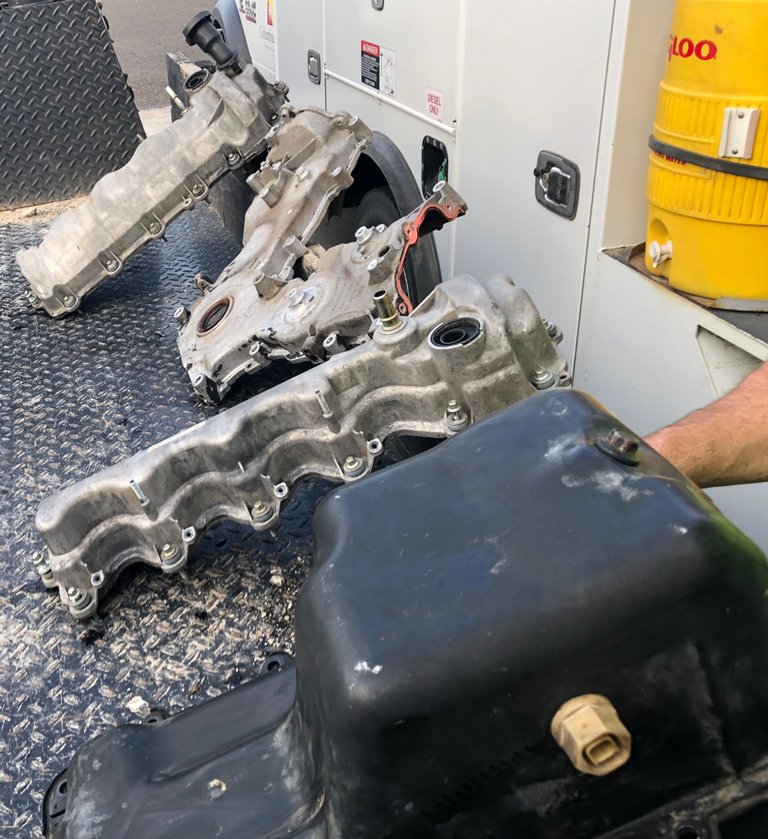
Oil Pan, 2-Valve Covers, and a Front Cover Drying out
Initially that is all I had planned, get these parts cleaned up and call it a day, but.... I just couldn’t help myself. Looking at all the new shiny parts sitting on the table waiting to get installed, triggered me to dig in and get after it!!
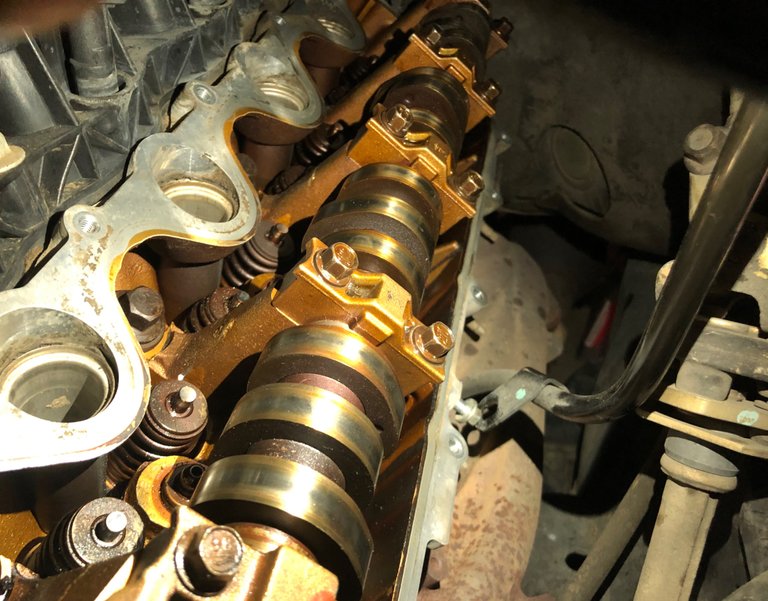
First thing was to get the cam shafts swiped down inspected and laid in the cam cradles. Placing a few drops of oil in the cradles prior to landing the cams and give them a spin. Then put a few more drops of oil on them, then put the cam caps on. These are what hold the camshaft to the head of the engine.
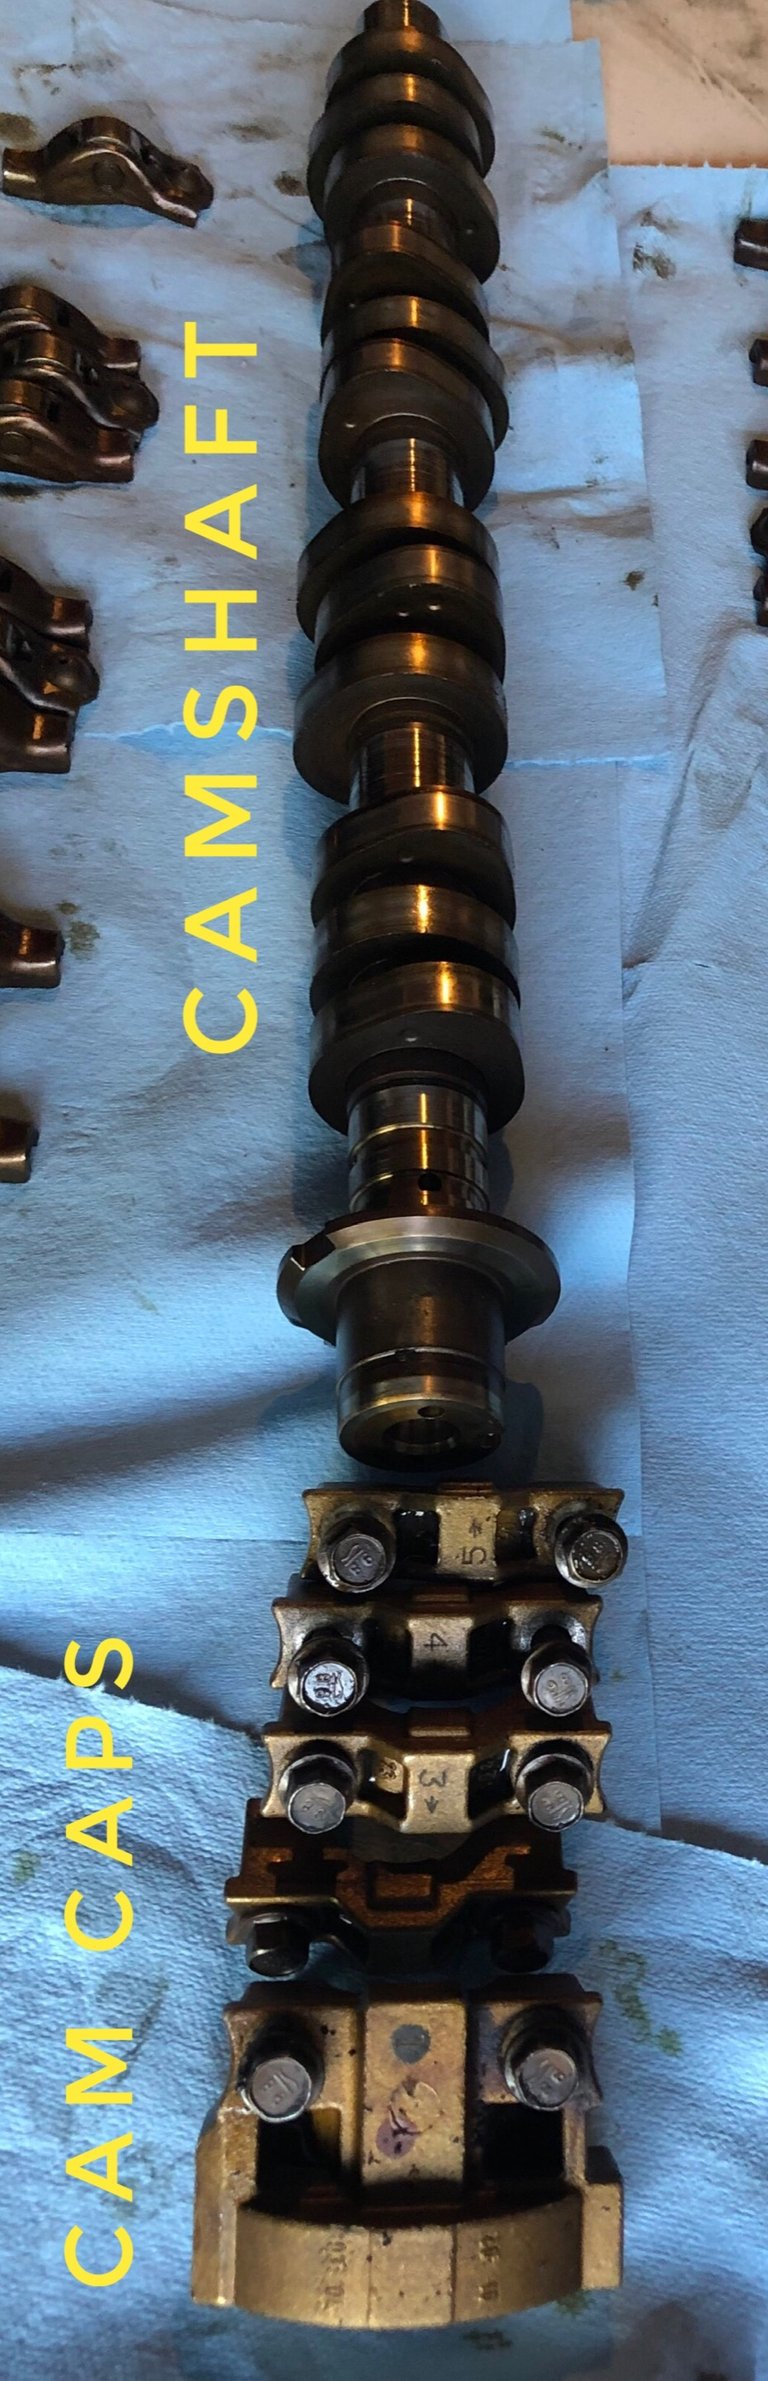
After installing the cam caps and torquing them in the proper order I noticed that my camshafts were not spinning very well at all. They were really tight. I mean REALLY tight!! Something is wrong!! These should spin “freely” since they don’t have the timing chains on them and the roller followers aren’t in either.
So I loosened them all up on both sides of the engine and re-torqued them all again!! Still the same result?!?!? I know it was important to keep the cam caps in the same position the were and I know I put them in the right order. So I looked closer at them, wiped them off and noticed they all had a number and an arrow on them. How come I didn’t notice that before?!? Hmm weird?!?!
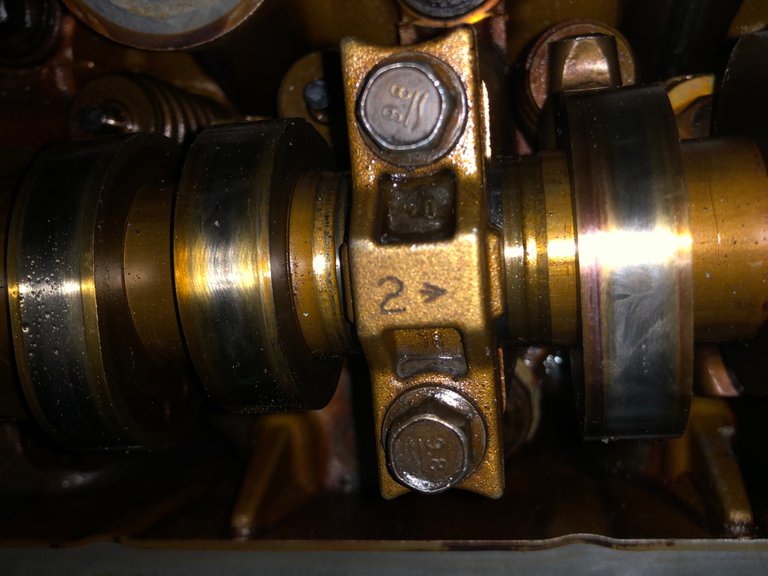
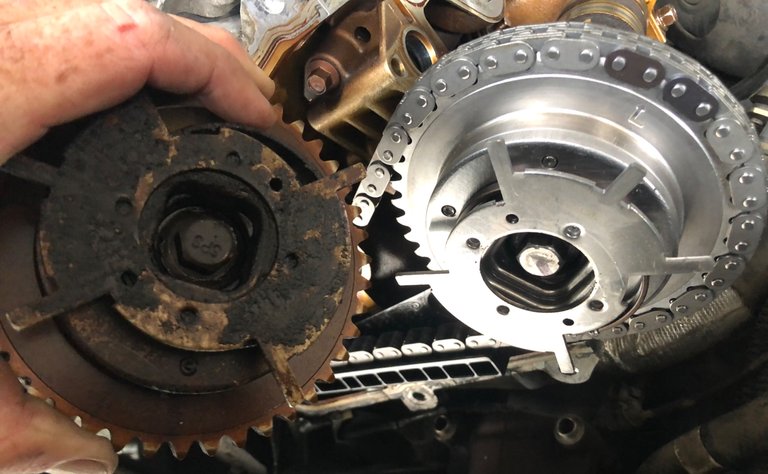
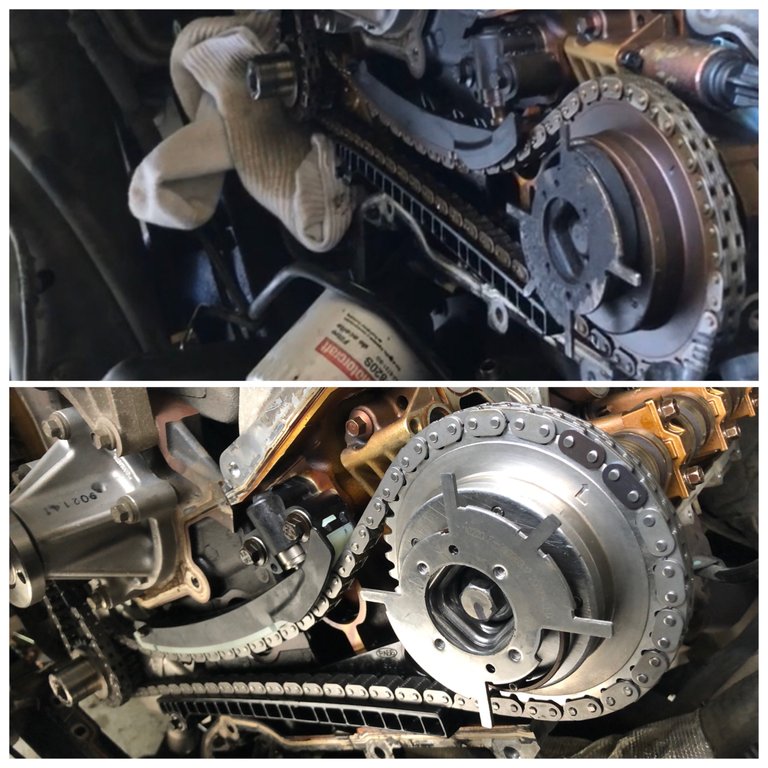
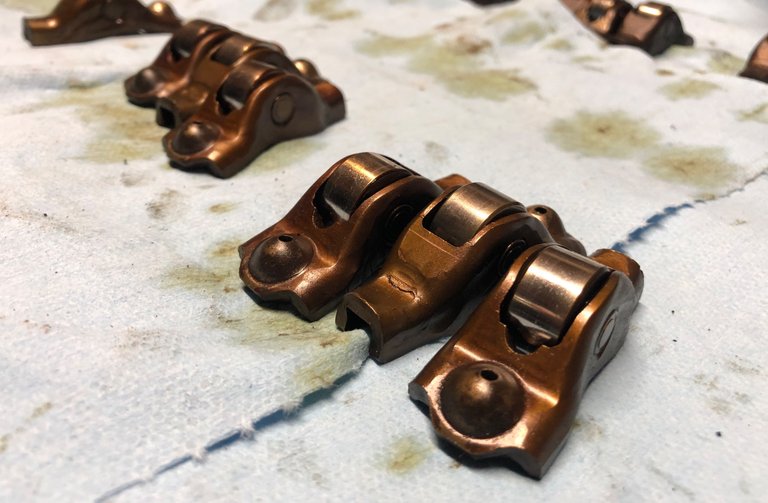
Most of the time when it comes to automotive stuff, logical thinking is out of the question. Some rigs you have to pull the cab off to change a fuel pump?!?!? I mean why on earth would they make these cam caps in a manner that when you stand on the side of the vehicle the numbers on top of them are upright and all the arrows point forward?? Then you go to the other side of the vehicle and you see the same thing??? What a concept right?! Needless to say I had a couple of them on with the arrow pointing toward the rear of the motor. That is all it took to put these camshafts in a bind. So I had to loosen them all back up again and flip the ones that were installed wrong and re-torque them all... again!! Then I installed the Cam Phaser to the front of each camshaft. This is what the timing chains ride on in order to turn the camshaft. Check out the old Cam Phasers compared to the new ones... Wow
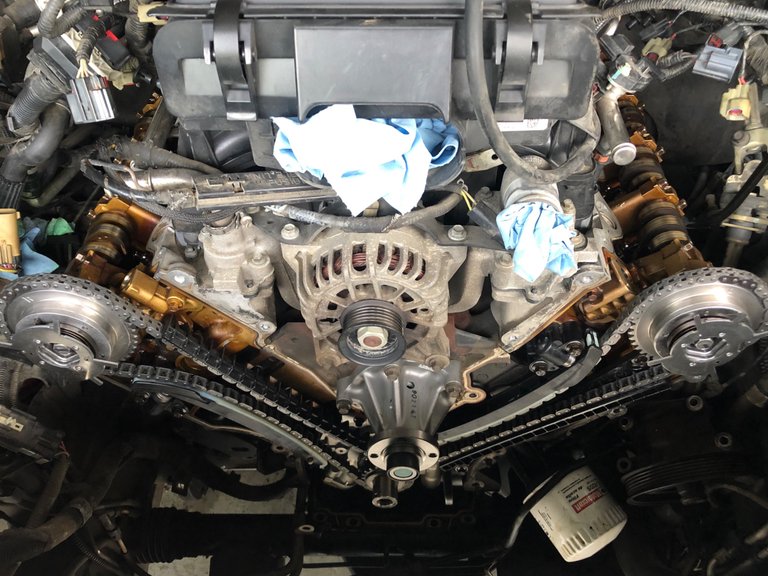
I am so happy they made a tool to set the timing on this engine. It’s a tool that goes over the Crankshaft and fits over a little nipple on the engine block. This places the Crankshaft in the correct position while you get the Camshafts positioned to it. There are links on the timing chain that are a different color. When they are positioned on the Camshafts and the Crankshaft sprockets correctly the timing of the engine is perfect.
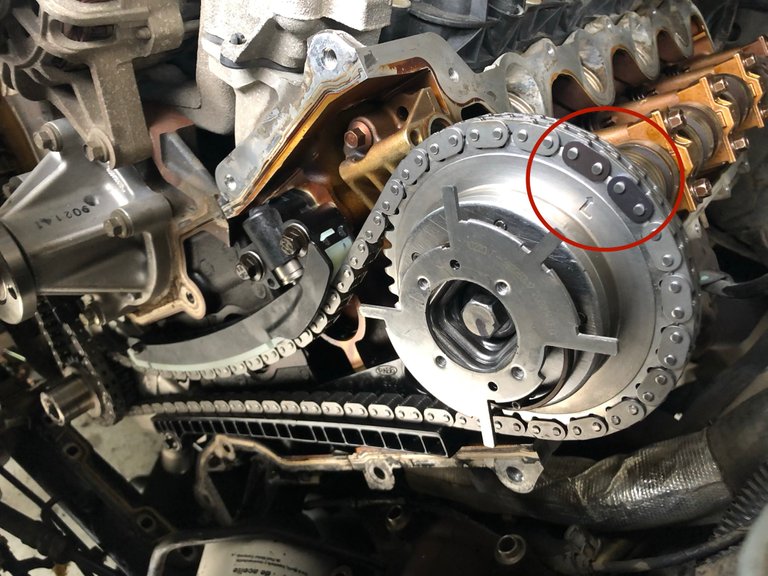
Camshaft
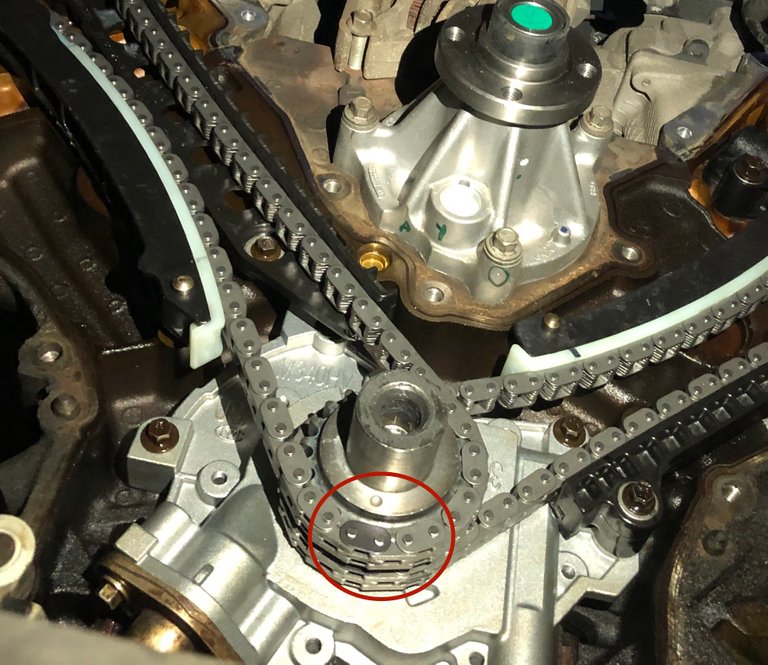
Crankshaft
What a relief!!! I never thought timing this engine could be so “Dummy Proof”. The timing components look pretty awesome, too bad you won’t be able to see them when this is all out back together. The old ones didn’t look to good but DAAAAAAANG them new ones sure look nice!!
Next is the tedious part, installing all the roller followers. I have to use a special tool to compress each spring in order to get these in under the camshaft. They don’t just slide under cam all easy, you gotta turn them on their side, flip-flop, turn, tilt, and line them up perfectly on the valve. I mean, I only have 24 of them to install.
My plans are to have everything put back together this weekend. If everything goes good and I don’t get called into work, I definitely see me turning the key and firing up the engine this weekend. It’s been a few weeks since I first tore into this engine and I will be happy when it is done. Being able to tackle this project a little at a time has made the repair process way less stressful And I feel that I am doing a more thorough job as well. Hopefully I don’t have to see this view for a very long time...
Another productive day in the books!! Time to relax and crack a cold one... or two..

Hive On
and


Very nice post, I would love to see that engine in the car!!
It's in there... just missing a bunch of pieces. Lol
Keep that momentum! If you take a week off it will be hard to get back into a project like this.
I am tryin'... got another couple hours in tonight. I had my spring compression tool break but I was cruising along getting those roller followers in. I have 7 left out of 24. So I went and installed the new A/C compressor, new crankshaft seal, cam sensors and crank sensor, VVT solenoids, and VVT solenoid seals..... I got to help my brother in law do brakes on his rig tomorrow, but after that... it's game on. Lol
Clearly you have some skills man. It's amazing what you're achieving in the workshop you have and it's coming together really nicely. Keeping all those bits together and getting them back into place correctly...That's a bit of work dude, and not something you want to mess up. It's sort of real life Lego Technic.
Tell me, how long have you been at it so far, like in hours all up, and how long do you think it'll take to complete?
In all honesty I would have never attempted this without a a Ford mechanic and his YouTube videos.
Keeping organized is definitely one of my weak points that I have been working on. The last time I did something... somewhat like this I ended up with extra brackets and bolts???? Ummm ya not good but the car drove for another 4 years until I sold it. Lol
As far as time... I was just out there for 2 hours and it only seemed like 45 minutes...
I was actually thinking that (fingers crossed) If I had to do this again I could probably knock it out in a day and a half. That is if I really got buckled down and got after it. Being that is it my first time, it is taking a good amount of time. How much, God only know. HAHAHA
Good old YouTube huh? I've used it a bit for gun stuff but am always careful to verify the information as not everything there is legit.
It looks like it's all coming along nicely and you're getting it moved forward. Let's hope there's no left over bits man, that might not go so well. Lol.
I think the next post will be job complete right? I'm looking forward to seeing how it all comes out....And if there's left over bits.
Thank you for using the recommended tag/s @jlsplatts. This post has been manually rewarded with BUILD tokens in the form of an upvote. You can buy, stake, and exchange our "BUILD" tokens for Hive Engine https://hive-engine.com/?p=market&t=BUILD
At Build-it, we welcome all sorts of DIY, How-to tutorials and projects. We want to encourage this modern society to start doing things by themselves with the exception of hiring a service provider. Please subscribe to our community and publish your post/project through there and use at least one of our tags (#diy #build #build-it #how-to #doityourself) for additional upvote support.
Are we adding value to the HIVE ecosystem? Consider delegating some of you Hive Power to us to continue curating and rewarding DIY (do it yourself) and How-to contents/projects on the Hive Ecosystem.
Follow our vote curation trial => https://hive.vote/dash.php?trail=build-it&i=1
Amazing to me.