Greenhouse Tomato Plants, setting up the watering system
Hello, and welcome to my greenhouse!
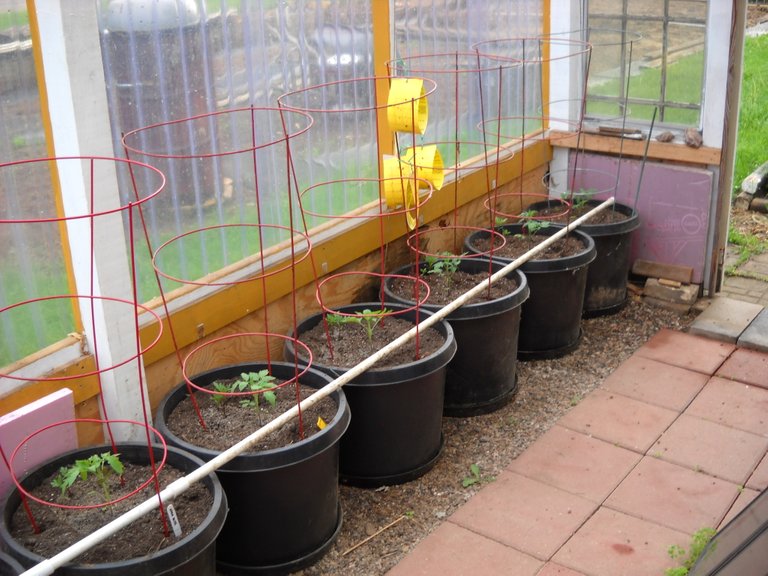
I finally managed to get all of my tomato plants planted into the big greenhouse pots where they'll stay for the summer. Once that was done, I decided to set up the watering system for the plants. There's 10 tomato plants in the greenhouse, and watering them one at a time isn't very practical, and takes longer than I want to spend watering, so I set up a watering system every year to water all the plants at the same time.
I use 1/2 inch PVC water pipe for my watering system. When I built the system, I drilled a 1/16 inch hole in the pipe every 6 inches, keeping them in a straight line on the pipe so they all face the same direction. I use a gravity feed system for the water, so It's not necessary to glue the pipes together. I just push the pipe fittings and end caps onto the pipes. The fittings have a tight fit to the pipe and there's not enough water pressure in the pipes to push them apart.
Here's my 5 Roma paste tomato plants with the watering pipe in place.
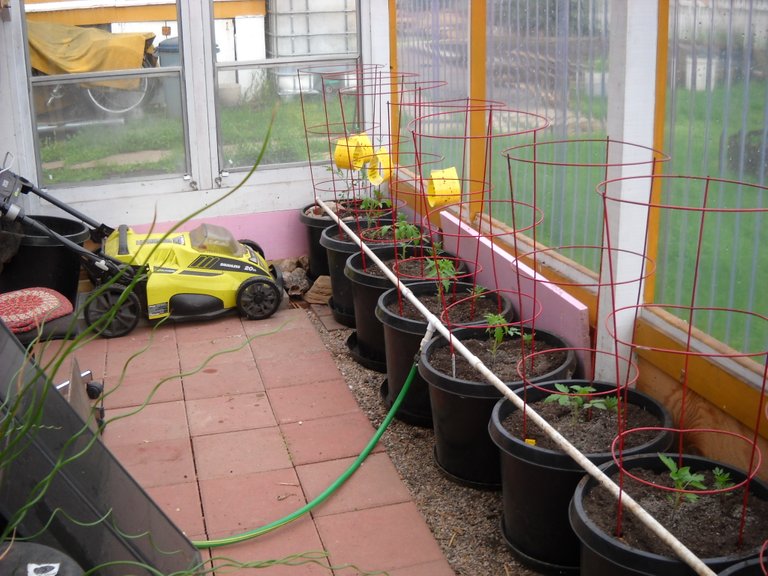
This is the 5 Amish paste plants with the watering pipe in place.The white post in the middle of the front wall has 5 pots on either side of it. In this picture, you can see how I have the pipes connected to the water supply with a piece of garden hose.
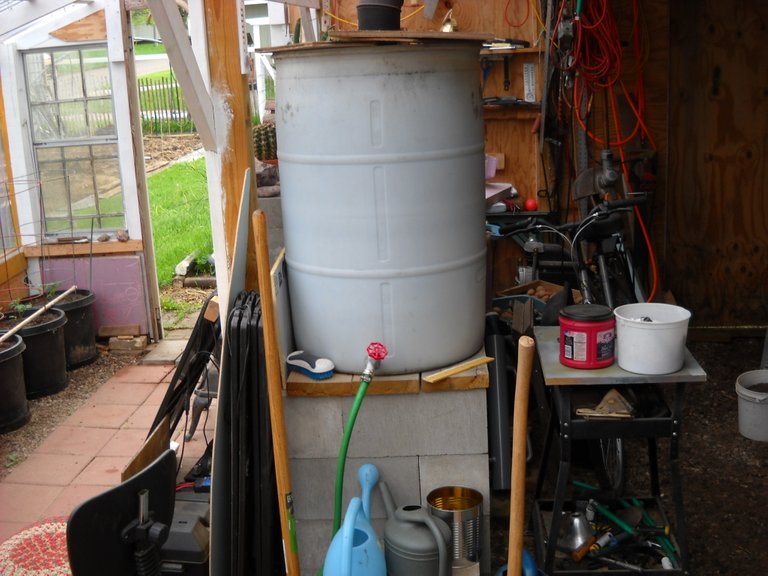
This is the 55 gallon plastic barrel that I use for the water supply. You can see the hose for the pipes hooked up to the valve. The barrel is up on a stand made of dry stacked concrete blocks. That provides enough height for the gravity feed. The top of the barrel is a bit higher than I am, I have to stand on something to look in the barrel to check the water level.
I took a picture of the watering system in use to show how it works. I control the water pressure to the pipes by how far I open the valve. The system gives enough pressure to squirt the water up against the wall, so I have to back off on the valve to control how far the water goes. The idea is to water the plants, not the wall.
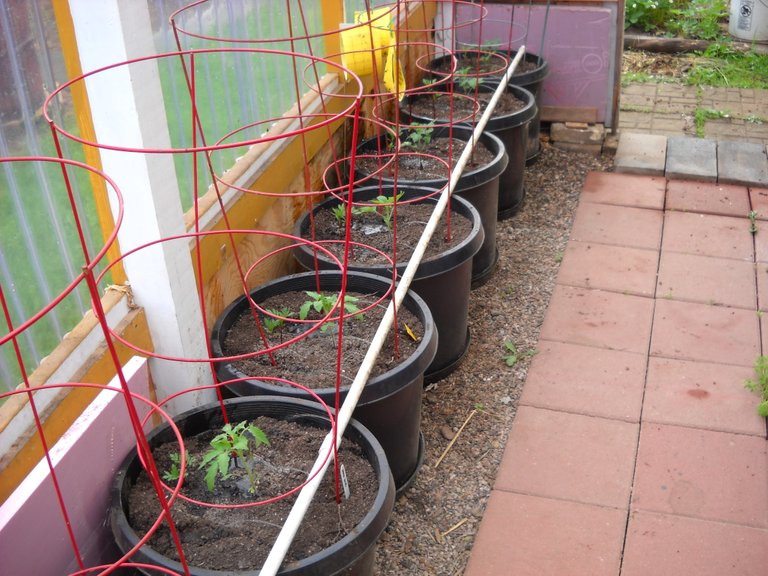
Some of the holes in the pipes don't line up with the pots, so I have to block them with small screws. There's no point in wasting water between the pots. This watering system will stay in place for the rest of the growing season.
I usually fill the 55 gallon barrel from the rain water catchment system, if there's water in the system. If we get a dry spell and I run out of rainwater, I'll use city water to fill the barrel. I've been using some form of this system since we built the greenhouse, it works quite well for me.
Well, that's all I have for this post, thanks for stopping by to check it out!

Ingenious! Simple and works well.
Thanks!
That's a very practical system you've built!
Thanks! :-)
Looks like a lot of work to put together, but compared to the time spent manually watering its a great time-saver.
Do you find the plants closer to the barrel get more water than the ones further away I wonder? Suppose you could block some extra holes there to increase the pressure at the far end.
In terms of checking your water level, you could make a float from an empty plastic bottle and tape a stick to it with lines for level, would save you climbing up all the time to see whats going on? You have rough thirds on that barrel already for approximation.
What I've discovered with the watering system is that there tends to be more water pressure at the far ends of the pipe than close to the hose hookup. Also, how level the pipes are can determine where the water pressure goes. You have to basically get the water going and then lift or lower the pipe sections as necessary to adjust the flow.
I thought about making a float system for the water level, but it's easy enough to step up on the concrete block that sits in front of the stand for the barrel. I put the concrete block there to have something to put the watering can on for filling from the valve in the bottom of the barrel when the hose is not hooked up in the spring.
Thanks for sharing your creative and inspirational post on HIVE!
This post got curated by our fellow curator @ashikstd and you received a 100% upvote from our non-profit curation service!
Join the official DIYHub community on HIVE and show us more of your amazing work!