Partsocaster Project
This is a documentation of my partsocaster project. I was inspired by @amberyooper to finally finish this project that has been sitting around for a couple years.
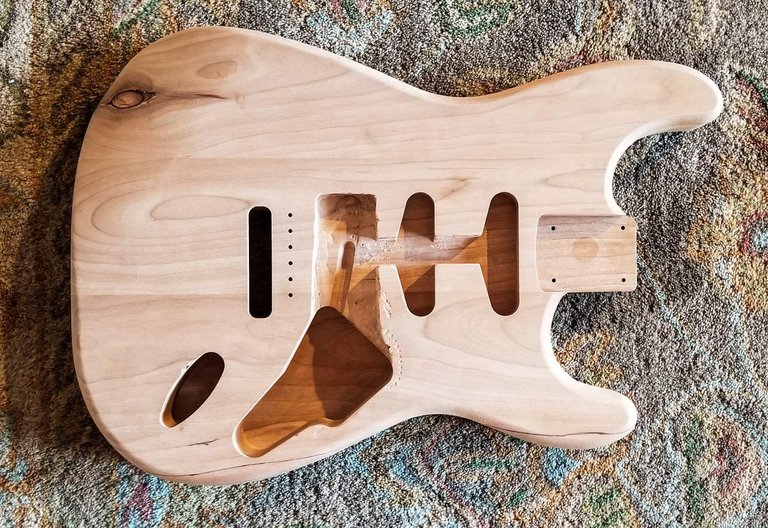
This project started out a couple years ago when I went to the Chicago guitar show and bought this reject stratocaster body for around 30 dollars.
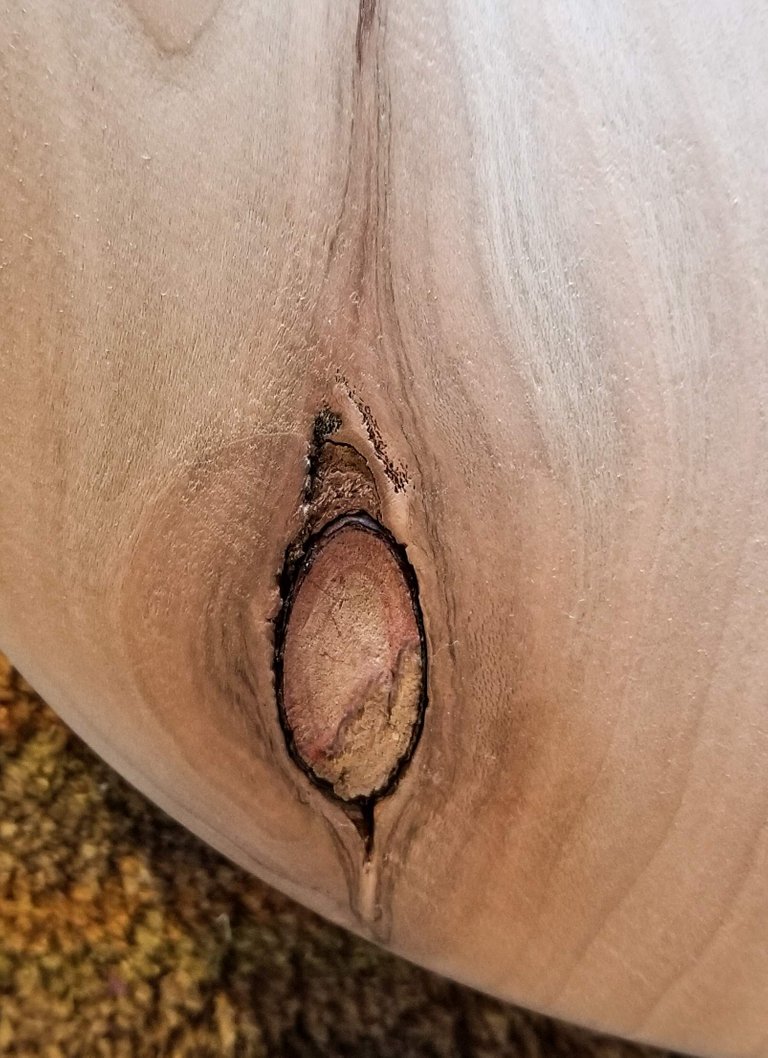
It has a big old knot in it, thus the body was rejected by the factory. I kind of think it looks cool there.
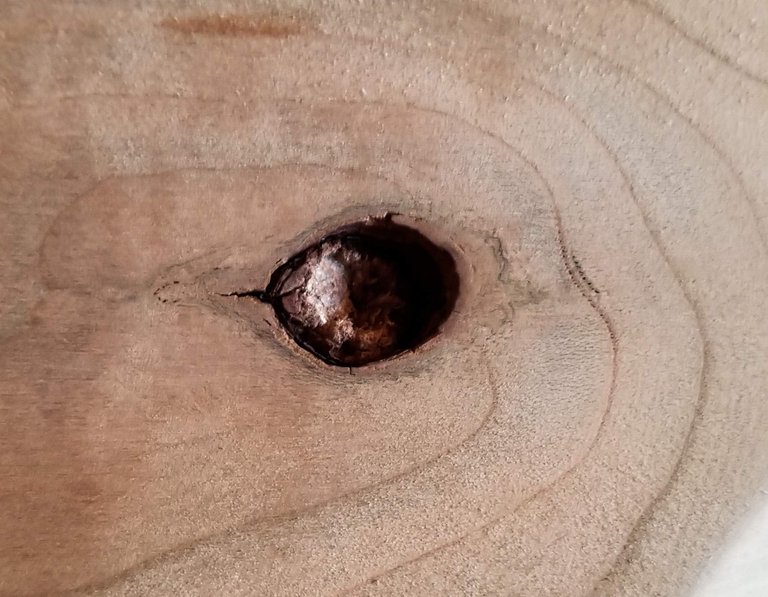
Here it is from the back. I can actually push the whole knot out if I wanted to.
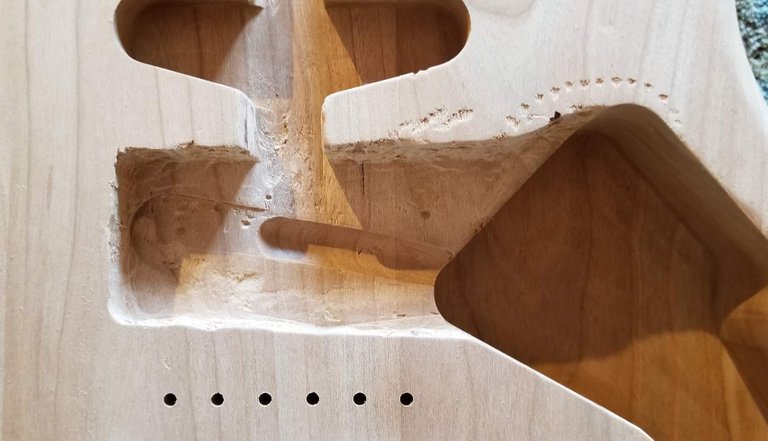
Also someone had hand routed out a humbucker opening for a humbucker, this used to be a single coil opening. But I thought this was perfect because I had an old used hss pickguard I bought on ebay a while back.

Here's the loaded pickguard, it has lace sensor alumitones in it. These pickups are good in almost any genre and are really quiet for hum.
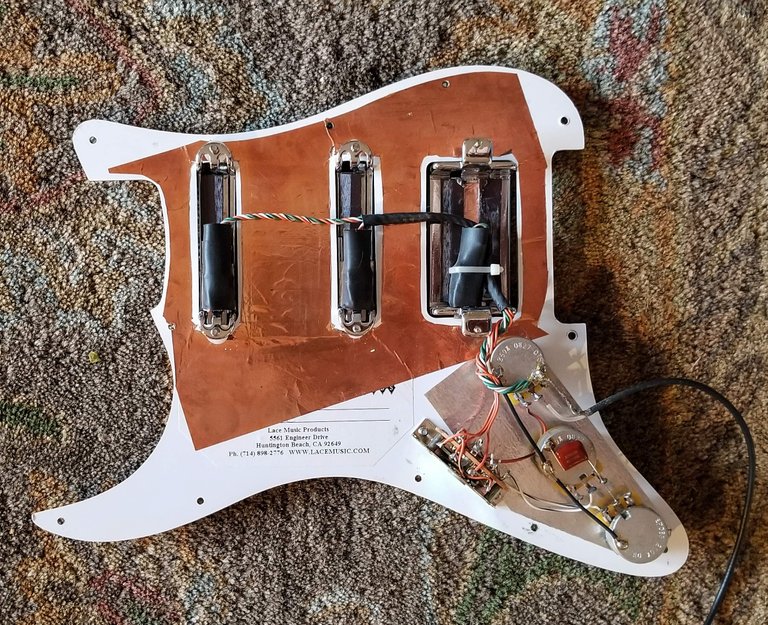
I got this off ebay as well. This was a rejected loaded pickguard, one of the pots or the switcher has something wrong with it. Possibly a cold solder connection. But the pickups themselves are good to go.
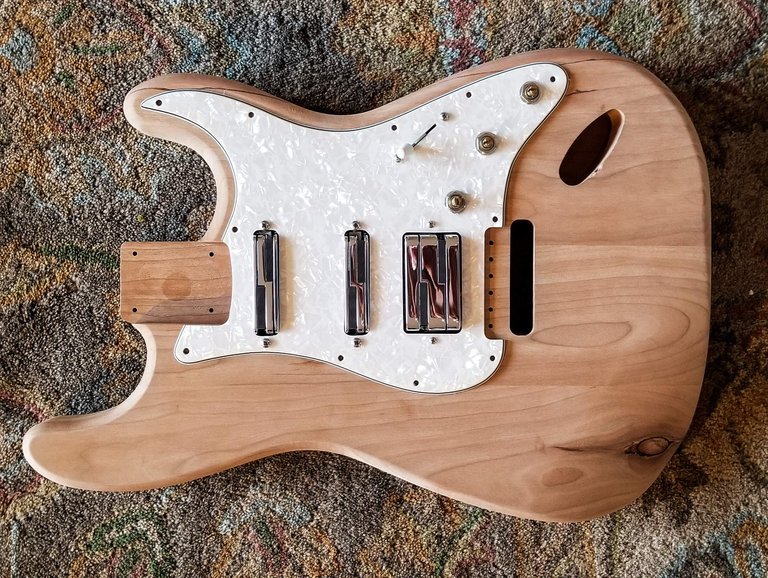
With just a bit of additional carving the pickguard set in place perfectly. The predrilled bridge holes line up as well.
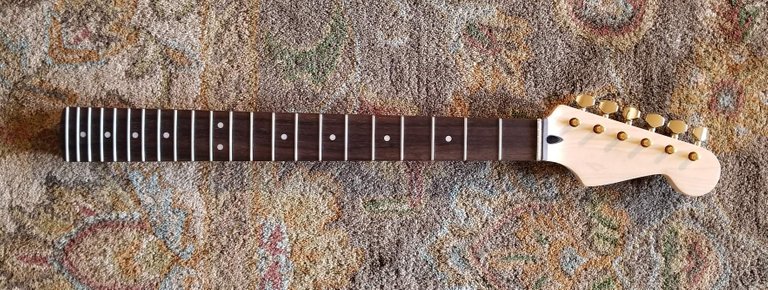
Here's the new neck I got. This is a mighty mite neck from Stewmac. Its important to measure the neck pocket of the body first before buying a neck for the body. Otherwise you will have a tedious woodworking project on your hands lol.
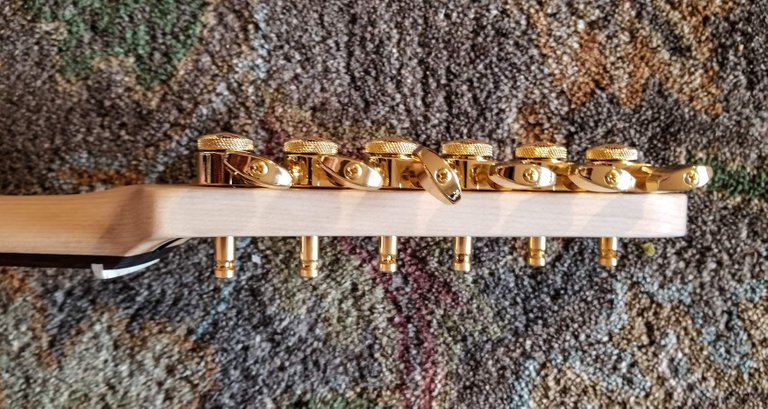
I got the tuners from guitarfetish.com. These are staggard locking tuners as you can see the farther away from the nut the lower down the tuner head goes. This is to add more tension to the higher strings for tuning stability.
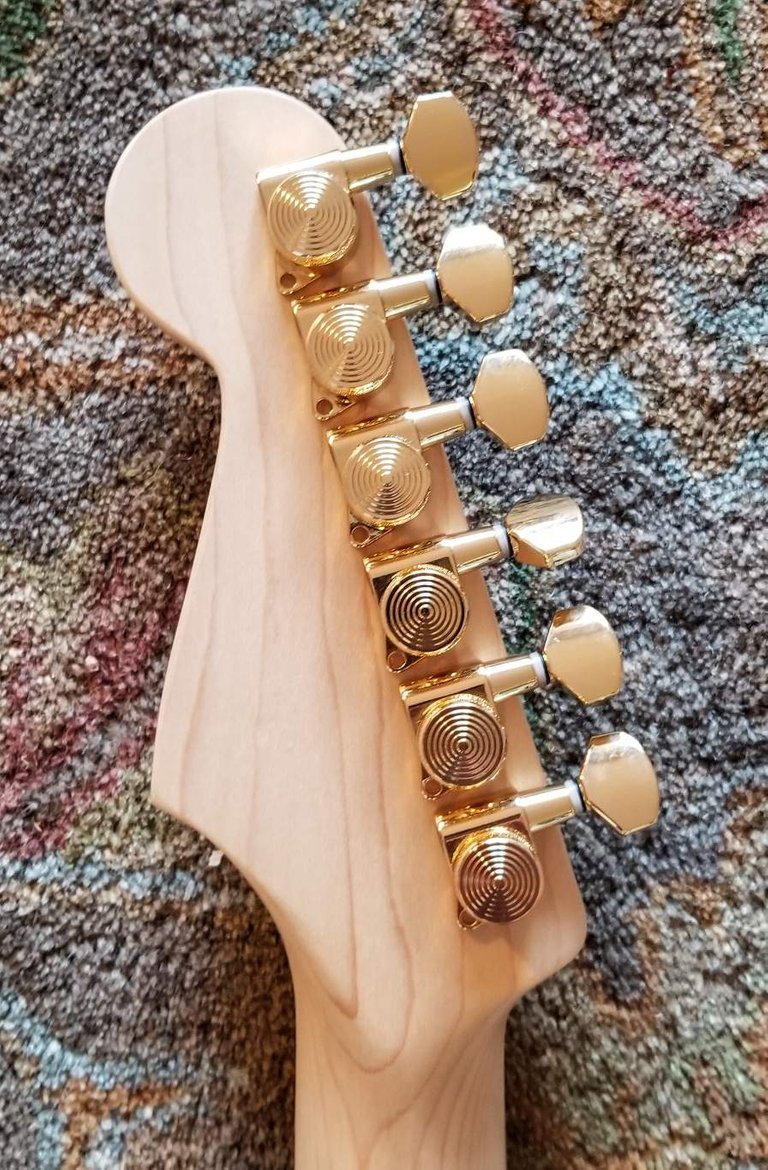
Here's the locking mechanism to the tuners. These allow you to clamp the string in place while tuning rather than having to wrap the string around the tuning post.
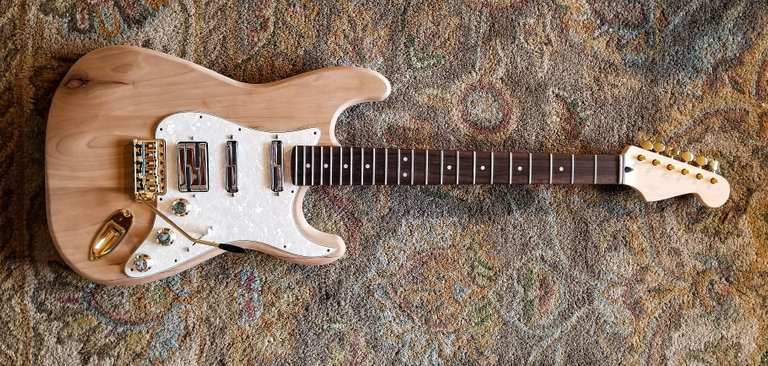
Here are all the parts in place, next step is rewiring the pickups and bolting everything down.
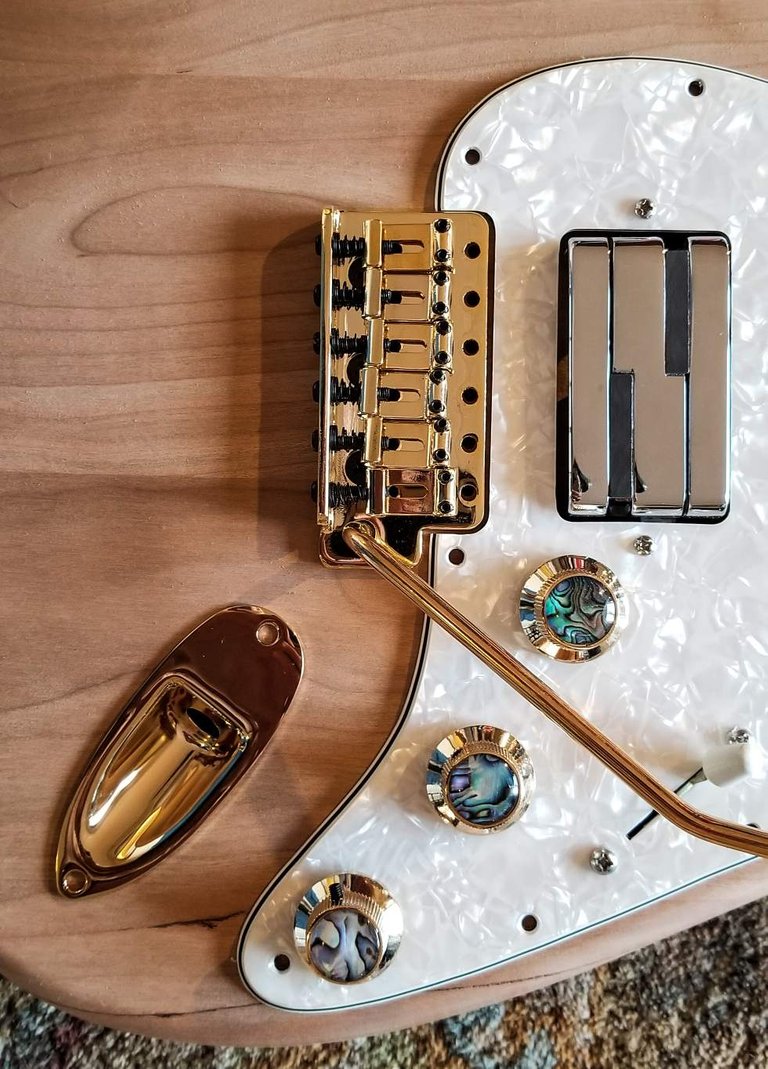
The bridge lines up perfectly with the screw holes. This is another important thing to measure before buying a bridge.
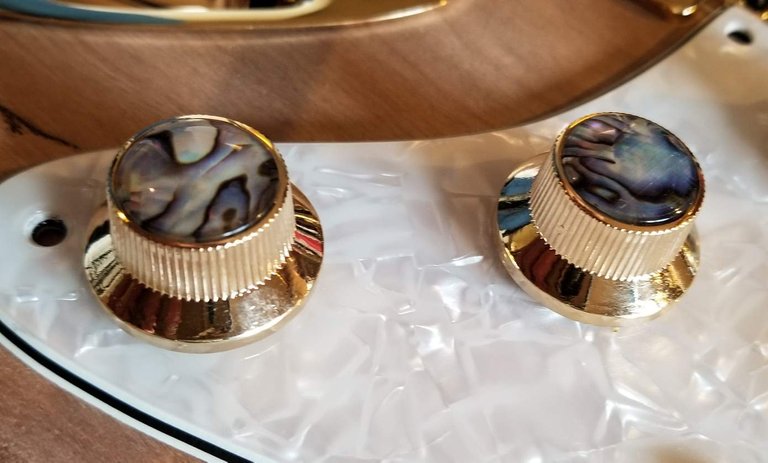
These are the fancy looking mother of pearl gold volume and tone knobs.
here's the finished project for now, I got the pickups working and the neck set and everything intonated.
Now its time for wiring the pickups to the main 5-way switch. I got a toneshaper solderless kit that allows for a more clear signal to go to the amp without worrying about messy solder. Simple strip the ends of the wires on the pickups and plug them into the green part on the left side. The letters N, M and B stand for neck, middle and bridge pickup. GD stands for ground. The green connectors on the right go to the input jack. The little white switches in the middle can be configured to rewire your pickups in series, parallel, vintage or modern wiring depending on what combo of switches you turn on and off. The big white plugs go to the knobs.

Here is the old wiring, i just snipped off the wires to the old controls and plugged them into the new controls. I had to do a bit of research to figure out what color wire does what. Red and orange wires bring the signal to the controls, the green is the ground wire.

Now everything is wired to the new controls. You just have to turn a tiny little screw to clamp down the pickup wire into the controls.

Next I finished attaching the tuners to the neck. These tuners also had to have little joles drilled in back to adhere them in place. I used my trusty dremmel to predrill the holes and then used a tiny screwdriver to put each screw in by hand.

Next the neck and body need to be predrilled. I lined them up first then used my dremmel and an appropriate sized bit to predrill the holes in alignment with the neck.

I made little marks in the back of the neck first before drilling to the right depth. You really need to keep the drill straight and put the dremmel on a low speed and slowly proceed. A messup here could ruin the neck forever :-(

Fortunately the neck went on perfectly and fit perfectly so there was no need for tricky carving or shimming. Now its time to intonate the bridge. Unfortunately I skipped a few picture steps like attaching the bridge and springs as I was getting excited at the guitar being close to playable.

I setup the bridge to rest on the body for better tuning stability. Someday after I put on the wooden pickguard I might set the bridge to float but that tends to cause tuning stability problems on these 6 screw bridges.

Here it is all finished up. All the puckups work and the action and intonation is good. I even did a few divebombs on the tremelo and it stayed in tune.

I'll live with this setup for a while before swapping the white pickguard out with a wooden pickguard. I may give the body some more sanding and a truoil finish next.
This is the first video I made using this guitar
Here is a more recent video I made that has this guitar harmonizing with my Egyptian Oud.
Next up is adding a wooden pickguard... I may try out some emg active pickups in it as well...
Thanks for sharing your creative and inspirational post on HIVE!
This post got curated by our fellow curator @tibfox and you received a 100% upvote from our non-profit curation service!
Join the official DIYHub community on HIVE and show us more of your amazing work!
thanks @tibfox
Questo post è stato condiviso e votato all'interno del discord del team curatori di discovery-it Entra nella nostra community! hive-193212
This post was shared and voted inside the discord by the curators team of discovery-it. Join our community! hive-193212
thanks :-)
That guitar really came out well! the hardware is really nice stuff!
Hopefully this week I can put in the wood pickguard. It will really make the hardware shine.
I did about two years in the Larrivee factory back in the day until I couldn't stand the assembly line ethic. Fcuk I hate Adam Smith for that.
I did one similar, though, a white flying V with gold hardware and Paddock pickguard. She was a lovely looking girl. Stolen and never got 'er back...
Your girl is purdy darn sexy, though:)
One of the nicest sounding acoustics I ever played was a Larrivee, it sounded better than any taylor or martin. Only problem was I was looking for a resonator guitar at the time. Too bad about the flying V, maybe check reverb to see if the thief is selling it there...
That was stolen in '86...Never got 'er back. In fact, by '99 every piece of gear I had was stolen and my Hummingbird twice! NO LIE! I got every piece of gear back and those stories are in part why what is happening now is not a random biological attack.
John's acoustics were amazing and I loved him as a person on a social level. Every Friday night we'd yak well into the evening at the pub. But I grew to HATE his capitalist methodology. The GUILD system would have been much better, IMO...
Stay well:)
Gotta put tracking chips into all your guitars to see who's stealing everything lol.
Those are old stories and I did find out who stole everything from multiple occasions. They are fantastic anecdotes and have metaphysical significance.
The only time I didn't find out was the second Hummingbird theft. Amazingly enough, I got a letter from the cops six months later saying that they had it...And that guitar survived my hangover hands one Saturday morning at the Larrivee shop as it slipped out of my hands when buffing it. John comes over and I told Him, 'Now this Gibson is a well-made guitar!!
Ouch, a dropped hummingbird Gibson ;-(
Did you post this before? It is still a cool looking guitar and something unique. Keep rocking.
On steem it appeared last year in a two part series. Now it is combined with some video examples. Now with all the time I have at home I plan on adding the wooden pickguard in a post soon, with some new active pickups.