[ESP|ENG] Makeup for beginners: Smoky black with a touch of silver to welcome the new year
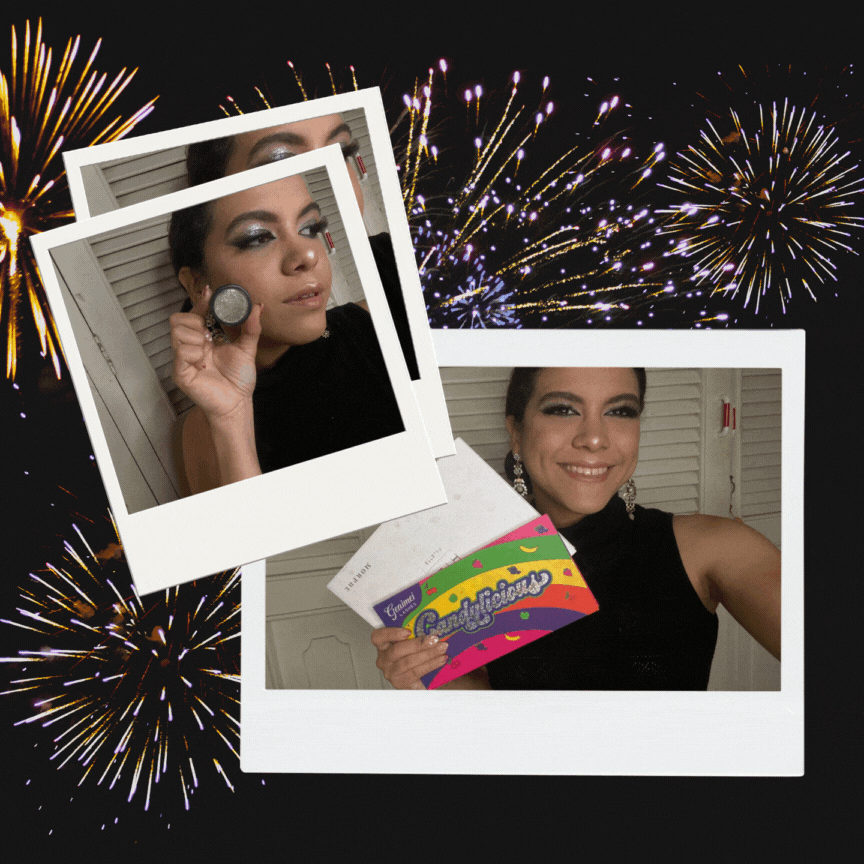
¡Hola Hola mis queridos makeup lovers! Ya quedan solo horas para que el año 2023 se nos vaya y si son como yo desde ahorita ya están planificando el outfit y el maquillaje que usaran para despedir el año viejo y recibir el que viene. He de decirles que nunca había intentado maquillarme con tonos plateados ni nada frío porque pensaba que no le quedaba bien a mi color de tes o por lo menos sentía que los dorados me iban mucho mejor pero como el outfit que planeo usar es de color azul ¿por qué no intentar probar cosas nuevas? y he de decirles que quedé muy feliz con el resultado.
Hello my dear makeup lovers! There are only hours left for the year 2023 to leave us and if you are like me you are already planning the outfit and makeup you will use to say goodbye to the old year and welcome the new one. I have to tell you that I had never tried makeup with silver tones or anything cold because I thought it didn't look good with my tes color or at least I felt that gold tones were better for me but since the outfit I plan to use is blue why not try new things? and I have to tell you that I was very happy with the result.
- Sombra plateada, marrón, negra y blanca o champán.
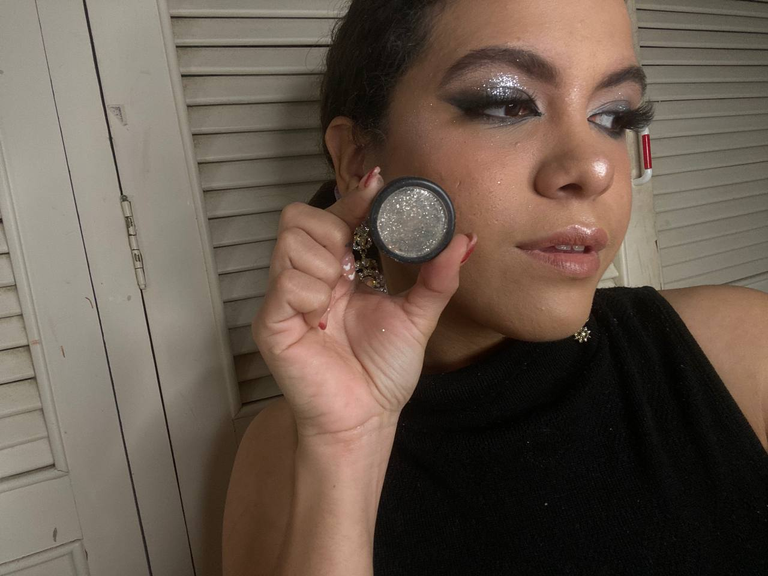
- Glitter plateado.
- Delineador negro de tu preferencia, yo utilicé liquido.
- Delineador de ojos en lápiz negro (yo no lo utilicé porque no tenía pero si tú lo tienes te servirá para pintar la linea de agua debajo del ojo).
- Sombra para cejas.
- Base.
- Corrector.
- Rubor.
- Bronzer.
- Iluminador
- Pestañas Postizas.
- Toallitas desmaquillantes.
For this make-up we will need
- Silver, brown, black and white or champagne eyeshadow.
- Silver glitter.
- Black eyeliner of your choice, I used liquid eyeliner.
- Black pencil eyeliner (I didn't use it because I didn't have it but if you have it you can use it to paint the water line under the eye).
- Eyebrow shadow.
- Foundation.
- Concealer.
- Blush.
- Bronzer.
- Illuminator
- False Eyelashes.
- Make-up remover wipes.
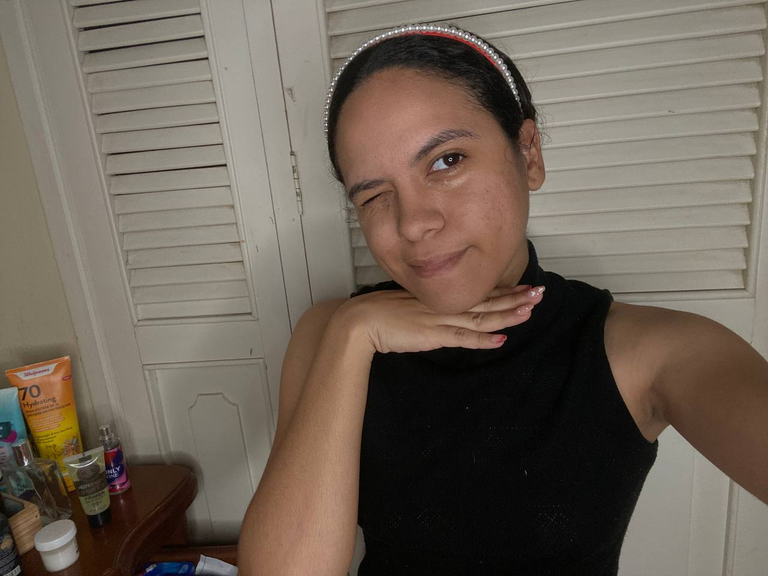
Primero comenzaremos por uno de los pasos más importantes al momento de maquillar y es el skincare. Si quieres que tu piel no luzca acartonada ni pesada, es importante que primero hidrates muy bien tu cara y uses contorno de ojos en tu ojera, esperes unos minutos a que tu piel absorba todo y ya luego te coloques tu base y corrector. Eso, para un maquillaje sencillo pero en esta ocasión como trabaremos con glitter no haremos la piel primero ya que luego de que terminemos los ojos debemos limpiar el rostro para retirar el brillo y el pigmento que haya caído. Ya luego de que hayamos hecho los ojos, allí si procederemos a aplicarnos nuestras cremas y primer para que la base nos dure mucho más.
First we will start with one of the most important steps when applying makeup and that is the skincare. If you want your skin not to look stiff or heavy, it is important that you first moisturize your face very well and use eye contour on your eyes, wait a few minutes for your skin to absorb everything and then apply your foundation and concealer. That, for a simple makeup but this time as we will work with glitter we will not do the skin first because after we finish the eyes we must clean the face to remove the glitter and pigment that has fallen. After we have done the eyes, we will proceed to apply our creams and primer so that the base will last much longer.
En lo personal no soy de hacerme mucho las cejas, más que todo porque naturalmente son muy oscuras pero como aquí estamos probando cosas nuevas decidí darle una oportunidad. Inicié con las cejas dándole un poco de forma al principio. Al momento de maquillar nuestras cejas debemos tener cuidado de no colocar mucha sombra adelante. Primero las peinaremos y con sombra oscura ( del color de nuestra ceja, no utilicemos un negro cuando nuestro color es un marrón) marcaremos por debajo desde el inicio hasta el final siguiendo nuestra forma natural y luego por arriba con un poco mas de sombra marcaremos la esquina nada más. Ahora con otro poquito de sombra cubriremos los espacios que veamos y con lo que quede en la brocha, sin recargar más, pintaremos el frente de nuestra ceja. Ahora, lo que hará que nuestra ceja no se vea como que hicimos un desastre, será el corrector, aprovecharemos el paso de echar el corrector en todo el parpado para prepararlo para la sombra. Con una brocha lengua de gato limpiaremos por debajo de nuestra ceja y de esa manera quedará mejor definida, y con ese mismo corrector lo esparciremos por todo nuestro parpado.
Personally I don't do my eyebrows much, mostly because they are naturally very dark but since we are trying new things here I decided to give it a try. I started with the eyebrows giving them a little shape at first. When doing our eyebrows we must be careful not to put too much shadow in front of them. First we will comb them and with dark shadow (the color of our eyebrow, do not use a black when our color is brown) we will mark below from the beginning to the end following our natural shape and then above with a little more shadow we will mark the corner only. Now with another little bit of shadow we will cover the spaces we see and with what is left on the brush, without overloading more, we will paint the front of our eyebrow. Now, what will make our eyebrow not look like we made a mess, will be the concealer, we will take advantage of the step of applying the concealer all over the eyelid to prepare it for the shadow. With a cat tongue brush we will clean under our eyebrow and that way it will be better defined, and with the same concealer we will spread it all over our eyelid.
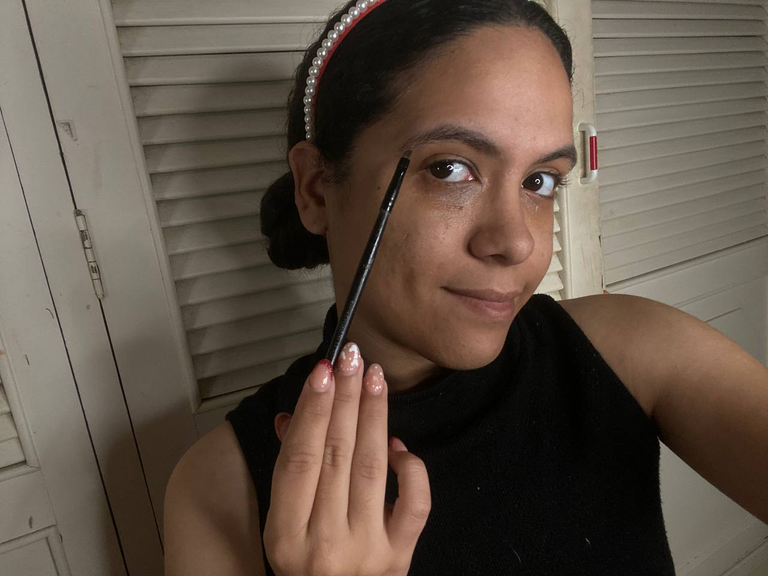
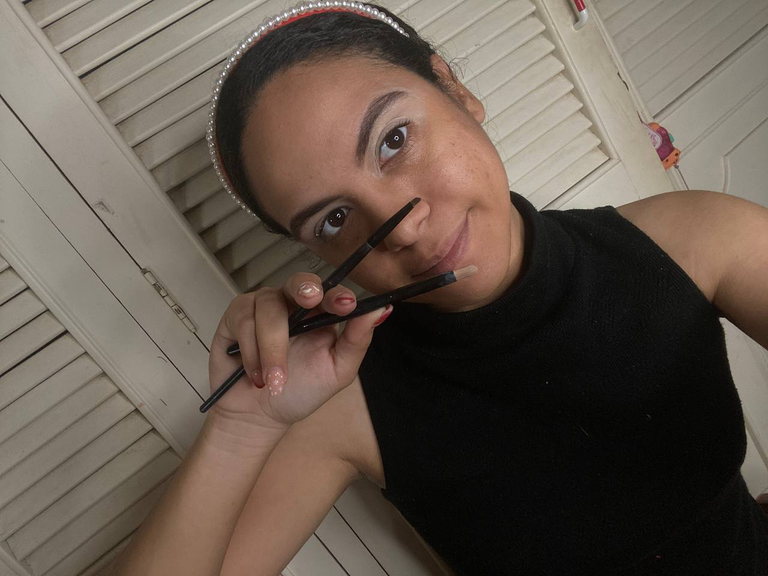
Ahora pasaremos a lo divertido jaja. Primero con un poco de bronzer y una brocha esponjosita marcaremos la cuenca de nuestro ojo hasta la nariz. Luego con delineador negro nos delinearemos todo el ojo terminando en la cola de gato. Ojo, debemos tener cuidado en este paso. Hay que asegurarse de que mientras mas cerca del lagrimal, el delineado debe ser más delgado, no tan grueso porque luego lo difuminaremos.
Now let's move on to the fun part haha. First with a bit of bronzer and a fluffy brush we will mark the socket of our eye up to the nose. Then with black eyeliner we will outline the whole eye ending in the cat tail. Be careful with this step. Make sure that the closer you get to the tear trough, the thinner the eyeliner should be, not so thick because you will smudge it later.
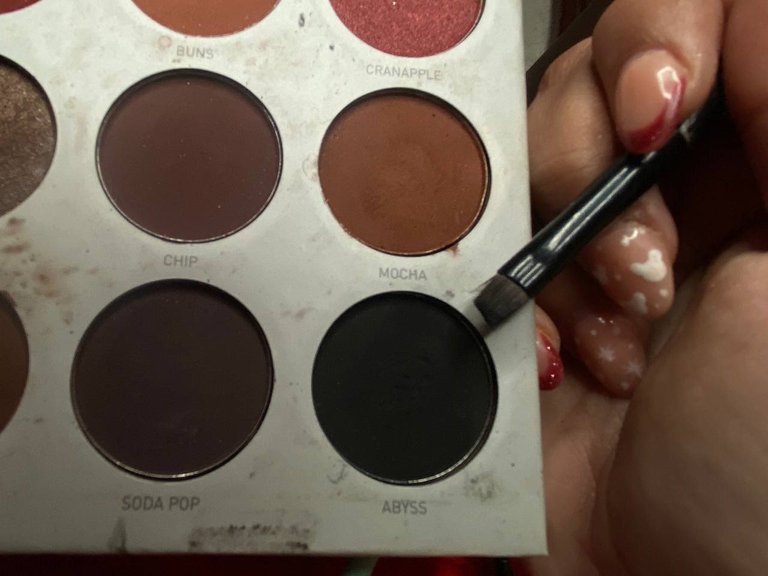
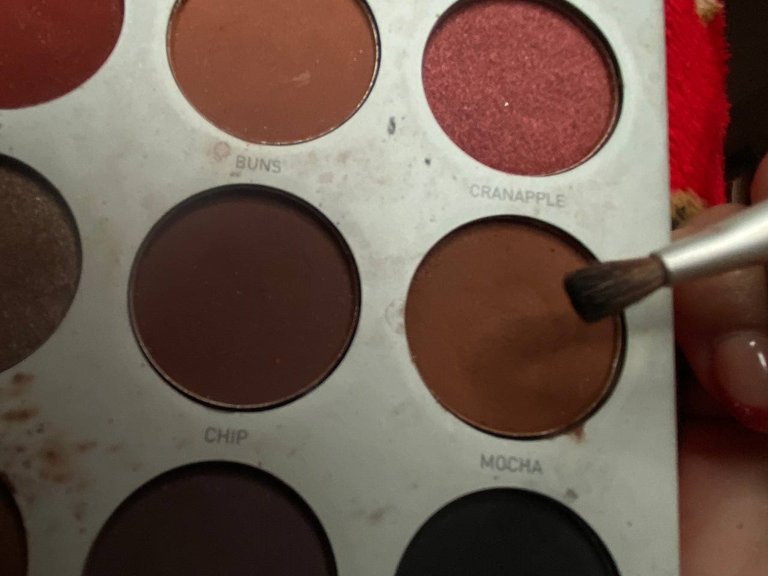
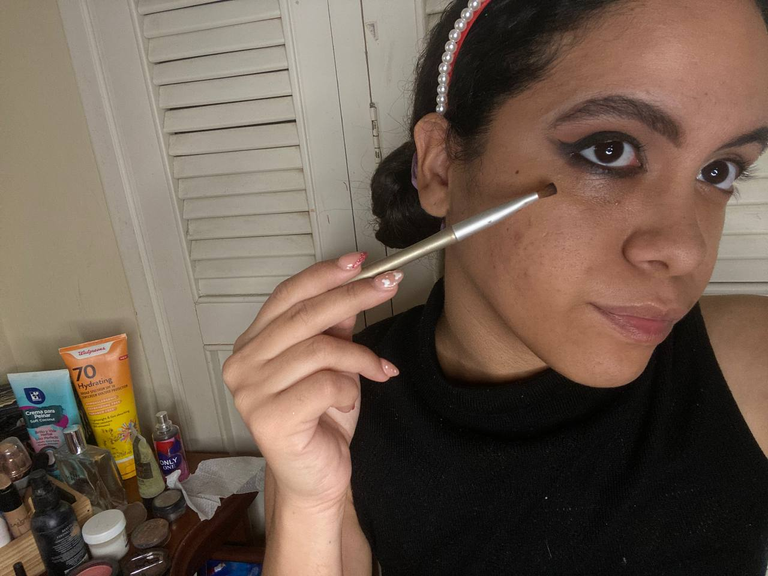
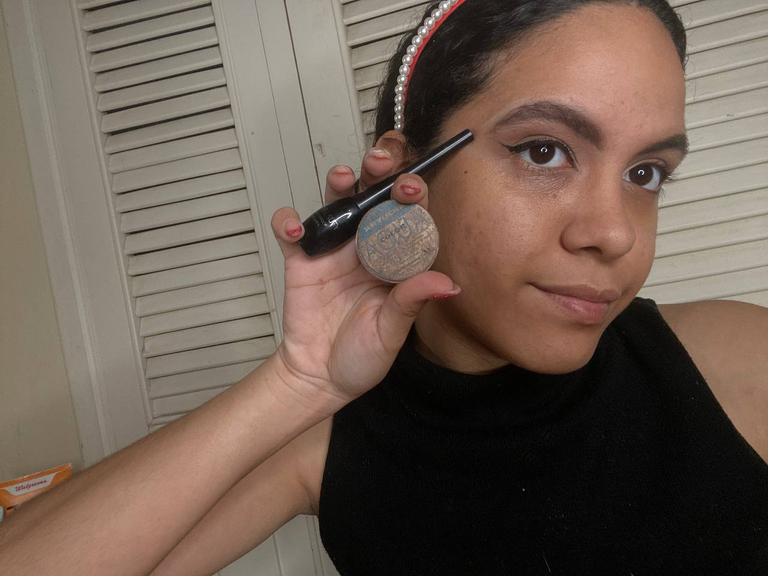
Luego que tengamos el delineado como queremos, con sombra negra y la brocha mas pequeña que tengamos la aplicaremos por donde realizamos el delineado y también por debajo del ojo conectando con el mismo delineado que hicimos. Después con una sombra marroncita difuminaremos los bordes.
After we have the eyeliner as we want, with black shadow and the smallest brush we have we will apply it where we made the eyeliner and also under the eye connecting with the same eyeliner we made. Then with a brown shadow we will blend the edges.
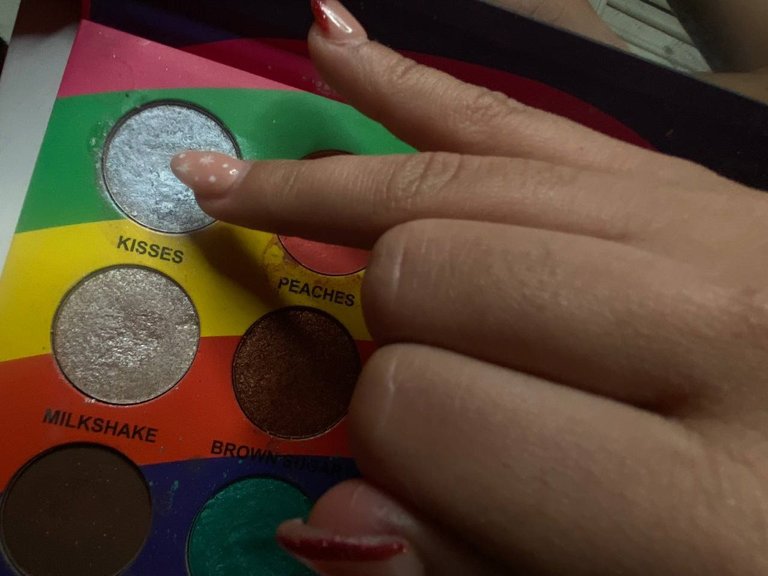
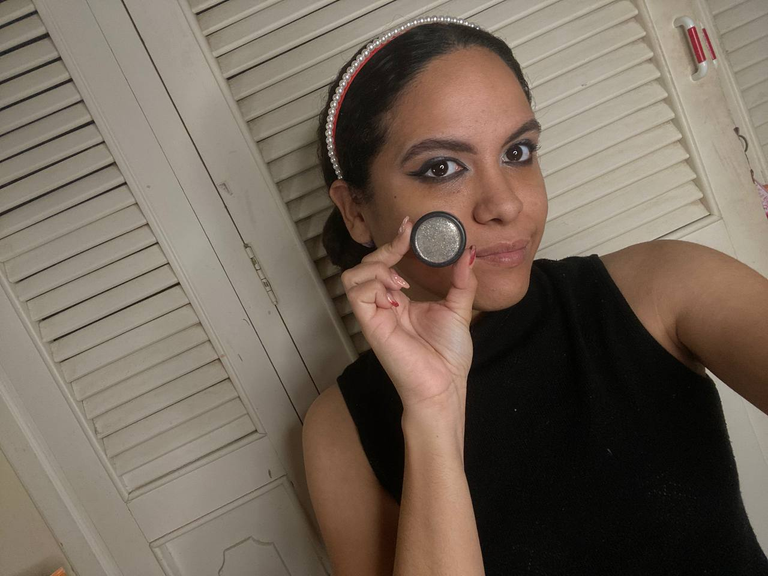
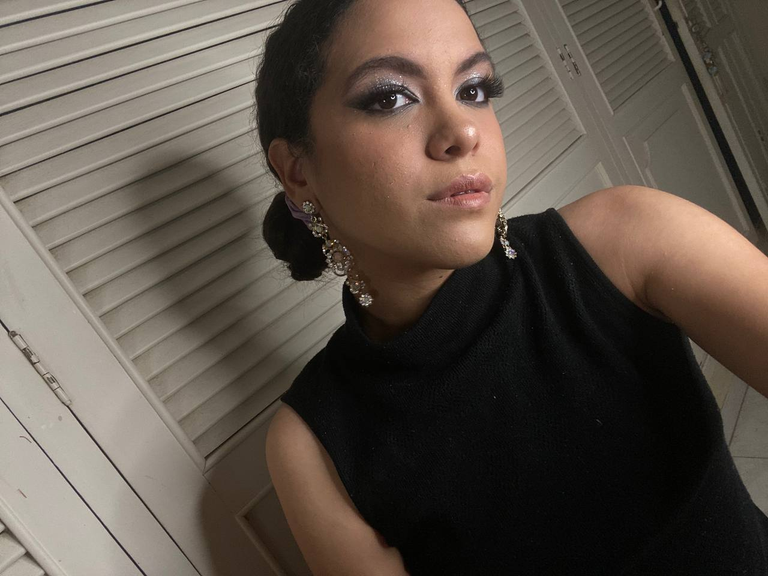
Después que ya hayamos difuminado y estemos satisfechas, en el centro del parpado colocaremos la sombra plateada, solo en el medio. Si eres de parpado encapotado como yo, sube esa sombra un poquito más, hasta arriba del pliegue y luego para darle ese toque de brillo que queremos e iluminar toda la cuadra, encima de la sombra plateada que nos colocamos aplicaremos también glitter del mismo color.
After we have already blended and we are satisfied, in the center of the eyelid we will place the silver shadow, only in the middle. If you have a dark eyelid like me, raise that shadow a little bit more, up to the crease and then to give it that touch of shine that we want and illuminate the whole block, on top of the silver shadow that we apply we will also apply glitter of the same color.
De esta manera nos debe estar quedando. En el lagrimal del ojo colocaremos un toque de sombra blanca o color champan para iluminar más la mirada, luego recordemos remarcar con el delineador.
This is how it should look. In the tear of the eye we will place a touch of white shadow or champagne color to illuminate the look, then remember to highlight with eyeliner.


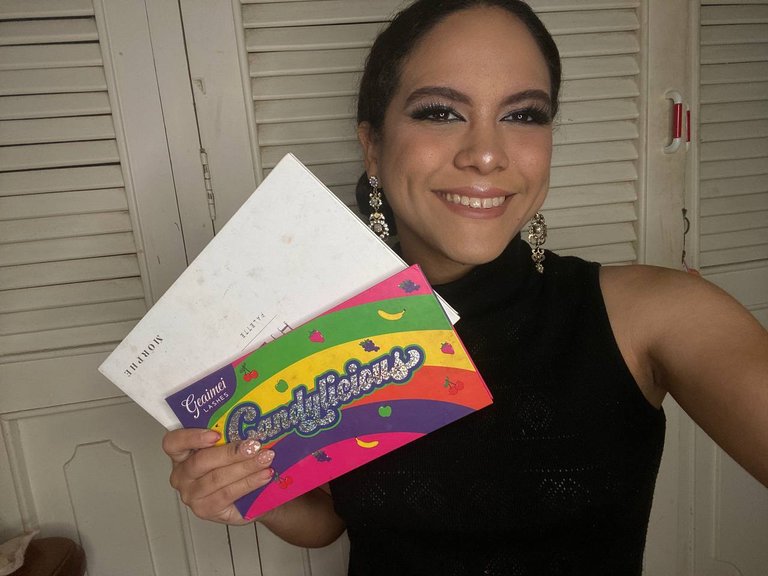
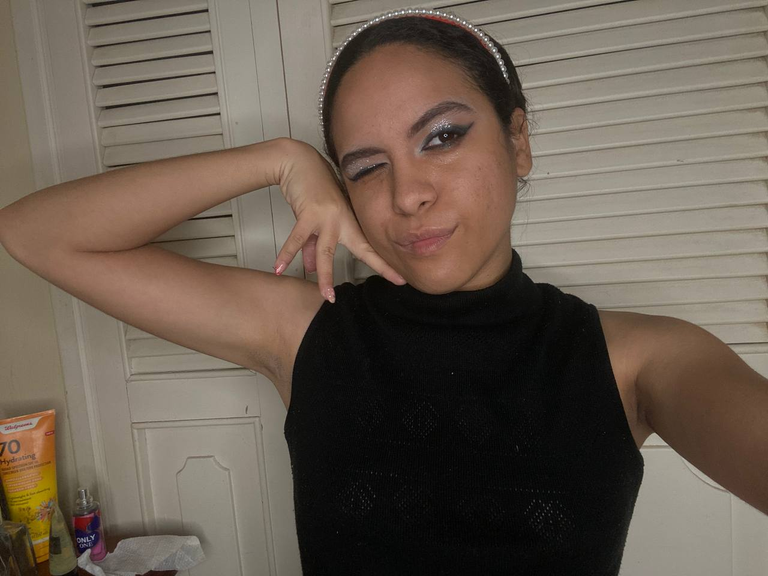
Ahora, puliremos el maquillaje, limpiaremos las esquinas de nuestro ojo para remarcar mucho más el delineado que hicimos y también retiraremos todo el pigmento y glitter no deseado que haya caído sobre nuestra piel. Aplicaremos base, corrector, rubor, bronzer e iluminador y obviamente unas pestañas postizas para resaltar este look.
Now, we will polish the makeup, clean the corners of our eye to highlight much more the eyeliner we did and also remove all the unwanted pigment and glitter that has fallen on our skin. We will apply foundation, concealer, blush, bronzer and highlighter and obviously some false eyelashes to highlight this look.
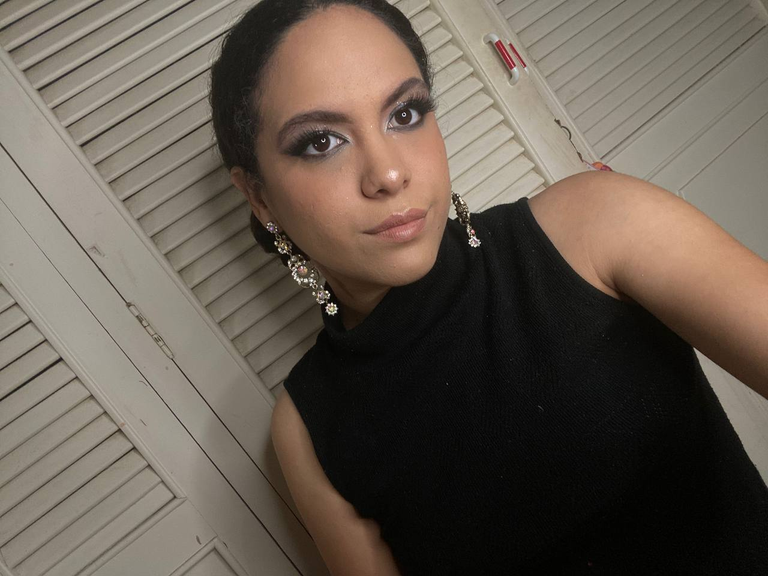
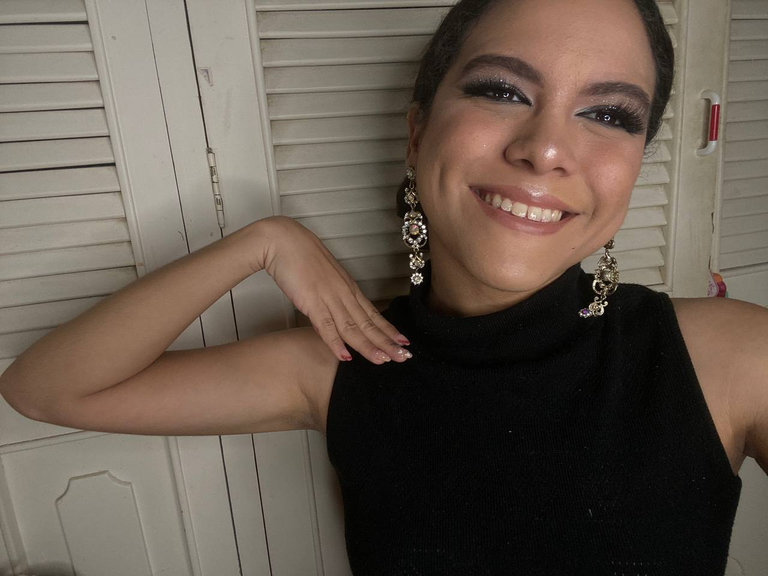
Y de esta manera quedó nuestro maquillaje para recibir por todo lo alto el año 2024 ¿Que les pareció? En lo personal me gustó mucho como me quedó, me había bloqueado a usar este tipo de tonos por lo que les dije anteriormente pero creo que con esto me di cuenta que debo experimentar más jajaja y es una de las razones por las que me encanta hacer estos tipos de tutoriales para ustedes porque aprendemos juntos y salgo de mi zona de confort. Espero leer en los comentarios que les pareció y que tipo de maquillajes esperan que creemos juntos el próximo año. Los leo y ¡Feliz Año Nuevo!
And this is how our make up was to receive the year 2024 in style, what did you think? Personally I really liked how it turned out, I had blocked myself to use this kind of shades because of what I told you before but I think with this I realized that I should experiment more hahaha and that's one of the reasons why I love to do these types of tutorials for you because we learn together and I get out of my comfort zone. I look forward to reading in the comments what you guys thought and what kind of makeovers you hope we create together next year. I read you and Happy New Year!

Estoy eternamente agradecida de que hayan llegado hasta el final de este post. Espero les haya gustado la publicación. Nos vemos en el siguiente post, un fuerte abrazo ❤️
I am eternally grateful that you have made it to the end of this post. I hope you liked the publication. See you in the next post, a big hug.❤️
- Las fotografías son de mi autoría, tomadas con mi iPhone 11.
- Las imágenes fueron editadas con Canva
- Parte de las fotografías fueron editadas con Lightroom
- La traducción a ingles fue gracias a Deelp
- The photographs are of my authorship, taken with my iPhone 11.
- The images were edited with Canva.
- Part of the photographs were edited with Lightroom.
- The english translation was thanks to Deelp
¡Enhorabuena!
✅ Has hecho un buen trabajo, por lo cual tu publicación ha sido valorada y ha recibido el apoyo de parte de CHESS BROTHERS ♔ 💪
♟ Te invitamos a usar nuestra etiqueta #chessbrothers y a que aprendas más sobre nosotros.
♟♟ También puedes contactarnos en nuestro servidor de Discord y promocionar allí tus publicaciones.
♟♟♟ Considera unirte a nuestro trail de curación para que trabajemos en equipo y recibas recompensas automáticamente.
♞♟ Echa un vistazo a nuestra cuenta @chessbrotherspro para que te informes sobre el proceso de curación llevado a diario por nuestro equipo.
🏅 Si quieres obtener ganancias con tu delegacion de HP y apoyar a nuestro proyecto, te invitamos a unirte al plan Master Investor. Aquí puedes aprender cómo hacerlo.
Cordialmente
El equipo de CHESS BROTHERS
Muchisimas gracias por el apoyo ❤️