Drawing a velvet ant // Dibujando una hormiga terciopelo
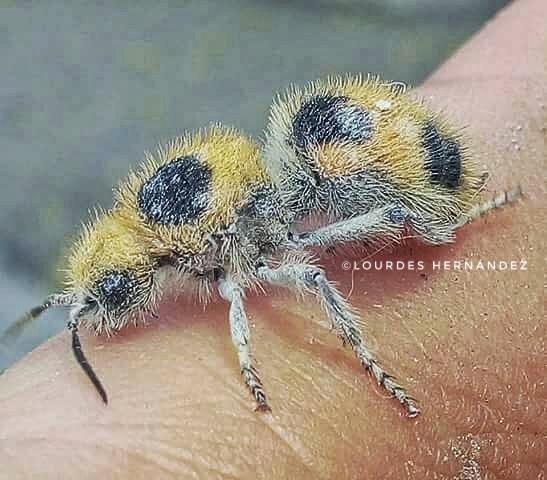
I continue with the practices in digital drawing and this time I present a velvet ant, which I photographed a while ago, I loved this insect for its colors, size and appearance, so fluffy and furry that it seems stuffed lol
Here I will leave you the step by step that I carry out to obtain the beautiful drawing.
Continúo con las prácticas en dibujo digital y en esta ocasión presento una hormiga terciopelo, la cuál fotografíe hace un tiempo ya, me encantó este insecto por sus colores, tamaño y apariencia, tan esponjosa y peluda que parece de peluche jajaja
Aquí las dejaré el paso a paso que realice para obtener el bello dibujo.

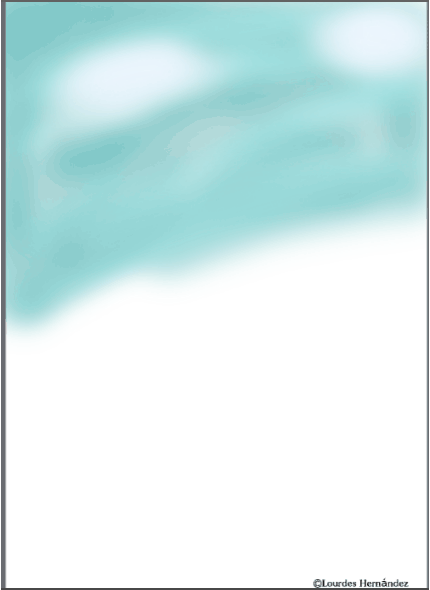
Step 1
I started painting a blue sky, with soft strokes and a pastel color, giving a little depth mixing light and shadow, and I decided to paint some faint clouds.

Paso 1
Comencé pintando un cielo azul, con trazos suaves y un color pastel, dando un poco de profundidad mezclando luces y sombras, y decidí pintar unas nubes tenues.
Step 2
Then draw the floor and where our little friend will walk, in the same way starting with the darkest tones, interspersing light colors and then mixing and creating a homogeneous layer. After finishing the floor, I drew between the ground and the sky a few small strokes to simulate small herbs, I tried to draw them softly, so much so that they didn't take center stage but enough so that they could be noticed.

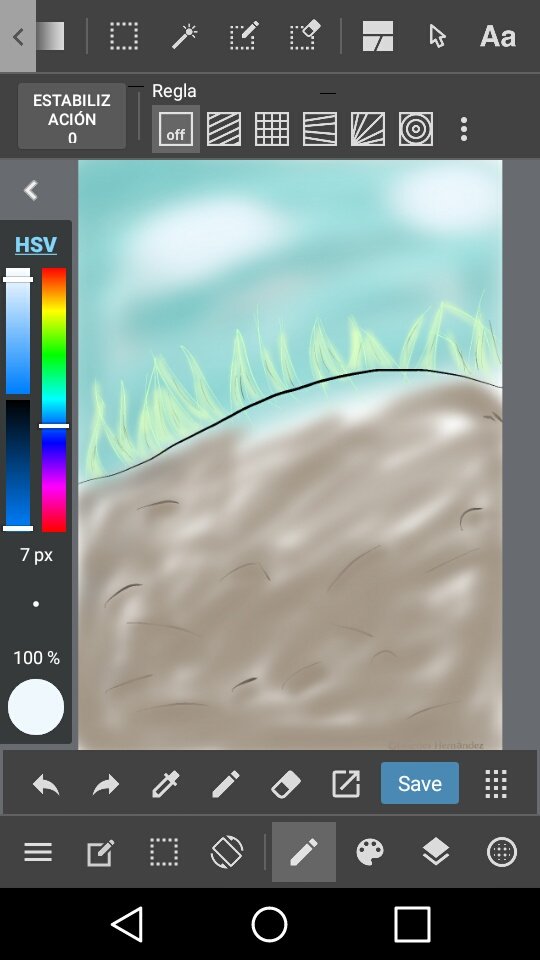
Paso 2
Posteriormente dibuje el piso y donde caminará nuestra pequeña amiga, de igual manera comenzando con los tonos más oscuros a intercalando colores claros para después mezclar y crear una capa homogénea. Después de terminar con el piso dibujé entre el suelo y el cielo unos pequeños trazos para simular pequeñas hierbas traté de dibujarlas suaves, tanto para que no quitaran protagonismo pero suficiente para que pudieran notarse..
Step 3
I begin to draw the main object that is the ant, drawing for the moment only the outline, spots and details of its appearance.
Paso 3
Comienzo a dibujar el objeto principal que es la hormiga, dibujando por el momento sólo el contorno, manchas y detalles propios de su apariencia.
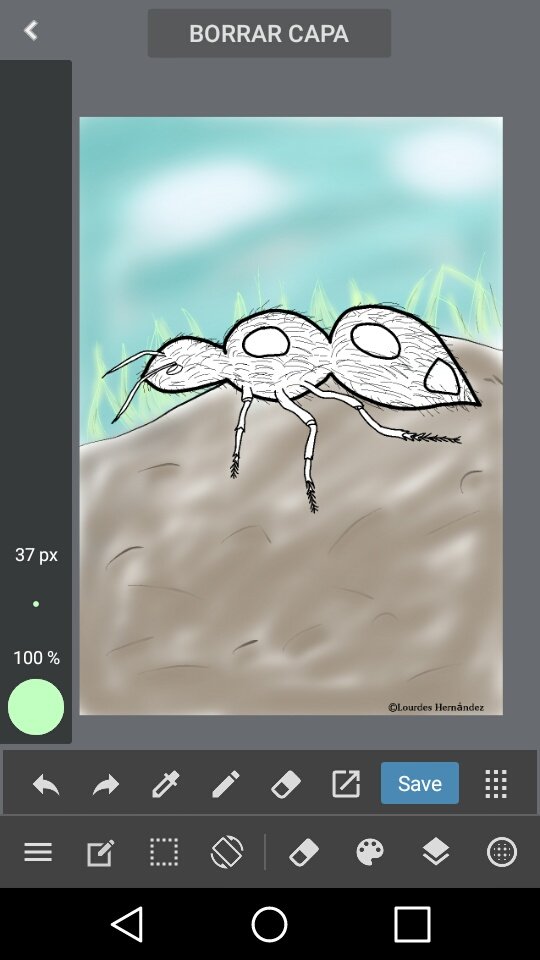
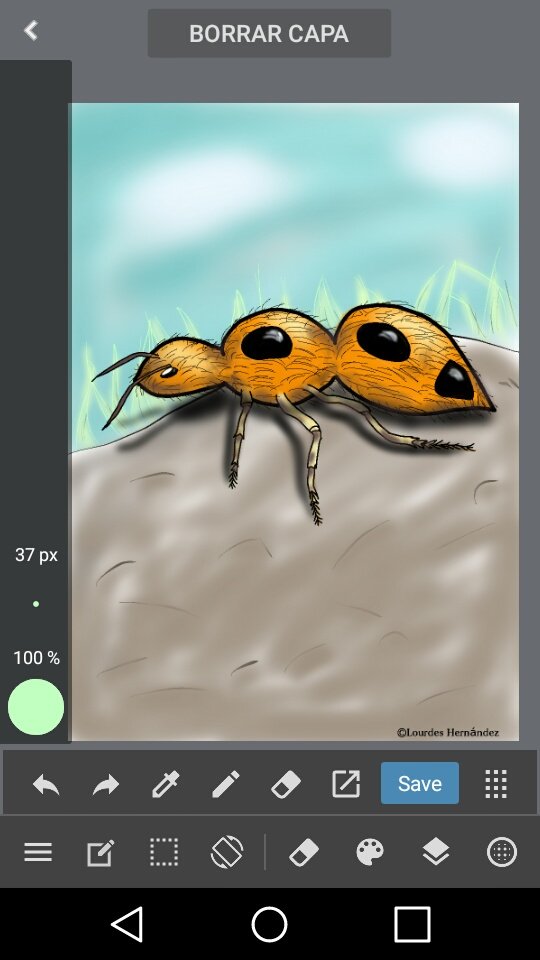
Step 4
In this step I begin to add the colors to the ant, starting with the peculiar spots on the back, giving it details with lights to simulate a special shine.
I continue to give a base color to the entire body of the ant, preparing the body to add light and shadow.
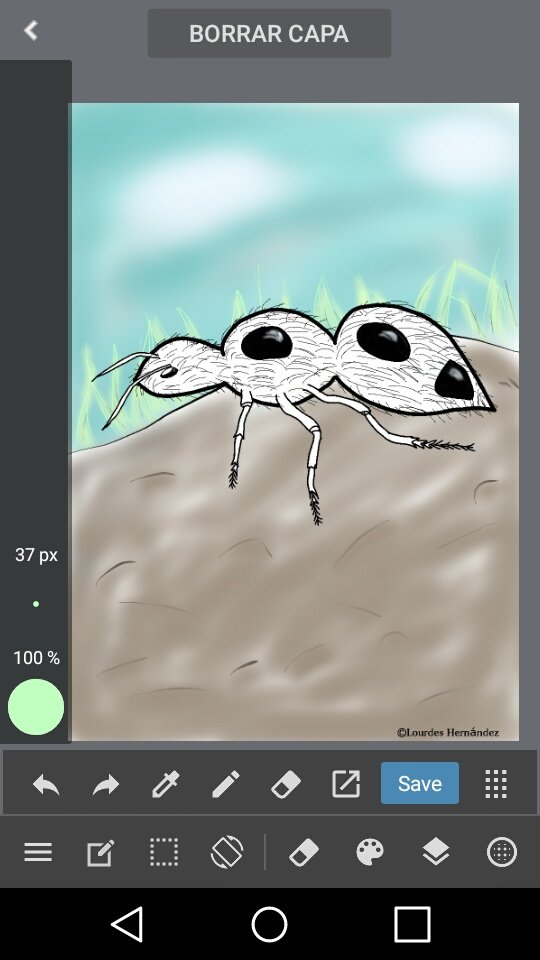
Paso 4
En este paso comienzo a agregar los colores a la hormiga, iniciando por las manchas tan peculiares que tiene en el lomo dándole detalles con luces para simular un brillo especial. Continúo dándole un color base a todo el cuerpo de la hormiga preparando el cuerpo para ir agregando luces y sombras.
Step 5
I give depth to the main object by adding dark tones to the base color, to later mix and create shadows to later add lights to it.
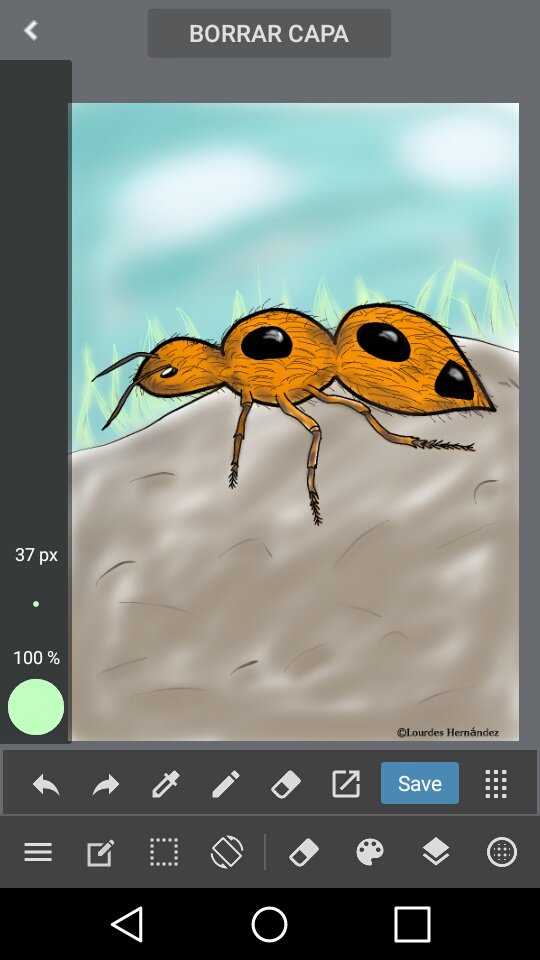
Paso 5
Doy profundidad al objeto principal agregando tonos oscuros al color base, para después ir mezclando y creando sombras para posteriormente agregar luces en el mismo.
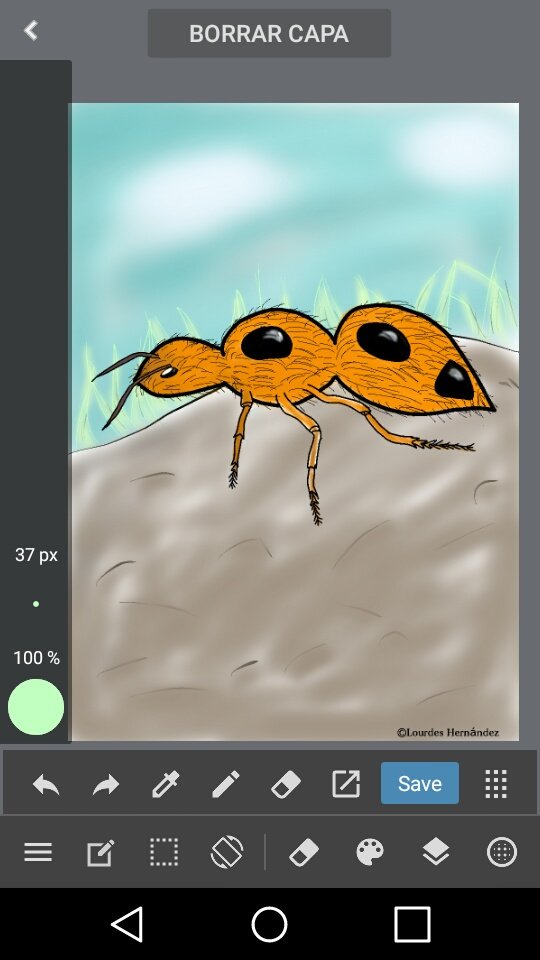
Step 6
This is where I am adding lights to create relief and depth effects, mixing tones to achieve the desired result, it is also here where I begin to add the shadow that the ant forms on the floor due to the position of the sun, finishing these details, giving one last look at everything and unifying the layers is how I finish today's project.
Paso 6
Aquí es donde voy agregando luces para crear efectos de relieve y profundidad, mezclando tonos para llegar al resultado deseado, también es aquí donde comienzo a agregar la sombra que la hormiga forma en el piso debido a la posición del sol, terminando estos detalles, dando un último vistazo a todo y unificando las capas es como termino el proyecto de hoy.
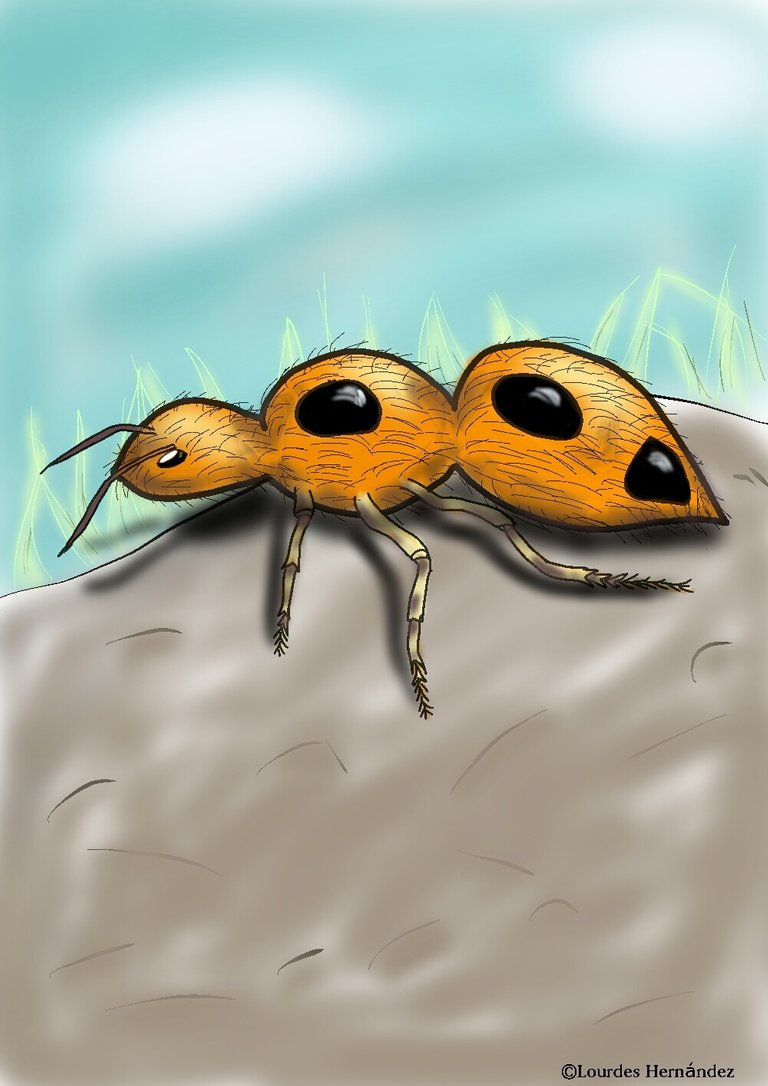
Reference image
Process animation
For the realization of the digital drawing and the animation I used
medibang paint pro and gif creator and editor


I really like how you showed us the step by step process of drawing this painting. :) Welcome to HIVE!
I know it is a fairly simple drawing but the truth for me was quite an achievement.
Thank you :D
I think it's good progress :)
¡Felicidades! Esta publicación obtuvo upvote y fue compartido por @la-colmena, un proyecto de Curación Manual para la comunidad hispana de Hive que cuenta con el respaldo de @curie.
Si te gusta el trabajo que hacemos, te invitamos a darle tu voto a este comentario y a votar como testigo por Curie.
Si quieres saber más sobre nuestro proyecto, acompáñanos en Discord: La Colmena.
Muchas muchas gracias por su apoyo 👏🙌
This post was shared in the #spanish-curation channel in the Curation Collective Discord community for curators, and upvoted and resteemed by the @c2-spanish community account after manual review.
@c-squared runs a community witness. Please consider using one of your witness votes on us here
Agradezco mucho su apoyo 🙌👏
Love this! Great step by step how you did it guide!
https://twitter.com/FeltBuzzWrites/status/1241997914097975299?s=19
I really appreciate your support 😊