Bola especial para planchado de copas (Es/En)
Español
Reciban un saludo fraternal, estimados compañeros de #NeedleWorldMonday. En esta ocasión quiero compartir con ustedes cómo realicé una herramienta para el planchado de copas, la cual fue sumamente necesaria para concretar la elaboración de una prenda en un curso on line en el cual me inscribí recientemente.

Aquí les detallo como elaboré una bola especial para el plantado de copas talla pequeña y mediana.
Materiales:
• Media esfera de anime o icopor número 12
• tela rígida (varios trozos)
• tela con elastano (un trozo para el recubrimiento final)
• silicon líquido
• cartón para la base
• Tijeras
• Alfileres
procedimiento:
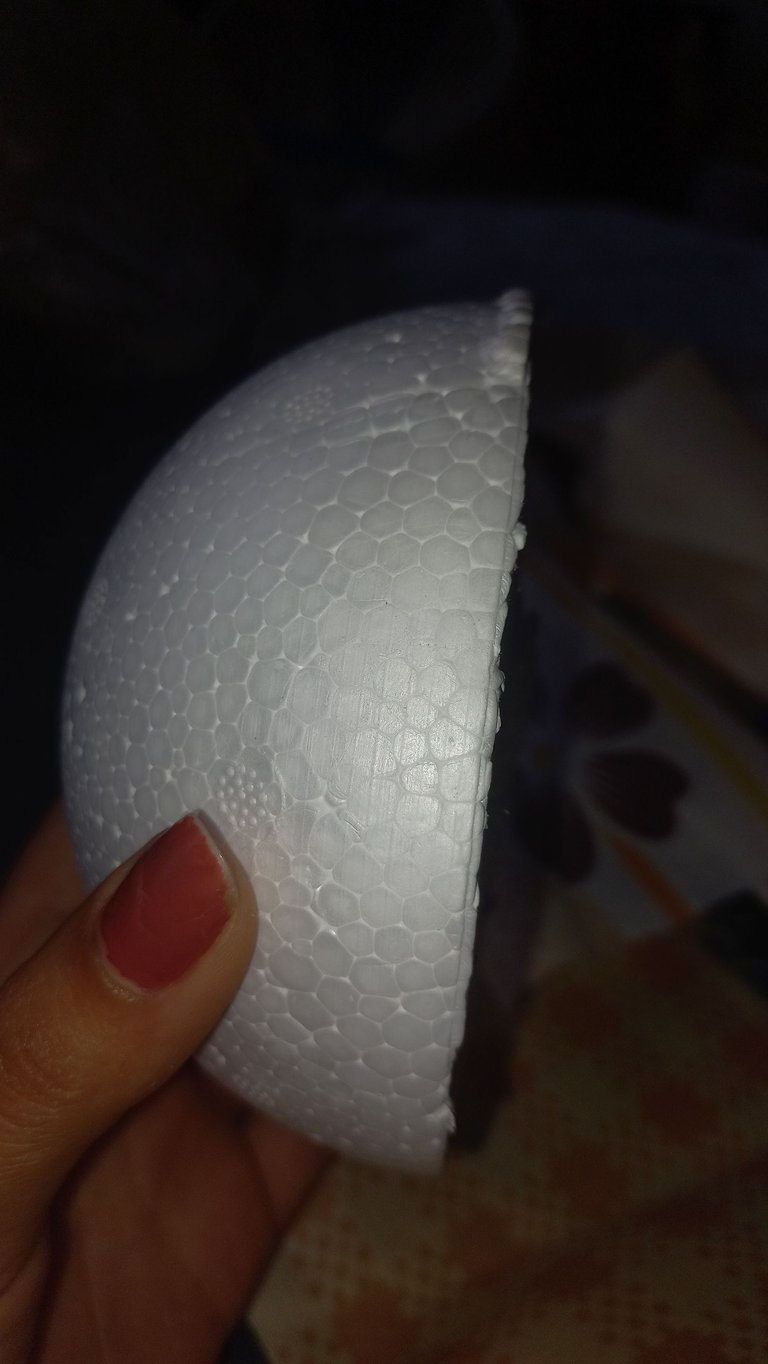
• Debido a que no conseguí en la papelería media esfera, tuve que cortar la que adquirí a la mitad. Para ello, utilicé un bisturí y poco a poco fui realizando el corte superficial e iba girando la esfera tratando de efectuar el corte lo más recto posible.
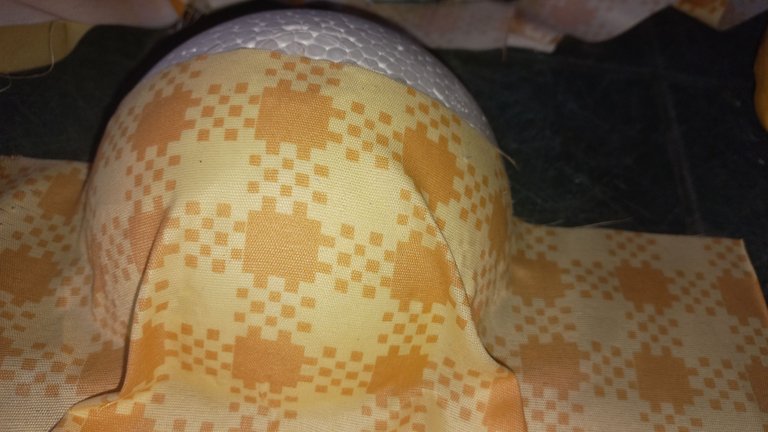
• Una vez cortada la esfera, procedí a empezar a pegar las primera capa de tela. Lo primero que hice fue aplicar un poco de silicón en la parte superior de la bola. Previamente corté un cuadrado de tela que lograra cubrir la media bola en su totalidad. Fui colocando silicon hacia la parte de la base y fui acomodando la tela.

• Dado que la tela es plana, y la bola es tridimensional, resulta normal que queden picos de tela apuntando hacia la zona de la base. Me aseguré de dejar lo más prolija posible la superficie de la esfera y con la ayuda de una tijera corte el exceso de tela que quedaba en forma de pico. El corte lo hice lo más cerca posible a la esfera para evitar abultamientos. Si notaba que faltaba pegamento con cuidado agregaba alli para sellar bien.
• Tras pegar la primera capa procedí a cortar el exceso de tela en el borde de la base.
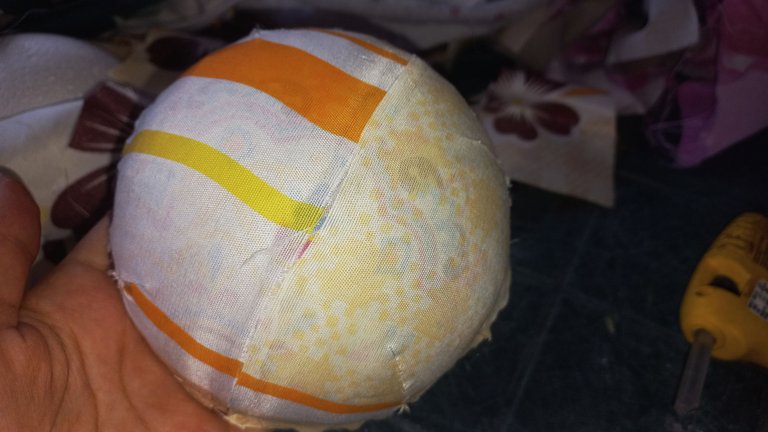
• Las tres primeras capas las hice de manera similar. Sin embargo, en algunas capas no utilicé un trozo de tela para cubrir la esfera, sino dos.
• Al utilizar dos trozos de tela, uno para cada lado de la media esfera, el proceso se me facilitó más. Para ello, iba colocando una linea recta a lo largo del centro de la esfera, pegando alli el borde recto de la tela. Y seguidamente, fui aplicando pegamento tratando de dejar lo más lisa posible la superficie.
• Cada tres capas iba dejando un borde en la base para ser pegado hacia la parte interna de la base. Así fui repitiendo el proceso hasta terminar unas doce capas aproximadamente.
• Para este proyecto utilicé unos retazos de telas para sábana que me habían sobrado de un trabajo de cubrecamas que hice hace más de un año para mi mamá. Asi que aproveché esas telas, las cuales me parecieron además ideales para la bola de planchado.
• Ya que tenia todas las capas listas solo quedaba cubrir la bola con un trozo de tela con elastano, es decir, un tejido elástico que permita ajustarse a la curvatura de la bola sin mayor inconveniente. Para ello, utilicé un trozo que me sobró de tela para pijamas.
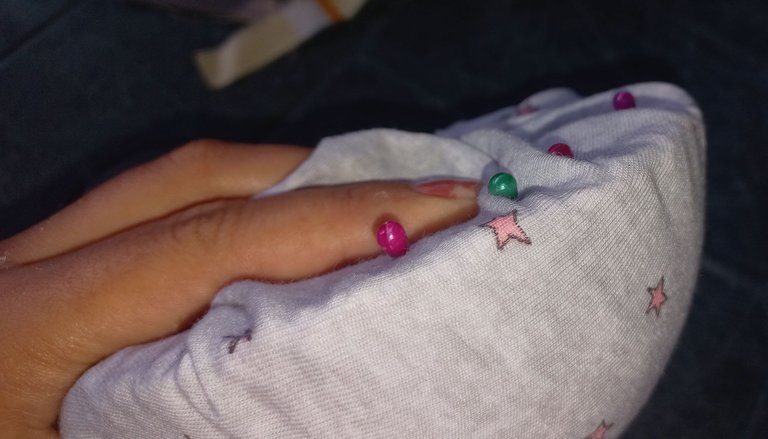
• Antes de aplicar pegamento, fui colocando la tela y asegurandola con alfileres en la parte inferior. A medida que fui acomodando, iba moviendo los alfileres de sitio hasta lograr que la tela se viera bien lisa sobre toda la superficie de la esfera. Procedí a ir colocando poco a poco el pegamento en la parte inferior de la base e iba sujetando la tela con el alfiler para asegurar el secado.
• Una vez bien pegada corté el excedente con una tijera.
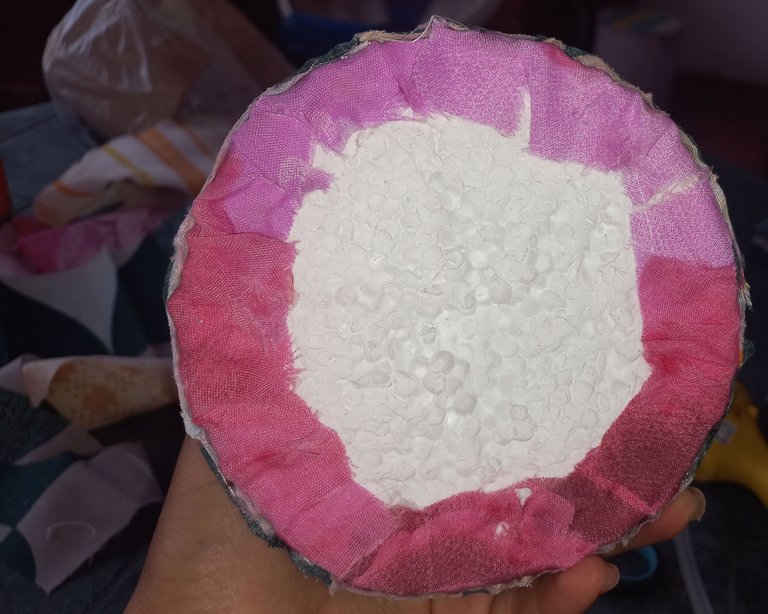
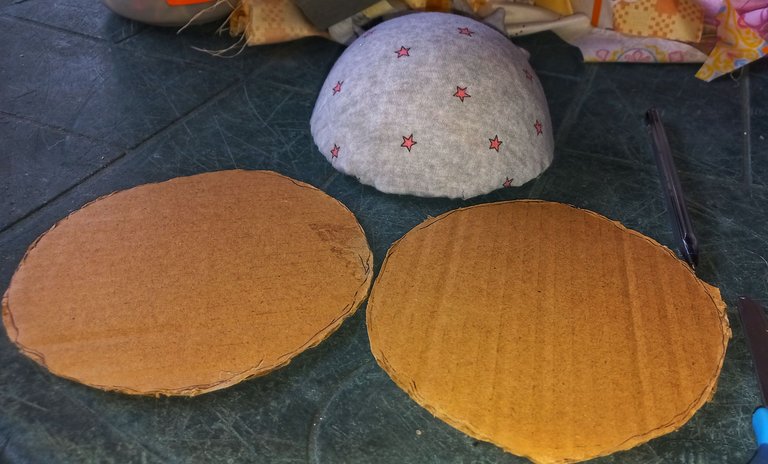
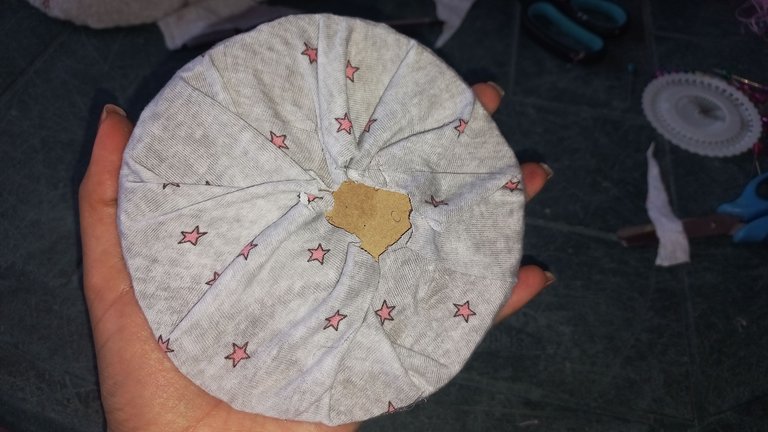
• Utilicé la misma media esfera para marcar el borde de la base dos veces sobre el cartón. Recorte ambos círculos y procedí pegarlos para darle mayor soporte. Procedí a forrarlos con la tela elástica. Junté esta base a la bola con pegamento, dejando hacia la parte interna los bordes de tela y la parte prolija hacia el exterior.
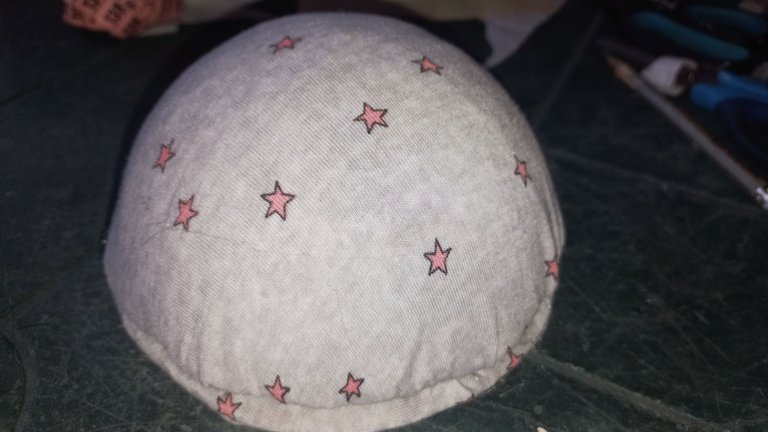
Y listo, ya pude utilizar esta bola forrada en tela para el planchado de las copas de mi proyecto.
Nota: Para el planchado de copas talla grande se puede adquirir la esfera de icopor número 15.
Espero que este post les sirva de guía para la realización de bola casera para el planchado de copas. Agradezco su lectura, atención y apoyo. Un abrazo cordial
English
Greetings, dear fellow #NeedleWorldMonday members. This time I want to share with you how I made a tool for ironing cups, which was extremely necessary to make a garment in an online course in which I recently enrolled.
Here I detail how I elaborated a special ball for the plantation of small and medium size cups.
Materials:
- Half sphere of anime or icopor number 12
- stiff fabric (several pieces)
- fabric with elastane (one piece for the final coating)
- liquid silicon
- cardboard for the base
- Scissors
- Pins
procedure:
- Since I didn't get half a sphere at the stationery store, I had to cut the one I bought in half. To do this, I used a scalpel and little by little I made the superficial cut and turned the sphere trying to make the cut as straight as possible.
- Once the sphere was cut, I proceeded to start gluing the first layer of fabric. The first thing I did was to apply a little silicone on the top of the ball. Previously I cut a square of fabric to cover the half ball in its entirety. I applied silicone towards the base and placed the fabric.
- Since the fabric is flat, and the ball is three-dimensional, it is normal that there are peaks of fabric pointing towards the base area. I made sure to leave the surface of the sphere as neat as possible and with the help of a scissors I cut the excess fabric that remained in the shape of a peak. The cut was made as close as possible to the sphere to avoid bulging. If I noticed that glue was missing I carefully added it there to seal well.
- After gluing the first layer I proceeded to cut the excess fabric at the edge of the base.
- I did the first three layers in a similar way. However, in some layers I did not use one piece of fabric to cover the sphere, but two.
- By using two pieces of fabric, one for each side of the half sphere, the process was easier for me. To do this, I was placing a straight line along the center of the sphere, gluing the straight edge of the fabric there. Then, I applied glue, trying to leave the surface as smooth as possible.
- Every three layers I was leaving an edge at the base to be glued to the inside of the base. I repeated the process until I finished approximately twelve layers.

Your next target is to reach 150 posts.
You can view your badges on your board and compare yourself to others in the Ranking
If you no longer want to receive notifications, reply to this comment with the word
STOPHola María. Esta es una gran idea para conseguir esta superficie de planchado, que bien que pudiste hacerla por tu cuenta. Seguramente será muy útil en proyectos futuros. ¡Felicitaciones 😃!
Hola, Gracias... si, espero sacarle provecho en próximos proyectos... un abrazo
Congratulations, your post has been upvoted by @dsc-r2cornell, which is the curating account for @R2cornell's Discord Community.
Enhorabuena, su "post" ha sido "up-voted" por @dsc-r2cornell, que es la "cuenta curating" de la Comunidad de la Discordia de @R2cornell.