#needleworkmonday | Adapting a trouser paper pattern and ... Tragedy!
After trying out all manner of customised designs on the Tailornova website, I decided to adapt a paper pattern I had bought earlier in the year. It was a pyjama pattern I had found for £5 in a bargain box in one of the shops in the town and I hadn't got round to making.
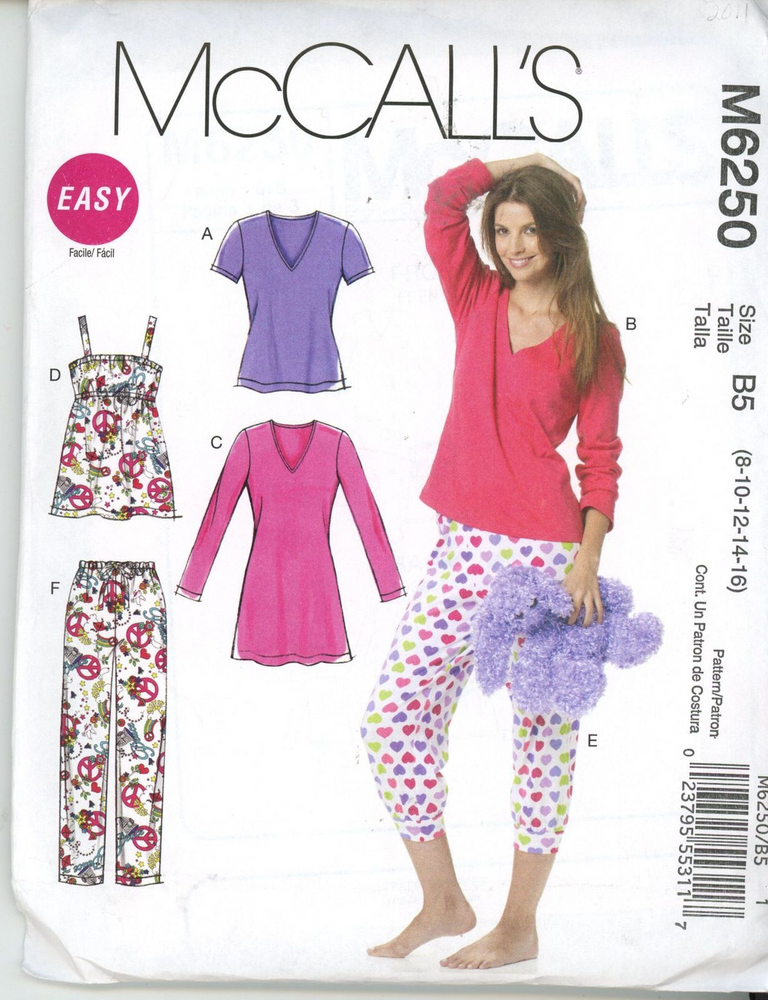
Source I like the Easy classification 😁. I plan to make the cuffed trousers full-length.
In desperation, I had bought some new pyjamas as the old ones were falling apart. The new ones had cuffed trousers and a really nice relaxed top. I wasn't sure about the cuffs, but so far they have turned out to be really comfortable and they look very smart ... smart enough to go outside in them. I really liked the design and thought they would look great with the tunics I wear, instead of jeans, and would be much cooler in the warmer weather.
One thing I had learned from playing on the Tailornova site was how short my body was in comparison to my overall height - it becomes easy to see on the 3D model if you compare your own measurements with the standard fashion industry models. For both tops and bottoms, there's a four or five centimetre difference between my measurements and the standard industry sizes. Tailornova doesn't yet have the ability to customise measurements for trousers, so another reason to go back to the drawing board.
I remember from making trousers in needlework classes at school that I seemed to have far too much material involved around the crotch area; we've talked before in #needleworkmonday about the difficulties of getting the right rise on jeans - sizes marked as low-rise and below the natural waistline seem to fit me perfectly.
There are so many curves involved around the body part of trousers that I already knew that it wasn't going to be as straightforward as simply shortening the body. After a search on youtube, I came up with a perfect set of videos which sets out the process for the beginning dressmaker:
Ep.1: top 5 Beginner friendly, easy to sew pants patterns
Ep.2: best and worst fabric choices for easy to sew pants
Episode 3: How to measure your crotch length and depth..
I used this for adapting my pattern.
Ep. 4: How to easily adjust crotch length on pants
Ep.5: How to improve fit on your pants
Some of the measurements in episode 3 were easy: I had a fabric tape measure, but the cardboard set square for measuring crotch depth required some hunting in the garage. Eventually, I found a large enough cardboard box, Stanley knife, ruler and cutting board. Some time later, I had a cardboard set square. One of things that Karina talks about in the videos, is that front and back crotch depth can be different with often the front depth shorter than the back.
I found this. One of the techniques to find your true waist is to tie a piece of elastic around your waist and let it settle - bend sideways a couple of times, forwards and backs, try some dance moves or housework and see where the elastic settles. On me, it was higher at the back and lower at the front, not perpendicular to the floor all the way round.
After some contortions, I had the body measurements and started comparing them with the paper pattern. It would have been easier to have someone with me to take the measurements, and we'll see how my efforts turn out in the finished garment.
 .
.
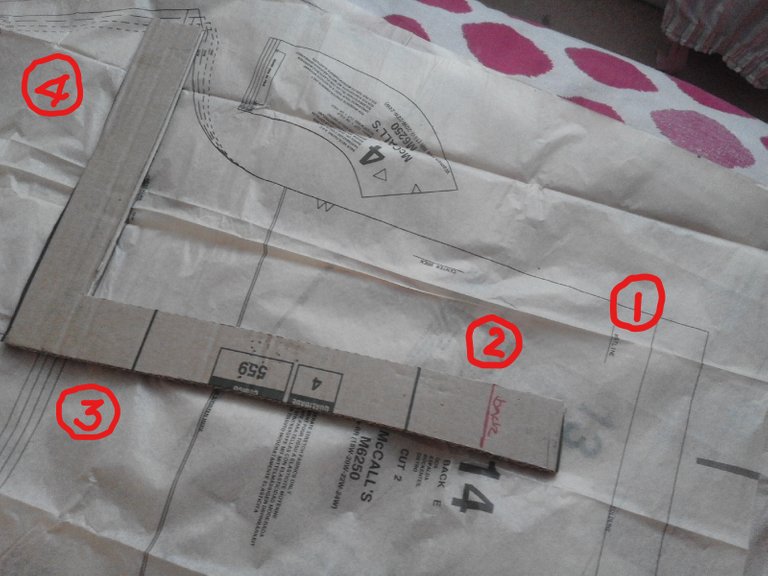
Adjusting for crotch depth: You can see clearly the difference between the pattern waist (1) and my waist (2). This was the amount that would have to be reduced on the pattern. You can see the double lines marking the place to make the pattern longer or shorter to get the correct crotch depth. The lines (3) represent the crotch depth for the different pattern sizes. You need to line up the inner side of the set square with the appropriate line for the size you are making. It was quite easy to make the set square (4), although it took me a little while to find all the tools and materials.

Adjusting the crotch length: having shortened the trousers to the reach the correct crotch depth (the folded part of the pattern piece (4)), I needed to lengthen the inner crotch curve to get the correct crotch length (5). Even with the adjustments to correct the crotch depth, you can see the difference between the pattern waistline (2) and the my front back and back waistline marked in red on the set square (3). I decided not to worry too much about these and to review them when I made the muslin toile. Crotch depth is not marked on the front pattern piece, so I lined up the inner edge of the set square with the grainline (1).
After this, I cut out the front and back pieces - not in muslin - but in calico - I seem to have 18 metres of light calico in a bolt in a cupboard in the bedroom. I think I bought this in 1998, and I've been carrying it around ever since. I cut the pattern pieces larger than I needed to and marked the stitch lines for my size with tailor tacks, so I would know where to sew, but also had plenty of spare seam allowance for alterations.
So far so good. Then I threaded my sewing machine and tested a line of stitching on some scrap calico.
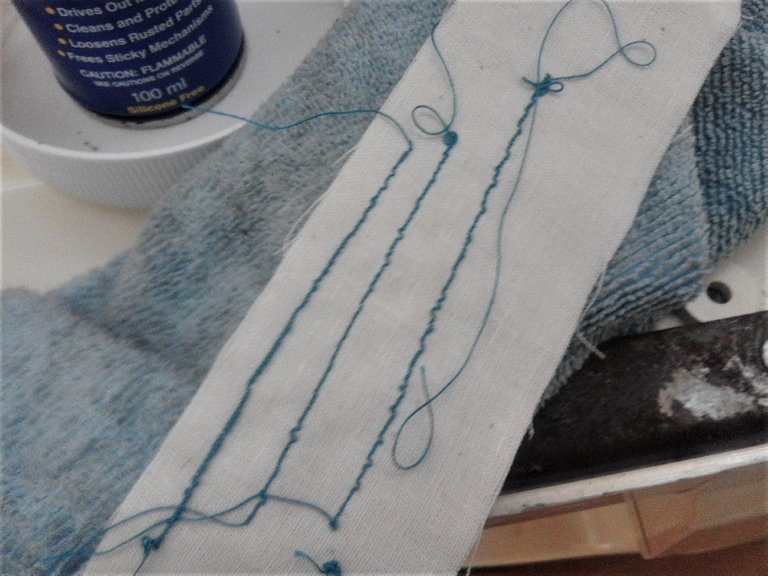
This is what I found on the underside of the stitching - the bobbin thread snarled into birds' nests and skipped and irregular stitches. Even when the foot pedal was fully depressed, the fabric was hardly moving. After investigation, I found that the feed wasn't moving correctly. An easy problem to resolve as I had seen a similar problem with my sister's machine and, after dismantling the machine, we had diagnosed the problem, a torn but replaceable cog.
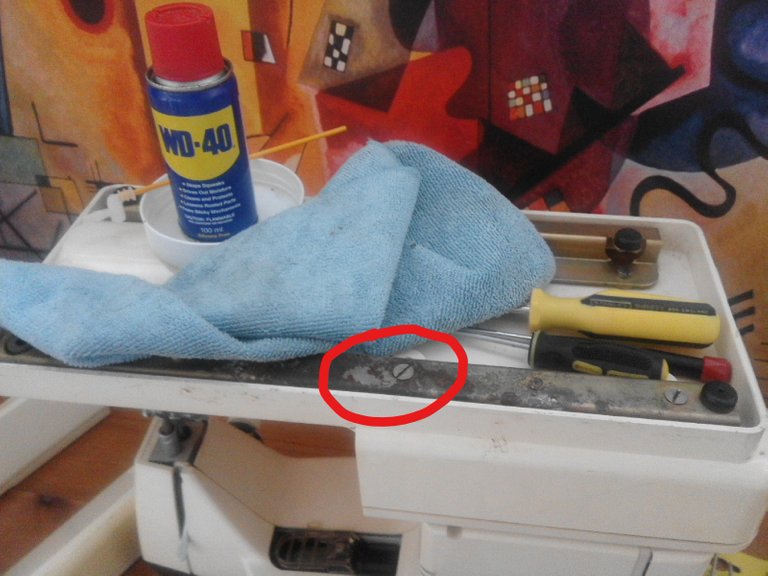
Sadly, it was not to be: part of the base plate of the machine was corroded and even after cleaning with steel wool, saturating (many times) with WD-40, and tapping the screwhead gently with a hammer, I haven't yet been able to undo the screw that holds the bottom casing of the machine to the inner framework. Truly, a tragedy!
I was really put out: all that preparatory work and now no functioning machine so I could find out if my adjustments worked! I was also annoyed that my machine had broken down after only forty-two years, and even more annoyed that it was only one malfunctioning part - I haven't even replaced the light-bulb in all that time, everything else works perfectly.
Never mind, I remembered that @crosheille's Mum has five sewing machines in her sewing room, there is a repair shop nearby where I can take this one when lockdown eases a bit more and ... I enjoyed choosing a new machine. It arrives tomorrow!

Hi @shanibeer,
Thank you for participating in the #teamuk curated tag. We have upvoted your quality content.
For more information visit our discord https://discord.gg/8CVx2Am
👌
Bummer you had a breakdown at an inopportune time. Hope you get that screw out and get your sewing machine fixed and sorted soon.
Thanks, @justinparke - a friend keeps texting, "have you got a screw loose?"
How's things with you and your family? I hope you are all safe.
!ENGAGE 25
Well, you "need a screw loosened" is the better way to phrase it. We are good, Hive profits increase daily and we also learn how to live here more cheaply by the week. Going back to Cambodian is on the horizon, even though we weren't able to get legally married. All the paperwork is too old now, so seems a return is necessary anyways.
Okay, good to hear you are okay :)
ENGAGEtokens.Ah yes the old type of screw heads. Very easy to muff up if not careful. I am sure the shop will be able to loosen it. Sometimes a quick hit with a torch or an impact type of wrench will give the needed persuasion. :)
One tip was to hold a lighter flame to the base plate to expand the base plate and break the corrosion seal but, it advised, "don't do this if you have saturated the area with penetrating oil." 😂
!ENGAGE 30
I made bermuda shorts for my nephews once and I used existing shorts that were comfortable for them, just to be safe, Then I added an inch more, just to be safer :D
It is a bummer about the sewing machine but yay! New sewing machine coming! Forty-two years is a long time! I hope mine lasts that long, though it is not even 10 years yet :D I had my share of sewing machine frustration during the strict lockdown, right when it started, when I had plans to sew a whole lot! Enjoy your new machine! :)
Hey, thanks, this is cool.
Congratulations @shanibeer! You received a personal badge!
May the Hive Power be with you!
You can view your badges on your board And compare to others on the Ranking
Do not miss the last post from @hivebuzz: